Difference between revisions of "Samurai Spirits Amakusa Kourin"
From Sega Retro
| Line 95: | Line 95: | ||
{{MoveListRow | Ougi Resshin Zan | {{RDP}} {{slash}} (requires weapon) | Haohmaru leaps forward and flips over with a falling sword cut. This move is an overhead attack that can hit characters who are crouch blocking. The distance of the leap depends on the strength of the button used.}} | {{MoveListRow | Ougi Resshin Zan | {{RDP}} {{slash}} (requires weapon) | Haohmaru leaps forward and flips over with a falling sword cut. This move is an overhead attack that can hit characters who are crouch blocking. The distance of the leap depends on the strength of the button used.}} | ||
{{MoveListRow | Zankousen | {{HCB}} {{HS}} (requires weapon) | Haohmaru turns around, then performs a heavy downward slash. }} | {{MoveListRow | Zankousen | {{HCB}} {{HS}} (requires weapon) | Haohmaru turns around, then performs a heavy downward slash. }} | ||
| − | {{MoveListRow | '''Super:''' Hiougi Tenha Fuujin Zan | {{left}} {{ | + | {{MoveListRow | '''Super:''' Hiougi Tenha Fuujin Zan | {{left}} {{QCFD}} {{LS}}+{{MS}} (requires weapon) | Haohmaru steps forward while spinning his katana in circles multiple times, rising into the air with the last slice.}} |
}} | }} | ||
{{hr}} | {{hr}} | ||
| Line 105: | Line 105: | ||
{{MoveListRow | Senpuu Ha | {{QCF}} {{kick}} (requires weapon) | Haohmaru swings his sword across the ground, generating a spray of sparks that knocks his opponent over.}} | {{MoveListRow | Senpuu Ha | {{QCF}} {{kick}} (requires weapon) | Haohmaru swings his sword across the ground, generating a spray of sparks that knocks his opponent over.}} | ||
{{MoveListRow | Nagi Yaiba | {{RDP}} {{slash}} (requires weapon) | Haohmaru holds his blade in a reverse grip. If the opponent tries to hit him while he is doing this or if he is close to the opponent, he counters by slicing upward with his katana, then continues slicing as he rises into the air.}} | {{MoveListRow | Nagi Yaiba | {{RDP}} {{slash}} (requires weapon) | Haohmaru holds his blade in a reverse grip. If the opponent tries to hit him while he is doing this or if he is close to the opponent, he counters by slicing upward with his katana, then continues slicing as he rises into the air.}} | ||
| − | {{MoveListRow | '''Super:''' Hiougi Tenha Dankuu Retsu Zan | {{left}} {{ | + | {{MoveListRow | '''Super:''' Hiougi Tenha Dankuu Retsu Zan | {{left}} {{QCFD}} {{LS}}+{{MS}} (close) (requires weapon) | Haohmaru slices upward with his katana, creating a cyclone that tosses his opponent into the air, then follows it up with a downward sword slash in the air and another downward sword slash as he falls to the ground.}} |
}} | }} | ||
}} | }} | ||
| Line 119: | Line 119: | ||
{{MoveListRow | Lela Kishima Tek | {{left}}+{{HS}} or {{right}}+{{HS}} in midair (close) | Nakoruru grabs and slams her opponent to the ground.}} | {{MoveListRow | Lela Kishima Tek | {{left}}+{{HS}} or {{right}}+{{HS}} in midair (close) | Nakoruru grabs and slams her opponent to the ground.}} | ||
{{MoveListRow | Kamui Fum Kesupu | {{down}}+{{kick}} or {{right}}+{{kick}} in midair | Nakoruru does an axe kick in the air. This move is an overhead attack that can hit characters who are crouch blocking.}} | {{MoveListRow | Kamui Fum Kesupu | {{down}}+{{kick}} or {{right}}+{{kick}} in midair | Nakoruru does an axe kick in the air. This move is an overhead attack that can hit characters who are crouch blocking.}} | ||
| − | {{MoveListRow | Annu Mutsube | {{ | + | {{MoveListRow | Annu Mutsube | {{QCBD}} {{slash}} (requires weapon) | Nakoruru flies along the ground while holding her kodachi in front of her, which knocks over and slides to the other side of her opponent. The distance traveled depends on the strength of the button used. This move can only be blocked low.}} |
{{MoveListRow | Lela Mutsube | {{QCF}} {{slash}} (requires weapon) | Nakoruru flies into the air while holding her kodachi in front of her. The distance and the height traveled depends on the strength of the button used.}} | {{MoveListRow | Lela Mutsube | {{QCF}} {{slash}} (requires weapon) | Nakoruru flies into the air while holding her kodachi in front of her. The distance and the height traveled depends on the strength of the button used.}} | ||
{{MoveListRow | Kamui Rimuse | {{RDP}} {{slash}} | Nakoruru whips her cape in circles. She whips it one time with {{LS}}, two times with {{MS}}, and three times with {{HS}}. She can follow up with an upward whip by pressing {{slash}} before she finishes. This move can reflect projectiles.}} | {{MoveListRow | Kamui Rimuse | {{RDP}} {{slash}} | Nakoruru whips her cape in circles. She whips it one time with {{LS}}, two times with {{MS}}, and three times with {{HS}}. She can follow up with an upward whip by pressing {{slash}} before she finishes. This move can reflect projectiles.}} | ||
| Line 125: | Line 125: | ||
{{MoveListRow | Kamui Mutsube | {{LS}}+{{MS}} while carried by Mamahaha | Nakoruru dives diagonally downwards while holding her kodachi out.}} | {{MoveListRow | Kamui Mutsube | {{LS}}+{{MS}} while carried by Mamahaha | Nakoruru dives diagonally downwards while holding her kodachi out.}} | ||
{{MoveListRow | Shichikapu Etu | {{HCB}} {{MS}} | Mamahaha charges downward and stabs the opponent with her beak, momentarily stunning the opponent. The angle of the dive depends on the strength of the button used, with {{LS}} being the closest to vertical and {{HS}} being the closest to horizontal.}} | {{MoveListRow | Shichikapu Etu | {{HCB}} {{MS}} | Mamahaha charges downward and stabs the opponent with her beak, momentarily stunning the opponent. The angle of the dive depends on the strength of the button used, with {{LS}} being the closest to vertical and {{HS}} being the closest to horizontal.}} | ||
| − | {{MoveListRow | '''Super:''' Ererushi Kamui Rimse | {{left}} {{ | + | {{MoveListRow | '''Super:''' Ererushi Kamui Rimse | {{left}} {{QCFD}} {{LS}}+{{MS}} | Nakoruru jumps into the air, dives down while holding her kodachi in front of her, then whips her cape in circles, knocking her opponent into the air, where Mamahaha hits them with a dive attack.}} |
}} | }} | ||
{{hr}} | {{hr}} | ||
| Line 134: | Line 134: | ||
{{MoveListRow | Kamui Rimuse | {{RDP}} {{slash}} | Nakoruru whips her cape in circles. She whips it one time with {{LS}}, two times with {{MS}}, and three times with {{HS}}. She can follow up with an upward whip by pressing {{slash}} before she finishes. This move can reflect projectiles.}} | {{MoveListRow | Kamui Rimuse | {{RDP}} {{slash}} | Nakoruru whips her cape in circles. She whips it one time with {{LS}}, two times with {{MS}}, and three times with {{HS}}. She can follow up with an upward whip by pressing {{slash}} before she finishes. This move can reflect projectiles.}} | ||
{{MoveListRow | Shikuruu ni Nori | {{QCB}} {{slash}} or {{kick}} | Nakoruru hops onto the back of her wolf Shikuruu until she is hit by the opponent or dismounts. While riding, Nakoruru can move with {{left}} or {{right}}, jump with {{up}}, dismount with {{kick}}, or slash her kodachi with {{slash}}.}} | {{MoveListRow | Shikuruu ni Nori | {{QCB}} {{slash}} or {{kick}} | Nakoruru hops onto the back of her wolf Shikuruu until she is hit by the opponent or dismounts. While riding, Nakoruru can move with {{left}} or {{right}}, jump with {{up}}, dismount with {{kick}}, or slash her kodachi with {{slash}}.}} | ||
| − | {{MoveListRow | Mer Shikite | {{ | + | {{MoveListRow | Mer Shikite | {{QCBD}} {{slash}} while riding Shikuruu | Shikuruu runs forward. He can cross over to the other side of the opponent. Nakoruru can jump off and charge in a direction while holding her kodachi in front of her by holding any direction (except {{up}} or {{down}}) and {{HS}} simultaneously.}} |
{{MoveListRow | Kanto Shikite | {{DPF}} {{slash}} while riding Shikuruu | Shikuruu charges diagonally upwards. Nakoruru can jump off and charge in a direction while holding her kodachi in front of her by holding any direction (except {{up}} or {{down}}) and {{HS}} simultaneously.}} | {{MoveListRow | Kanto Shikite | {{DPF}} {{slash}} while riding Shikuruu | Shikuruu charges diagonally upwards. Nakoruru can jump off and charge in a direction while holding her kodachi in front of her by holding any direction (except {{up}} or {{down}}) and {{HS}} simultaneously.}} | ||
{{MoveListRow | Imeru Shikite | {{QCF}} {{slash}} in midair while riding Shikuruu | Shikuruu dives diagonally downwards while Nakoruru holds her kodachi out in front of her.}} | {{MoveListRow | Imeru Shikite | {{QCF}} {{slash}} in midair while riding Shikuruu | Shikuruu dives diagonally downwards while Nakoruru holds her kodachi out in front of her.}} | ||
{{MoveListRow | Epunkine Shikite | {{LS}}+{{HS}} when knocked down | Shikuruu charges at the opponent after Nakoruru is knocked down.}} | {{MoveListRow | Epunkine Shikite | {{LS}}+{{HS}} when knocked down | Shikuruu charges at the opponent after Nakoruru is knocked down.}} | ||
| − | {{MoveListRow | '''Super:''' Nubeki Kamui Shikite | {{left}} {{ | + | {{MoveListRow | '''Super:''' Nubeki Kamui Shikite | {{left}} {{QCFD}} {{LS}}+{{MS}} (requires weapon) | Nakoruru hops onto the back of her wolf Shikuruu. She charges forward with a kodachi strike, followed by a rising slash that carries the opponent into the air, finishing with a cape whip that knocks the opponent to the ground.}} |
}} | }} | ||
}} | }} | ||
| Line 154: | Line 154: | ||
{{MoveListRow | Shizuku Jin | {{DPF}} {{kick}} (close) (requires weapon) | Genjuro tosses his opponent into the air, jumps after them, and hits them back down with a downward sword slash. This move is a grab that cannot be blocked.}} | {{MoveListRow | Shizuku Jin | {{DPF}} {{kick}} (close) (requires weapon) | Genjuro tosses his opponent into the air, jumps after them, and hits them back down with a downward sword slash. This move is a grab that cannot be blocked.}} | ||
{{MoveListRow | Kurenai | {{RDP}} {{slash}} (requires weapon) | Genjuro pulls his katana back, as a hanafuda card begins to materialize a short distance in front of him, then slashes downward. If the opponent is inside the hanafuda card, they are hit as the card is sliced in two.}} | {{MoveListRow | Kurenai | {{RDP}} {{slash}} (requires weapon) | Genjuro pulls his katana back, as a hanafuda card begins to materialize a short distance in front of him, then slashes downward. If the opponent is inside the hanafuda card, they are hit as the card is sliced in two.}} | ||
| − | {{MoveListRow | '''Super:''' Gokou Zan | {{left}} {{ | + | {{MoveListRow | '''Super:''' Gokou Zan | {{left}} {{QCFD}} {{LS}}+{{MS}} (close) (requires weapon) | Genjuro slashes his opponent into the air, jumps after them, and slashes them five times in midair.}} |
}} | }} | ||
{{hr}} | {{hr}} | ||
| Line 163: | Line 163: | ||
{{MoveListRow | Hyakki Satsu | {{QCB}} {{right}} {{slash}} (requires weapon) | Genjuro slices his blade multiple times in front of him. He slices more times when a stronger button is used. If a slice connects, he impales the opponent on the blade, then pushes them off with his foot.}} | {{MoveListRow | Hyakki Satsu | {{QCB}} {{right}} {{slash}} (requires weapon) | Genjuro slices his blade multiple times in front of him. He slices more times when a stronger button is used. If a slice connects, he impales the opponent on the blade, then pushes them off with his foot.}} | ||
{{MoveListRow | Shigure | {{RDP}} {{slash}} (requires weapon) | Genjuro pulls his katana back, as a hanafuda card begins to materialize a short distance in front of him, then slashes downward. If the opponent is inside the hanafuda card, they are hit as the card is sliced in two.}} | {{MoveListRow | Shigure | {{RDP}} {{slash}} (requires weapon) | Genjuro pulls his katana back, as a hanafuda card begins to materialize a short distance in front of him, then slashes downward. If the opponent is inside the hanafuda card, they are hit as the card is sliced in two.}} | ||
| − | {{MoveListRow | '''Super:''' Ura Gokou | {{left}} {{ | + | {{MoveListRow | '''Super:''' Ura Gokou | {{left}} {{QCFD}} {{LS}}+{{MS}} (close) (requires weapon) | Genjuro slashes his opponent into the air with a series of five slashes.}} |
}} | }} | ||
}} | }} | ||
| Line 177: | Line 177: | ||
{{MoveListRow | Tri-Slash | {{QCF}} {{slash}} (requires weapon) | Charlotte slashes in the air, creating a large triangle-shaped projectile that launches forward. The speed and distance traveled depends on the strength of the button used. The projectile can be delayed by holding {{slash}} before releasing it.}} | {{MoveListRow | Tri-Slash | {{QCF}} {{slash}} (requires weapon) | Charlotte slashes in the air, creating a large triangle-shaped projectile that launches forward. The speed and distance traveled depends on the strength of the button used. The projectile can be delayed by holding {{slash}} before releasing it.}} | ||
{{MoveListRow | Power Gradation | {{DPF}} {{slash}} (requires weapon) | Charlotte flies into the air while slashing her rapier. The height of the maneuver depends on the strength of the button used.}} | {{MoveListRow | Power Gradation | {{DPF}} {{slash}} (requires weapon) | Charlotte flies into the air while slashing her rapier. The height of the maneuver depends on the strength of the button used.}} | ||
| − | {{MoveListRow | '''Super:''' Splash Gradation | {{left}} {{ | + | {{MoveListRow | '''Super:''' Splash Gradation | {{left}} {{QCFD}} {{LS}}+{{MS}} (requires weapon) | Charlotte slashes a 7-pointed star in the air with her rapier, then flies into the air while slashing her rapier.}} |
}} | }} | ||
{{hr}} | {{hr}} | ||
| Line 184: | Line 184: | ||
{{MoveListRow | Lance de Lion | {{QCF}} {{kick}} | Charlotte slides on the ground. If she hits her opponent, she throws the opponent over her head and behind her.}} | {{MoveListRow | Lance de Lion | {{QCF}} {{kick}} | Charlotte slides on the ground. If she hits her opponent, she throws the opponent over her head and behind her.}} | ||
{{MoveListRow | Power Gradation | {{DPF}} {{slash}} (requires weapon) | Charlotte flies into the air while slashing her rapier. The height of the maneuver depends on the strength of the button used.}} | {{MoveListRow | Power Gradation | {{DPF}} {{slash}} (requires weapon) | Charlotte flies into the air while slashing her rapier. The height of the maneuver depends on the strength of the button used.}} | ||
| − | {{MoveListRow | '''Super:''' Crystal Rose | {{left}} {{ | + | {{MoveListRow | '''Super:''' Crystal Rose | {{left}} {{QCFD}} {{LS}}+{{MS}} (requires weapon) | Charlotte throws a rose at her opponent, then slashes them repeatedly, making an image of a rose, thrusts her rapier through the rose, then flies into the air while slashing her rapier.}} |
}} | }} | ||
}} | }} | ||
| Line 204: | Line 204: | ||
{{MoveListRow | Imitate Replica | Hold {{LS}}+{{HS}} or {{MS}}+{{kick}} while being attacked | Galford disappears in a cloud of smoke, leaving only a log in his stead, then reappears above his opponent with a spinning sword slash. He appears in front of the opponent with {{LS}}+{{HS}} or behind the opponent with {{MS}}+{{kick}}.}} | {{MoveListRow | Imitate Replica | Hold {{LS}}+{{HS}} or {{MS}}+{{kick}} while being attacked | Galford disappears in a cloud of smoke, leaving only a log in his stead, then reappears above his opponent with a spinning sword slash. He appears in front of the opponent with {{LS}}+{{HS}} or behind the opponent with {{MS}}+{{kick}}.}} | ||
{{MoveListRow | Shadow Copy | {{right}} {{HCF}} {{LS}} or {{MS}} | Galford disappears in a cloud of smoke, then two flashing mirror images appear, one on each side of the screen. Galford reappears in place of the leftmost image with {{LS}} or the rightmost image with {{MS}}.}} | {{MoveListRow | Shadow Copy | {{right}} {{HCF}} {{LS}} or {{MS}} | Galford disappears in a cloud of smoke, then two flashing mirror images appear, one on each side of the screen. Galford reappears in place of the leftmost image with {{LS}} or the rightmost image with {{MS}}.}} | ||
| − | {{MoveListRow | '''Super:''' Double Mega Strike Heads | {{left}} {{ | + | {{MoveListRow | '''Super:''' Double Mega Strike Heads | {{left}} {{QCFD}} {{LS}}+{{MS}} or {{HS}}+{{kick}} (requires weapon) | Galford disappears, then he and a duplicate fall from the air around his opponent and perform a series of sword strikes. Then they carry the opponent into the air and finish with a slam. Galford falls in front of the opponent with {{LS}}+{{MS}} or behind the opponent with {{HS}}+{{kick}}.}} |
}} | }} | ||
{{hr}} | {{hr}} | ||
| Line 216: | Line 216: | ||
{{MoveListRow | Shadow Copy | {{right}} {{HCF}} {{LS}} or {{MS}} | Galford disappears in a cloud of smoke, then two flashing mirror images appear, one on each side of the screen. Galford reappears in place of the leftmost image with {{LS}} or the rightmost image with {{MS}}.}} | {{MoveListRow | Shadow Copy | {{right}} {{HCF}} {{LS}} or {{MS}} | Galford disappears in a cloud of smoke, then two flashing mirror images appear, one on each side of the screen. Galford reappears in place of the leftmost image with {{LS}} or the rightmost image with {{MS}}.}} | ||
{{MoveListRow | Head Strike | {{DPF}} {{kick}} (close) | Galford grabs his opponent and flies into the air, then drives his opponent head-first into the ground. This move is a grab that cannot be blocked. It can be done from a dash.}} | {{MoveListRow | Head Strike | {{DPF}} {{kick}} (close) | Galford grabs his opponent and flies into the air, then drives his opponent head-first into the ground. This move is a grab that cannot be blocked. It can be done from a dash.}} | ||
| − | {{MoveListRow | '''Super:''' Lightning Strike Three | {{left}} {{ | + | {{MoveListRow | '''Super:''' Lightning Strike Three | {{left}} {{QCFD}} {{LS}}+{{MS}} (requires weapon) | Galford runs forward, throws his opponent into the air, teleports to where they land to kick them back into the air, then teleports into the air for a body slam.}} |
}} | }} | ||
}} | }} | ||
| Line 230: | Line 230: | ||
{{MoveListRow | Kattou Suigetsu Tou | {{QCF}} {{slash}} (requires weapon) | Jubei slashes a saber and causes a ripple of fire to roll across the ground. The speed of the projectile depends on the strength of the button used.}} | {{MoveListRow | Kattou Suigetsu Tou | {{QCF}} {{slash}} (requires weapon) | Jubei slashes a saber and causes a ripple of fire to roll across the ground. The speed of the projectile depends on the strength of the button used.}} | ||
{{MoveListRow | Nikkai Ratou | {{DPF}} {{slash}} (requires weapon) | Jubei charges at this opponent with his shoulder, then launches into the air while swiping a saber. He can follow up with an additional lateral slash by pressing {{down}}+{{HS}}.}} | {{MoveListRow | Nikkai Ratou | {{DPF}} {{slash}} (requires weapon) | Jubei charges at this opponent with his shoulder, then launches into the air while swiping a saber. He can follow up with an additional lateral slash by pressing {{down}}+{{HS}}.}} | ||
| − | {{MoveListRow | '''Super:''' Zetsu Suigetsu Tou | {{left}} {{ | + | {{MoveListRow | '''Super:''' Zetsu Suigetsu Tou | {{left}} {{QCFD}} {{LS}}+{{MS}} (requires weapon) | Jubei slashes a saber, causing a giant geyser of energy to erupt from the ground.}} |
}} | }} | ||
{{hr}} | {{hr}} | ||
| Line 239: | Line 239: | ||
{{MoveListRow | Yagyu Shingan Tou: Souha | {{QCB}} {{MS}} (requires weapon) | Jubei takes a defensive stance. If he is hit by a mid-level attack, he parries it and responds with an upward slash.}} | {{MoveListRow | Yagyu Shingan Tou: Souha | {{QCB}} {{MS}} (requires weapon) | Jubei takes a defensive stance. If he is hit by a mid-level attack, he parries it and responds with an upward slash.}} | ||
{{MoveListRow | Yagyu Shingan Tou: Tenra | {{QCB}} {{HS}} (requires weapon) | Jubei takes a defensive stance. If he is hit by a high attack, he parries it and responds with a jumping slash.}} | {{MoveListRow | Yagyu Shingan Tou: Tenra | {{QCB}} {{HS}} (requires weapon) | Jubei takes a defensive stance. If he is hit by a high attack, he parries it and responds with a jumping slash.}} | ||
| − | {{MoveListRow | '''Super:''' Geki Souran Jin | {{left}} {{ | + | {{MoveListRow | '''Super:''' Geki Souran Jin | {{left}} {{QCFD}} {{LS}}+{{MS}} (requires weapon) | Jubei waves his sabers rapidly in front of him, then does a shoulder charge, slashes the opponent, and launches into the air while swiping a saber.}} |
}} | }} | ||
}} | }} | ||
| Line 254: | Line 254: | ||
{{MoveListRow | Hiken Oboro Gatana | {{QCF}} {{slash}} (requires weapon) | Ukyo advances with afterimages of himself that perform sword slashes that knock the opponent over. He slashes one time with {{LS}}, two times with {{MS}}, and three times with {{HS}}.}} | {{MoveListRow | Hiken Oboro Gatana | {{QCF}} {{slash}} (requires weapon) | Ukyo advances with afterimages of himself that perform sword slashes that knock the opponent over. He slashes one time with {{LS}}, two times with {{MS}}, and three times with {{HS}}.}} | ||
{{MoveListRow | Hiken Tsubame Gaeshi | {{downleft}} {{QCF}} {{slash}} in midair (requires weapon) | Ukyo slashes his sword in a semicircle, leaving a trail of fire in the air. This move is an overhead attack that can hit characters who are crouch blocking.}} | {{MoveListRow | Hiken Tsubame Gaeshi | {{downleft}} {{QCF}} {{slash}} in midair (requires weapon) | Ukyo slashes his sword in a semicircle, leaving a trail of fire in the air. This move is an overhead attack that can hit characters who are crouch blocking.}} | ||
| − | {{MoveListRow | '''Super:''' Tsubame Rokuren | {{left}} {{ | + | {{MoveListRow | '''Super:''' Tsubame Rokuren | {{left}} {{QCFD}} {{LS}}+{{MS}} (requires weapon) | Ukyo tosses an apple into the air, then jumps over his opponent and slashes his fiery sword multiple times midjump before landing.}} |
}} | }} | ||
{{hr}} | {{hr}} | ||
| Line 262: | Line 262: | ||
{{MoveListRow | Hiken Tsubame Gaeshi | {{downleft}} {{QCF}} {{slash}} in midair (requires weapon) | Ukyo slashes his sword in a semicircle, leaving a trail of fire in the air. This move is an overhead attack that can hit characters who are crouch blocking.}} | {{MoveListRow | Hiken Tsubame Gaeshi | {{downleft}} {{QCF}} {{slash}} in midair (requires weapon) | Ukyo slashes his sword in a semicircle, leaving a trail of fire in the air. This move is an overhead attack that can hit characters who are crouch blocking.}} | ||
{{MoveListRow | Hiken Kagerou | {{QCF}} {{slash}} (requires weapon) | Ukyo slashes the air, causing a wave-like projectile to travel across the screen. The stronger versions travel faster but have a longer startup time.}} | {{MoveListRow | Hiken Kagerou | {{QCF}} {{slash}} (requires weapon) | Ukyo slashes the air, causing a wave-like projectile to travel across the screen. The stronger versions travel faster but have a longer startup time.}} | ||
| − | {{MoveListRow | '''Super:''' Musou Zankou Ka | {{left}} {{ | + | {{MoveListRow | '''Super:''' Musou Zankou Ka | {{left}} {{QCFD}} {{LS}}+{{MS}} (requires weapon) | Ukyo runs around his opponent in a blur while slashing his sword. As he stops to sheathe his sword, the slashes hit the opponent.}} |
}} | }} | ||
}} | }} | ||
| Line 282: | Line 282: | ||
{{MoveListRow | Ninpou Migawari no Jutsu: Oni | {{MS}}+{{kick}} after being hit | Hanzo disappears in a cloud of smoke, leaving only a log in his stead, then reappears in front of his opponent with a low sweeping slash.}} | {{MoveListRow | Ninpou Migawari no Jutsu: Oni | {{MS}}+{{kick}} after being hit | Hanzo disappears in a cloud of smoke, leaving only a log in his stead, then reappears in front of his opponent with a low sweeping slash.}} | ||
{{MoveListRow | Ninpou Mozu Otoshi | {{DPF}} {{HS}}+{{kick}} (close) | Hanzo grabs his opponent and flies into the air, then drives his opponent head-first into the ground. This move is a grab that cannot be blocked. It can be done from a dash.}} | {{MoveListRow | Ninpou Mozu Otoshi | {{DPF}} {{HS}}+{{kick}} (close) | Hanzo grabs his opponent and flies into the air, then drives his opponent head-first into the ground. This move is a grab that cannot be blocked. It can be done from a dash.}} | ||
| − | {{MoveListRow | '''Super:''' Fuujite Mijin Gakure | {{left}} {{ | + | {{MoveListRow | '''Super:''' Fuujite Mijin Gakure | {{left}} {{QCFD}} {{LS}}+{{MS}} | Hanzo explodes in a burst of flame that can harm nearby opponents, then reappears.}} |
}} | }} | ||
{{hr}} | {{hr}} | ||
| Line 292: | Line 292: | ||
{{MoveListRow | Ninpou Kage: Shizune | {{down}} {{down}}+{{slash}} | Hanzo disappears in a cloud of smoke, then reappears in the same position.}} | {{MoveListRow | Ninpou Kage: Shizune | {{down}} {{down}}+{{slash}} | Hanzo disappears in a cloud of smoke, then reappears in the same position.}} | ||
{{MoveListRow | Ninpou Enbu | {{RDP}} {{slash}} or {{kick}} | Hanzo disappears in a cloud of smoke, then reappears in the top-left with {{LS}}, the bottom-left with {{MS}}, the top-right with {{HS}}, or the bottom-right with {{kick}}.}} | {{MoveListRow | Ninpou Enbu | {{RDP}} {{slash}} or {{kick}} | Hanzo disappears in a cloud of smoke, then reappears in the top-left with {{LS}}, the bottom-left with {{MS}}, the top-right with {{HS}}, or the bottom-right with {{kick}}.}} | ||
| − | {{MoveListRow | '''Super:''' Fuujite Dokuryuu | {{left}} {{ | + | {{MoveListRow | '''Super:''' Fuujite Dokuryuu | {{left}} {{QCFD}} {{LS}}+{{MS}} | Hanzo flips upside down while leaping forward. If he lands on top of his opponent, he drops several bombs at their feet, which explode in a large burst.}} |
}} | }} | ||
}} | }} | ||
| Line 309: | Line 309: | ||
{{MoveListRow | Kaen Kyokubu | {{RDP}} {{slash}} | Kyoshiro breathes a tall cloud of flame in front of him, which knocks over his opponent on impact.}} | {{MoveListRow | Kaen Kyokubu | {{RDP}} {{slash}} | Kyoshiro breathes a tall cloud of flame in front of him, which knocks over his opponent on impact.}} | ||
{{MoveListRow | Choubi Jishi | {{QCB}} {{slash}} (requires weapon) | Kyoshiro vaults onto his naginata and kicks forward while radiating with fire, which knocks over his opponent on impact.}} | {{MoveListRow | Choubi Jishi | {{QCB}} {{slash}} (requires weapon) | Kyoshiro vaults onto his naginata and kicks forward while radiating with fire, which knocks over his opponent on impact.}} | ||
| − | {{MoveListRow | '''Super:''' Aragotoshi Kyoshiro "Oni no Mai" | {{left}} {{ | + | {{MoveListRow | '''Super:''' Aragotoshi Kyoshiro "Oni no Mai" | {{left}} {{QCFD}} {{LS}}+{{MS}} (requires weapon) | Kyoshiro attacks his opponent multiple times with his naginata, then breathes a cloud of fire that bursts into an explosion.}} |
}} | }} | ||
{{hr}} | {{hr}} | ||
| Line 317: | Line 317: | ||
{{MoveListRow | Kyoushiro Enbu | {{QCF}} {{kick}} (requires weapon) | Kyoshiro slides forward with a palm strike, then spins around with a downward naginata slash and finishes with an upward naginata slash.}} | {{MoveListRow | Kyoushiro Enbu | {{QCF}} {{kick}} (requires weapon) | Kyoshiro slides forward with a palm strike, then spins around with a downward naginata slash and finishes with an upward naginata slash.}} | ||
{{MoveListRow | Yamata no Orochi | {{QCF}} {{slash}} | Kyoshiro spins around and shoots multiple snake-like fireballs in front of him. The number of fireballs depends on the strength of the button used.}} | {{MoveListRow | Yamata no Orochi | {{QCF}} {{slash}} | Kyoshiro spins around and shoots multiple snake-like fireballs in front of him. The number of fireballs depends on the strength of the button used.}} | ||
| − | {{MoveListRow | '''Super:''' Aragotoshi Kyoshiro "Ketsuniku no Honoo" | {{left}} {{ | + | {{MoveListRow | '''Super:''' Aragotoshi Kyoshiro "Ketsuniku no Honoo" | {{left}} {{QCFD}} {{LS}}+{{MS}} (requires weapon) | Kyoshiro spins around like a top while holding his naginata out until bursting into a ball of fire.}} |
}} | }} | ||
}} | }} | ||
| Line 333: | Line 333: | ||
{{MoveListRow | Ahau Gaburu | {{DPF}} {{slash}} | Tam Tam puffs up his chest and floats into the air, then spits a fireball diagonally downwards to the ground.}} | {{MoveListRow | Ahau Gaburu | {{DPF}} {{slash}} | Tam Tam puffs up his chest and floats into the air, then spits a fireball diagonally downwards to the ground.}} | ||
{{MoveListRow | Paguna Dios | {{RDP}} {{slash}} | Tam Tam splits his legs and moves across the ground while rotating. The distance traveled depends on the strength of the button used.}} | {{MoveListRow | Paguna Dios | {{RDP}} {{slash}} | Tam Tam splits his legs and moves across the ground while rotating. The distance traveled depends on the strength of the button used.}} | ||
| − | {{MoveListRow | '''Super:''' Ahau Tiuwakan | {{left}} {{ | + | {{MoveListRow | '''Super:''' Ahau Tiuwakan | {{left}} {{QCFD}} {{LS}}+{{MS}} | Tam Tam puffs up his chest and floats into the air, then spits a giant fireball diagonally downwards to the ground.}} |
}} | }} | ||
{{hr}} | {{hr}} | ||
| Line 340: | Line 340: | ||
{{MoveListRow | Gaburu Gaburu | {{QCF}} {{HS}} (close) | Tam Tam grabs and bites his opponent repeatedly. This move is a grab that cannot be blocked. It has longer reach than most grabs.}} | {{MoveListRow | Gaburu Gaburu | {{QCF}} {{HS}} (close) | Tam Tam grabs and bites his opponent repeatedly. This move is a grab that cannot be blocked. It has longer reach than most grabs.}} | ||
{{MoveListRow | Paguna Dios | {{RDP}} {{slash}} | Tam Tam splits his legs and moves across the ground while rotating. The distance traveled depends on the strength of the button used.}} | {{MoveListRow | Paguna Dios | {{RDP}} {{slash}} | Tam Tam splits his legs and moves across the ground while rotating. The distance traveled depends on the strength of the button used.}} | ||
| − | {{MoveListRow | '''Super:''' Ahau Tiuwakan | {{left}} {{ | + | {{MoveListRow | '''Super:''' Ahau Tiuwakan | {{left}} {{QCFD}} {{LS}}+{{MS}} | Tam Tam puffs up his chest and floats into the air, then spits a giant fireball diagonally downwards to the ground.}} |
}} | }} | ||
}} | }} | ||
| Line 357: | Line 357: | ||
{{MoveListRow | Hitouryuu Hisame Gaeshi | {{QCF}} {{kick}} (requires weapon) | Shizumaru opens his parasol in front of him. It hurts his opponent if the opponent touches or tries to attack it, and it reflects projectiles.}} | {{MoveListRow | Hitouryuu Hisame Gaeshi | {{QCF}} {{kick}} (requires weapon) | Shizumaru opens his parasol in front of him. It hurts his opponent if the opponent touches or tries to attack it, and it reflects projectiles.}} | ||
{{MoveListRow | Hitouryuu Amanagare Kyouraku Zan | Hold {{kick}} for at least 1 second, then release (requires weapon) | Shizumaru throws the canopy of his parasol into the air, unsheathing the blade inside it. He charges forward with the blade, finishing with a sideways slash as the canopy falls back down. The distance traveled depends on the strength of the button used.}} | {{MoveListRow | Hitouryuu Amanagare Kyouraku Zan | Hold {{kick}} for at least 1 second, then release (requires weapon) | Shizumaru throws the canopy of his parasol into the air, unsheathing the blade inside it. He charges forward with the blade, finishing with a sideways slash as the canopy falls back down. The distance traveled depends on the strength of the button used.}} | ||
| − | {{MoveListRow | '''Super:''' Hitouryuu Fuujite Bouu Kyoufuu Zan | {{left}} {{ | + | {{MoveListRow | '''Super:''' Hitouryuu Fuujite Bouu Kyoufuu Zan | {{left}} {{QCFD}} {{LS}}+{{MS}} (requires weapon) | Shizumaru swings his parasol upwards like a bat, then fans it out and spins it like a large buzzsaw while carrying the opponent into the air.}} |
}} | }} | ||
{{hr}} | {{hr}} | ||
| Line 367: | Line 367: | ||
{{MoveListRow | Hitouryuu Baiu Ensatsu Jin | {{DPF}} {{slash}} (requires weapon) | Shizumaru swings his parasol around like a bat, unsheathing the blade, then rises into the air with it. The height of the jump depends on the strength of the button used.}} | {{MoveListRow | Hitouryuu Baiu Ensatsu Jin | {{DPF}} {{slash}} (requires weapon) | Shizumaru swings his parasol around like a bat, unsheathing the blade, then rises into the air with it. The height of the jump depends on the strength of the button used.}} | ||
{{MoveListRow | Hitouryuu Amanagare Kyouraku Zan | Hold {{kick}} for at least 1 second, then release (requires weapon) | Shizumaru throws the canopy of his parasol into the air, unsheathing the blade inside it. He charges forward with the blade, finishing with a jumping slash as the canopy falls back down. The distance traveled depends on the strength of the button used.}} | {{MoveListRow | Hitouryuu Amanagare Kyouraku Zan | Hold {{kick}} for at least 1 second, then release (requires weapon) | Shizumaru throws the canopy of his parasol into the air, unsheathing the blade inside it. He charges forward with the blade, finishing with a jumping slash as the canopy falls back down. The distance traveled depends on the strength of the button used.}} | ||
| − | {{MoveListRow | '''Super:''' Hitouryuu Fuujite Amanagare Ressatsu Jin | {{left}} {{ | + | {{MoveListRow | '''Super:''' Hitouryuu Fuujite Amanagare Ressatsu Jin | {{left}} {{QCFD}} {{LS}}+{{MS}} (requires weapon) | Shizumaru swings his parasol upwards like a bat, then fans it out and spins it like a large buzzsaw while carrying the opponent into the air.}} |
}} | }} | ||
}} | }} | ||
| Line 386: | Line 386: | ||
{{MoveListRow | Konru Memu | {{QCB}} {{slash}} | Rimururu creates an ice puddle in front of her, which does no damage but causes her opponent to slip when walking over it, stunning them momentarily.}} | {{MoveListRow | Konru Memu | {{QCB}} {{slash}} | Rimururu creates an ice puddle in front of her, which does no damage but causes her opponent to slip when walking over it, stunning them momentarily.}} | ||
{{MoveListRow | Kamui Shituki | {{RDP}} {{slash}} | Rimururu creates an ice barrier in front of her. It hurts her opponent if the opponent touches or tries to attack it, and it reflects projectiles.}} | {{MoveListRow | Kamui Shituki | {{RDP}} {{slash}} | Rimururu creates an ice barrier in front of her. It hurts her opponent if the opponent touches or tries to attack it, and it reflects projectiles.}} | ||
| − | {{MoveListRow | '''Super:''' Rupushi Kamui Emushi: Nishi | {{left}} {{ | + | {{MoveListRow | '''Super:''' Rupushi Kamui Emushi: Nishi | {{left}} {{QCFD}} {{LS}}+{{MS}} | Rimururu creates a humongous ice block that she throws in an arc forward.}} |
}} | }} | ||
{{hr}} | {{hr}} | ||
| Line 397: | Line 397: | ||
{{MoveListRow | Upun Op | {{right}}+{{repeat|{{slash}}}} | Rimururu creates a wall of icy spears in front of her, then pushes them a short distance forward as one large ice spear.}} | {{MoveListRow | Upun Op | {{right}}+{{repeat|{{slash}}}} | Rimururu creates a wall of icy spears in front of her, then pushes them a short distance forward as one large ice spear.}} | ||
{{MoveListRow | Konru Memu | {{QCB}} {{slash}} | Rimururu creates an ice puddle in front of her, which does no damage but causes her opponent to slip when walking over it, stunning them momentarily.}} | {{MoveListRow | Konru Memu | {{QCB}} {{slash}} | Rimururu creates an ice puddle in front of her, which does no damage but causes her opponent to slip when walking over it, stunning them momentarily.}} | ||
| − | {{MoveListRow | '''Super:''' Rupushi Kamui Emishi: Toitoi | {{left}} {{ | + | {{MoveListRow | '''Super:''' Rupushi Kamui Emishi: Toitoi | {{left}} {{QCFD}} {{LS}}+{{MS}} | Rimururu creates a humongous ice block in front of her, then breaks it.}} |
}} | }} | ||
}} | }} | ||
| Line 417: | Line 417: | ||
{{MoveListRow | Nue Dama | {{RDP}} {{slash}} or {{kick}} | Basara throws a glowing projectile into the air that slowly travels in a circular path and partly homes in on the opponent.}} | {{MoveListRow | Nue Dama | {{RDP}} {{slash}} or {{kick}} | Basara throws a glowing projectile into the air that slowly travels in a circular path and partly homes in on the opponent.}} | ||
{{MoveListRow | Tomobiki | {{DPF}} {{slash}} or {{kick}} (close) (requires weapon) | Basara grabs his opponent and they both fall into a large portal in the ground. The opponent is tossed back out by Basara's shuriken.}} | {{MoveListRow | Tomobiki | {{DPF}} {{slash}} or {{kick}} (close) (requires weapon) | Basara grabs his opponent and they both fall into a large portal in the ground. The opponent is tossed back out by Basara's shuriken.}} | ||
| − | {{MoveListRow | '''Super:''' Kage Mai: Mukui | {{left}} {{ | + | {{MoveListRow | '''Super:''' Kage Mai: Mukui | {{left}} {{QCFD}} {{LS}}+{{MS}} (requires weapon) | Basara hops back, then rushes at his opponent, pummeling them repeatedly while invisible as Kagaribi appears intermittently.}} |
}} | }} | ||
{{hr}} | {{hr}} | ||
| Line 429: | Line 429: | ||
{{MoveListRow | Kage Sui | {{QCB}} {{slash}} or {{kick}} | Basara drops himself into a portal in the ground beneath him. He reappears after a moment. The portal can be moved with {{left}} or {{right}} before he pops back up, or the move can be canceled early by pressing any button.}} | {{MoveListRow | Kage Sui | {{QCB}} {{slash}} or {{kick}} | Basara drops himself into a portal in the ground beneath him. He reappears after a moment. The portal can be moved with {{left}} or {{right}} before he pops back up, or the move can be canceled early by pressing any button.}} | ||
{{MoveListRow | Kage Damashi | {{RDP}} {{slash}} or {{kick}} | A duplicate of Basara pops out of him and performs a maneuver, then turns into a bat and disappears. The duplicate has no collision and cannot damage the opponent. It does a high forward jump with {{LS}}, a high vertical jump with {{MS}}, a high backward jump with {{HS}}, and a forward walk with {{kick}}.}} | {{MoveListRow | Kage Damashi | {{RDP}} {{slash}} or {{kick}} | A duplicate of Basara pops out of him and performs a maneuver, then turns into a bat and disappears. The duplicate has no collision and cannot damage the opponent. It does a high forward jump with {{LS}}, a high vertical jump with {{MS}}, a high backward jump with {{HS}}, and a forward walk with {{kick}}.}} | ||
| − | {{MoveListRow | '''Super:''' Kage Mai: Yumebiki | {{left}} {{ | + | {{MoveListRow | '''Super:''' Kage Mai: Yumebiki | {{left}} {{QCFD}} {{LS}}+{{MS}} (requires weapon) | Basara hops back, then rushes at his opponent with a series of slashes and kicks. At the end, he raises his opponent into the air and slices their neck with his shuriken.}} |
}} | }} | ||
}} | }} | ||
| Line 447: | Line 447: | ||
{{MoveListRow | Tsukamuzo: Ishi Atama | {{RDP}} {{MS}} (close) | Gaira grabs and headbutts his opponent three times. Unlike most grabs, this move can be blocked.}} | {{MoveListRow | Tsukamuzo: Ishi Atama | {{RDP}} {{MS}} (close) | Gaira grabs and headbutts his opponent three times. Unlike most grabs, this move can be blocked.}} | ||
{{MoveListRow | Tsukamuzo: Shiri Mekuri | {{RDP}} {{HS}} (close) | Gaira grabs and trips his opponent. Unlike most grabs, this move can be blocked (but must be blocked low).}} | {{MoveListRow | Tsukamuzo: Shiri Mekuri | {{RDP}} {{HS}} (close) | Gaira grabs and trips his opponent. Unlike most grabs, this move can be blocked (but must be blocked low).}} | ||
| − | {{MoveListRow | '''Super:''' Kenbu | {{left}} {{ | + | {{MoveListRow | '''Super:''' Kenbu | {{left}} {{QCFD}} {{LS}}+{{MS}} | Gaira moves forward while pummeling his opponent with alternating palm strikes, then knocks them into the air with several punches and finishes with an uppercut.}} |
}} | }} | ||
{{hr}} | {{hr}} | ||
| Line 454: | Line 454: | ||
{{MoveListRow | Katsu! | {{QCF}} {{slash}} | Gaira shouts, causing the kanji 喝 to appear in front of him and knocking down his opponent on impact. This move can reflect projectiles.}} | {{MoveListRow | Katsu! | {{QCF}} {{slash}} | Gaira shouts, causing the kanji 喝 to appear in front of him and knocking down his opponent on impact. This move can reflect projectiles.}} | ||
{{MoveListRow | Enshin Satsu | {{QCB}} {{right}} {{slash}} (close) (requires weapon) | Gaira swings his prayer beads over his opponent like a belt, then spins around in a circle before throwing the opponent. This move is a grab that cannot be blocked.}} | {{MoveListRow | Enshin Satsu | {{QCB}} {{right}} {{slash}} (close) (requires weapon) | Gaira swings his prayer beads over his opponent like a belt, then spins around in a circle before throwing the opponent. This move is a grab that cannot be blocked.}} | ||
| − | {{MoveListRow | '''Super:''' Nioh Baku Un Satsu | {{left}} {{ | + | {{MoveListRow | '''Super:''' Nioh Baku Un Satsu | {{left}} {{QCFD}} {{LS}}+{{MS}} | Gaira jumps forward and slams his prayer beads on the ground, creating an explosive Asura-like figure.}} |
}} | }} | ||
}} | }} | ||
| Line 471: | Line 471: | ||
{{MoveListRow | En Metsu | {{RDP}} {{slash}} (requires weapon) | Kazuki teleports a short distance away, leaving a duplicate behind that explodes.}} | {{MoveListRow | En Metsu | {{RDP}} {{slash}} (requires weapon) | Kazuki teleports a short distance away, leaving a duplicate behind that explodes.}} | ||
{{MoveListRow | Homura Gaeshi | {{LS}}+{{HS}} when knocked down | Kazuki launches his fireballs (if any) at his opponent after being knocked down.}} | {{MoveListRow | Homura Gaeshi | {{LS}}+{{HS}} when knocked down | Kazuki launches his fireballs (if any) at his opponent after being knocked down.}} | ||
| − | {{MoveListRow | '''Super:''' Baku Bou, Kaen Geki | {{left}} {{ | + | {{MoveListRow | '''Super:''' Baku Bou, Kaen Geki | {{left}} {{QCFD}} {{LS}}+{{MS}} (requires weapon) | Kazuki infuses himself with fire, then runs at his opponent and causes an explosion on contact.}} |
}} | }} | ||
{{hr}} | {{hr}} | ||
| Line 479: | Line 479: | ||
{{MoveListRow | Guren Kyaku | {{DPF}} {{slash}} or {{kick}} | Kazuki does a rising drill kick. This can be followed up with {{right}}+{{slash}} or {{kick}} to kick off a short distance or {{left}}+{{slash}} or {{kick}} to kick off a long distance, putting space between the fighters.}} | {{MoveListRow | Guren Kyaku | {{DPF}} {{slash}} or {{kick}} | Kazuki does a rising drill kick. This can be followed up with {{right}}+{{slash}} or {{kick}} to kick off a short distance or {{left}}+{{slash}} or {{kick}} to kick off a long distance, putting space between the fighters.}} | ||
{{MoveListRow | En Metsu | {{RDP}} {{slash}} (requires weapon) | Kazuki teleports a short distance away, leaving a duplicate behind that explodes.}} | {{MoveListRow | En Metsu | {{RDP}} {{slash}} (requires weapon) | Kazuki teleports a short distance away, leaving a duplicate behind that explodes.}} | ||
| − | {{MoveListRow | '''Super:''' Enja Kakusei | {{left}} {{ | + | {{MoveListRow | '''Super:''' Enja Kakusei | {{left}} {{QCFD}} {{LS}}+{{MS}} (requires weapon) | Kazuki erupts into a tall pillar of flames.}} |
}} | }} | ||
}} | }} | ||
| Line 494: | Line 494: | ||
{{MoveListRow | Tsuki Gakure | {{QCB}} {{slash}} (requires weapon) | Sogetsu sinks into a puddle of water, then reappears on the far side of the screen behind him with {{LS}}, in front of the opponent with {{MS}}, or behind the opponent with {{HS}}.}} | {{MoveListRow | Tsuki Gakure | {{QCB}} {{slash}} (requires weapon) | Sogetsu sinks into a puddle of water, then reappears on the far side of the screen behind him with {{LS}}, in front of the opponent with {{MS}}, or behind the opponent with {{HS}}.}} | ||
{{MoveListRow | Gekkou | {{DPF}} {{slash}} (requires weapon) | Sogetsu spins around, creating a pillar of water that bursts out of the ground, knocking over opponents on impact. The distance that it bursts depends on the strength of the button used.}} | {{MoveListRow | Gekkou | {{DPF}} {{slash}} (requires weapon) | Sogetsu spins around, creating a pillar of water that bursts out of the ground, knocking over opponents on impact. The distance that it bursts depends on the strength of the button used.}} | ||
| − | {{MoveListRow | '''Super:''' Shouha Fuugetsu Zan | {{left}} {{ | + | {{MoveListRow | '''Super:''' Shouha Fuugetsu Zan | {{left}} {{QCFD}} {{LS}}+{{MS}} (requires weapon) | Sogetsu runs forward with multiple lateral slashes, then stabs the ground, creating a splash of water that tosses the opponent into the air.}} |
}} | }} | ||
{{hr}} | {{hr}} | ||
| Line 502: | Line 502: | ||
{{MoveListRow | Shigetsu | {{QCB}} {{slash}} in midair | Sogetsu dives diagonally downwards, grabbing and throwing the opponent by the head.}} | {{MoveListRow | Shigetsu | {{QCB}} {{slash}} in midair | Sogetsu dives diagonally downwards, grabbing and throwing the opponent by the head.}} | ||
{{MoveListRow | Engetsu | {{DPF}} {{slash}} in midair (requires weapon) | Sogetsu surrounds himself in a giant water bubble that shields him from damage.}} | {{MoveListRow | Engetsu | {{DPF}} {{slash}} in midair (requires weapon) | Sogetsu surrounds himself in a giant water bubble that shields him from damage.}} | ||
| − | {{MoveListRow | '''Super:''' Suichuu Ha | {{left}} {{ | + | {{MoveListRow | '''Super:''' Suichuu Ha | {{left}} {{QCFD}} {{LS}}+{{MS}} (requires weapon) | Sogetsu creates four pillars of water that spin rapidly around him.}} |
}} | }} | ||
}} | }} | ||
| Line 520: | Line 520: | ||
{{MoveListRow | Tenshou Fuuou Jin | {{QCB}} {{slash}} (requires weapon) | Amakusa throws his crystal ball in a fireball. The ball teleports a distance away, then shoots a short distance forward. If it touches the opponent, the opponent is swept up in a pillar of light, then dropped to the ground. The distance that the ball is teleported depends on the strength of the button used.}} | {{MoveListRow | Tenshou Fuuou Jin | {{QCB}} {{slash}} (requires weapon) | Amakusa throws his crystal ball in a fireball. The ball teleports a distance away, then shoots a short distance forward. If it touches the opponent, the opponent is swept up in a pillar of light, then dropped to the ground. The distance that the ball is teleported depends on the strength of the button used.}} | ||
{{MoveListRow | Shouki Dan | {{DPF}} {{kick}} (requires weapon) | Amakusa creates a second crystal ball, and both crystal balls revolve around him.}} | {{MoveListRow | Shouki Dan | {{DPF}} {{kick}} (requires weapon) | Amakusa creates a second crystal ball, and both crystal balls revolve around him.}} | ||
| − | {{MoveListRow | '''Super:''' Kyoumei Jussatsu Jin | {{left}} {{ | + | {{MoveListRow | '''Super:''' Kyoumei Jussatsu Jin | {{left}} {{QCFD}} {{LS}}+{{MS}} (close) (requires weapon) | Amakusa throws his crystal ball a short distance forward. If it hits his opponent, it traps the opponent in a magic prison, then Amakusa retrieves the ball and uses it to shoot the opponent with violent energy.}} |
}} | }} | ||
{{hr}} | {{hr}} | ||
| Line 531: | Line 531: | ||
{{MoveListRow | Kouma Shourai Ha | {{QCB}} {{slash}} (requires weapon) | Amakusa throws his crystal ball on the ground, which creates a dark portal that moves along the ground and sucks the opponent into it when close. A pillar of light blasts out from the portal, then the opponent is ejected from it. The distance traveled by the portal depends on the strength of the button used. This move can only be blocked low.}} | {{MoveListRow | Kouma Shourai Ha | {{QCB}} {{slash}} (requires weapon) | Amakusa throws his crystal ball on the ground, which creates a dark portal that moves along the ground and sucks the opponent into it when close. A pillar of light blasts out from the portal, then the opponent is ejected from it. The distance traveled by the portal depends on the strength of the button used. This move can only be blocked low.}} | ||
{{MoveListRow | Kairetsu Shou | {{DPF}} {{kick}} (requires weapon) | Amakusa slaps his opponent repeatedly.}} | {{MoveListRow | Kairetsu Shou | {{DPF}} {{kick}} (requires weapon) | Amakusa slaps his opponent repeatedly.}} | ||
| − | {{MoveListRow | '''Super:''' Kyoumei Jussatsu Jin | {{left}} {{ | + | {{MoveListRow | '''Super:''' Kyoumei Jussatsu Jin | {{left}} {{QCFD}} {{LS}}+{{MS}} (close) (requires weapon) | Amakusa throws his crystal ball a short distance forward. If it hits his opponent, it traps the opponent in a magic prison, then Amakusa retrieves the ball and uses it to shoot the opponent with violent energy.}} |
}} | }} | ||
}} | }} | ||
| Line 555: | Line 555: | ||
{{MoveListRow | Mugenryuu Muhou Ken | {{QCF}} {{kick}} | Zankuro charges forward with a glowing fist that knocks his opponent over.}} | {{MoveListRow | Mugenryuu Muhou Ken | {{QCF}} {{kick}} | Zankuro charges forward with a glowing fist that knocks his opponent over.}} | ||
{{MoveListRow | Mugenryuu Fudou | {{DPF}} {{kick}} (requires weapon) | Zankuro pulls his sword back and creates a glowing energy spike with his hand. If the opponent attacks while he is doing this, Zankuro knocks the opponent's weapon away, grabs them, then hits them with a downward sword slash.}} | {{MoveListRow | Mugenryuu Fudou | {{DPF}} {{kick}} (requires weapon) | Zankuro pulls his sword back and creates a glowing energy spike with his hand. If the opponent attacks while he is doing this, Zankuro knocks the opponent's weapon away, grabs them, then hits them with a downward sword slash.}} | ||
| − | {{MoveListRow | '''Super:''' Ougi Musou Shingeki Zan | {{left}} {{ | + | {{MoveListRow | '''Super:''' Ougi Musou Shingeki Zan | {{left}} {{QCFD}} {{LS}}+{{MS}} | Zankuro stomps the ground, which causes the opponent to lose balance, then slashes his sword down.}} |
}} | }} | ||
}} | }} | ||
Latest revision as of 02:52, 27 March 2024
| |||||||||||||||
| Samurai Spirits Amakusa Kourin | |||||||||||||||
|---|---|---|---|---|---|---|---|---|---|---|---|---|---|---|---|
| System(s): Sega Saturn | |||||||||||||||
| Publisher: SNK | |||||||||||||||
| Developer: TUG[1], Yumekobo[2] | |||||||||||||||
| Original system(s): Neo Geo | |||||||||||||||
| Sound driver: SCSP/CD-DA (37 tracks) | |||||||||||||||
| Peripherals supported: Extended RAM Cartridge (1MB/4MB) | |||||||||||||||
| Genre: Fighting Action/Kakutou Action (格闘アクション)[3], Action[4][5] | |||||||||||||||
| Number of players: 1-2 | |||||||||||||||
| Official in-game languages: | |||||||||||||||
| |||||||||||||||
|


Samurai Spirits Amakusa Kourin (サムライスピリッツ 天草降臨) is a 2D fighting game developed by SNK as part of the Samurai Spirits series. It was originally released for the Neo Geo in late 1996, then ported to the Sega Saturn nearly a full year later in 1997. The game requires an Extended RAM Cartridge to play.
Contents
Story
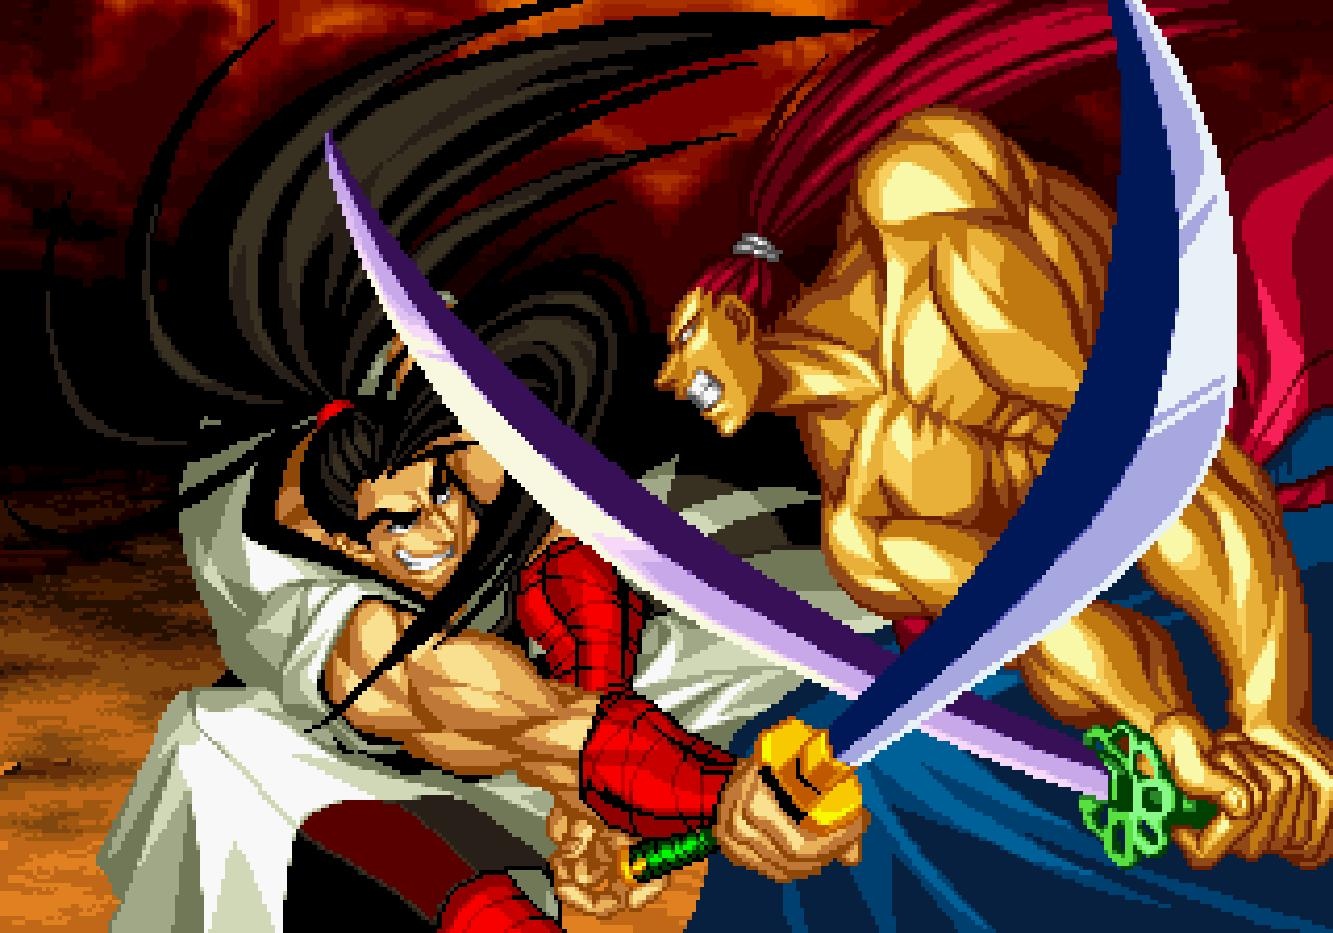
The second part of a two-chapter story that is chronologically set between the events of Samurai Spirits and Shin Samurai Spirits: Haohmaru Jigokuhen (Samurai Shodown and Samurai Shodown II in the West), the game focuses on the return of Shiro Tokisada Amakusa, the villain of the first game. Amakusa has taken over a castle in the jagged wasteland of Shimabara and kidnapped the sorceress-in-training Hazuki Kazama in order to use her as a conduit to control a resurrected Zankuro Minazuki.
Gameplay


The game is the fourth in a series of weapons-based fighting games set in Edo-period Japan. Compared to the previous entry, Samurai Spirits Zankurou Musouken, it returns to the lighter color palette of the earlier games and restores three characters not seen since the second game. It removes several mechanics introduced in the previous game, such as aerial blocking, unblockable heavy slash attacks after a dash, and the ability to charge the POW gauge by holding all three slash buttons. It also removes mechanics that have been in the series since the first game, such as the delivery man and items and the ability to stun opponents by hitting them with several attacks in a short span of time. However, it retains the Slash and Bust techniques and the grades introduced in the last game. New mechanics include chain combos, pounce attacks for downed opponents, taunts, reworked "Rage explosion" techniques, and violent finishing moves. Health is split across two separate gauges for each player to compensate for the high damage of many attacks. The game also introduces two new characters, Hazuki Kazama's brothers Kazuki and Sogetsu.
As before, matches are fought to the best of three rounds. Each round is timed (with the winner being the combatant with the most health remaining if time runs out). If the battle goes to four rounds, both characters start with full POW gauges and fight a shortened final round. Both players lose if the fourth round ends in a draw or a tie.
Characters move with ![]() or
or ![]() . They backstep or dash with
. They backstep or dash with ![]()
![]() or
or ![]()
![]() . They jump upward with
. They jump upward with ![]() and jump behind and ahead with
and jump behind and ahead with ![]() or
or ![]() . They crouch with
. They crouch with ![]() . Characters can slash (or punch if disarmed) with
. Characters can slash (or punch if disarmed) with ![]() (weak),
(weak), ![]() (normal), or
(normal), or ![]() (heavy) and kick with
(heavy) and kick with ![]() . Heavy attacks do more damage but are significantly slower. Attacks can be done while standing, crouching, jumping, or dashing. Performing a counter-hit (hitting the opponent while the opponent is attacking) does extra damage. Characters can evade attacks with
. Heavy attacks do more damage but are significantly slower. Attacks can be done while standing, crouching, jumping, or dashing. Performing a counter-hit (hitting the opponent while the opponent is attacking) does extra damage. Characters can evade attacks with ![]() (or
(or ![]() +
+![]() ), which causes the character to quickly lean into the background, causing any attacks made in that moment to miss; however, the character is vulnerable for an instant when coming out of the dodge. If the character is close to the opponent, instead of dodging, the character passes to the other side of the opponent. This can also be used to evade an enemy strike, leaving the opponent open to counterattack if timed right. When next to the opponent, a character can initiate a chain combo by pressing
), which causes the character to quickly lean into the background, causing any attacks made in that moment to miss; however, the character is vulnerable for an instant when coming out of the dodge. If the character is close to the opponent, instead of dodging, the character passes to the other side of the opponent. This can also be used to evade an enemy strike, leaving the opponent open to counterattack if timed right. When next to the opponent, a character can initiate a chain combo by pressing ![]() +
+![]() and following up with a series of quick slashes.
and following up with a series of quick slashes.
When characters slash each other at the same time (when both armed), they lock swords. Players must press the slash buttons rapidly to break the lock, with the player who loses the hold (by not pressing the buttons as fast as the opposing player) having the character knocked back and disarmed. Both players have visible counters that count their button presses. A character can equip his or her weapon again by pressing a slash button while standing next to it. A character can taunt and throw his or her own weapon down (to fight unarmed) by pressing ![]() +
+![]() . In addition to their standard attacks, characters can perform special moves using specific button combinations (though many special moves cannot be performed if the character is disarmed).
. In addition to their standard attacks, characters can perform special moves using specific button combinations (though many special moves cannot be performed if the character is disarmed).
Guarding is done by holding the D-Pad away from the opponent. Guarding can be done while standing or crouching and can also be done in midair. Most attacks can be blocked while standing or crouching, but many attacks must specifically be blocked high or low. Every character has a sweep kick performed with ![]() +
+![]() (or
(or ![]() +
+![]() when facing left) that can only be blocked crouching and an overhead move performed with
when facing left) that can only be blocked crouching and an overhead move performed with ![]() (or
(or ![]() +
+![]() ) that can only be blocked standing. If a character is armed, the character can also perform a parry against a weapon attack by pressing
) that can only be blocked standing. If a character is armed, the character can also perform a parry against a weapon attack by pressing ![]()
![]()
![]()
![]() K (or
K (or ![]()
![]()
![]()
![]() K when facing left) as the opponent is attacking in close range. The timing for this maneuver must be precise, but if successful, the character repels the opponent's attack, and the opponent is left vulnerable to counterattack for a moment. If the character is unarmed, this move instead disarms the opponent.
K when facing left) as the opponent is attacking in close range. The timing for this maneuver must be precise, but if successful, the character repels the opponent's attack, and the opponent is left vulnerable to counterattack for a moment. If the character is unarmed, this move instead disarms the opponent.
Characters can break an opponent's guard by holding ![]() or
or ![]() while pressing the heavy slash button in close range. This grabs and then pushes or pulls the opponent aside, which does no damage by itself but leaves the opponent open to attack. After a character has been knocked down, the character can recover more quickly by holding
while pressing the heavy slash button in close range. This grabs and then pushes or pulls the opponent aside, which does no damage by itself but leaves the opponent open to attack. After a character has been knocked down, the character can recover more quickly by holding ![]() , roll away by holding
, roll away by holding ![]() or
or ![]() , or recover some health by holding
, or recover some health by holding ![]() while pressing the attack buttons rapidly. Downed opponents can be attacked with a pounce attack from far away by pressing
while pressing the attack buttons rapidly. Downed opponents can be attacked with a pounce attack from far away by pressing ![]() and a slash button simultaneously or with a nearby attack by pressing
and a slash button simultaneously or with a nearby attack by pressing ![]() (or
(or ![]() if facing left) and a slash button simultaneously.
if facing left) and a slash button simultaneously.
Each character has a "POW" gauge that fills as the player is hit by enemy attacks or guards against an attack. When the gauge is full, the character starts to glow and can perform a Weapon-Flipping Technique (武器飛ばし必殺技). These are super moves that do heavy damage and disarm the opponent, which are performed with special button combinations or by pressing ![]() . The gauge drains if the move hits the opponent (but not if it misses). The POW gauge stays permanently filled when a character's health gauge has depleted into the red area and started flashing.
. The gauge drains if the move hits the opponent (but not if it misses). The POW gauge stays permanently filled when a character's health gauge has depleted into the red area and started flashing.
The "Rage explosion" (怒りモード) from previous games is now separate from the POW gauge. Characters can enter this mode by pressing ![]() +
+![]() +
+![]() (or
(or ![]() ), which causes the character to "explode" and push back the opponent (but the explosion inflicts no damage). The character turns red and attacks with increased damage for long as the "Explosion gauge," which replaces the POW gauge, lasts. The Explosion gauge drains quickly over time, and its duration is inversely proportional to the amount of health that the character has remaining. During this state, the character can perform a Link Slash (連ね斬り), a Weapon-Flipping Technique, or a Fatal Flash (一閃). A Link Slash is an automatic combos performed with
), which causes the character to "explode" and push back the opponent (but the explosion inflicts no damage). The character turns red and attacks with increased damage for long as the "Explosion gauge," which replaces the POW gauge, lasts. The Explosion gauge drains quickly over time, and its duration is inversely proportional to the amount of health that the character has remaining. During this state, the character can perform a Link Slash (連ね斬り), a Weapon-Flipping Technique, or a Fatal Flash (一閃). A Link Slash is an automatic combos performed with ![]() +
+![]() +
+![]() that drains a small amount of the gauge. The Weapon-Flipping Technique is the same as with POW gauge and empties the Explosion gauge if it hits. The Fatal Flash is a special attack that is performed with
that drains a small amount of the gauge. The Weapon-Flipping Technique is the same as with POW gauge and empties the Explosion gauge if it hits. The Fatal Flash is a special attack that is performed with ![]() +
+![]() +
+![]() (or
(or ![]() ). The damage inflicted if it connects is inversely proportionate to the amount of health that the player's character has remaining, which is potentially a severe amount of damage if the character is close to defeat. However, it can only be performed once per match (the player loses the POW gauge for the rest of the match afterwards) and can be blocked.
). The damage inflicted if it connects is inversely proportionate to the amount of health that the player's character has remaining, which is potentially a severe amount of damage if the character is close to defeat. However, it can only be performed once per match (the player loses the POW gauge for the rest of the match afterwards) and can be blocked.
If the opponent is defeated under certain conditions, the player is prompted to enter a special button combination to perform a special finishing move called a No Contest (断末奥義) move. The button combination is shown on-screen and must be entered quickly. The requirements for being able to perform this move are that the opponent must be defeated in less than twenty seconds in the second round of the match and that the opponent must be left standing when hit by the last move (not in midair or knocked down by the move). It can be done in single-player or two-player games, except against Nakoruru or Rimururu or against the boss characters (including the rival character) in the story mode. These moves kill the opponent in an elaborate and bloody fashion, similar to the Fatalities in the Mortal Kombat games.
Chain combos
The game introduces a chain combo system (called 連続斬り or "CD combos," after the buttons used in the original Neo Geo version to start the sequence). These combos use the same button combinations for every character and can be initiated by pressing HS +K when next to the opponent. This can then be followed up with one of the following chains:
- LS LS LS
- LS MS HS
- MS MS HS
- HOLD
 LS LS MS MS HS HS LS MS HS HS HS HS HS
 - HOLD LS LS HS MS LS HS MS LS HS MS LS HS MS
- HS HS K (Shizumaru only)
- HS HS (Kazuki and Sogetsu only)
- HS MS MS MS (Kazuki and Sogetsu only)
Modes
In the single-player mode, the player chooses any of the seventeen selectable characters and the character's alignment and then fights a series of matches against six opponents before reaching Amakusa's Castle. There is a time limit for reaching this point that causes the game to branch into one of two outcomes. The time limit appears at the start of the game, and the timer is shown during gameplay. If the player exceeds this time, the character reaches the castle after a rival character (specific to the chosen character) has already arrived and killed Amakusa, and the two characters fight. Otherwise, if the player finishes within the time limit, the character fights Amakusa, then the resurrected Zankuro, then the rival character. There are eight difficulty levels. A second player can enter the game by pressing START on a second control pad.
The Vs Mode is a dedicated two-player mode where two players can fight each other in single matches. The Practice Mode is a single-player training mode where the player can choose any character and any opponent. The opponent has infinite health and adjustable behavior (stand, crouch, or jump and not guard, guard, or guard after being hit). The game shows button inputs on the side of the screen in this mode.
In either mode, after choosing a character, the player can choose between two versions of the character: 修羅 (localized as "Slash" in other releases of the game) or 羅刹 ("Bust"). Slash is the the chivalrous alignment and represents the "normal" version of the character, while Bust is a darker, treacherous version with a modified moveset. Then the player chooses between three experience levels: 剣聖 (localized as "Upper Grade"), 剣豪 ("Medium Grade"), or 剣客 ("Beginners Class"). Upper Grade gives the player a faster character but takes away the ability to guard (though the character can still dodge). Medium Grade is the normal game. The character can block, and the POW gauge fills normally. Beginners Class lets the player perform automatic four-hit combos by pressing ![]() +
+![]() (but extending it into a longer combo is not possible) and perform the character's Rage special move (when the POW gauge is full) by pressing
(but extending it into a longer combo is not possible) and perform the character's Rage special move (when the POW gauge is full) by pressing ![]() +
+![]() +
+![]() +
+![]() (but the POW gauge charges more slowly). The player cannot use the Rage explosion technique in Beginners Class.
(but the POW gauge charges more slowly). The player cannot use the Rage explosion technique in Beginners Class.
There are also options for setting the amount of damage taken by each player ("Capacity"), the starting amount of life for both players ("Life"), the number of rounds needed to win a match (from 1 to 5), the time limit for each round (60 seconds or unlimited), and the POW gauge (normal for empty or "MAX" for full). The game saves high scores and completion status to the Saturn's internal memory.
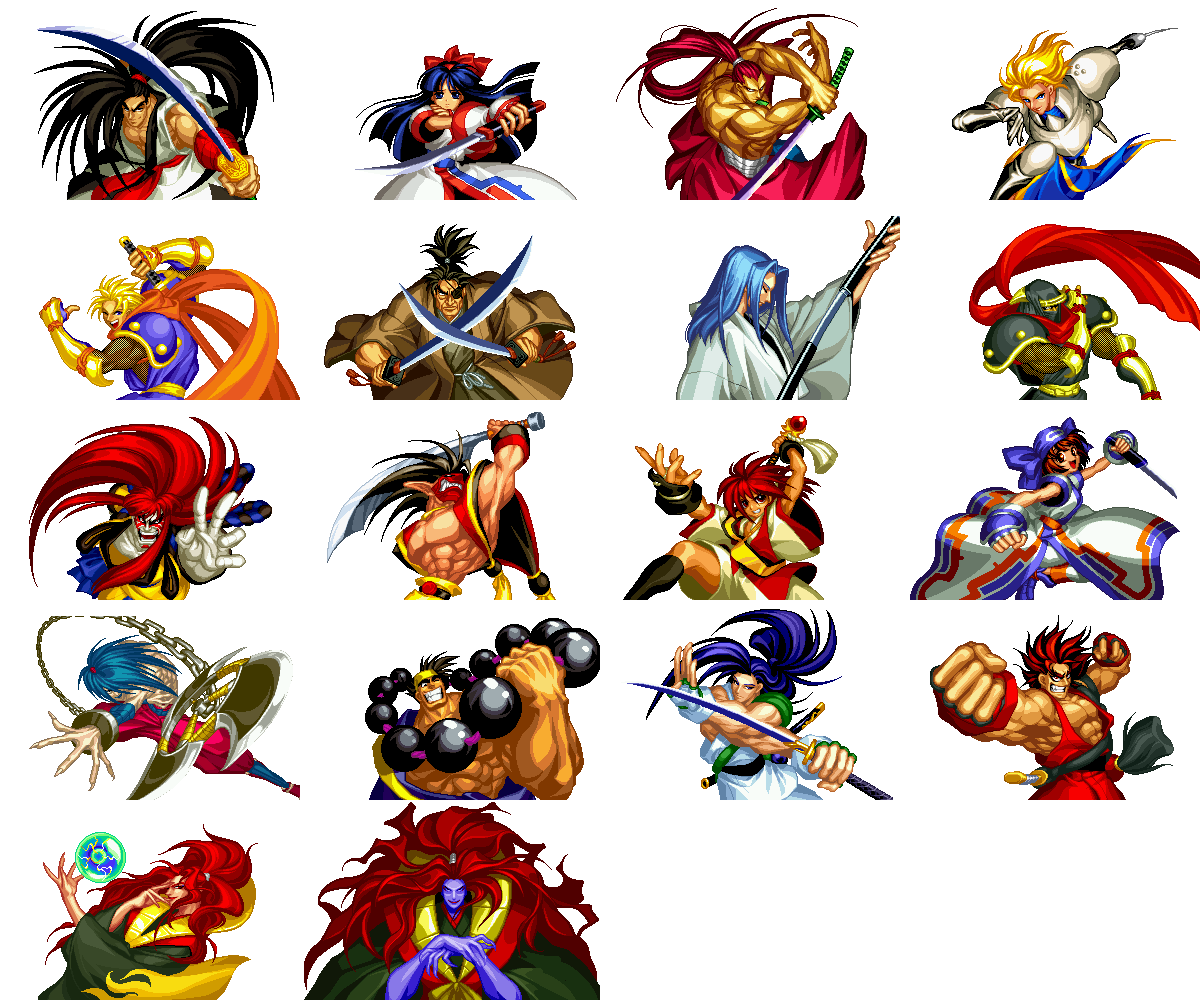
Characters
Note: Move lists assume that the character is facing right. When facing left, ![]() and
and ![]() should be reversed.
should be reversed.
| S | Any slash button |
| LS | Light slash |
| MS | Medium slash |
| HS | Hard slash |
| K | Kick |
Playable
The two ninja brothers, Kazuki Kazama and Sogetsu Kazama, are new characters. Charlotte and Jubei return after being absent from the last game, and Tam Tam returns after being absent from the last two games.
Rival battle: Genjuro Kibagami
|
Haohmaru | |||||||||||||||||||||||||||||||||||||||||||||||||||||||||||||||||
An honorable samurai. He decides to make the journey to Shimabara after hearing that the castle was restored and sensing the presence of Amakusa.
| ||||||||||||||||||||||||||||||||||||||||||||||||||||||||||||||||||
Rival battle: Genjuro Kibagami
|
Nakoruru | |||||||||||||||||||||||||||||||||||||||||||||||||||||||||||||||||
A young girl who is a guardian of nature. She travels to Shimabara to protect nature from the evil blight emanating from the castle.
| ||||||||||||||||||||||||||||||||||||||||||||||||||||||||||||||||||
Rival battle: Haohmaru
|
Genjuro Kibagami | |||||||||||||||||||||||||||||||||||||||||||||||||||||||||||||||||
A cold-hearted ronin. He is uninterested in the return of Amakusa and seeks only a duel with Haohmaru.
| ||||||||||||||||||||||||||||||||||||||||||||||||||||||||||||||||||
Rival battle: Haohmaru
|
Charlotte Christine de Colde | |||||||||||||||||||||||||||||||||||||||||||||||||||||||||||||||||
A master fencer who "paints" with her rapier. She senses that her native France is in peril and travels to Japan to investigate.
| ||||||||||||||||||||||||||||||||||||||||||||||||||||||||||||||||||
Rival battle: Tam Tam
|
Galford D. Weller | |||||||||||||||||||||||||||||||||||||||||||||||||||||||||||||||||
An American sailor who traveled to Japan to learn ninjutsu. Determined to vanquish all evil from the world, he starts his journey to Shimabara.
| ||||||||||||||||||||||||||||||||||||||||||||||||||||||||||||||||||
Rival battle: Hanzo Hattori
|
Jubei Yagyu | |||||||||||||||||||||||||||||||||||||||||||||||||||||||||||||||||
A ronin and a agent for the bakufu. He has been ordered to search the castle at Shimabara.
| ||||||||||||||||||||||||||||||||||||||||||||||||||||||||||||||||||
Rival battle: Kyoshiro Senryo
|
Ukyo Tachibana | |||||||||||||||||||||||||||||||||||||||||||||||||||||||||||||||||
A master swordsman afflicted with a fatal disease. He decides to journey to Shimabara to protect his fiancée from harm.
| ||||||||||||||||||||||||||||||||||||||||||||||||||||||||||||||||||
Rival battle: Jubei Yagyu
|
Hanzo Hattori | |||||||||||||||||||||||||||||||||||||||||||||||||||||||||||||||||
The head of the Iga ninja clan. He is sent by the shogunate to destroy the evil castle, not aware yet that Amakusa has returned.
| ||||||||||||||||||||||||||||||||||||||||||||||||||||||||||||||||||
Rival battle: Ukyo Tachibana
|
Kyoshiro Senryo | |||||||||||||||||||||||||||||||||||||||||||||||||||||||||||||||||
A kabuki performer. He hears in his travels that demons have been unleashed in Hizen and goes to verify.
| ||||||||||||||||||||||||||||||||||||||||||||||||||||||||||||||||||
Rival battle: Galford D. Weller
|
Tam Tam | |||||||||||||||||||||||||||||||||||||||||||||||||||||||||||||||||
A Mesoamerican warrior. He is told by his chief that the evil god has been resurrected and returns to Japan to battle him again.
| ||||||||||||||||||||||||||||||||||||||||||||||||||||||||||||||||||
Rival battle: Haohmaru
|
Shizumaru Hisame | |||||||||||||||||||||||||||||||||||||||||||||||||||||||||||||||||
An adolescent boy who suffers from memory loss. He again senses the presence of a "demon" and traces the source of the feeling to Shimabara.
| ||||||||||||||||||||||||||||||||||||||||||||||||||||||||||||||||||
Rival battle: Genjuro Kibagami
|
Rimururu | |||||||||||||||||||||||||||||||||||||||||||||||||||||||||||||||||
A priestess and the younger sister of Nakoruru. She travels to Shimabara after detecting the evil radiating from it.
| ||||||||||||||||||||||||||||||||||||||||||||||||||||||||||||||||||
Rival battle: Gaira Caffeine
|
Basara Kubikiri | |||||||||||||||||||||||||||||||||||||||||||||||||||||||||||||||||
A yuurei who was murdered, along with his lover Kagaribi, by the possessed swordsman Zankuro. His rest is again interrupted with the resurrection of Zankuro.
| ||||||||||||||||||||||||||||||||||||||||||||||||||||||||||||||||||
Rival battle: Basara Kubikiri
|
Gaira Caffeine | |||||||||||||||||||||||||||||||||||||||||||||||||||||||||||||||||
A Buddhist monk in training. He suspects that Zankuro's body has been removed and heads to the castle to investigate.
| ||||||||||||||||||||||||||||||||||||||||||||||||||||||||||||||||||
Rival battle: Sogetsu Kazama
|
Kazuki Kazama | |||||||||||||||||||||||||||||||||||||||||||||||||||||||||||||||||
A member of the Kazama ninja clan specializing in fire jutsu. He deserts to rescue his younger sister, Hazuki, from Amakusa's clutches.
| ||||||||||||||||||||||||||||||||||||||||||||||||||||||||||||||||||
Rival battle: Kazuki Kazama
|
Sogetsu Kazama | |||||||||||||||||||||||||||||||||||||||||||||||||||||||||||||||||
The older brother to Kazuki and Hazuki who uses water jutsu. Unlike Kazuki, he stays with the clan and is ordered to assassinate his brother for leaving.
| ||||||||||||||||||||||||||||||||||||||||||||||||||||||||||||||||||
Rival battle: Hanzo Hattori
|
Shiro Tokisada Amakusa | |||||||||||||||||||||||||||||||||||||||||||||||||||||||||||||||||
A powerful sorcerer. He goes to Shimabara to destroy his evil counterpart and become one again.
|
Bosses
- Main article: Samurai Spirits Amakusa Kourin/Hidden content.
Zankuro is playable using a cheat code.
|
Aku Amakusa | |||||||||||||||||
| A resurrected evil sorcerer. He resurrects Zankuro Minazuki from the dead and kidnaps the kunoichi Hazuki Kazama to use her powers. | ||||||||||||||||||
|
Zankuro Minazuki | |||||||||||||||||
A demonic swordsman. He was slain by Shizumaru in the last game, but he is returned to life by Amakusa.
|

Stages
For the first time in the series, stages are not associated with characters. Instead, the player takes one of two routes to the castle, determined randomly at the start of the game, with a map of Shimabara appearing between matches. The western route starts at Funatsu and goes through Obama, Kushiyama, Kuchinotsu, Dohsaki, Fukae, and ends at Amakusa Castle. The eastern route starts at Koga and goes through Fukae, Arie, Kushiyama, Obama, Kusenbutake, and ends at Amakusa Castle. Each route has three unique stages and shares four stages with the other route. The castle appears in the background of many of the stages.
The stage background changes when both characters have flashing red health, when the third round is low on time, or during the fourth round.


History
Amakusa Kourin is the fourth main entry in the series. Had it been released in the Western world, it would have likely used the name Samurai Shodown IV: Amakusa's Revenge like other ports. Despite being a Japanese exclusive, the game offers a language selection option, and if set to either English, Spanish or Portuguese, the title screen will use the localised name.
Production credits
- 企画: Head-Ken., Tomi-Yan, Kouji.T, Guro
- 人物: Yes,I Do!, Masami.T, R Y U !, Datefu-Macky, Takachan・0, Y・Koyasu, Bugyo, Y・Kaneko・N, Ito ?, Mine-Chan, Grappler-J.K, Solt-Moon, Wonbat-Dera., Nancy, Charie・Tani, Haggy
- 背景: Yasu-Puu, Anta-Baka?, Y.Yoshimitsu, Yoshiko, Pu-Suke, HAS, Y, Azumi, CHU
- プログラム: Kura, Llaoyllakcuf, Dan・・・Abe
- 音響: Yamapy-I, Kitapy, Mitsuo, Sha-V
- 協力: Masami Nakaoka, Eiji Shiroi, Y.Kawase, Araiichi, Nao.Q., E.Kawasaki, Y.Koudou, H.Kawano, Bad Apple
- 声: Masaki Usui, Harumi Ikoma, Megumi Matsumoto, Eiji Yano, Mantaro Koichi, Masahiro Nonaka, Kiyoshi Kobayashi, Toshikazu Nishimura, Enma Ito, Ken Watanabe, Toshimitsu Arai, Naoki Oikawa, Miho Kaneda, Monster Maetsuka, Kong Kuwata, Atsushi Yamanishi
- Spacial Thanks To: All SNK Staff
- SNK Consumer Ver Staff: Hideki Miyakami, Hata Yoshiyuki, Yasushi Kabashima, Hideshi Ito, Yasushi Ida, Hidemitsu Hosono, AMO, Masaaki Kurokawa, Takashi Muraoka, Yumiko Suzuki, Eden Horikoshi, Takashi Hayashi
Magazine articles
- Main article: Samurai Spirits Amakusa Kourin/Magazine articles.
Physical scans
| Sega Retro Average | ||||||||||||||||||||||||||||||||||||||||||||||||||||||||||||||||
|---|---|---|---|---|---|---|---|---|---|---|---|---|---|---|---|---|---|---|---|---|---|---|---|---|---|---|---|---|---|---|---|---|---|---|---|---|---|---|---|---|---|---|---|---|---|---|---|---|---|---|---|---|---|---|---|---|---|---|---|---|---|---|---|---|
|
| 81 | |
|---|---|
| Based on 12 reviews | |
| Saturn, JP |
|---|
 _Saturn_JP_Box_F_ront.jpg) Cover
|
Spinecard |
| Saturn, JP (1MB RAM Pack) |
|---|
  Cover
|
 Disc Manual  Jewel Case |
Technical information
- Main article: Samurai Spirits Amakusa Kourin/Technical information.
References
- ↑ http://gdri.smspower.org/wiki/index.php/TUG
- ↑ http://gdri.smspower.org/wiki/index.php/Yumekobo
- ↑ File:SSAK Saturn JP Box Front 1MB.jpg
- ↑ File:SSAK Saturn JP Box Back.jpg
- ↑ 5.0 5.1 https://sega.jp/fb/segahard/ss/soft_licensee3.html (Wayback Machine: 2020-03-20 23:05)
- ↑ File:SSAmakusa Saturn JP SSEnding.pdf
- ↑ Ação Games, "Dezembro 1997" (BR; 1997-xx-xx), page 31
- ↑ Consoles +, "Novembre 1997" (FR; 1997-1x-xx), page 127
- ↑ Famitsu, "1997-10-10" (JP; 1997-09-26), page 1
- ↑ Freak, "11/97" (IL; 1997-xx-xx), page 1
- ↑ MAN!AC, "12/97" (DE; 1997-11-12), page 53
- ↑ Mega Console, "Novembre 1997" (IT; 1997-xx-xx), page 76
- ↑ Mega Fun, "01/98" (DE; 1997-12-03), page 102
- ↑ Saturn Fan, "1997 No. 19" (JP; 1997-09-26), page 181
- ↑ Saturn Fan, "1997 No. 22" (JP; 1997-11-14), page 82
- ↑ Sega Magazin, "Januar 1998" (DE; 1997-12-10), page 76
- ↑ Sega Saturn Magazine, "1997-34 (1997-10-03,10)" (JP; 1997-09-19), page 250
- ↑ Sega Saturn Magazine, "Readers rating final data" (JP; 2000-03), page 12
| Samurai Spirits Amakusa Kourin | |
|---|---|
|
Main page | Hidden content | Magazine articles | Reception | Technical information | |
| Samurai Shodown/Samurai Spirits games for Sega systems | |
|---|---|
| Samurai Shodown (1994) | |
| Samurai Shodown (1994) | |
| Samurai Shodown (1995) | |
| Samurai Spirits Zankurou Musouken (1996) | Shinsetsu Samurai Spirits Bushidou Retsuden (1997) | Samurai Spirits Amakusa Kourin (1997) | Samurai Spirits Best Collection (1998) | |
| Nakoruru: Anohito Kara no Okurimono (2002) | |
| Samurai Spirits Tenkaichi Kenkakuden (2005) | |
| Unlicensed Samurai Shodown/Samurai Spirits games for Sega systems | |
| Soul Edge vs. Samurai Spirits (1997) | Shin Samurai Spirits Haohmaru Jigokuhen (1998) | |