Difference between revisions of "Ultimate Mortal Kombat 3 (Saturn)"
From Sega Retro
(→Gameplay: added combo damage) |
m (button templates) |
||
| Line 89: | Line 89: | ||
Move lists assume the player is facing right. If facing left, {{left}} and {{right}} should be reversed. | Move lists assume the player is facing right. If facing left, {{left}} and {{right}} should be reversed. | ||
| − | All characters can perform roundhouse kicks with {{left}}+{{ | + | All characters can perform roundhouse kicks with {{left}}+{{HighKick}} (which knock the opponent across the screen), leg sweeps with {{left}}+{{LowKick}} (which cause the opponent to fall down), and uppercuts with {{down}}+{{HighPunch}} (which knock the opponent high into the air). Throws are performed by pressing {{LowPunch}} when next to the opponent. |
| − | When using a standard three-button control pad, for moves requiring {{ | + | When using a standard three-button control pad, for moves requiring {{LowPunch}}, hold the direction and {{LowPunch}} simultaneously. For moves requiring {{HighPunch}}, release the direction before pressing {{LowPunch}}. Special moves requiring {{LowPunch}}+{{HighPunch}} can be done with just {{LowPunch}}. Uppercuts are performed with {{down}}+{{LowPunch}}. |
Fatalities often require being a certain distance from the opponent in order to execute. Each character has a special button combination for performing the stage-specific Fatalities on the Subway and Pit 3 stages. Friendships and Babalities can only be performed if the player does not block during the final round. | Fatalities often require being a certain distance from the opponent in order to execute. Each character has a special button combination for performing the stage-specific Fatalities on the Subway and Pit 3 stages. Friendships and Babalities can only be performed if the player does not block during the final round. | ||
| Line 107: | Line 107: | ||
| desc=A ninja who was born in Kitana's former world of Edenia and smuggled away as a small child. He resurfaced thousands of years later in the service of his captor Shao Kahn. | | desc=A ninja who was born in Kitana's former world of Edenia and smuggled away as a small child. He resurfaced thousands of years later in the service of his captor Shao Kahn. | ||
{{MoveListTable | | {{MoveListTable | | ||
| − | {{MoveListRow | Control Orb | {{down}} {{right}} {{ | + | {{MoveListRow | Control Orb | {{down}} {{right}} {{HighPunch}} | Rain shoots a projectile that stuns his opponent, then the player can move the opponent around using the D-Pad.}} |
| − | {{MoveListRow | Lightning Lift | {{left}} {{left}} {{ | + | {{MoveListRow | Lightning Lift | {{left}} {{left}} {{HighPunch}} | Rain calls a strike of lightning at his opponent.}} |
| − | {{MoveListRow | Super Roundhouse Kick | {{left}}+{{ | + | {{MoveListRow | Super Roundhouse Kick | {{left}}+{{HighKick}} | Rain's roundhouse kick knocks opponents farther away. The opponent falls through the opposite side of the screen if knocked through one side.}} |
}} | }} | ||
{{MoveListTable | desc=Chain combos | | {{MoveListTable | desc=Chain combos | | ||
| − | {{MoveListRow | Combo 1 | {{ | + | {{MoveListRow | Combo 1 | {{HighPunch}} {{HighPunch}} {{LowPunch}} {{HighPunch}} | 22% damage}} |
| − | {{MoveListRow | Combo 2 | {{ | + | {{MoveListRow | Combo 2 | {{HighKick}} {{HighKick}} {{LowKick}} {{HighKick}} {{left}}+{{HighKick}} | 29% damage}} |
| − | {{MoveListRow | Combo 3 | {{ | + | {{MoveListRow | Combo 3 | {{HighKick}} {{HighKick}} {{LowPunch}} {{HighPunch}} | 21% damage}} |
}} | }} | ||
{{MoveListTable | desc=Finishing moves | | {{MoveListTable | desc=Finishing moves | | ||
| − | {{MoveListRow | Brutality | {{ | + | {{MoveListRow | Brutality | {{HighPunch}} {{HighPunch}} {{Block}} {{LowKick}} {{HighKick}} {{Block}} {{LowKick}} {{HighKick}} {{Block}} {{HighPunch}} {{LowPunch}} (close)}} |
}} | }} | ||
}} | }} | ||
| Line 125: | Line 125: | ||
| desc=A reptilian creature who takes the form of a human ninja. As one of Shao Kahn's most trusted servants, Reptile assists Jade in the hunt for Kitana, but he has secret orders to kill her if necessary. | | desc=A reptilian creature who takes the form of a human ninja. As one of Shao Kahn's most trusted servants, Reptile assists Jade in the hunt for Kitana, but he has secret orders to kill her if necessary. | ||
{{MoveListTable | | {{MoveListTable | | ||
| − | {{MoveListRow | Acid Spit | {{right}} {{right}} {{ | + | {{MoveListRow | Acid Spit | {{right}} {{right}} {{HighPunch}} | Reptile takes his mask off and spits a gob of acid.}} |
| − | {{MoveListRow | Slide | {{left}}+{{Block}}+{{ | + | {{MoveListRow | Slide | {{left}}+{{Block}}+{{LowPunch}}+{{LowKick}} | Reptile slides forward with a leg sweep.}} |
| − | {{MoveListRow | Slow Force Ball | {{left}} {{left}} {{ | + | {{MoveListRow | Slow Force Ball | {{left}} {{left}} {{LowPunch}}+{{HighPunch}} | Reptile conjures a slow-moving force ball that moves across the screen and knocks the opponent down.}} |
| − | {{MoveListRow | Fast Force Ball | {{right}} {{right}} {{ | + | {{MoveListRow | Fast Force Ball | {{right}} {{right}} {{LowPunch}}+{{HighPunch}} | Reptile conjures a fast-moving force ball that moves across the screen and knocks the opponent down.}} |
| − | {{MoveListRow | Invisibility | {{hold|{{Block}}|{{up}} {{down}}}} {{ | + | {{MoveListRow | Invisibility | {{hold|{{Block}}|{{up}} {{down}}}} {{HighKick}} | Reptile makes himself invisible until he is attacked.}} |
| − | {{MoveListRow | Reverse Elbow | {{left}} {{right}} {{ | + | {{MoveListRow | Reverse Elbow | {{left}} {{right}} {{LowKick}} | Reptile runs through his opponent, then turns around and hits his opponent with an elbow strike.}} |
}} | }} | ||
{{MoveListTable | desc=Chain combos | | {{MoveListTable | desc=Chain combos | | ||
| − | {{MoveListRow | Combo 1 | {{ | + | {{MoveListRow | Combo 1 | {{HighPunch}} {{HighPunch}} {{down}}+{{LowPunch}} | 18% damage}} |
| − | {{MoveListRow | Combo 2 | {{ | + | {{MoveListRow | Combo 2 | {{HighKick}} {{HighKick}} {{left}}+{{HighKick}} | 21% damage}} |
| − | {{MoveListRow | Combo 3 | {{ | + | {{MoveListRow | Combo 3 | {{HighPunch}} {{HighPunch}} {{HighKick}} {{left}}+{{HighKick}} | 24% damage}} |
}} | }} | ||
{{MoveListTable | desc=Finishing moves | | {{MoveListTable | desc=Finishing moves | | ||
{{MoveListRow | Fatality 1 | {{left}} {{left}} {{right}} {{down}} {{Block}} (half screen away) | Reptile removes his mask, revealing his reptilian head, and uses his tongue to eat his opponent in segments.}} | {{MoveListRow | Fatality 1 | {{left}} {{left}} {{right}} {{down}} {{Block}} (half screen away) | Reptile removes his mask, revealing his reptilian head, and uses his tongue to eat his opponent in segments.}} | ||
| − | {{MoveListRow | Fatality 2 | {{hold|{{Block}}|{{right}} {{right}} {{up}} {{up}}}} {{ | + | {{MoveListRow | Fatality 2 | {{hold|{{Block}}|{{right}} {{right}} {{up}} {{up}}}} {{HighKick}} (sweep distance) | Reptile removes his mask, revealing his reptilian head, and vomits acid that dissolves his opponent into a pile of bones.}} |
{{MoveListRow | Stage Fatality | {{Block}} {{Run}} {{Block}} {{Block}} (close)}} | {{MoveListRow | Stage Fatality | {{Block}} {{Run}} {{Block}} {{Block}} (close)}} | ||
| − | {{MoveListRow | Friendship | {{down}} {{right}} {{right}} {{left}} {{ | + | {{MoveListRow | Friendship | {{down}} {{right}} {{right}} {{left}} {{HighKick}} (close) | Reptile unwinds a lizard jack-in-the-box.}} |
| − | {{MoveListRow | Babality | {{right}} {{right}} {{left}} {{down}} {{ | + | {{MoveListRow | Babality | {{right}} {{right}} {{left}} {{down}} {{LowKick}}}} |
| − | {{MoveListRow | Brutality | {{ | + | {{MoveListRow | Brutality | {{HighPunch}} {{Block}} {{HighKick}} {{HighKick}} {{Block}} {{HighPunch}} {{LowPunch}} {{LowKick}} {{LowKick}} {{Block}} {{LowPunch}} (close)}} |
}} | }} | ||
}} | }} | ||
| Line 151: | Line 151: | ||
| desc=A riot control police officer and the lone survivor of a major city after Shao Kahn's invasion. | | desc=A riot control police officer and the lone survivor of a major city after Shao Kahn's invasion. | ||
{{MoveListTable | | {{MoveListTable | | ||
| − | {{MoveListRow | Low Grenade | {{down}} {{left}} {{ | + | {{MoveListRow | Low Grenade | {{down}} {{left}} {{LowPunch}} | Stryker throws a grenade in a low arc across the screen.}} |
| − | {{MoveListRow | High Grenade | {{down}} {{left}} {{ | + | {{MoveListRow | High Grenade | {{down}} {{left}} {{HighPunch}} | Stryker throws a grenade in a high arc across the screen.}} |
| − | {{MoveListRow | Baton Trip | {{right}} {{left}} {{ | + | {{MoveListRow | Baton Trip | {{right}} {{left}} {{LowPunch}} | Stryker dashes across the screen and uses his baton to sweep his opponent.}} |
| − | {{MoveListRow | Baton Toss | {{right}} {{right}} {{ | + | {{MoveListRow | Baton Toss | {{right}} {{right}} {{HighKick}} | Stryker leaps across the screen and uses his baton to toss his opponent.}} |
| − | {{MoveListRow | Rapid Fire Gun | {{left}} {{right}} {{ | + | {{MoveListRow | Rapid Fire Gun | {{left}} {{right}} {{HighPunch}} | Stryker kneels and fires his gun, which hits nearby opponents.}} |
}} | }} | ||
{{MoveListTable | desc=Chain combos | | {{MoveListTable | desc=Chain combos | | ||
| − | {{MoveListRow | Combo 1 | {{ | + | {{MoveListRow | Combo 1 | {{HighPunch}} {{HighPunch}} {{LowPunch}} | 18% damage}} |
| − | {{MoveListRow | Combo 2 | {{ | + | {{MoveListRow | Combo 2 | {{HighKick}} {{HighPunch}} {{HighPunch}} {{LowPunch}} | 23% damage}} |
| − | {{MoveListRow | Combo 3 | {{ | + | {{MoveListRow | Combo 3 | {{HighKick}} {{LowKick}} {{left}}+{{LowPunch}} {{left}}+{{HighKick}} | 23% damage}} |
| − | {{MoveListRow | Combo 4 | {{ | + | {{MoveListRow | Combo 4 | {{HighKick}} {{LowKick}} {{left}}+{{HighKick}} | 19% damage}} |
}} | }} | ||
{{MoveListTable | desc=Finishing moves | | {{MoveListTable | desc=Finishing moves | | ||
{{MoveListRow | Fatality 1 | {{down}} {{right}} {{down}} {{right}} {{Block}} (close) | Stryker straps explosives to his opponent's chest, which explode.}} | {{MoveListRow | Fatality 1 | {{down}} {{right}} {{down}} {{right}} {{Block}} (close) | Stryker straps explosives to his opponent's chest, which explode.}} | ||
| − | {{MoveListRow | Fatality 2 | {{right}} {{right}} {{right}} {{ | + | {{MoveListRow | Fatality 2 | {{right}} {{right}} {{right}} {{LowKick}} (full screen away) | Stryker uses his taser to cause his opponent to explode.}} |
| − | {{MoveListRow | Stage Fatality | {{hold|{{Block}}|{{right}} {{up}} {{up}}}} {{ | + | {{MoveListRow | Stage Fatality | {{hold|{{Block}}|{{right}} {{up}} {{up}}}} {{HighKick}} (close)}} |
| − | {{MoveListRow | Friendship | {{ | + | {{MoveListRow | Friendship | {{LowPunch}} {{Run}} {{Run}} {{LowPunch}} | Stryker acts as a crossing guard as dogs run across the screen.}} |
| − | {{MoveListRow | Babality | {{down}} {{right}} {{right}} {{left}} {{ | + | {{MoveListRow | Babality | {{down}} {{right}} {{right}} {{left}} {{HighPunch}}}} |
| − | {{MoveListRow | Brutality | {{ | + | {{MoveListRow | Brutality | {{HighPunch}} {{LowPunch}} {{HighKick}} {{LowKick}} {{HighPunch}} {{LowPunch}} {{LowKick}} {{HighKick}} {{HighPunch}} {{LowKick}} {{LowKick}} (close)}} |
}} | }} | ||
}} | }} | ||
| Line 177: | Line 177: | ||
| desc=A special forces soldier. He fitted both of his arms with bionic implants in preparation for the impending Outworld invasion. | | desc=A special forces soldier. He fitted both of his arms with bionic implants in preparation for the impending Outworld invasion. | ||
{{MoveListTable | | {{MoveListTable | | ||
| − | {{MoveListRow | Dash Punch | {{right}} {{right}} {{ | + | {{MoveListRow | Dash Punch | {{right}} {{right}} {{HighKick}} | Jax dashes forward at high speed with his fist extended.}} |
| − | {{MoveListRow | Single Shot | {{left}} {{right}} {{ | + | {{MoveListRow | Single Shot | {{left}} {{right}} {{HighPunch}} | Jax shoots a fireball across the screen.}} |
| − | {{MoveListRow | Double Shot | {{right}} {{right}} {{left}} {{left}} {{ | + | {{MoveListRow | Double Shot | {{right}} {{right}} {{left}} {{left}} {{HighPunch}} | Jax shoots two successive fireballs across the screen, one low and one high.}} |
| − | {{MoveListRow | Ground Pound | Hold {{ | + | {{MoveListRow | Ground Pound | Hold {{LowKick}} for 3 seconds and release | Jax punches the ground, causing an opponent on the ground to lose balance.}} |
| − | {{MoveListRow | Gotcha Grab | {{right}} {{right}} {{ | + | {{MoveListRow | Gotcha Grab | {{right}} {{right}} {{LowPunch}} (close) | Jax grabs his opponent by the throat and punches twice.}} |
{{MoveListRow | Back Breaker | {{Block}} in midair (close) | Jax grabs his opponent in midair, drops to the ground, and snaps the opponent's back on his shoulder.}} | {{MoveListRow | Back Breaker | {{Block}} in midair (close) | Jax grabs his opponent in midair, drops to the ground, and snaps the opponent's back on his shoulder.}} | ||
| − | {{MoveListRow | Body Slam | {{ | + | {{MoveListRow | Body Slam | {{HighPunch}} during throw | Jax slams his opponent against the ground. This move can be done multiple times by pressing {{HighPunch}} repeatedly.}} |
}} | }} | ||
{{MoveListTable | desc=Chain combos | | {{MoveListTable | desc=Chain combos | | ||
| − | {{MoveListRow | Combo 1 | {{ | + | {{MoveListRow | Combo 1 | {{HighKick}} {{HighKick}} {{left}}+{{HighKick}} | 19% damage}} |
| − | {{MoveListRow | Combo 2 | {{ | + | {{MoveListRow | Combo 2 | {{HighPunch}} {{HighPunch}} {{Block}} {{LowPunch}} {{left}}+{{HighPunch}} | 27% damage}} |
| − | {{MoveListRow | Combo 3 | {{ | + | {{MoveListRow | Combo 3 | {{HighKick}} {{HighKick}} {{down}}+{{HighPunch}} {{HighPunch}} {{Block}} {{LowPunch}} {{left}}+{{HighPunch}} | 33% damage}} |
}} | }} | ||
{{MoveListTable | desc=Finishing moves | | {{MoveListTable | desc=Finishing moves | | ||
{{MoveListRow | Fatality 1 | {{hold|{{Block}}|{{up}} {{down}} {{right}} {{up}}}} (close) | Jax changes his arms into blades and dices his opponent with them.}} | {{MoveListRow | Fatality 1 | {{hold|{{Block}}|{{up}} {{down}} {{right}} {{up}}}} (close) | Jax changes his arms into blades and dices his opponent with them.}} | ||
| − | {{MoveListRow | Fatality 2 | {{Run}} {{Block}} {{Run}} {{Run}} {{ | + | {{MoveListRow | Fatality 2 | {{Run}} {{Block}} {{Run}} {{Run}} {{LowKick}} (full screen away) | Jax grows to humongous size and stomps his opponent.}} |
| − | {{MoveListRow | Stage Fatality | {{down}} {{right}} {{down}} {{ | + | {{MoveListRow | Stage Fatality | {{down}} {{right}} {{down}} {{LowPunch}} (close)}} |
| − | {{MoveListRow | Friendship | {{ | + | {{MoveListRow | Friendship | {{LowKick}} {{Run}} {{Run}} {{LowKick}} (outside sweep distance) | Jax uses a jump rope.}} |
| − | {{MoveListRow | Babality | {{down}} {{down}} {{down}} {{ | + | {{MoveListRow | Babality | {{down}} {{down}} {{down}} {{LowKick}}}} |
| − | {{MoveListRow | Brutality | {{ | + | {{MoveListRow | Brutality | {{HighPunch}} {{HighPunch}} {{HighPunch}} {{Block}} {{LowPunch}} {{HighPunch}} {{HighPunch}} {{HighPunch}} {{Block}} {{LowPunch}} {{HighPunch}} (close)}} |
}} | }} | ||
}} | }} | ||
| Line 204: | Line 204: | ||
| desc=A Native American historian who uses his shaman magic to protect his tribe's land against the Outworld invasion. | | desc=A Native American historian who uses his shaman magic to protect his tribe's land against the Outworld invasion. | ||
{{MoveListTable | | {{MoveListTable | | ||
| − | {{MoveListRow | Spirit Arrow | {{down}} {{left}} {{ | + | {{MoveListRow | Spirit Arrow | {{down}} {{left}} {{LowPunch}} | Nightwolf shoots an arrow across the screen at his opponent.}} |
| − | {{MoveListRow | Tomahawk Swipe | {{down}} {{right}} {{ | + | {{MoveListRow | Tomahawk Swipe | {{down}} {{right}} {{HighPunch}} | Nightwolf swipes his hatchet in front of him.}} |
| − | {{MoveListRow | Shoulder Charge | {{right}} {{right}} {{ | + | {{MoveListRow | Shoulder Charge | {{right}} {{right}} {{LowKick}} | Nightwolf charges while ramming his shoulder.}} |
| − | {{MoveListRow | Red Shoulder Charge | {{left}} {{left}} {{right}} {{ | + | {{MoveListRow | Red Shoulder Charge | {{left}} {{left}} {{right}} {{HighKick}} | Nightwolf charges while ramming his shoulder. This move is faster and travels farther than the normal Shoulder Charge.}} |
| − | {{MoveListRow | Spirit Shield | {{left}} {{left}} {{left}} {{ | + | {{MoveListRow | Spirit Shield | {{left}} {{left}} {{left}} {{HighKick}} | Nightwolf glows, reflecting projectiles that hit him back toward their caster.}} |
}} | }} | ||
{{MoveListTable | desc=Chain combos | | {{MoveListTable | desc=Chain combos | | ||
| − | {{MoveListRow | Combo 1 | {{ | + | {{MoveListRow | Combo 1 | {{HighKick}} {{HighKick}} {{left}}+{{HighKick}} | 19% damage}} |
| − | {{MoveListRow | Combo 2 | {{ | + | {{MoveListRow | Combo 2 | {{HighPunch}} {{HighPunch}} {{LowPunch}} {{down}} {{right}}+{{HighPunch}} | 23% damage}} |
| − | {{MoveListRow | Combo 3 | {{ | + | {{MoveListRow | Combo 3 | {{HighPunch}} {{HighPunch}} {{LowPunch}} {{HighKick}} | 22% damage}} |
| − | {{MoveListRow | Combo 4 | {{ | + | {{MoveListRow | Combo 4 | {{LowKick}} {{HighPunch}} {{HighPunch}} {{LowPunch}} {{down}} {{right}}+{{HighPunch}} | 28% damage}} |
| − | {{MoveListRow | Combo 5 | {{ | + | {{MoveListRow | Combo 5 | {{HighKick}} {{HighPunch}} {{HighPunch}} {{LowPunch}} {{HighKick}} | 27% damage}} |
}} | }} | ||
{{MoveListTable | desc=Finishing moves | | {{MoveListTable | desc=Finishing moves | | ||
{{MoveListRow | Fatality 1 | {{hold|{{Block}}|{{up}} {{up}}}} {{left}} {{right}} {{Block}} (close) | Nightwolf calls down a column of light that disintegrates his opponent.}} | {{MoveListRow | Fatality 1 | {{hold|{{Block}}|{{up}} {{up}}}} {{left}} {{right}} {{Block}} (close) | Nightwolf calls down a column of light that disintegrates his opponent.}} | ||
| − | {{MoveListRow | Fatality 2 | {{left}} {{left}} {{down}} {{ | + | {{MoveListRow | Fatality 2 | {{left}} {{left}} {{down}} {{HighPunch}} (half screen away) | Nightwolf uses his hatchet to call a strike of lightning on his opponent.}} |
{{MoveListRow | Stage Fatality | {{Run}} {{Run}} {{Block}} (close)}} | {{MoveListRow | Stage Fatality | {{Run}} {{Run}} {{Block}} (close)}} | ||
{{MoveListRow | Friendship | {{Run}} {{Run}} {{Run}} {{down}} | Nightwolf transforms into Rayden as a ''Mortal Kombat II'' arcade machine falls behind him.}} | {{MoveListRow | Friendship | {{Run}} {{Run}} {{Run}} {{down}} | Nightwolf transforms into Rayden as a ''Mortal Kombat II'' arcade machine falls behind him.}} | ||
| − | {{MoveListRow | Babality | {{right}} {{left}} {{right}} {{left}} {{ | + | {{MoveListRow | Babality | {{right}} {{left}} {{right}} {{left}} {{LowPunch}}}} |
| − | {{MoveListRow | Brutality | {{ | + | {{MoveListRow | Brutality | {{HighPunch}} {{HighPunch}} {{HighKick}} {{LowKick}} {{LowKick}} {{Block}} {{Block}} {{LowPunch}} {{LowPunch}} {{HighPunch}} {{HighKick}} (close)}} |
}} | }} | ||
}} | }} | ||
| Line 231: | Line 231: | ||
| desc=A close friend of the renegade princess Kitana. After Kitana killed her evil twin Mileena and escaped from Outworld to Earth, Jade was appointed by the emperor Shao Kahn to find and bring her back alive. | | desc=A close friend of the renegade princess Kitana. After Kitana killed her evil twin Mileena and escaped from Outworld to Earth, Jade was appointed by the emperor Shao Kahn to find and bring her back alive. | ||
{{MoveListTable | | {{MoveListTable | | ||
| − | {{MoveListRow | Razor-Rang (Straight) | {{left}} {{right}} {{ | + | {{MoveListRow | Razor-Rang (Straight) | {{left}} {{right}} {{LowPunch}} | Jade throws a Razor-Rang straight across the screen.}} |
| − | {{MoveListRow | Razor-Rang (Upward) | {{left}} {{right}} {{ | + | {{MoveListRow | Razor-Rang (Upward) | {{left}} {{right}} {{HighPunch}} | Jade throws a Razor-Rang that arcs upward.}} |
| − | {{MoveListRow | Razor-Rang (Downward) | {{left}} {{right}} {{ | + | {{MoveListRow | Razor-Rang (Downward) | {{left}} {{right}} {{LowKick}} | Jade throws a Razor-Rang that arcs downward.}} |
| − | {{MoveListRow | Projectile Shield | {{left}} {{right}} {{ | + | {{MoveListRow | Projectile Shield | {{left}} {{right}} {{HighKick}} | Jade flashes and projectiles pass harmlessly through her.}} |
| − | {{MoveListRow | Shadow Kick | {{down}} {{right}} {{ | + | {{MoveListRow | Shadow Kick | {{down}} {{right}} {{LowKick}} | Jade dashes forward while kicking.}} |
}} | }} | ||
{{MoveListTable | desc=Chain combos | | {{MoveListTable | desc=Chain combos | | ||
| − | {{MoveListRow | Combo 1 | {{ | + | {{MoveListRow | Combo 1 | {{HighPunch}} {{HighPunch}} {{down}}+{{LowPunch}} {{down}}+{{HighPunch}} | 22% damage}} |
| − | {{MoveListRow | Combo 2 | {{ | + | {{MoveListRow | Combo 2 | {{HighKick}} {{HighKick}} {{LowKick}} {{left}}+{{HighKick}} | 23% damage}} |
| − | {{MoveListRow | Combo 3 | {{ | + | {{MoveListRow | Combo 3 | {{HighPunch}} {{HighPunch}} {{down}}+{{LowPunch}} {{LowKick}} {{HighKick}} {{left}}+{{LowKick}} {{left}}+{{HighKick}} | 25% damage}} |
}} | }} | ||
{{MoveListTable | desc=Finishing moves | | {{MoveListTable | desc=Finishing moves | | ||
| − | {{MoveListRow | Fatality 1 | {{hold|{{Block}}|{{up}} {{up}}}} {{down}} {{right}} {{ | + | {{MoveListRow | Fatality 1 | {{hold|{{Block}}|{{up}} {{up}}}} {{down}} {{right}} {{HighPunch}} (close) | Jade stabs her opponent with her staff and flays them by shaking them.}} |
{{MoveListRow | Fatality 2 | {{Run}} {{Run}} {{Run}} {{Block}} {{Run}} (close) | Jade uppercuts her opponent into the air, then catches them by impaling them on her staff.}} | {{MoveListRow | Fatality 2 | {{Run}} {{Run}} {{Run}} {{Block}} {{Run}} (close) | Jade uppercuts her opponent into the air, then catches them by impaling them on her staff.}} | ||
{{MoveListRow | Stage Fatality | {{left}} {{right}} {{down}} {{Run}} (close)}} | {{MoveListRow | Stage Fatality | {{left}} {{right}} {{down}} {{Run}} (close)}} | ||
| − | {{MoveListRow | Friendship | {{left}} {{down}} {{left}} {{left}} {{ | + | {{MoveListRow | Friendship | {{left}} {{down}} {{left}} {{left}} {{HighKick}} | Jade hops on her staff like a pogo stick.}} |
| − | {{MoveListRow | Babality | {{down}} {{down}} {{right}} {{down}} {{ | + | {{MoveListRow | Babality | {{down}} {{down}} {{right}} {{down}} {{HighKick}}}} |
| − | {{MoveListRow | Brutality | {{ | + | {{MoveListRow | Brutality | {{HighPunch}} {{LowKick}} {{HighPunch}} {{LowPunch}} {{HighKick}} {{HighKick}} {{LowKick}} {{Block}} {{Block}} {{HighPunch}} {{HighKick}} (close)}} |
}} | }} | ||
}} | }} | ||
| Line 256: | Line 256: | ||
| desc=A mysterious figure that emerged from the Netherrealm to spy on the battle between realms and report back to his leaders. | | desc=A mysterious figure that emerged from the Netherrealm to spy on the battle between realms and report back to his leaders. | ||
{{MoveListTable | | {{MoveListTable | | ||
| − | {{MoveListRow | Disabler | {{down}} {{right}} {{ | + | {{MoveListRow | Disabler | {{down}} {{right}} {{LowPunch}} | Noob Saibot shoots a cloud that disables his opponent's ability to block.}} |
{{MoveListRow | Teleport Slam | {{down}} {{up}} | Noob Saibot flies into the air, then reappears and slams his opponent into the ground.}} | {{MoveListRow | Teleport Slam | {{down}} {{up}} | Noob Saibot flies into the air, then reappears and slams his opponent into the ground.}} | ||
| − | {{MoveListRow | Shadow Throw | {{right}} {{right}} {{ | + | {{MoveListRow | Shadow Throw | {{right}} {{right}} {{HighPunch}} | A shadow splits from Noob Saibot that runs to and throws his opponent.}} |
}} | }} | ||
{{MoveListTable | desc=Chain combos | | {{MoveListTable | desc=Chain combos | | ||
| − | {{MoveListRow | Combo 1 | {{ | + | {{MoveListRow | Combo 1 | {{LowKick}} {{LowKick}} {{LowKick}} {{LowKick}} | 23% damage}} |
| − | {{MoveListRow | Combo 2 | {{ | + | {{MoveListRow | Combo 2 | {{HighPunch}} {{HighPunch}} {{LowPunch}} {{HighKick}} | 22% damage}} |
}} | }} | ||
{{MoveListTable | desc=Finishing moves | | {{MoveListTable | desc=Finishing moves | | ||
| − | {{MoveListRow | Brutality | {{ | + | {{MoveListRow | Brutality | {{HighPunch}} {{LowKick}} {{LowPunch}} {{Block}} {{LowKick}} {{HighKick}} {{HighPunch}} {{LowPunch}} {{Block}} {{LowKick}} {{HighKick}} (close)}} |
}} | }} | ||
}} | }} | ||
| Line 273: | Line 273: | ||
| desc=A special forces soldier who disappeared after the first tournament. She was rescued by Jax, and the two prepare for Shao Kahn's invasion after failing to convince the government of the threat. | | desc=A special forces soldier who disappeared after the first tournament. She was rescued by Jax, and the two prepare for Shao Kahn's invasion after failing to convince the government of the threat. | ||
{{MoveListTable | | {{MoveListTable | | ||
| − | {{MoveListRow | Sonic Rings | {{down}} {{right}} {{ | + | {{MoveListRow | Sonic Rings | {{down}} {{right}} {{LowPunch}} | Sonya throws sonic rings across the screen.}} |
| − | {{MoveListRow | Leg Grab | {{down}}+{{Block}}+{{ | + | {{MoveListRow | Leg Grab | {{down}}+{{Block}}+{{LowPunch}} (sweep distance) | Sonya does a handstand and uses her legs to grab and slam her opponent against the ground.}} |
| − | {{MoveListRow | Square Wave Punch | {{right}} {{left}} {{ | + | {{MoveListRow | Square Wave Punch | {{right}} {{left}} {{HighPunch}} | Sonya jumps into the air and shoots across the screen with her fist extended.}} |
| − | {{MoveListRow | Rising Bicycle Kick | {{left}} {{left}} {{down}} {{ | + | {{MoveListRow | Rising Bicycle Kick | {{left}} {{left}} {{down}} {{HighKick}} | Sonya flies diagonally upward while kicking multiple times, resembling pedaling a bicycle.}} |
}} | }} | ||
{{MoveListTable | desc=Chain combos | | {{MoveListTable | desc=Chain combos | | ||
| − | {{MoveListRow | Combo 1 | {{ | + | {{MoveListRow | Combo 1 | {{HighPunch}} {{HighPunch}} {{LowPunch}} {{left}}+{{HighPunch}} | 22% damage}} |
| − | {{MoveListRow | Combo 2 | {{ | + | {{MoveListRow | Combo 2 | {{HighKick}} {{HighKick}} {{HighPunch}} {{HighPunch}} {{LowPunch}} {{left}}+{{HighPunch}} | 31% damage}} |
| − | {{MoveListRow | Combo 3 | {{ | + | {{MoveListRow | Combo 3 | {{HighKick}} {{HighPunch}} {{HighPunch}} {{LowPunch}} {{left}}+{{HighPunch}} | 27% damage}} |
| − | {{MoveListRow | Combo 4 | {{ | + | {{MoveListRow | Combo 4 | {{HighKick}} {{HighPunch}} {{HighPunch}} {{up}}+{{LowPunch}} | 23% damage}} |
| − | {{MoveListRow | Combo 5 | {{ | + | {{MoveListRow | Combo 5 | {{HighPunch}} {{HighPunch}} {{up}}+{{LowPunch}} | 18% damage}} |
| − | {{MoveListRow | Combo 6 | {{ | + | {{MoveListRow | Combo 6 | {{HighKick}} {{HighPunch}} {{HighPunch}} {{up}}+{{HighPunch}} | 23% damage}} |
| − | {{MoveListRow | Combo 7 | {{ | + | {{MoveListRow | Combo 7 | {{HighKick}} {{HighKick}} {{HighPunch}} {{HighPunch}} {{up}}+{{LowPunch}} | 27% damage}} |
| − | {{MoveListRow | Combo 8 | {{ | + | {{MoveListRow | Combo 8 | {{HighKick}} {{HighKick}} {{left}}+{{HighKick}} | 19% damage}} |
}} | }} | ||
{{MoveListTable | desc=Finishing moves | | {{MoveListTable | desc=Finishing moves | | ||
{{MoveListRow | Fatality 1 | {{hold|{{Run}}+{{Block}}|{{up}} {{up}} {{left}} {{down}}}} (half screen away) | Sonya blows a kiss that crushes her opponent.}} | {{MoveListRow | Fatality 1 | {{hold|{{Run}}+{{Block}}|{{up}} {{up}} {{left}} {{down}}}} (half screen away) | Sonya blows a kiss that crushes her opponent.}} | ||
{{MoveListRow | Fatality 2 | {{left}} {{right}} {{down}} {{down}} {{Run}} | Sonya blows a kiss that incinerates her opponent.}} | {{MoveListRow | Fatality 2 | {{left}} {{right}} {{down}} {{down}} {{Run}} | Sonya blows a kiss that incinerates her opponent.}} | ||
| − | {{MoveListRow | Stage Fatality | {{right}} {{right}} {{down}} {{ | + | {{MoveListRow | Stage Fatality | {{right}} {{right}} {{down}} {{HighPunch}} (close)}} |
{{MoveListRow | Friendship | {{left}} {{right}} {{left}} {{down}}+{{Run}} | Sonya swings her arms playfully.}} | {{MoveListRow | Friendship | {{left}} {{right}} {{left}} {{down}}+{{Run}} | Sonya swings her arms playfully.}} | ||
| − | {{MoveListRow | Babality | {{down}} {{down}} {{right}} {{ | + | {{MoveListRow | Babality | {{down}} {{down}} {{right}} {{LowKick}}}} |
| − | {{MoveListRow | Brutality | {{ | + | {{MoveListRow | Brutality | {{HighPunch}} {{LowKick}} {{Block}} {{HighPunch}} {{LowKick}} {{Block}} {{HighPunch}} {{LowPunch}} {{Block}} {{HighKick}} {{LowKick}} (close)}} |
}} | }} | ||
}} | }} | ||
| Line 302: | Line 302: | ||
| desc=A criminal thought to have been killed in the first tournament. He convinces Shao Kahn to spare his soul before the Outworld invasion, proposing to teach Kahn's warriors how to use Earth's weapons. | | desc=A criminal thought to have been killed in the first tournament. He convinces Shao Kahn to spare his soul before the Outworld invasion, proposing to teach Kahn's warriors how to use Earth's weapons. | ||
{{MoveListTable | | {{MoveListTable | | ||
| − | {{MoveListRow | Knife Throw | {{down}} {{left}} {{ | + | {{MoveListRow | Knife Throw | {{down}} {{left}} {{HighPunch}} | Kano throws a knife across the screen.}} |
| − | {{MoveListRow | Knife Uppercut | {{down}} {{right}} {{ | + | {{MoveListRow | Knife Uppercut | {{down}} {{right}} {{HighPunch}} | Kano slices upward in front of him with a knife.}} |
| − | {{MoveListRow | Cannonball | Hold {{ | + | {{MoveListRow | Cannonball | Hold {{LowKick}} for 3 seconds and release | Kano hurls himself toward his opponent like a flying cannonball.}} |
| − | {{MoveListRow | Upwards Cannonball | {{DPF}} {{ | + | {{MoveListRow | Upwards Cannonball | {{DPF}} {{HighKick}} | Kano hurls himself diagonally upwards like a flying cannonball.}} |
| − | {{MoveListRow | Strangle Grab | {{down}} {{right}} {{ | + | {{MoveListRow | Strangle Grab | {{down}} {{right}} {{LowPunch}} (close) | Kano grabs and strangles his opponent.}} |
{{MoveListRow | Air Kick | {{Block}} in midair (close) | Kano grabs and kicks away his opponent in midair.}} | {{MoveListRow | Air Kick | {{Block}} in midair (close) | Kano grabs and kicks away his opponent in midair.}} | ||
}} | }} | ||
{{MoveListTable | desc=Chain combos | | {{MoveListTable | desc=Chain combos | | ||
| − | {{MoveListRow | Combo 1 | {{ | + | {{MoveListRow | Combo 1 | {{HighKick}} {{LowPunch}} | 15% damage}} |
| − | {{MoveListRow | Combo 2 | {{ | + | {{MoveListRow | Combo 2 | {{HighKick}} {{down}}+{{LowPunch}} {{down}}+{{HighPunch}} | 19% damage}} |
| − | {{MoveListRow | Combo 3 | {{ | + | {{MoveListRow | Combo 3 | {{HighKick}} {{HighKick}} {{LowKick}} {{left}}+{{HighKick}} | 23% damage}} |
| − | {{MoveListRow | Combo 4 | {{ | + | {{MoveListRow | Combo 4 | {{HighPunch}} {{HighPunch}} {{left}}+{{LowPunch}} | 18% damage}} |
| − | {{MoveListRow | Combo 5 | {{ | + | {{MoveListRow | Combo 5 | {{HighPunch}} {{HighPunch}} {{down}}+{{LowPunch}} {{down}}+{{HighPunch}} | 22% damage}} |
| − | {{MoveListRow | Combo 6 | {{ | + | {{MoveListRow | Combo 6 | {{HighPunch}} {{HighPunch}} {{HighKick}} {{LowKick}} {{left}}+{{HighKick}} | 26% damage}} |
}} | }} | ||
{{MoveListTable | desc=Finishing moves | | {{MoveListTable | desc=Finishing moves | | ||
| − | {{MoveListRow | Fatality 1 | {{hold|{{ | + | {{MoveListRow | Fatality 1 | {{hold|{{LowPunch}}|{{right}} {{down}} {{down}} {{right}}}} (close) | Kano rips his opponent's skeleton out from their mouth.}} |
| − | {{MoveListRow | Fatality 2 | {{ | + | {{MoveListRow | Fatality 2 | {{LowPunch}} {{Block}} {{Block}} {{HighKick}} (sweep distance) | Kano uses his eye laser to cause his opponent to explode.}} |
| − | {{MoveListRow | Stage Fatality | {{hold|{{Block}}|{{up}} {{up}} {{left}}}} {{ | + | {{MoveListRow | Stage Fatality | {{hold|{{Block}}|{{up}} {{up}} {{left}}}} {{LowKick}} (close)}} |
| − | {{MoveListRow | Friendship | {{ | + | {{MoveListRow | Friendship | {{LowKick}} {{Run}} {{Run}} {{HighKick}} | Kano blows a bubble with bubblegum.}} |
| − | {{MoveListRow | Babality | {{right}} {{right}} {{down}} {{down}} {{ | + | {{MoveListRow | Babality | {{right}} {{right}} {{down}} {{down}} {{LowKick}}}} |
| − | {{MoveListRow | Brutality | {{ | + | {{MoveListRow | Brutality | {{HighPunch}} {{LowPunch}} {{Block}} {{LowPunch}} {{HighPunch}} {{Block}} {{HighKick}} {{LowKick}} {{Block}} {{HighKick}} {{LowKick}} (close)}} |
}} | }} | ||
}} | }} | ||
| Line 331: | Line 331: | ||
| desc=A grotesque clone of Kitana. After she was killed by Kitana, Mileena was brought back to life by Shao Kahn to help him defeat Earth's warriors with her combat skills and a mind-reading connection to her sister. | | desc=A grotesque clone of Kitana. After she was killed by Kitana, Mileena was brought back to life by Shao Kahn to help him defeat Earth's warriors with her combat skills and a mind-reading connection to her sister. | ||
{{MoveListTable | | {{MoveListTable | | ||
| − | {{MoveListRow | Sai Throw | Hold {{ | + | {{MoveListRow | Sai Throw | Hold {{HighPunch}} for 2 seconds and release | Mileena throws a pair of sai across the screen. This move can be done in midair.}} |
| − | {{MoveListRow | Teleport Kick | {{right}} {{right}} {{ | + | {{MoveListRow | Teleport Kick | {{right}} {{right}} {{LowKick}} | Mileena disappears, then drops from the air in front of her opponent while kicking.}} |
| − | {{MoveListRow | Ground Roll | {{left}} {{left}} {{down}} {{ | + | {{MoveListRow | Ground Roll | {{left}} {{left}} {{down}} {{HighKick}} | Mileena rolls quickly along the ground, knocking over her opponent on impact.}} |
}} | }} | ||
{{MoveListTable | desc=Chain combos | | {{MoveListTable | desc=Chain combos | | ||
| − | {{MoveListRow | Combo 1 | {{ | + | {{MoveListRow | Combo 1 | {{HighPunch}} {{HighPunch}} {{up}}+{{LowPunch}} {{down}}+{{LowPunch}} | 22% damage}} |
| − | {{MoveListRow | Combo 2 | {{ | + | {{MoveListRow | Combo 2 | {{HighKick}} {{HighKick}} {{up}}+{{LowKick}} {{up}}+{{HighKick}} | 23% damage}} |
| − | {{MoveListRow | Combo 3 | {{ | + | {{MoveListRow | Combo 3 | {{HighPunch}} {{HighPunch}} {{HighKick}} {{HighKick}} {{up}}+{{LowKick}} {{up}}+{{HighKick}} | 30% damage}} |
| − | {{MoveListRow | Combo 4 | {{ | + | {{MoveListRow | Combo 4 | {{HighPunch}} {{HighPunch}} {{HighKick}} {{HighKick}} {{QCF}}+{{LowKick}} | 24% damage}} |
| − | {{MoveListRow | Combo 5 | {{ | + | {{MoveListRow | Combo 5 | {{HighKick}} {{HighKick}} {{QCF}}+{{LowKick}} | 16% damage}} |
}} | }} | ||
{{MoveListTable | desc=Finishing moves | | {{MoveListTable | desc=Finishing moves | | ||
| − | {{MoveListRow | Fatality 1 | {{left}} {{left}} {{left}} {{right}} {{ | + | {{MoveListRow | Fatality 1 | {{left}} {{left}} {{left}} {{right}} {{LowKick}} (full screen away) | Mileena swallows a cup full of nails, then spits them at her opponent like a machine gun.}} |
| − | {{MoveListRow | Fatality 2 | {{down}} {{right}} {{down}} {{right}} {{ | + | {{MoveListRow | Fatality 2 | {{down}} {{right}} {{down}} {{right}} {{LowPunch}} (close) | Mileena swallows her opponent then spits out a pile of bones.}} |
| − | {{MoveListRow | Stage Fatality | {{down}} {{down}} {{down}} {{ | + | {{MoveListRow | Stage Fatality | {{down}} {{down}} {{down}} {{LowPunch}} (close)}} |
| − | {{MoveListRow | Friendship | {{down}} {{down}} {{left}} {{right}} {{ | + | {{MoveListRow | Friendship | {{down}} {{down}} {{left}} {{right}} {{HighPunch}} | Mileena removes her mask and looks at her face in a mirror, which shatters it.}} |
| − | {{MoveListRow | Babality | {{down}} {{down}} {{right}} {{right}} {{ | + | {{MoveListRow | Babality | {{down}} {{down}} {{right}} {{right}} {{HighPunch}}}} |
| − | {{MoveListRow | Brutality | {{ | + | {{MoveListRow | Brutality | {{HighPunch}} {{LowPunch}} {{LowPunch}} {{HighPunch}} {{Block}} {{HighKick}} {{LowKick}} {{LowKick}} {{HighKick}} {{Block}} {{HighPunch}} {{LowPunch}} (close)}} |
}} | }} | ||
}} | }} | ||
| Line 356: | Line 356: | ||
| desc=A ninja, once a member of the Liu Kuei clan. He is now hunted by cybernetic assassins from his former clan after escaping their betrayal. | | desc=A ninja, once a member of the Liu Kuei clan. He is now hunted by cybernetic assassins from his former clan after escaping their betrayal. | ||
{{MoveListTable | | {{MoveListTable | | ||
| − | {{MoveListRow | Ice Blast | {{down}} {{right}} {{ | + | {{MoveListRow | Ice Blast | {{down}} {{right}} {{LowPunch}} | Sub-Zero shoots a burst of ice across the screen, freezing his opponent on contact. Hitting an already frozen opponent "backfires" and freezes Sub-Zero while unfreezing his opponent.}} |
| − | {{MoveListRow | Ice Clone | {{down}} {{left}} {{ | + | {{MoveListRow | Ice Clone | {{down}} {{left}} {{LowPunch}} | Sub-Zero spawns an ice clone that freezes his opponent on contact. This move can be done in midair.}} |
| − | {{MoveListRow | Ice Shower (close) | {{down}} {{right}} {{left}} {{ | + | {{MoveListRow | Ice Shower (close) | {{down}} {{right}} {{left}} {{HighPunch}} | Sub-Zero shoots ice into the air, which falls in front of him.}} |
| − | {{MoveListRow | Ice Shower (far) | {{down}} {{right}} {{ | + | {{MoveListRow | Ice Shower (far) | {{down}} {{right}} {{HighPunch}} | Sub-Zero shoots ice into the air, which falls at the far end of the screen.}} |
| − | {{MoveListRow | Ice Shower (behind) | {{down}} {{left}} {{right}} {{ | + | {{MoveListRow | Ice Shower (behind) | {{down}} {{left}} {{right}} {{HighPunch}} | Sub-Zero shoots ice into the air, which falls behind him.}} |
| − | {{MoveListRow | Slide | {{left}}+{{Block}}+{{ | + | {{MoveListRow | Slide | {{left}}+{{Block}}+{{LowPunch}} or {{left}}+{{Block}}+{{LowKick}} | Sub-Zero slides forward with a leg sweep.}} |
}} | }} | ||
{{MoveListTable | desc=Chain combos | | {{MoveListTable | desc=Chain combos | | ||
| − | {{MoveListRow | Combo 1 | {{ | + | {{MoveListRow | Combo 1 | {{HighPunch}} {{HighPunch}} {{LowKick}} {{HighKick}} {{left}}+{{HighKick}} | 26% damage}} |
| − | {{MoveListRow | Combo 2 | {{ | + | {{MoveListRow | Combo 2 | {{HighPunch}} {{HighPunch}} {{left}}+{{HighKick}} | 18% damage}} |
| − | {{MoveListRow | Combo 3 | {{ | + | {{MoveListRow | Combo 3 | {{HighKick}} {{HighKick}} {{left}}+{{HighKick}} | 19% damage}} |
| − | {{MoveListRow | Combo 4 | {{ | + | {{MoveListRow | Combo 4 | {{HighPunch}} {{HighPunch}} {{LowPunch}} {{left}}+{{LowKick}} {{left}}+{{HighKick}} {{left}}+{{HighKick}} | 23% damage}} |
| − | {{MoveListRow | Combo 5 | {{ | + | {{MoveListRow | Combo 5 | {{HighPunch}} {{HighPunch}} {{LowPunch}} {{left}}+{{HighKick}} | 22% damage}} |
}} | }} | ||
{{MoveListTable | desc=Finishing moves | | {{MoveListTable | desc=Finishing moves | | ||
{{MoveListRow | Fatality 1 | {{left}} {{left}} {{down}} {{left}} {{Run}} (sweep distance) | Sub-Zero blows ice breath, turning his opponent into an ice statue that falls over and shatters into many pieces.}} | {{MoveListRow | Fatality 1 | {{left}} {{left}} {{down}} {{left}} {{Run}} (sweep distance) | Sub-Zero blows ice breath, turning his opponent into an ice statue that falls over and shatters into many pieces.}} | ||
{{MoveListRow | Fatality 2 | {{Block}} {{Block}} {{Run}} {{Block}} {{Run}} (close) | Sub-Zero holds his opponent over his head, freezing them and then pulling them apart.}} | {{MoveListRow | Fatality 2 | {{Block}} {{Block}} {{Run}} {{Block}} {{Run}} (close) | Sub-Zero holds his opponent over his head, freezing them and then pulling them apart.}} | ||
| − | {{MoveListRow | Stage Fatality | {{left}} {{down}} {{right}} {{right}} {{ | + | {{MoveListRow | Stage Fatality | {{left}} {{down}} {{right}} {{right}} {{HighKick}} (close)}} |
| − | {{MoveListRow | Friendship | {{ | + | {{MoveListRow | Friendship | {{LowKick}} {{Run}} {{Run}} {{up}} (close) | Sub-Zero unwinds a snowman jack-in-the-box.}} |
| − | {{MoveListRow | Babality | {{down}} {{left}} {{left}} {{ | + | {{MoveListRow | Babality | {{down}} {{left}} {{left}} {{HighKick}}}} |
| − | {{MoveListRow | Brutality | {{ | + | {{MoveListRow | Brutality | {{HighPunch}} {{LowKick}} {{HighKick}} {{LowPunch}} {{HighPunch}} {{HighKick}} {{HighKick}} {{HighPunch}} {{HighPunch}} {{LowPunch}} {{HighPunch}} (close)}} |
}} | }} | ||
}} | }} | ||
| Line 384: | Line 384: | ||
| desc=A Lin Kuei ninja with cryogenic powers. Having been seemingly killed in the first game, Sub-Zero mysteriously returns to again attempt the assassination of Shang Tsung. | | desc=A Lin Kuei ninja with cryogenic powers. Having been seemingly killed in the first game, Sub-Zero mysteriously returns to again attempt the assassination of Shang Tsung. | ||
{{MoveListTable | | {{MoveListTable | | ||
| − | {{MoveListRow | Deep Freeze | {{down}} {{right}} {{ | + | {{MoveListRow | Deep Freeze | {{down}} {{right}} {{LowPunch}} | Sub-Zero shoots a burst of ice across the screen, freezing his opponent on contact. Hitting an already frozen opponent "backfires" and freezes Sub-Zero while unfreezing his opponent.}} |
| − | {{MoveListRow | Ground Freeze | {{down}} {{left}} {{ | + | {{MoveListRow | Ground Freeze | {{down}} {{left}} {{LowKick}} | Sub-Zero shoots ice at the ground in front of him, which causes his opponent to slip uncontrollably if walked on.}} |
| − | {{MoveListRow | Slide | {{left}}+{{Block}}+{{ | + | {{MoveListRow | Slide | {{left}}+{{Block}}+{{LowPunch}} or {{left}}+{{Block}}+{{LowKick}} | Sub-Zero slides forward with a leg sweep.}} |
}} | }} | ||
{{MoveListTable | desc=Chain combos | | {{MoveListTable | desc=Chain combos | | ||
| − | {{MoveListRow | Combo 1 | {{ | + | {{MoveListRow | Combo 1 | {{HighPunch}} {{HighPunch}} {{LowKick}} {{left}}+{{HighKick}} {{right}}+{{LowKick}} | 26% damage}} |
| − | {{MoveListRow | Combo 2 | {{ | + | {{MoveListRow | Combo 2 | {{LowKick}} {{left}}+{{HighKick}} {{right}}+{{LowKick}} | 19% damage}} |
| − | {{MoveListRow | Combo 3 | {{ | + | {{MoveListRow | Combo 3 | {{HighPunch}} {{HighPunch}} {{down}}+{{LowPunch}} {{down}}+{{HighPunch}} | 22% damage}} |
}} | }} | ||
{{MoveListTable | desc=Finishing moves | | {{MoveListTable | desc=Finishing moves | | ||
| − | {{MoveListRow | Fatality | {{down}} {{down}} {{down}} {{right}} {{ | + | {{MoveListRow | Fatality | {{down}} {{down}} {{down}} {{right}} {{HighPunch}} (close) | Sub-Zero grabs his opponent's head, and the screen turns black.}} |
| − | {{MoveListRow | Stage Fatality | {{right}} {{down}} {{right}} {{right}} {{ | + | {{MoveListRow | Stage Fatality | {{right}} {{down}} {{right}} {{right}} {{HighPunch}} (close)}} |
| − | {{MoveListRow | Brutality | {{ | + | {{MoveListRow | Brutality | {{HighPunch}} {{LowPunch}} {{HighPunch}} {{Block}} {{LowKick}} {{LowKick}} {{HighKick}} {{HighKick}} {{LowPunch}} {{HighPunch}} {{LowPunch}} (close)}} |
}} | }} | ||
}} | }} | ||
| Line 404: | Line 404: | ||
| desc=A Shaolin monk. His plans to reform the White Lotus Society are disrupted by Shao Kahn's invasion. Alongside Liu Kang, he embarks on a journey to end Shao Kahn's treachery. | | desc=A Shaolin monk. His plans to reform the White Lotus Society are disrupted by Shao Kahn's invasion. Alongside Liu Kang, he embarks on a journey to end Shao Kahn's treachery. | ||
{{MoveListTable | | {{MoveListTable | | ||
| − | {{MoveListRow | Hat Throw | {{left}} {{right}} {{ | + | {{MoveListRow | Hat Throw | {{left}} {{right}} {{LowPunch}} | Kung Lao throws his hat like a discus.}} |
| − | {{MoveListRow | Bullet Kick | {{down}}+{{ | + | {{MoveListRow | Bullet Kick | {{down}}+{{HighKick}} before the apex of a jump | Kung Lao drops diagonally in a kick.}} |
{{MoveListRow | Whirlwind Spin | {{right}} {{down}} {{right}} {{repeat|{{Run}}}} | Kung Lao spins in place, doing damage at his sides. He spins longer if {{Run}} is pressed repeatedly.}} | {{MoveListRow | Whirlwind Spin | {{right}} {{down}} {{right}} {{repeat|{{Run}}}} | Kung Lao spins in place, doing damage at his sides. He spins longer if {{Run}} is pressed repeatedly.}} | ||
{{MoveListRow | Teleport | {{down}} {{up}} | Kung Lao disappears into the air and reappears behind his opponent.}} | {{MoveListRow | Teleport | {{down}} {{up}} | Kung Lao disappears into the air and reappears behind his opponent.}} | ||
}} | }} | ||
{{MoveListTable | desc=Chain combos | | {{MoveListTable | desc=Chain combos | | ||
| − | {{MoveListRow | Combo 1 | {{ | + | {{MoveListRow | Combo 1 | {{LowKick}} {{LowKick}} {{left}}+{{HighKick}} | 19% damage}} |
| − | {{MoveListRow | Combo 2 | {{ | + | {{MoveListRow | Combo 2 | {{HighPunch}} {{LowPunch}} {{HighPunch}} {{LowPunch}} {{LowKick}} {{LowKick}} {{left}}+{{HighKick}} | 34% damage}} |
| − | {{MoveListRow | Combo 3 | {{ | + | {{MoveListRow | Combo 3 | {{HighPunch}} {{LowKick}} {{left}}+{{HighKick}} | 18% damage}} |
}} | }} | ||
{{MoveListTable | desc=Finishing moves | | {{MoveListTable | desc=Finishing moves | | ||
{{MoveListRow | Fatality 1 | {{Run}} {{Block}} {{Run}} {{Block}} {{down}} | Kung Lao spins in place, pulling his opponent in like a vortex.}} | {{MoveListRow | Fatality 1 | {{Run}} {{Block}} {{Run}} {{Block}} {{down}} | Kung Lao spins in place, pulling his opponent in like a vortex.}} | ||
| − | {{MoveListRow | Fatality 2 | {{right}} {{right}} {{left}} {{down}} {{ | + | {{MoveListRow | Fatality 2 | {{right}} {{right}} {{left}} {{down}} {{HighPunch}} (close) | Kung Lao throws his hat, which slices his opponent into multiple pieces.}} |
| − | {{MoveListRow | Stage Fatality | {{down}} {{down}} {{right}} {{right}} {{ | + | {{MoveListRow | Stage Fatality | {{down}} {{down}} {{right}} {{right}} {{LowKick}} (close)}} |
| − | {{MoveListRow | Friendship | {{Run}} {{ | + | {{MoveListRow | Friendship | {{Run}} {{LowPunch}} {{Run}} {{LowKick}} (sweep distance or farther) | Kung Lao throws his hat and a dog runs to fetch it.}} |
| − | {{MoveListRow | Babality | {{down}} {{right}} {{right}} {{ | + | {{MoveListRow | Babality | {{down}} {{right}} {{right}} {{HighPunch}}}} |
| − | {{MoveListRow | Brutality | {{ | + | {{MoveListRow | Brutality | {{HighPunch}} {{LowPunch}} {{LowKick}} {{HighKick}} {{Block}} {{HighPunch}} {{LowPunch}} {{LowKick}} {{HighKick}} {{Block}} {{HighPunch}} (close)}} |
}} | }} | ||
}} | }} | ||
| Line 428: | Line 428: | ||
| desc=Unit LK-9T9, the first of three prototype cybernetic ninjas built by the Lin Kuei. He was once a human assassin but volunteered to be turned into a cyborg because of his loyalty to the clan. | | desc=Unit LK-9T9, the first of three prototype cybernetic ninjas built by the Lin Kuei. He was once a human assassin but volunteered to be turned into a cyborg because of his loyalty to the clan. | ||
{{MoveListTable | | {{MoveListTable | | ||
| − | {{MoveListRow | Missile | {{right}} {{right}} {{ | + | {{MoveListRow | Missile | {{right}} {{right}} {{LowPunch}} | Sektor shoots a missile across the screen.}} |
| − | {{MoveListRow | Heat-Seeking Missile | {{down}} {{left}} {{ | + | {{MoveListRow | Heat-Seeking Missile | {{down}} {{left}} {{HighPunch}} | Sektor shoots a missile that seeks his opponent.}} |
| − | {{MoveListRow | Teleport Uppercut | {{right}} {{right}} {{ | + | {{MoveListRow | Teleport Uppercut | {{right}} {{right}} {{LowKick}} | Sektor teleports to the other side of his opponent, reappearing with an uppercut.}} |
}} | }} | ||
{{MoveListTable | desc=Chain combos | | {{MoveListTable | desc=Chain combos | | ||
| − | {{MoveListRow | Combo 1 | {{ | + | {{MoveListRow | Combo 1 | {{HighKick}} {{HighKick}} | 15% damage}} |
| − | {{MoveListRow | Combo 2 | {{ | + | {{MoveListRow | Combo 2 | {{HighPunch}} {{HighPunch}} {{HighKick}} {{left}}+{{HighKick}} | 22% damage}} |
| − | {{MoveListRow | Combo 3 | {{ | + | {{MoveListRow | Combo 3 | {{HighPunch}} {{HighPunch}} {{HighKick}} {{HighKick}} {{left}}+{{HighKick}} | 26% damage}} |
| − | {{MoveListRow | Combo 4 | {{ | + | {{MoveListRow | Combo 4 | {{HighPunch}} {{HighPunch}} {{down}}+{{LowPunch}} | 18% damage}} |
}} | }} | ||
{{MoveListTable | desc=Finishing moves | | {{MoveListTable | desc=Finishing moves | | ||
| − | {{MoveListRow | Fatality 1 | {{ | + | {{MoveListRow | Fatality 1 | {{LowPunch}} {{Run}} {{Run}} {{Block}} (sweep distance) | Sektor crushes his opponent in a press that comes out from his chest.}} |
{{MoveListRow | Fatality 2 | {{right}} {{right}} {{right}} {{left}} {{Block}} (half screen away or farther) | Sektor incinerates his opponent with a wrist-mounted flamethrower.}} | {{MoveListRow | Fatality 2 | {{right}} {{right}} {{right}} {{left}} {{Block}} (half screen away or farther) | Sektor incinerates his opponent with a wrist-mounted flamethrower.}} | ||
{{MoveListRow | Stage Fatality | {{Run}} {{Run}} {{Run}} {{down}} (close)}} | {{MoveListRow | Stage Fatality | {{Run}} {{Run}} {{Run}} {{down}} (close)}} | ||
{{MoveListRow | Friendship | {{Run}} {{Run}} {{Run}} {{Run}} {{down}} | Sektor hits a carnival high striker with a hammer.}} | {{MoveListRow | Friendship | {{Run}} {{Run}} {{Run}} {{Run}} {{down}} | Sektor hits a carnival high striker with a hammer.}} | ||
| − | {{MoveListRow | Babality | {{left}} {{down}} {{down}} {{down}} {{ | + | {{MoveListRow | Babality | {{left}} {{down}} {{down}} {{down}} {{HighKick}}}} |
| − | {{MoveListRow | Brutality | {{ | + | {{MoveListRow | Brutality | {{HighPunch}} {{HighPunch}} {{Block}} {{Block}} {{HighKick}} {{HighKick}} {{LowKick}} {{LowKick}} {{LowPunch}} {{LowPunch}} {{HighPunch}} (close)}} |
}} | }} | ||
}} | }} | ||
| Line 452: | Line 452: | ||
| desc=A princess of the realm of Edenia. After killing Mileena, Kitana is accused of treason. She now attempts to reach Queen Sindel to warn her of their true past. | | desc=A princess of the realm of Edenia. After killing Mileena, Kitana is accused of treason. She now attempts to reach Queen Sindel to warn her of their true past. | ||
{{MoveListTable | | {{MoveListTable | | ||
| − | {{MoveListRow | Fan Throw | {{right}} {{right}} {{ | + | {{MoveListRow | Fan Throw | {{right}} {{right}} {{LowPunch}}+{{HighPunch}} | Kitana throws a spinning fan like a sawblade. This move can be done in midair.}} |
| − | {{MoveListRow | Fan Lift | {{left}} {{left}} {{left}} {{ | + | {{MoveListRow | Fan Lift | {{left}} {{left}} {{left}} {{HighPunch}} | Kitana spins her fan at the air, generating waves that can catch and lift opponents.}} |
| − | {{MoveListRow | Square Wave Punch | {{down}} {{left}} {{ | + | {{MoveListRow | Square Wave Punch | {{down}} {{left}} {{HighPunch}} | Kitana jumps into the air and shoots across the screen with her fist extended.}} |
}} | }} | ||
{{MoveListTable | desc=Chain combos | | {{MoveListTable | desc=Chain combos | | ||
| − | {{MoveListRow | Combo 1 | {{ | + | {{MoveListRow | Combo 1 | {{HighKick}} {{HighKick}} {{LowKick}} {{left}}+{{HighKick}} | 23% damage}} |
| − | {{MoveListRow | Combo 2 | {{ | + | {{MoveListRow | Combo 2 | {{HighPunch}} {{HighPunch}} {{left}}+{{LowPunch}} {{right}}+{{HighPunch}} | 25% damage}} |
}} | }} | ||
{{MoveListTable | desc=Finishing moves | | {{MoveListTable | desc=Finishing moves | | ||
| − | {{MoveListRow | Fatality 1 | {{left}} {{down}} {{right}} {{right}}+{{ | + | {{MoveListRow | Fatality 1 | {{left}} {{down}} {{right}} {{right}}+{{HighKick}} (close) | Kitana decapitates her opponent with a fan.}} |
| − | {{MoveListRow | Fatality 2 | {{Run}} {{Run}} {{Block}} {{Block}} {{ | + | {{MoveListRow | Fatality 2 | {{Run}} {{Run}} {{Block}} {{Block}} {{LowKick}} (close) | Kitana gives her opponent a "kiss of death," which causes their head to inflate and carry them away. The opponent explodes into a pile of bones off-screen.}} |
| − | {{MoveListRow | Stage Fatality | {{right}} {{down}} {{down}} {{ | + | {{MoveListRow | Stage Fatality | {{right}} {{down}} {{down}} {{LowKick}} (close)}} |
| − | {{MoveListRow | Friendship | {{down}} {{left}} {{right}} {{right}} {{ | + | {{MoveListRow | Friendship | {{down}} {{left}} {{right}} {{right}} {{LowPunch}} | Kitana removes her mask and blows bubbles at her opponent through a wand. Due to a bug, this move can only be performed in this version when the "Quick End" cheat code is enabled.}} |
| − | {{MoveListRow | Babality | {{right}} {{right}} {{down}} {{right}} {{ | + | {{MoveListRow | Babality | {{right}} {{right}} {{down}} {{right}} {{HighKick}}}} |
| − | {{MoveListRow | Brutality | {{ | + | {{MoveListRow | Brutality | {{HighPunch}} {{HighPunch}} {{Block}} {{HighKick}} {{Block}} {{Block}} {{LowKick}} {{Block}} {{LowPunch}} {{Block}} {{HighPunch}} {{Block}} (close)}} |
}} | }} | ||
}} | }} | ||
| Line 474: | Line 474: | ||
| desc=A mysterious warrior that exists as a life force of the souls of dead Outworld warriors in Shao Kahn's possession. | | desc=A mysterious warrior that exists as a life force of the souls of dead Outworld warriors in Shao Kahn's possession. | ||
{{MoveListTable | | {{MoveListTable | | ||
| − | {{MoveListRow | Fireball | {{down}} {{left}} {{ | + | {{MoveListRow | Fireball | {{down}} {{left}} {{LowPunch}} | Ermac shoots an explosive fireball across the screen.}} |
| − | {{MoveListRow | Teleport Punch | {{down}} {{left}} {{ | + | {{MoveListRow | Teleport Punch | {{down}} {{left}} {{HighPunch}} | Ermac teleports to the other side of the screen, flying in with a punch. This move can be done in midair.}} |
| − | {{MoveListRow | Telekinetic Slam | {{left}} {{down}} {{left}} {{ | + | {{MoveListRow | Telekinetic Slam | {{left}} {{down}} {{left}} {{HighKick}} | Ermac telekinetically lifts his opponent, then slams them into the ground. This move only works if the opponent is closer than half the screen away but farther than sweep distance.}} |
}} | }} | ||
{{MoveListTable | desc=Chain combos | | {{MoveListTable | desc=Chain combos | | ||
| − | {{MoveListRow | Combo 1 | {{ | + | {{MoveListRow | Combo 1 | {{HighKick}} {{LowPunch}} | 15% damage}} |
| − | {{MoveListRow | Combo 2 | {{ | + | {{MoveListRow | Combo 2 | {{HighKick}} {{HighKick}} {{LowKick}} {{left}}+{{HighKick}} | 23% damage}} |
| − | {{MoveListRow | Combo 3 | {{ | + | {{MoveListRow | Combo 3 | {{HighPunch}} {{HighPunch}} {{left}}+{{LowPunch}} {{down}} {{right}} {{LowPunch}} | 19% damage}} |
| − | {{MoveListRow | Combo 4 | {{ | + | {{MoveListRow | Combo 4 | {{HighPunch}} {{HighPunch}} {{left}}+{{LowPunch}} {{HighKick}} {{left}}+{{LowKick}} | 24% damage}} |
}} | }} | ||
{{MoveListTable | desc=Finishing moves | | {{MoveListTable | desc=Finishing moves | | ||
| − | {{MoveListRow | Fatality | {{Run}} {{Block}} {{Run}} {{Run}} {{ | + | {{MoveListRow | Fatality | {{Run}} {{Block}} {{Run}} {{Run}} {{HighKick}} (close) | Ermac does an uppercut that decapitates his opponent.}} |
| − | {{MoveListRow | Stage Fatality | {{Run}} {{Run}} {{Run}} {{Run}} {{ | + | {{MoveListRow | Stage Fatality | {{Run}} {{Run}} {{Run}} {{Run}} {{LowKick}} (close)}} |
| − | {{MoveListRow | Brutality | {{ | + | {{MoveListRow | Brutality | {{HighPunch}} {{HighPunch}} {{LowPunch}} {{Block}} {{HighKick}} {{LowKick}} {{Block}} {{HighPunch}} {{LowPunch}} {{LowKick}} {{HighKick}} (close)}} |
}} | }} | ||
}} | }} | ||
| Line 495: | Line 495: | ||
| desc=Scorpion escapes from Earth's hell after Shao Kahn's failed attempt at stealing the souls of Earthrealm. He eventually joins the struggle against Outworld. | | desc=Scorpion escapes from Earth's hell after Shao Kahn's failed attempt at stealing the souls of Earthrealm. He eventually joins the struggle against Outworld. | ||
{{MoveListTable | | {{MoveListTable | | ||
| − | {{MoveListRow | Spear | {{left}} {{left}} {{ | + | {{MoveListRow | Spear | {{left}} {{left}} {{LowPunch}} | Scorpion throws a spear across the screen, then uses it to pull his opponent toward him. The opponent is momentarily stunned.}} |
| − | {{MoveListRow | Teleport Punch | {{down}} {{left}} {{ | + | {{MoveListRow | Teleport Punch | {{down}} {{left}} {{HighPunch}} | Scorpion teleports to the other side of the screen, flying in with a punch.}} |
{{MoveListRow | Air Throw | {{Block}} in midair (close) | Scorpion grabs and throws his opponent in midair.}} | {{MoveListRow | Air Throw | {{Block}} in midair (close) | Scorpion grabs and throws his opponent in midair.}} | ||
}} | }} | ||
{{MoveListTable | desc=Chain combos | | {{MoveListTable | desc=Chain combos | | ||
| − | {{MoveListRow | Combo 1 | {{ | + | {{MoveListRow | Combo 1 | {{HighPunch}} {{HighPunch}} {{HighKick}} {{left}}+{{HighKick}} | 24% damage}} |
| − | {{MoveListRow | Combo 2 | {{ | + | {{MoveListRow | Combo 2 | {{HighKick}} {{HighKick}} {{LowKick}} {{LowKick}} | 23% damage}} |
| − | {{MoveListRow | Combo 3 | {{ | + | {{MoveListRow | Combo 3 | {{HighPunch}} {{HighPunch}} {{up}}+{{LowPunch}} | 18% damage}} |
}} | }} | ||
{{MoveListTable | desc=Finishing moves | | {{MoveListTable | desc=Finishing moves | | ||
| − | {{MoveListRow | Fatality 1 | {{hold|{{Block}}|{{down}} {{down}} {{up}}}} {{ | + | {{MoveListRow | Fatality 1 | {{hold|{{Block}}|{{down}} {{down}} {{up}}}} {{HighKick}} (half screen away) | Scorpion removes his mask, revealing a demonic skull, and incinerates his opponent with his fire breath. Toasty!}} |
{{MoveListRow | Fatality 2 | {{right}} {{right}} {{down}} {{up}} {{Run}} (close) | Scorpion teleports his opponent to his infernal lair, where the opponent bathes in hellfire.}} | {{MoveListRow | Fatality 2 | {{right}} {{right}} {{down}} {{up}} {{Run}} (close) | Scorpion teleports his opponent to his infernal lair, where the opponent bathes in hellfire.}} | ||
| − | {{MoveListRow | Stage Fatality | {{hold|{{Block}}|{{right}} {{up}} {{up}}}} {{ | + | {{MoveListRow | Stage Fatality | {{hold|{{Block}}|{{right}} {{up}} {{up}}}} {{LowPunch}} (close)}} |
| − | {{MoveListRow | Friendship | {{left}} {{right}} {{right}} {{left}} {{ | + | {{MoveListRow | Friendship | {{left}} {{right}} {{right}} {{left}} {{LowKick}} (close) | Scorpion unwinds a demonic jack-in-the-box.}} |
| − | {{MoveListRow | Babality | {{down}} {{left}} {{left}} {{right}} {{ | + | {{MoveListRow | Babality | {{down}} {{left}} {{left}} {{right}} {{HighPunch}}}} |
| − | {{MoveListRow | Brutality | {{ | + | {{MoveListRow | Brutality | {{HighPunch}} {{HighPunch}} {{Block}} {{HighKick}} {{HighKick}} {{LowKick}} {{HighKick}} {{HighPunch}} {{HighPunch}} {{LowPunch}} {{HighPunch}} (close)}} |
}} | }} | ||
}} | }} | ||
| Line 518: | Line 518: | ||
| desc=Unit LK-4D4, the second of three prototype cybernetic ninjas built by the Lin Kuei. Like the other cyborgs, he has been programmed to find and terminate the rogue ninja Sub-Zero. | | desc=Unit LK-4D4, the second of three prototype cybernetic ninjas built by the Lin Kuei. Like the other cyborgs, he has been programmed to find and terminate the rogue ninja Sub-Zero. | ||
{{MoveListTable | | {{MoveListTable | | ||
| − | {{MoveListRow | Near Bomb Toss | {{hold|{{ | + | {{MoveListRow | Near Bomb Toss | {{hold|{{LowKick}}|{{left}} {{left}} {{HighKick}}}} | Cyrax drops a bomb from his chest that hits the ground near him and explodes after a moment.}} |
| − | {{MoveListRow | Far Bomb Toss | {{hold|{{ | + | {{MoveListRow | Far Bomb Toss | {{hold|{{LowKick}}|{{right}} {{right}} {{HighKick}}}} | Cyrax drops a bomb from his chest that hits the ground far from him and explodes after a moment.}} |
| − | {{MoveListRow | Green Net | {{left}} {{left}} {{ | + | {{MoveListRow | Green Net | {{left}} {{left}} {{LowKick}} | Cyrax shoots a net from his chest that grabs and pulls his opponent closer to him.}} |
{{MoveListRow | Teleport | {{right}} {{down}} {{Block}} | Cyrax explodes, then reconstitutes on the other side of his opponent.}} | {{MoveListRow | Teleport | {{right}} {{down}} {{Block}} | Cyrax explodes, then reconstitutes on the other side of his opponent.}} | ||
| − | {{MoveListRow | Air Throw | {{down}} {{right}} {{Block}} in midair (close) to grab, {{ | + | {{MoveListRow | Air Throw | {{down}} {{right}} {{Block}} in midair (close) to grab, {{LowPunch}} to throw | Cyrax grabs and throws his opponent in midair.}} |
}} | }} | ||
{{MoveListTable | desc=Chain combos | | {{MoveListTable | desc=Chain combos | | ||
| − | {{MoveListRow | Combo 1 | {{ | + | {{MoveListRow | Combo 1 | {{HighPunch}} {{HighPunch}} {{LowPunch}} | 18% damage}} |
| − | {{MoveListRow | Combo 2 | {{ | + | {{MoveListRow | Combo 2 | {{HighKick}} {{HighKick}} {{left}}+{{HighKick}} | 19% damage}} |
| − | {{MoveListRow | Combo 3 | {{ | + | {{MoveListRow | Combo 3 | {{HighPunch}} {{HighPunch}} {{HighKick}} {{HighPunch}} {{HighKick}} {{left}}+{{HighKick}} | 30% damage}} |
}} | }} | ||
{{MoveListTable | desc=Finishing moves | | {{MoveListTable | desc=Finishing moves | | ||
| − | {{MoveListRow | Fatality 1 | {{hold|{{Block}}|{{down}} {{down}} {{up}} {{down}}}} {{ | + | {{MoveListRow | Fatality 1 | {{hold|{{Block}}|{{down}} {{down}} {{up}} {{down}}}} {{HighPunch}} (close) | Cyrax flies using a helicopter blade on his head and dives onto his opponent.}} |
{{MoveListRow | Fatality 2 | {{hold|{{Block}}|{{down}} {{down}} {{right}} {{up}}}} {{Run}} (close) | Cyrax self-destructs, killing himself as well as his opponent.}} | {{MoveListRow | Fatality 2 | {{hold|{{Block}}|{{down}} {{down}} {{right}} {{up}}}} {{Run}} (close) | Cyrax self-destructs, killing himself as well as his opponent.}} | ||
{{MoveListRow | Stage Fatality | {{Run}} {{Block}} {{Run}} (close)}} | {{MoveListRow | Stage Fatality | {{Run}} {{Block}} {{Run}} (close)}} | ||
{{MoveListRow | Friendship | {{Run}} {{Run}} {{Run}} {{up}} | Cyrax dances the Charleston.}} | {{MoveListRow | Friendship | {{Run}} {{Run}} {{Run}} {{up}} | Cyrax dances the Charleston.}} | ||
| − | {{MoveListRow | Babality | {{right}} {{right}} {{left}} {{ | + | {{MoveListRow | Babality | {{right}} {{right}} {{left}} {{HighPunch}}}} |
| − | {{MoveListRow | Brutality | {{ | + | {{MoveListRow | Brutality | {{HighPunch}} {{HighKick}} {{HighPunch}} {{HighKick}} {{HighKick}} {{HighPunch}} {{HighKick}} {{HighPunch}} {{HighKick}} {{LowKick}} {{LowPunch}} (close)}} |
}} | }} | ||
}} | }} | ||
| Line 543: | Line 543: | ||
| desc=An unknown warrior who is kept alive by respirators. He is thought to be a survivor of an attack by Shao Kahn's extermination squads. He fights with two hook swords. | | desc=An unknown warrior who is kept alive by respirators. He is thought to be a survivor of an attack by Shao Kahn's extermination squads. He fights with two hook swords. | ||
{{MoveListTable | | {{MoveListTable | | ||
| − | {{MoveListRow | Plasma Blast | {{left}} {{left}} {{ | + | {{MoveListRow | Plasma Blast | {{left}} {{left}} {{HighPunch}} | Kabal throws a fireball across the screen. This move can be done in midair.}} |
| − | {{MoveListRow | Tornado Spin | {{left}} {{right}} {{ | + | {{MoveListRow | Tornado Spin | {{left}} {{right}} {{LowKick}} | Kabal dashes through his opponent, causing the opponent to spin in place like a tornado.}} |
{{MoveListRow | Ground Saw | {{left}} {{left}} {{left}} {{Run}} | Kabal summons a sawblade that appears under his opponent.}} | {{MoveListRow | Ground Saw | {{left}} {{left}} {{left}} {{Run}} | Kabal summons a sawblade that appears under his opponent.}} | ||
}} | }} | ||
{{MoveListTable | desc=Chain combos | | {{MoveListTable | desc=Chain combos | | ||
| − | {{MoveListRow | Combo 1 | {{ | + | {{MoveListRow | Combo 1 | {{HighPunch}} {{HighPunch}} {{down}}+{{HighPunch}} | 13% damage}} |
| − | {{MoveListRow | Combo 2 | {{ | + | {{MoveListRow | Combo 2 | {{LowKick}} {{LowKick}} {{HighPunch}} {{HighPunch}} {{down}}+{{HighPunch}} | 15% damage}} |
| − | {{MoveListRow | Combo 3 | {{ | + | {{MoveListRow | Combo 3 | {{HighPunch}} {{HighPunch}} {{HighKick}} {{left}}+{{HighKick}} | 25% damage}} |
| − | {{MoveListRow | Combo 4 | {{ | + | {{MoveListRow | Combo 4 | {{HighPunch}} {{HighPunch}} {{down}}+{{LowPunch}} {{down}}+{{HighPunch}} | 17% damage}} |
| − | {{MoveListRow | Combo 5 | {{ | + | {{MoveListRow | Combo 5 | {{LowKick}} {{LowKick}} {{HighPunch}} {{HighPunch}} {{down}}+{{LowPunch}} {{down}}+{{HighPunch}} | 17% damage}} |
| − | {{MoveListRow | Combo 6 | {{ | + | {{MoveListRow | Combo 6 | {{LowKick}} {{LowKick}} {{HighPunch}} {{HighPunch}} {{HighKick}} {{left}}+{{HighKick}} | 18% damage}} |
| − | {{MoveListRow | Combo 7 | {{ | + | {{MoveListRow | Combo 7 | {{HighKick}} {{LowKick}} {{left}}+{{HighKick}} | 18% damage}} |
| − | {{MoveListRow | Combo 8 | {{ | + | {{MoveListRow | Combo 8 | {{HighKick}} {{LowKick}} {{HighKick}} {{left}}+{{HighKick}} | 24% damage}} |
}} | }} | ||
{{MoveListTable | desc=Finishing moves | | {{MoveListTable | desc=Finishing moves | | ||
{{MoveListRow | Fatality 1 | {{down}} {{down}} {{left}} {{right}} {{Block}} (sweep distance) | Kabal inflates his opponent's head until it explodes.}} | {{MoveListRow | Fatality 1 | {{down}} {{down}} {{left}} {{right}} {{Block}} (sweep distance) | Kabal inflates his opponent's head until it explodes.}} | ||
| − | {{MoveListRow | Fatality 2 | {{Run}} {{Block}} {{Block}} {{Block}} {{ | + | {{MoveListRow | Fatality 2 | {{Run}} {{Block}} {{Block}} {{Block}} {{HighKick}} (close) | Kabal removes his mask and terrifies his opponent with his frightful visage.}} |
| − | {{MoveListRow | Stage Fatality | {{Block}} {{Block}} {{ | + | {{MoveListRow | Stage Fatality | {{Block}} {{Block}} {{HighKick}} (close)}} |
| − | {{MoveListRow | Friendship | {{Run}} {{ | + | {{MoveListRow | Friendship | {{Run}} {{LowKick}} {{Run}} {{Run}} {{up}} | Kabal roasts a marshmallow on a hook sword.}} |
| − | {{MoveListRow | Babality | {{Run}} {{Run}} {{ | + | {{MoveListRow | Babality | {{Run}} {{Run}} {{LowKick}}}} |
| − | {{MoveListRow | Brutality | {{ | + | {{MoveListRow | Brutality | {{HighPunch}} {{Block}} {{LowKick}} {{LowKick}} {{LowKick}} {{HighKick}} {{LowPunch}} {{LowPunch}} {{LowPunch}} {{HighPunch}} {{LowPunch}} (close)}} |
}} | }} | ||
}} | }} | ||
| Line 571: | Line 571: | ||
| desc=Shao Kahn's wife and the Queen of Outworld before her death 10,000 years ago. She has been reborn on Earth. | | desc=Shao Kahn's wife and the Queen of Outworld before her death 10,000 years ago. She has been reborn on Earth. | ||
{{MoveListTable | | {{MoveListTable | | ||
| − | {{MoveListRow | Fireball | {{right}} {{right}} {{ | + | {{MoveListRow | Fireball | {{right}} {{right}} {{LowPunch}} | Sindel disgorges a fireball from her mouth.}} |
| − | {{MoveListRow | Air Fireball | {{down}} {{right}} {{ | + | {{MoveListRow | Air Fireball | {{down}} {{right}} {{LowKick}} (in midair) | Sindel belches a fireball downward in midair.}} |
| − | {{MoveListRow | Banshee Scream | {{right}} {{right}} {{right}} {{ | + | {{MoveListRow | Banshee Scream | {{right}} {{right}} {{right}} {{HighPunch}} | Sindel screams, causing waves to appear that stun opponents and pull them toward her.}} |
| − | {{MoveListRow | Levitate | {{left}} {{left}} {{right}} {{ | + | {{MoveListRow | Levitate | {{left}} {{left}} {{right}} {{HighKick}} | Sindel hovers in the air. She can move in any direction using the D-Pad or land with {{Block}}. She cannot use her normal attacks but can cast her Air Fireball while hovering.}} |
}} | }} | ||
{{MoveListTable | desc=Chain combos | | {{MoveListTable | desc=Chain combos | | ||
| − | {{MoveListRow | Combo 1 | {{ | + | {{MoveListRow | Combo 1 | {{HighPunch}} {{HighPunch}} {{down}}+{{HighPunch}} | 19% damage}} |
| − | {{MoveListRow | Combo 2 | {{ | + | {{MoveListRow | Combo 2 | {{HighPunch}} {{HighPunch}} {{LowPunch}} {{HighKick}} | 25% damage}} |
| − | {{MoveListRow | Combo 3 | {{ | + | {{MoveListRow | Combo 3 | {{HighKick}} {{HighPunch}} {{HighPunch}} {{down}}+{{HighPunch}} | 27% damage}} |
| − | {{MoveListRow | Combo 4 | {{ | + | {{MoveListRow | Combo 4 | {{HighKick}} {{HighPunch}} {{HighPunch}} {{LowPunch}} {{HighKick}} | 33% damage}} |
| − | {{MoveListRow | Combo 5 | {{ | + | {{MoveListRow | Combo 5 | {{HighKick}} {{HighKick}} {{left}}+{{HighKick}} | 19% damage}} |
}} | }} | ||
{{MoveListTable | desc=Finishing moves | | {{MoveListTable | desc=Finishing moves | | ||
{{MoveListRow | Fatality 1 | {{Run}} {{Run}} {{Block}} {{Run}} {{Block}} (sweep distance) | Sindel entangles her opponent with her hair, then spins the opponent around like a tornado.}} | {{MoveListRow | Fatality 1 | {{Run}} {{Run}} {{Block}} {{Run}} {{Block}} (sweep distance) | Sindel entangles her opponent with her hair, then spins the opponent around like a tornado.}} | ||
{{MoveListRow | Fatality 2 | {{Run}} {{Block}} {{Block}} {{Run}}+{{Block}} (close) | Sindel emits a horrific scream that flays her opponent.}} | {{MoveListRow | Fatality 2 | {{Run}} {{Block}} {{Block}} {{Run}}+{{Block}} (close) | Sindel emits a horrific scream that flays her opponent.}} | ||
| − | {{MoveListRow | Stage Fatality | {{down}} {{down}} {{down}} {{ | + | {{MoveListRow | Stage Fatality | {{down}} {{down}} {{down}} {{LowPunch}} (close)}} |
{{MoveListRow | Friendship | {{Run}} {{Run}} {{Run}} {{Run}} {{Run}} {{Run}} {{up}} | Sindel kicks a field goal with a ball.}} | {{MoveListRow | Friendship | {{Run}} {{Run}} {{Run}} {{Run}} {{Run}} {{Run}} {{up}} | Sindel kicks a field goal with a ball.}} | ||
{{MoveListRow | Babality | {{Run}} {{Run}} {{Run}} {{up}}}} | {{MoveListRow | Babality | {{Run}} {{Run}} {{Run}} {{up}}}} | ||
| − | {{MoveListRow | Brutality | {{ | + | {{MoveListRow | Brutality | {{HighPunch}} {{Block}} {{LowKick}} {{Block}} {{LowKick}} {{HighKick}} {{Block}} {{HighKick}} {{LowKick}} {{Block}} {{LowPunch}} (close)}} |
}} | }} | ||
}} | }} | ||
| Line 597: | Line 597: | ||
| desc=Unit LK-7T2, the last of three prototype cybernetic ninjas built by the Lin Kuei. Smoke was captured and turned into a cyborg while his friend Sub-Zero escaped. | | desc=Unit LK-7T2, the last of three prototype cybernetic ninjas built by the Lin Kuei. Smoke was captured and turned into a cyborg while his friend Sub-Zero escaped. | ||
{{MoveListTable | | {{MoveListTable | | ||
| − | {{MoveListRow | Harpoon | {{left}} {{left}} {{ | + | {{MoveListRow | Harpoon | {{left}} {{left}} {{LowPunch}} | Smoke launches a harpoon from his chest, then uses it to pull his opponent toward him. The opponent is momentarily stunned.}} |
| − | {{MoveListRow | Teleport Uppercut | {{right}} {{right}} {{ | + | {{MoveListRow | Teleport Uppercut | {{right}} {{right}} {{LowKick}} | Smoke teleports to the other side of his opponent, reappearing with an uppercut.}} |
{{MoveListRow | Invisibility | {{hold|{{Block}}|{{up}} {{up}}}} {{Run}} | Smoke makes himself invisible until he is attacked.}} | {{MoveListRow | Invisibility | {{hold|{{Block}}|{{up}} {{up}}}} {{Run}} | Smoke makes himself invisible until he is attacked.}} | ||
{{MoveListRow | Air Throw | {{Block}} in midair (close) | Smoke grabs and throws his opponent in midair.}} | {{MoveListRow | Air Throw | {{Block}} in midair (close) | Smoke grabs and throws his opponent in midair.}} | ||
}} | }} | ||
{{MoveListTable | desc=Chain combos | | {{MoveListTable | desc=Chain combos | | ||
| − | {{MoveListRow | Combo 1 | {{ | + | {{MoveListRow | Combo 1 | {{HighPunch}} {{HighPunch}} {{LowKick}} {{HighKick}} {{LowPunch}} | 26% damage}} |
| − | {{MoveListRow | Combo 2 | {{ | + | {{MoveListRow | Combo 2 | {{HighKick}} {{HighKick}} {{LowPunch}} | 19% damage}} |
| − | {{MoveListRow | Combo 3 | {{ | + | {{MoveListRow | Combo 3 | {{HighPunch}} {{HighPunch}} {{HighKick}} | 18% damage}} |
| − | {{MoveListRow | Combo 4 | {{ | + | {{MoveListRow | Combo 4 | {{HighPunch}} {{HighPunch}} {{left}}+{{LowPunch}} | 18% damage}} |
}} | }} | ||
{{MoveListTable | desc=Finishing moves | | {{MoveListTable | desc=Finishing moves | | ||
{{MoveListRow | Fatality 1 | {{hold|{{Block}}|{{up}} {{up}} {{right}} {{down}}}} (full screen away) | Smoke drops a pile of bombs from his chest, which explode and destroy the entire planet.}} | {{MoveListRow | Fatality 1 | {{hold|{{Block}}|{{up}} {{up}} {{right}} {{down}}}} (full screen away) | Smoke drops a pile of bombs from his chest, which explode and destroy the entire planet.}} | ||
{{MoveListRow | Fatality 2 | {{hold|{{Run}}+{{Block}}|{{down}} {{down}} {{right}} {{up}}}} (sweep distance) | Smoke drops a bomb into his opponent's mouth.}} | {{MoveListRow | Fatality 2 | {{hold|{{Run}}+{{Block}}|{{down}} {{down}} {{right}} {{up}}}} (sweep distance) | Smoke drops a bomb into his opponent's mouth.}} | ||
| − | {{MoveListRow | Stage Fatality | {{right}} {{right}} {{down}} {{ | + | {{MoveListRow | Stage Fatality | {{right}} {{right}} {{down}} {{LowKick}} (close)}} |
| − | {{MoveListRow | Friendship | {{Run}} {{Run}} {{Run}} {{ | + | {{MoveListRow | Friendship | {{Run}} {{Run}} {{Run}} {{HighKick}} (full screen away) | Smoke blasts an air horn that comes out of his chest.}} |
| − | {{MoveListRow | Babality | {{down}} {{down}} {{left}} {{left}} {{ | + | {{MoveListRow | Babality | {{down}} {{down}} {{left}} {{left}} {{HighKick}}}} |
| − | {{MoveListRow | Brutality | {{ | + | {{MoveListRow | Brutality | {{HighPunch}} {{LowKick}} {{LowKick}} {{HighKick}} {{Block}} {{Block}} {{LowPunch}} {{LowPunch}} {{HighPunch}} {{HighPunch}} {{Block}} {{Block}} (close)}} |
}} | }} | ||
}} | }} | ||
| Line 622: | Line 622: | ||
| desc=A Shaolin monk. As the Shaolin Champion, he finds himself the prime target of Shao Kahn's extermination squads. | | desc=A Shaolin monk. As the Shaolin Champion, he finds himself the prime target of Shao Kahn's extermination squads. | ||
{{MoveListTable | | {{MoveListTable | | ||
| − | {{MoveListRow | High Fireball | {{right}} {{right}} {{ | + | {{MoveListRow | High Fireball | {{right}} {{right}} {{HighPunch}} | Liu Kang shoots a fireball while standing. This move can be done in midair.}} |
| − | {{MoveListRow | Low Fireball | {{right}} {{right}} {{ | + | {{MoveListRow | Low Fireball | {{right}} {{right}} {{LowPunch}} | Liu Kang shoots a fireball while crouching.}} |
| − | {{MoveListRow | Flying Kick | {{right}} {{right}} {{ | + | {{MoveListRow | Flying Kick | {{right}} {{right}} {{HighKick}} | Liu Kang launches himself across the screen in a kicking pose.}} |
| − | {{MoveListRow | Bicycle Kick | Hold {{ | + | {{MoveListRow | Bicycle Kick | Hold {{LowKick}} for 3 seconds and release | Liu Kang flies across the screen while kicking multiple times, resembling pedaling a bicycle.}} |
}} | }} | ||
{{MoveListTable | desc=Chain combos | | {{MoveListTable | desc=Chain combos | | ||
| − | {{MoveListRow | Combo 1 | {{ | + | {{MoveListRow | Combo 1 | {{HighPunch}} {{HighPunch}} {{left}}+{{LowPunch}} | 13% damage}} |
| − | {{MoveListRow | Combo 2 | {{ | + | {{MoveListRow | Combo 2 | {{HighKick}} {{LowKick}} {{HighKick}} {{LowKick}} | 22% damage}} |
| − | {{MoveListRow | Combo 3 | {{ | + | {{MoveListRow | Combo 3 | {{HighPunch}} {{LowKick}} {{LowKick}} {{HighKick}} {{LowKick}} | 25% damage}} |
| − | {{MoveListRow | Combo 4 | {{ | + | {{MoveListRow | Combo 4 | {{HighPunch}} {{HighPunch}} {{Block}} {{LowKick}} {{LowKick}} {{HighKick}} {{LowKick}} | 28% damage}} |
}} | }} | ||
{{MoveListTable | desc=Finishing moves | | {{MoveListTable | desc=Finishing moves | | ||
| − | {{MoveListRow | Fatality 1 | {{right}} {{right}} {{down}} {{down}} {{ | + | {{MoveListRow | Fatality 1 | {{right}} {{right}} {{down}} {{down}} {{LowKick}} | Liu Kang disappears and his opponent bursts into flames.}} |
{{MoveListRow | Fatality 2 | {{hold|{{Block}}|{{up}} {{down}} {{up}} {{up}}}} {{Run}}+{{Block}} | Liu Kang disappears and a ''Mortal Kombat II'' arcade machine falls on his opponent.}} | {{MoveListRow | Fatality 2 | {{hold|{{Block}}|{{up}} {{down}} {{up}} {{up}}}} {{Run}}+{{Block}} | Liu Kang disappears and a ''Mortal Kombat II'' arcade machine falls on his opponent.}} | ||
| − | {{MoveListRow | Stage Fatality | {{Run}} {{Block}} {{Block}} {{ | + | {{MoveListRow | Stage Fatality | {{Run}} {{Block}} {{Block}} {{LowKick}} (close)}} |
{{MoveListRow | Friendship | {{Run}} {{Run}} {{Run}} {{down}}+{{Run}} | Liu Kang recreates the ''Mortal Kombat'' dragon on a projector screen using hand puppetry.}} | {{MoveListRow | Friendship | {{Run}} {{Run}} {{Run}} {{down}}+{{Run}} | Liu Kang recreates the ''Mortal Kombat'' dragon on a projector screen using hand puppetry.}} | ||
| − | {{MoveListRow | Babality | {{down}} {{down}} {{down}} {{ | + | {{MoveListRow | Babality | {{down}} {{down}} {{down}} {{HighKick}}}} |
| − | {{MoveListRow | Brutality | {{ | + | {{MoveListRow | Brutality | {{HighPunch}} {{LowPunch}} {{HighPunch}} {{Block}} {{LowKick}} {{HighKick}} {{LowKick}} {{HighKick}} {{LowPunch}} {{LowPunch}} {{HighPunch}} (close)}} |
}} | }} | ||
}} | }} | ||
| Line 647: | Line 647: | ||
| desc=Shao Kahn's lead sorcerer. Despite his multiple failures trying to deliver Earth to his master Shao Kahn, the scheming sorcerer has convinced Kahn to grant him more power than ever before. | | desc=Shao Kahn's lead sorcerer. Despite his multiple failures trying to deliver Earth to his master Shao Kahn, the scheming sorcerer has convinced Kahn to grant him more power than ever before. | ||
{{MoveListTable | | {{MoveListTable | | ||
| − | {{MoveListRow | Single Flaming Skull | {{left}} {{left}} {{ | + | {{MoveListRow | Single Flaming Skull | {{left}} {{left}} {{HighPunch}} | Shang Tsung shoots a flaming skull from his hands.}} |
| − | {{MoveListRow | Double Flaming Skulls | {{left}} {{left}} {{right}} {{ | + | {{MoveListRow | Double Flaming Skulls | {{left}} {{left}} {{right}} {{HighPunch}} | Shang Tsung shoots two successive flaming skulls from his hands.}} |
| − | {{MoveListRow | Triple Flaming Skulls | {{left}} {{left}} {{right}} {{right}} {{ | + | {{MoveListRow | Triple Flaming Skulls | {{left}} {{left}} {{right}} {{right}} {{HighPunch}} | Shang Tsung shoots three successive flaming skulls from his hands.}} |
| − | {{MoveListRow | Volcanic Skulls | {{right}} {{left}} {{left}} {{ | + | {{MoveListRow | Volcanic Skulls | {{right}} {{left}} {{left}} {{LowKick}} | Shang Tsung summons three fireballs, one a time, from the ground underneath his opponent.}} |
}} | }} | ||
{{MoveListTable | desc=Morphs | | {{MoveListTable | desc=Morphs | | ||
| Line 656: | Line 656: | ||
{{MoveListRow | Ermac | {{down}} {{down}} {{up}}}} | {{MoveListRow | Ermac | {{down}} {{down}} {{up}}}} | ||
{{MoveListRow | Jade | {{right}} {{right}} {{down}} {{down}}+{{Block}}}} | {{MoveListRow | Jade | {{right}} {{right}} {{down}} {{down}}+{{Block}}}} | ||
| − | {{MoveListRow | Jax | {{right}} {{right}} {{down}} {{ | + | {{MoveListRow | Jax | {{right}} {{right}} {{down}} {{LowPunch}}}} |
| − | {{MoveListRow | Kabal | {{ | + | {{MoveListRow | Kabal | {{LowPunch}} {{Block}} {{HighKick}}}} |
{{MoveListRow | Kano | {{left}} {{right}} {{Block}}}} | {{MoveListRow | Kano | {{left}} {{right}} {{Block}}}} | ||
{{MoveListRow | Kitana | {{right}} {{down}} {{right}} {{Run}}}} | {{MoveListRow | Kitana | {{right}} {{down}} {{right}} {{Run}}}} | ||
{{MoveListRow | Kung Lao | {{Run}} {{Run}} {{Block}} {{Run}}}} | {{MoveListRow | Kung Lao | {{Run}} {{Run}} {{Block}} {{Run}}}} | ||
{{MoveListRow | Liu Kang | {{hold|{{Block}}|D-Pad in a 360° rotation clockwise}}}} | {{MoveListRow | Liu Kang | {{hold|{{Block}}|D-Pad in a 360° rotation clockwise}}}} | ||
| − | {{MoveListRow | Mileena | {{Run}} {{Block}} {{ | + | {{MoveListRow | Mileena | {{Run}} {{Block}} {{HighKick}}}} |
{{MoveListRow | Nightwolf | {{hold|{{Block}}|{{up}} {{up}} {{up}}}}}} | {{MoveListRow | Nightwolf | {{hold|{{Block}}|{{up}} {{up}} {{up}}}}}} | ||
| − | {{MoveListRow | Noob Saibot | {{right}} {{down}} {{down}} {{left}} {{ | + | {{MoveListRow | Noob Saibot | {{right}} {{down}} {{down}} {{left}} {{HighKick}}}} |
| − | {{MoveListRow | Rain | {{Run}} {{Block}} {{ | + | {{MoveListRow | Rain | {{Run}} {{Block}} {{LowKick}}}} |
| − | {{MoveListRow | Reptile | {{Run}} {{Block}} {{Block}} {{ | + | {{MoveListRow | Reptile | {{Run}} {{Block}} {{Block}} {{HighKick}}}} |
| − | {{MoveListRow | Scorpion | {{down}} {{down}} {{right}} {{ | + | {{MoveListRow | Scorpion | {{down}} {{down}} {{right}} {{LowPunch}}}} |
{{MoveListRow | Sektor | {{down}} {{right}} {{left}} {{Run}}}} | {{MoveListRow | Sektor | {{down}} {{right}} {{left}} {{Run}}}} | ||
| − | {{MoveListRow | Sindel | {{left}} {{down}} {{left}} {{ | + | {{MoveListRow | Sindel | {{left}} {{down}} {{left}} {{LowKick}}}} |
| − | {{MoveListRow | Smoke | {{right}} {{right}} {{ | + | {{MoveListRow | Smoke | {{right}} {{right}} {{LowPunch}}}} |
| − | {{MoveListRow | Sonya | {{down}}+{{Run}}+{{Block}}+{{ | + | {{MoveListRow | Sonya | {{down}}+{{Run}}+{{Block}}+{{LowPunch}} {{Block}}}} |
| − | {{MoveListRow | Stryker | {{right}} {{right}} {{right}} {{ | + | {{MoveListRow | Stryker | {{right}} {{right}} {{right}} {{HighKick}}}} |
| − | {{MoveListRow | Sub-Zero | {{right}} {{down}} {{right}} {{ | + | {{MoveListRow | Sub-Zero | {{right}} {{down}} {{right}} {{HighPunch}}}} |
{{MoveListRow | Sub-Zero (Classic) | {{Block}} {{Block}} {{Run}} {{Run}}}} | {{MoveListRow | Sub-Zero (Classic) | {{Block}} {{Block}} {{Run}} {{Run}}}} | ||
}} | }} | ||
{{MoveListTable | desc=Chain combos | | {{MoveListTable | desc=Chain combos | | ||
| − | {{MoveListRow | Combo 1 | {{ | + | {{MoveListRow | Combo 1 | {{HighPunch}} {{HighPunch}} {{LowPunch}} {{left}}+{{HighKick}} | 22% damage}} |
| − | {{MoveListRow | Combo 2 | {{ | + | {{MoveListRow | Combo 2 | {{HighKick}} {{HighKick}} {{left}}+{{HighKick}} | 19% damage}} |
| − | {{MoveListRow | Combo 3 | {{ | + | {{MoveListRow | Combo 3 | {{LowKick}} {{HighPunch}} {{HighPunch}} {{LowPunch}} {{left}}+{{HighKick}} | 27% damage}} |
}} | }} | ||
{{MoveListTable | desc=Finishing moves | | {{MoveListTable | desc=Finishing moves | | ||
| − | {{MoveListRow | Fatality 1 | {{hold|{{ | + | {{MoveListRow | Fatality 1 | {{hold|{{LowPunch}}|{{Run}} {{Block}} {{Run}} {{Block}}}} (close) | Shang Tsung steals his opponent's soul.}} |
| − | {{MoveListRow | Fatality 2 | {{hold|{{ | + | {{MoveListRow | Fatality 2 | {{hold|{{LowPunch}}|{{down}} {{right}} {{right}} {{down}}}} (close) | Shang Tsung raises a bed of spikes and slams his opponent into it.}} |
| − | {{MoveListRow | Stage Fatality | {{hold|{{Block}}|{{up}} {{up}} {{left}}}} {{ | + | {{MoveListRow | Stage Fatality | {{hold|{{Block}}|{{up}} {{up}} {{left}}}} {{LowPunch}} (close)}} |
| − | {{MoveListRow | Friendship | {{ | + | {{MoveListRow | Friendship | {{LowKick}} {{Run}} {{Run}} {{down}} | Shang Tsung morphs into the main character of the 1982 [[Williams]] arcade game ''Joust'', a knight riding an ostrich, and rides away.}} |
| − | {{MoveListRow | Babality | {{Run}} {{Run}} {{Run}} {{ | + | {{MoveListRow | Babality | {{Run}} {{Run}} {{Run}} {{LowKick}}}} |
| − | {{MoveListRow | Brutality | {{ | + | {{MoveListRow | Brutality | {{HighPunch}} {{Block}} {{Block}} {{Block}} {{LowKick}} {{HighPunch}} {{LowPunch}} {{LowPunch}} {{Block}} {{HighKick}} {{LowKick}} (close)}} |
}} | }} | ||
}} | }} | ||
| Line 699: | Line 699: | ||
| desc=A Centaurian chosen by Shao Kahn to lead his extermination squads. He is the game's penultimate boss. | | desc=A Centaurian chosen by Shao Kahn to lead his extermination squads. He is the game's penultimate boss. | ||
{{MoveListTable | | {{MoveListTable | | ||
| − | {{MoveListRow | Fireball | {{down}} {{left}} {{ | + | {{MoveListRow | Fireball | {{down}} {{left}} {{HighPunch}} | Motaro shoots a fireball from his tail.}} |
| − | {{MoveListRow | Grab and Smack | {{right}} {{right}} {{ | + | {{MoveListRow | Grab and Smack | {{right}} {{right}} {{LowPunch}} (close) | Motaro grabs and hits his opponent.}} |
{{MoveListRow | Teleport | {{down}} {{up}} | Motaro teleports in front of his opponent.}} | {{MoveListRow | Teleport | {{down}} {{up}} | Motaro teleports in front of his opponent.}} | ||
}} | }} | ||
| Line 709: | Line 709: | ||
| desc=The evil Emperor of Outworld, who wishes to conquer Earthrealm by any means. He is the game's ultimate antagonist and final boss. | | desc=The evil Emperor of Outworld, who wishes to conquer Earthrealm by any means. He is the game's ultimate antagonist and final boss. | ||
{{MoveListTable | | {{MoveListTable | | ||
| − | {{MoveListRow | Fireball | {{left}} {{left}} {{right}} {{ | + | {{MoveListRow | Fireball | {{left}} {{left}} {{right}} {{LowPunch}} | Shao Kahn shoots a fireball across the screen.}} |
| − | {{MoveListRow | Hammer Smash | {{left}} {{right}} {{ | + | {{MoveListRow | Hammer Smash | {{left}} {{right}} {{HighPunch}} | Shao Kahn swings a hammer in front of him.}} |
| − | {{MoveListRow | Shoulder Ram | {{right}} {{right}} {{ | + | {{MoveListRow | Shoulder Ram | {{right}} {{right}} {{LowPunch}} | Shao Kahn charges ahead while ramming his shoulder.}} |
| − | {{MoveListRow | Rising Shoulder Ram | {{right}} {{right}} {{ | + | {{MoveListRow | Rising Shoulder Ram | {{right}} {{right}} {{HighPunch}} | Shao Kahn charges upward while ramming his shoulder.}} |
| − | {{MoveListRow | Insult | {{down}} {{down}} {{ | + | {{MoveListRow | Insult | {{down}} {{down}} {{LowKick}} | Shao Kahn taunts his opponent.}} |
| − | {{MoveListRow | Laugh | {{down}} {{down}} {{ | + | {{MoveListRow | Laugh | {{down}} {{down}} {{HighKick}} | Shao Kahn laughs.}} |
}} | }} | ||
}} | }} | ||
| Line 726: | Line 726: | ||
| desc=An assassin working for the Lin Kuei who was captured and turned into a cyborg. His human form, similar to his original appearance in ''[[Mortal Kombat II]]'', can be played with a cheat code. | | desc=An assassin working for the Lin Kuei who was captured and turned into a cyborg. His human form, similar to his original appearance in ''[[Mortal Kombat II]]'', can be played with a cheat code. | ||
{{MoveListTable | | {{MoveListTable | | ||
| − | {{MoveListRow | Spear | {{left}} {{left}} {{ | + | {{MoveListRow | Spear | {{left}} {{left}} {{LowPunch}} | Smoke throws a spear across the screen, then uses it to pull his opponent toward him. The opponent is momentarily stunned.}} |
| − | {{MoveListRow | Teleport Punch | {{down}} {{left}} {{ | + | {{MoveListRow | Teleport Punch | {{down}} {{left}} {{HighPunch}} | Smoke teleports to the other side of the screen, flying in with a punch.}} |
{{MoveListRow | Air Throw | {{Block}} in midair (close) | Smoke grabs and throws his opponent in midair.}} | {{MoveListRow | Air Throw | {{Block}} in midair (close) | Smoke grabs and throws his opponent in midair.}} | ||
}} | }} | ||
{{MoveListTable | desc=Chain combos | | {{MoveListTable | desc=Chain combos | | ||
| − | {{MoveListRow | Combo 1 | {{ | + | {{MoveListRow | Combo 1 | {{HighKick}} {{LowPunch}} | 15% damage}} |
| − | {{MoveListRow | Combo 2 | {{ | + | {{MoveListRow | Combo 2 | {{HighKick}} {{down}}+{{LowPunch}} {{down}}+{{HighPunch}} | 18% damage}} |
| − | {{MoveListRow | Combo 3 | {{ | + | {{MoveListRow | Combo 3 | {{HighPunch}} {{HighPunch}} {{up}}+{{LowPunch}} | 19% damage}} |
| − | {{MoveListRow | Combo 4 | {{ | + | {{MoveListRow | Combo 4 | {{HighPunch}} {{HighPunch}} {{HighKick}} {{left}}+{{HighKick}} | 24% damage}} |
| − | {{MoveListRow | Combo 5 | {{ | + | {{MoveListRow | Combo 5 | {{HighKick}} {{HighKick}} {{LowKick}} {{left}}+{{HighKick}} | 23% damage}} |
}} | }} | ||
{{MoveListTable | desc=Finishing moves | | {{MoveListTable | desc=Finishing moves | | ||
| − | {{MoveListRow | Fatality | {{Run}} {{Block}} {{Run}} {{Run}} {{ | + | {{MoveListRow | Fatality | {{Run}} {{Block}} {{Run}} {{Run}} {{HighKick}} (close) | Smoke does an uppercut that decapitates his opponent.}} |
| − | {{MoveListRow | Stage Fatality | {{hold|{{Block}}|{{right}} {{up}} {{up}}}} {{ | + | {{MoveListRow | Stage Fatality | {{hold|{{Block}}|{{right}} {{up}} {{up}}}} {{LowPunch}} (close)}} |
| − | {{MoveListRow | Babality | {{down}} {{left}} {{left}} {{right}} {{ | + | {{MoveListRow | Babality | {{down}} {{left}} {{left}} {{right}} {{HighPunch}}}} |
| − | {{MoveListRow | Brutality | {{ | + | {{MoveListRow | Brutality | {{HighPunch}} {{HighPunch}} {{Block}} {{LowKick}} {{HighKick}} {{HighPunch}} {{HighKick}} {{HighPunch}} {{HighKick}} {{LowPunch}} {{LowKick}} (close)}} |
}} | }} | ||
}} | }} | ||
Revision as of 13:27, 2 September 2023
| This article should be split in two:.
For more information, see the talk page. |
| |||||||||||||||||||||||||||||||||||||||||||||||||||||||||||||||||||||||||||
| Ultimate Mortal Kombat 3 (Saturn) | |||||||||||||||||||||||||||||||||||||||||||||||||||||||||||||||||||||||||||
|---|---|---|---|---|---|---|---|---|---|---|---|---|---|---|---|---|---|---|---|---|---|---|---|---|---|---|---|---|---|---|---|---|---|---|---|---|---|---|---|---|---|---|---|---|---|---|---|---|---|---|---|---|---|---|---|---|---|---|---|---|---|---|---|---|---|---|---|---|---|---|---|---|---|---|---|
| System(s): Sega Mega Drive, Sega Saturn | |||||||||||||||||||||||||||||||||||||||||||||||||||||||||||||||||||||||||||
| Publisher: | |||||||||||||||||||||||||||||||||||||||||||||||||||||||||||||||||||||||||||
| Developer: | |||||||||||||||||||||||||||||||||||||||||||||||||||||||||||||||||||||||||||
| Licensor: Midway Manufacturing | |||||||||||||||||||||||||||||||||||||||||||||||||||||||||||||||||||||||||||
| Original system(s): Arcade boards | |||||||||||||||||||||||||||||||||||||||||||||||||||||||||||||||||||||||||||
| Sound driver: | |||||||||||||||||||||||||||||||||||||||||||||||||||||||||||||||||||||||||||
| Peripherals supported: | |||||||||||||||||||||||||||||||||||||||||||||||||||||||||||||||||||||||||||
| Genre: Fighting | |||||||||||||||||||||||||||||||||||||||||||||||||||||||||||||||||||||||||||
| Number of players: 1-2 | |||||||||||||||||||||||||||||||||||||||||||||||||||||||||||||||||||||||||||
| |||||||||||||||||||||||||||||||||||||||||||||||||||||||||||||||||||||||||||
|


Ultimate Mortal Kombat 3 (Saturn) is an update to Mortal Kombat 3, adding extra characters and stages and tweaking some of the gameplay. Originally released in arcades, it was ported first to the Sega Saturn and then to the Sega Mega Drive and the Super Nintendo Entertainment System. More recently, it has been re-released for the Nintendo DS and Xbox Live Arcade.
Contents
Story
Weary of continuous losses in tournament battle, Shao Kahn, who lost to Liu Kang in the Outworld tournament in the previous game, enacts a 10,000-year-old plan. He would have his Shadow Priests, led by Shang Tsung, revive his former Queen Sindel, who unexpectedly died at a young age. However, she would not be revived in the Outworld, but in Earthrealm. This would allow Shao Kahn to cross the boundary lines and reclaim his queen. When Sindel is reincarnated in Earthrealm, Shao Kahn reaches across the dimensions to reclaim her, and as a result, Earthrealm gradually becomes a part of Outworld, stripping billions of their souls. Only a few are spared, protected by Rayden. He tells them that Shao Kahn must be stopped, but he cannot interfere; due to his status, he has no power in Outworld, and Earthrealm is partially merged with Outworld. Shao Kahn has unleashed extermination squads to kill any Earthrealm survivors. Rayden's protection only extends to the soul, not to the body, so his chosen warriors have to fight the extermination squads and repel Shao Kahn.
Gameplay


The game is an enhanced version of Mortal Kombat 3. To balance the gameplay, some characters were given new moves and some existing moves were altered. Some characters were given extra combos, and some combos were made to cause less damage. Chain combos can be started by using a jump punch (vertical or angled) or a vertical jump kick, which creates more opportunities to use combos. Combos that knock opponents in the air no longer send the opponent to the stage above in multi-layered stages; only regular uppercuts do this. New stages were added. The Mega Drive and Super NES ports of the game vary significantly from the arcade version and include new characters and a new kind of finishing move, Brutalities, that would also appear in the Saturn and PlayStation game Mortal Kombat Trilogy. However, since this port used the same size cartridge as the Mega Drive port of Mortal Kombat 3, it also had significant cutbacks, with several stages, many announcer voice lines, and one character (Sheeva) removed.
The arcade mode from the previous game is retained. The player chooses a "tower" of opponents to face (Novice, Warrior, Master, or a new additional Master tier), with the more difficult towers having more opponents. Every tower ends with an endurance match (or two endurance matches in the second Master tier) and two final matches against the bosses Motaro and Shao Kahn. In the endurance matches, which return from the first Mortal Kombat, the player must defeat two opponents in each round rather than only one. At any point during gameplay, a second player can challenge the first by pressing START on a second control pad, with the winner continuing in the tournament.
Two new multiplayer modes have been introduced: a two-on-two mode and an eight-player tournament mode. In the two-on-two mode, two players choose two characters each and fight. After a character is eliminated, the player's second character jumps into the battle. A round is decided when both of a player's characters are defeated, and matches are played to the best of three rounds. The tournament mode is a bracketed tournament in which up to eight different players (with odd-numbered players using the first control pad and even-numbered players using the second control pad) can compete. Shao Kahn's Lost Treasures, which are ten selectable prizes, are introduced after either the main game or the eight-player tournament are completed.
Characters move with ![]() and
and ![]() and crouch with
and crouch with ![]() . They jump with
. They jump with ![]() and flip back and forth with
and flip back and forth with ![]() and
and ![]() . All characters have punches and kicks that can either be aimed high or low. Characters perform a low punch with
. All characters have punches and kicks that can either be aimed high or low. Characters perform a low punch with ![]() , a high punch with
, a high punch with ![]() , a low kick with
, a low kick with ![]() , and a high kick with
, and a high kick with ![]() . Characters can run by holding
. Characters can run by holding ![]() ; they can only run forwards. The Run meter is drained both by running and by performing combos, but the meter replenishes quickly if not used for a second. Characters block by holding
; they can only run forwards. The Run meter is drained both by running and by performing combos, but the meter replenishes quickly if not used for a second. Characters block by holding ![]() . Blocking can be done while standing or crouching. Some attacks cannot be blocked while standing (such as sweeps). All attacks do a small amount of damage even when blocked.
. Blocking can be done while standing or crouching. Some attacks cannot be blocked while standing (such as sweeps). All attacks do a small amount of damage even when blocked.
When using a standard three-button control pad, characters perform a low punch with ![]() , a high punch with
, a high punch with ![]() +
+![]() , a low kick with
, a low kick with ![]() , and a high kick with
, and a high kick with ![]() +
+![]() . They run by holding START and block by holding
. They run by holding START and block by holding ![]() .
.
Most characters have two Fatalities, a Friendship, a Babality, and a Brutality. Brutalities are 11-button combos that causes characters to rapidly beat on their opponents until they explode. Mercies and Animalities have been removed. Two stages have stage-specific Fatalities.
The game has five difficulty settings for computer-controlled opponents (Easiest, Easy, Medium, Hard, and Hardest).
Characters
Move lists assume the player is facing right. If facing left, ![]() and
and ![]() should be reversed.
should be reversed.
All characters can perform roundhouse kicks with ![]() + HK (which knock the opponent across the screen), leg sweeps with
+ HK (which knock the opponent across the screen), leg sweeps with ![]() + LK (which cause the opponent to fall down), and uppercuts with
+ LK (which cause the opponent to fall down), and uppercuts with ![]() + HP (which knock the opponent high into the air). Throws are performed by pressing LP when next to the opponent.
+ HP (which knock the opponent high into the air). Throws are performed by pressing LP when next to the opponent.
When using a standard three-button control pad, for moves requiring LP , hold the direction and LP simultaneously. For moves requiring HP , release the direction before pressing LP . Special moves requiring LP + HP can be done with just LP . Uppercuts are performed with ![]() + LP .
+ LP .
Fatalities often require being a certain distance from the opponent in order to execute. Each character has a special button combination for performing the stage-specific Fatalities on the Subway and Pit 3 stages. Friendships and Babalities can only be performed if the player does not block during the final round.
Playable
The entire cast of Mortal Kombat 3 returns, with the exception of Sheeva. The game adds back the palette-swapped male and female ninjas from Mortal Kombat II: Classic Sub-Zero, Scorpion, Reptile, Kitana, Mileena, and Jade. Noob Saibot is also re-introduced as a Lin Kuei ninja (rather than a blackened Kano, as in Mortal Kombat 3) with new special moves, and Human Smoke is added as a hidden character (with the same moves as Scorpion).
The new characters Rain and Ermac, both palette-swapped male ninjas, have been added. Rain was a fake secret character in the arcade version, teased in the attract sequence, but he was added to the 16-bit ports as a real character with new special moves. Ermac is named after a contraction for "error macro" found in a diagnostic menu in the original Mortal Kombat. The name was speculated to be a hidden character, and he was eventually made a fully fledged fighter in this game.
Classic Sub-Zero, Ermac, and Mileena were hidden in the arcade version but are immediately playable in the 16-bit ports. Noob Saibot and Rain are both exclusive to the 16-bit ports and have Brutalities but no other finishing moves. Sheeva was present in the arcade version but removed from the 16-bit ports.
| Rain | |||||||||||||||||||||||||||||||||||||||||||||||||||||||||||||||||||||||||||||||||||||||||||||||||||||||||||||||||||||
|---|---|---|---|---|---|---|---|---|---|---|---|---|---|---|---|---|---|---|---|---|---|---|---|---|---|---|---|---|---|---|---|---|---|---|---|---|---|---|---|---|---|---|---|---|---|---|---|---|---|---|---|---|---|---|---|---|---|---|---|---|---|---|---|---|---|---|---|---|---|---|---|---|---|---|---|---|---|---|---|---|---|---|---|---|---|---|---|---|---|---|---|---|---|---|---|---|---|---|---|---|---|---|---|---|---|---|---|---|---|---|---|---|---|---|---|---|---|
A ninja who was born in Kitana's former world of Edenia and smuggled away as a small child. He resurfaced thousands of years later in the service of his captor Shao Kahn.
| |||||||||||||||||||||||||||||||||||||||||||||||||||||||||||||||||||||||||||||||||||||||||||||||||||||||||||||||||||||
| Reptile | |||||||||||||||||||||||||||||||||||||||||||||||||||||||||||||||||||||||||||||||||||||||||||||||||||||||||||||||||||||
A reptilian creature who takes the form of a human ninja. As one of Shao Kahn's most trusted servants, Reptile assists Jade in the hunt for Kitana, but he has secret orders to kill her if necessary.
| |||||||||||||||||||||||||||||||||||||||||||||||||||||||||||||||||||||||||||||||||||||||||||||||||||||||||||||||||||||
| Kurtis Stryker | |||||||||||||||||||||||||||||||||||||||||||||||||||||||||||||||||||||||||||||||||||||||||||||||||||||||||||||||||||||
A riot control police officer and the lone survivor of a major city after Shao Kahn's invasion.
| |||||||||||||||||||||||||||||||||||||||||||||||||||||||||||||||||||||||||||||||||||||||||||||||||||||||||||||||||||||
| Jax (Major Jackson Briggs) | |||||||||||||||||||||||||||||||||||||||||||||||||||||||||||||||||||||||||||||||||||||||||||||||||||||||||||||||||||||
A special forces soldier. He fitted both of his arms with bionic implants in preparation for the impending Outworld invasion.
| |||||||||||||||||||||||||||||||||||||||||||||||||||||||||||||||||||||||||||||||||||||||||||||||||||||||||||||||||||||
| Nightwolf | |||||||||||||||||||||||||||||||||||||||||||||||||||||||||||||||||||||||||||||||||||||||||||||||||||||||||||||||||||||
A Native American historian who uses his shaman magic to protect his tribe's land against the Outworld invasion.
| |||||||||||||||||||||||||||||||||||||||||||||||||||||||||||||||||||||||||||||||||||||||||||||||||||||||||||||||||||||
| Jade | |||||||||||||||||||||||||||||||||||||||||||||||||||||||||||||||||||||||||||||||||||||||||||||||||||||||||||||||||||||
A close friend of the renegade princess Kitana. After Kitana killed her evil twin Mileena and escaped from Outworld to Earth, Jade was appointed by the emperor Shao Kahn to find and bring her back alive.
| |||||||||||||||||||||||||||||||||||||||||||||||||||||||||||||||||||||||||||||||||||||||||||||||||||||||||||||||||||||
| Noob Saibot | |||||||||||||||||||||||||||||||||||||||||||||||||||||||||||||||||||||||||||||||||||||||||||||||||||||||||||||||||||||
A mysterious figure that emerged from the Netherrealm to spy on the battle between realms and report back to his leaders.
| |||||||||||||||||||||||||||||||||||||||||||||||||||||||||||||||||||||||||||||||||||||||||||||||||||||||||||||||||||||
| Sonya Blade | |||||||||||||||||||||||||||||||||||||||||||||||||||||||||||||||||||||||||||||||||||||||||||||||||||||||||||||||||||||
A special forces soldier who disappeared after the first tournament. She was rescued by Jax, and the two prepare for Shao Kahn's invasion after failing to convince the government of the threat.
| |||||||||||||||||||||||||||||||||||||||||||||||||||||||||||||||||||||||||||||||||||||||||||||||||||||||||||||||||||||
| Kano | |||||||||||||||||||||||||||||||||||||||||||||||||||||||||||||||||||||||||||||||||||||||||||||||||||||||||||||||||||||
A criminal thought to have been killed in the first tournament. He convinces Shao Kahn to spare his soul before the Outworld invasion, proposing to teach Kahn's warriors how to use Earth's weapons.
| |||||||||||||||||||||||||||||||||||||||||||||||||||||||||||||||||||||||||||||||||||||||||||||||||||||||||||||||||||||
| Mileena | |||||||||||||||||||||||||||||||||||||||||||||||||||||||||||||||||||||||||||||||||||||||||||||||||||||||||||||||||||||
A grotesque clone of Kitana. After she was killed by Kitana, Mileena was brought back to life by Shao Kahn to help him defeat Earth's warriors with her combat skills and a mind-reading connection to her sister.
| |||||||||||||||||||||||||||||||||||||||||||||||||||||||||||||||||||||||||||||||||||||||||||||||||||||||||||||||||||||
| Sub-Zero | |||||||||||||||||||||||||||||||||||||||||||||||||||||||||||||||||||||||||||||||||||||||||||||||||||||||||||||||||||||
A ninja, once a member of the Liu Kuei clan. He is now hunted by cybernetic assassins from his former clan after escaping their betrayal.
| |||||||||||||||||||||||||||||||||||||||||||||||||||||||||||||||||||||||||||||||||||||||||||||||||||||||||||||||||||||
| Sub-Zero (Classic) | |||||||||||||||||||||||||||||||||||||||||||||||||||||||||||||||||||||||||||||||||||||||||||||||||||||||||||||||||||||
A Lin Kuei ninja with cryogenic powers. Having been seemingly killed in the first game, Sub-Zero mysteriously returns to again attempt the assassination of Shang Tsung.
| |||||||||||||||||||||||||||||||||||||||||||||||||||||||||||||||||||||||||||||||||||||||||||||||||||||||||||||||||||||
| Kung Lao | |||||||||||||||||||||||||||||||||||||||||||||||||||||||||||||||||||||||||||||||||||||||||||||||||||||||||||||||||||||
A Shaolin monk. His plans to reform the White Lotus Society are disrupted by Shao Kahn's invasion. Alongside Liu Kang, he embarks on a journey to end Shao Kahn's treachery.
| |||||||||||||||||||||||||||||||||||||||||||||||||||||||||||||||||||||||||||||||||||||||||||||||||||||||||||||||||||||
| Sektor | |||||||||||||||||||||||||||||||||||||||||||||||||||||||||||||||||||||||||||||||||||||||||||||||||||||||||||||||||||||
Unit LK-9T9, the first of three prototype cybernetic ninjas built by the Lin Kuei. He was once a human assassin but volunteered to be turned into a cyborg because of his loyalty to the clan.
| |||||||||||||||||||||||||||||||||||||||||||||||||||||||||||||||||||||||||||||||||||||||||||||||||||||||||||||||||||||
| Kitana | |||||||||||||||||||||||||||||||||||||||||||||||||||||||||||||||||||||||||||||||||||||||||||||||||||||||||||||||||||||
A princess of the realm of Edenia. After killing Mileena, Kitana is accused of treason. She now attempts to reach Queen Sindel to warn her of their true past.
| |||||||||||||||||||||||||||||||||||||||||||||||||||||||||||||||||||||||||||||||||||||||||||||||||||||||||||||||||||||
| Ermac | |||||||||||||||||||||||||||||||||||||||||||||||||||||||||||||||||||||||||||||||||||||||||||||||||||||||||||||||||||||
A mysterious warrior that exists as a life force of the souls of dead Outworld warriors in Shao Kahn's possession.
| |||||||||||||||||||||||||||||||||||||||||||||||||||||||||||||||||||||||||||||||||||||||||||||||||||||||||||||||||||||
| Scorpion | |||||||||||||||||||||||||||||||||||||||||||||||||||||||||||||||||||||||||||||||||||||||||||||||||||||||||||||||||||||
Scorpion escapes from Earth's hell after Shao Kahn's failed attempt at stealing the souls of Earthrealm. He eventually joins the struggle against Outworld.
| |||||||||||||||||||||||||||||||||||||||||||||||||||||||||||||||||||||||||||||||||||||||||||||||||||||||||||||||||||||
| Cyrax | |||||||||||||||||||||||||||||||||||||||||||||||||||||||||||||||||||||||||||||||||||||||||||||||||||||||||||||||||||||
Unit LK-4D4, the second of three prototype cybernetic ninjas built by the Lin Kuei. Like the other cyborgs, he has been programmed to find and terminate the rogue ninja Sub-Zero.
| |||||||||||||||||||||||||||||||||||||||||||||||||||||||||||||||||||||||||||||||||||||||||||||||||||||||||||||||||||||
| Kabal | |||||||||||||||||||||||||||||||||||||||||||||||||||||||||||||||||||||||||||||||||||||||||||||||||||||||||||||||||||||
An unknown warrior who is kept alive by respirators. He is thought to be a survivor of an attack by Shao Kahn's extermination squads. He fights with two hook swords.
| |||||||||||||||||||||||||||||||||||||||||||||||||||||||||||||||||||||||||||||||||||||||||||||||||||||||||||||||||||||
| Sindel | |||||||||||||||||||||||||||||||||||||||||||||||||||||||||||||||||||||||||||||||||||||||||||||||||||||||||||||||||||||
Shao Kahn's wife and the Queen of Outworld before her death 10,000 years ago. She has been reborn on Earth.
| |||||||||||||||||||||||||||||||||||||||||||||||||||||||||||||||||||||||||||||||||||||||||||||||||||||||||||||||||||||
| Smoke | |||||||||||||||||||||||||||||||||||||||||||||||||||||||||||||||||||||||||||||||||||||||||||||||||||||||||||||||||||||
Unit LK-7T2, the last of three prototype cybernetic ninjas built by the Lin Kuei. Smoke was captured and turned into a cyborg while his friend Sub-Zero escaped.
| |||||||||||||||||||||||||||||||||||||||||||||||||||||||||||||||||||||||||||||||||||||||||||||||||||||||||||||||||||||
| Liu Kang | |||||||||||||||||||||||||||||||||||||||||||||||||||||||||||||||||||||||||||||||||||||||||||||||||||||||||||||||||||||
A Shaolin monk. As the Shaolin Champion, he finds himself the prime target of Shao Kahn's extermination squads.
| |||||||||||||||||||||||||||||||||||||||||||||||||||||||||||||||||||||||||||||||||||||||||||||||||||||||||||||||||||||
| Shang Tsung | |||||||||||||||||||||||||||||||||||||||||||||||||||||||||||||||||||||||||||||||||||||||||||||||||||||||||||||||||||||
Shao Kahn's lead sorcerer. Despite his multiple failures trying to deliver Earth to his master Shao Kahn, the scheming sorcerer has convinced Kahn to grant him more power than ever before.
|
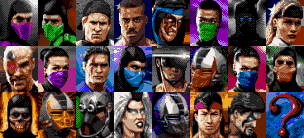
Bosses
The boss characters can be played in two-player games by enabling the Killer Codes menu with a cheat code. They cannot crouch, run, or use finishing moves (and finishing moves cannot be used against them).
| Motaro | |||||||||||||||||||||
|---|---|---|---|---|---|---|---|---|---|---|---|---|---|---|---|---|---|---|---|---|---|
A Centaurian chosen by Shao Kahn to lead his extermination squads. He is the game's penultimate boss.
| |||||||||||||||||||||
| Shao Kahn | |||||||||||||||||||||
The evil Emperor of Outworld, who wishes to conquer Earthrealm by any means. He is the game's ultimate antagonist and final boss.
|

Hidden
- Main article: Ultimate Mortal Kombat 3 (Saturn)/Hidden content.
| Smoke (Human) | |||||||||||||||||||||||||||||||||||||||||||||
|---|---|---|---|---|---|---|---|---|---|---|---|---|---|---|---|---|---|---|---|---|---|---|---|---|---|---|---|---|---|---|---|---|---|---|---|---|---|---|---|---|---|---|---|---|---|
An assassin working for the Lin Kuei who was captured and turned into a cyborg. His human form, similar to his original appearance in Mortal Kombat II, can be played with a cheat code.
|
Stages
- Main article: Ultimate Mortal Kombat 3 (Saturn)/Comparisons.
The stages are played in order (and loop around after the last one). Motaro is fought in the Lost World and Shao Kahn is fought in the Pit 3. The Subway and Pit 3 stages have stage-specific Fatalities.
Two stages are accessed by uppercutting an opponent through the ceiling of another stage: the Rooftop is above the Bank and Kahn's Kave is above Scorpion's Lair.


Versions
Mega Drive version
Using the prior port of Mortal Kombat 3 as a base, the Mega Drive version takes a hit in terms of graphical quality, but still provides extras not seen in the arcade original. Like the Super NES port, Rain and Noob Saibot are made playable characters along with bosses Motaro and Shao Kahn. Mileena, Ermac, and Classic Sub-Zero are playable without any need of codes. Shang Tsung can morph into Cyborg Smoke, Noob Saibot, and Rain, which is not possible in the arcades.
Brutalities are also included in this version. Nightwolf has his red shadow shoulder move from Mortal Kombat Trilogy and this version contained a rendition of Pong entitled MK4.
Animalities and Mercies were removed, reducing the number of finishing moves. However, Kabal still has his Animality combination coded, which, if executed, causes random glitches. Shao Kahn's treasure chest has only 10 boxes instead of 12, and the announcer no longer says the names of the characters. Most of the stages seen in Mortal Kombat 3 are missing, including the Balcony and the Street, so uppercutting in the Subway and Soul Chamber does not take the player to the stage above. Although the Bell Tower has been removed, the stage Fatality is still in the code and executable.
Another leftover from Mortal Kombat 3 that is still accessible through a Game Genie code is the Endurance Mode. Sheeva has been removed, although her sound clips are still available in the sound test. Sonya's Friendship from Mortal Kombat 3 is used, as opposed to her Friendship from the arcade version of Ultimate Mortal Kombat 3.
Scorpion's "Hellraiser" Fatality is different too: he takes the opponent back to the Scorpion's Lair stage, where they just catch on fire and explode. Kitana's "Kiss of Death" Fatality only inflates heads with the same effect as Kabal's "Air Pump" Fatality. Rain and Noob were given a Brutality, but no other finishing moves. Human Smoke shares Scorpion's combos, rather than having unique ones, and in Stryker's friendship, the running characters are replaced by dogs.
On the Mega Drive, Ultimate Mortal Kombat 3 is generally seen as closer to the original arcade game than its Super NES counterpart when it comes to gameplay and content. The Super NES has the advantage of higher quality audio and more colourful (if lower resolution) graphics, though some stages lack parallax scrolling, or are omitted from the game due to cartridge space or time restraints.
Saturn version
Curiously, the Saturn version is less accurate, being closer to Mortal Kombat 3 in design, dropping many Ultimate features.
The Bank stage that was present in Mortal Kombat 3 but was missing from the arcade Ultimate Mortal Kombat 3 returns. Shang Tsung was given a morph for the Cyborg Smoke, which was not possible in the arcades. The secret characters can be unlocked via a secret options screen, eliminating the need to enter three separate Kombat Kodes to unlock them, which is useful as there is no save system. The Kombat Kodes (to unlock the secret characters) were shortened to have six slots instead of ten (probably in order to allow it to be performed with only one controller), but this method is still slower than entering one code to access the secret options screen.
There are a few new Kombat Kodes, but several that were present in the arcade release no longer work in the Saturn version. Noob Saibot is a shadow Kano as in Mortal Kombat 3, not a black ninja as in the arcade version of Ultimate Mortal Kombat 3. Since the arcade intro is missing, Rain does not appear in the game, yet the Kombat Kode message "Rain can be found in the Graveyard" can still be displayed.
Loading times cause the "Supreme Demonstration" mode to take almost 30 minutes to complete.
History
Release
A Japanese Saturn version was planned, but cancelled. This version was set to be published by SoftBank[12].
As with previous games in the series, Ultimate Mortal Kombat 3 was banned in Germany on launch. The ban would not be overturned until 2005.
Production credits
Mega Drive version
- Kano and Kabal: Rich Divizio
- Sonya: Kerri Hoskins
- Jax: John Parrish
- Kitana: Becky Gable
- Jade and Mileena: Becky Gable
- Kung Lao: Tony Marquez
- Stryker: Michael O'Brien
- Sub-Zero and Shang Tsung: John Turk
- Scorpion and Reptile: John Turk
- Ermac and Rain: John Turk
- Noob Saibot and Sub-Zero: John Turk
- Sindel: Lia Montelongo
- Liu Kang: Eddie Wong
- Nightwolf and Sektor: Sal DiVita
- Cyrax and Smoke: Sal DiVita
- Shao Kahn: Brian Glynn
- Ed Boon, John Tobias, Steve Beran, Dan Forden, Tony Goskie, Dave Michicich, John Vogel
- Programmers: Jim Henn, Gary Penacho, John Blackburn, Todd Blackburn
- Artists: Derek Newman, Alan Taylor
- Sound By: Chris Braymen
- Avalanche Software Testing: Jason Humphrey
- Special Thanks To: Patrick Alphonso, Mike Crandall, Paul Blagay, Jeff Knight, Neil Melville, Mike Lott, Kent Barney, Roy Wilkins, Jim 'Crash' Jung
- Thanks To: Ned Martin, Adam Clayton, Rob Nelson, Mike Callahan
- Michael Rubinelli, Michael Gottlieb, Curtis R. Cherrington
- Williams Entertainment Testing: Mike Vinikour, Eddie Ferrier, J.R. Salazar, Richard Blair, Ross Deynata, Kevin Elrod, Andy Kaffka, Fred Pampo, Ben Larkin, Toan Ngo
- Special Thanks To: Dave Schwartz, Mark Guidarelli, Paul Dussault, Jim Flaharty, Justin Heber, Will Shen
Saturn version
- Kano and Kabal: Richard Divizio
- Sonya: Kerri Hoskins
- Jax: John Parrish
- Kitana: Becky Gable
- Kung Lao: Tony Marquez
- Stryker: Michael O'Brien
- Nightwolf and Sektor: Sal DiVita
- Sub-Zero and Shang Tsung: John Turk
- Sindel: Lia Montelongo
- Liu Kang: Eddie Wong
- Cyrax and Smoke: Sal DiVita
- Scorpion and Reptile: John Turk
- Kitana and Jade: Becky Gable
- Ermac: John Turk
- Mileena: Becky Gable
- Shao Kahn: Brian Glynn
- Software: Ed Boon
- Graphics: John Tobias, Steve Beran, Tony Goskie, Dave Michicich, John Vogel
- Sounds and Music: Dan Forden
- Producer and Programming: Mark Hetherington
- Hardware Code: Paul Bates
- Programming: Dave Pridmore
- Sound and Music: Neil Baldwin
- Steve Richie as The Voice of Shao Khan
- Grunts, Screams, Groans and Gibberish: Jon Hey, Peg Burr, Dan Forden, Ann Mazza, Vince Pontarelli, Ed Boon
- Eurocom Entertainment Testing: Richard Moody, Kevin Holt
- Many Thanks Go To: Hugh Binns, Adrian Mannion, David Schwartz, Greg Miller, Mark May, Mark Guidarelli, Scott Patterson, Rob Atesalp
- Packaging and Print Material: Debbie Austin, Steve High, Shawn Murphy, Dave Young
- Product Manager: Brian Johnson
- Williams Entertainment Testing: Peter Chang, Steve Kramer, J.R.Salazar, Will Shen, Jason Shigenaka, John Stookey, John Ubalde, Eddie Fe
- Special Thanks: Michael Rubinelli, Michael Gottlieb
Magazine articles
- Main article: Ultimate Mortal Kombat 3 (Saturn)/Magazine articles.
Promotional material
- Main article: Ultimate Mortal Kombat 3 (Saturn)/Promotional material.
Physical scans
Mega Drive version
| Sega Retro Average | ||||
|---|---|---|---|---|
|
| N/A | |
|---|---|
| Based on 0 reviews | |
| Mega Drive, US |
|---|
  Cover
|
Cart Manual |
| Mega Drive, EU |
|---|
 Cover
|
Cart Manual |
| Mega Drive, PT |
|---|
|
| Mega Drive, GR (Zegetron) |
|---|
| <div style="margin:auto; max-width:Expression error: Unexpected < operator.px">
320x120px Cover
|
Cart |
| Mega Drive, BR |
|---|
 Cover
|
Cart Manual |
Saturn version
| Sega Retro Average | |||||||||||||||||||||||||||||||||||||||||||||||||||||||||||||||||||||||||||||||||||||||||||||||||||||||||||||
|---|---|---|---|---|---|---|---|---|---|---|---|---|---|---|---|---|---|---|---|---|---|---|---|---|---|---|---|---|---|---|---|---|---|---|---|---|---|---|---|---|---|---|---|---|---|---|---|---|---|---|---|---|---|---|---|---|---|---|---|---|---|---|---|---|---|---|---|---|---|---|---|---|---|---|---|---|---|---|---|---|---|---|---|---|---|---|---|---|---|---|---|---|---|---|---|---|---|---|---|---|---|---|---|---|---|---|---|---|---|
|
| 83 | |
|---|---|
| Based on 21 reviews | |
| Saturn, US |
|---|
  Cover
|
Disc Manual |
| Saturn, EU |
|---|
 Cover
|
 Disc Manual |
| Saturn, PT |
|---|
 Cover
|
Disc |
| Saturn, AU |
|---|
  Cover
|
Disc |
| Saturn, BR |
|---|
 Cover
|
Technical information
- Main article: Ultimate Mortal Kombat 3 (Saturn)/Technical information.
ROM dump status
| System | Hash | Size | Build Date | Source | Comments | |||||||||
|---|---|---|---|---|---|---|---|---|---|---|---|---|---|---|
|
4MB | 1996-08 | Cartridge (US) | |||||||||||
|
4MB | 1996-10 | Cartridge (EU) | |||||||||||
|
459,042,192 | CD-ROM (EU) | T-25403H-50 V1.007 | |||||||||||
|
459,053,952 | CD-ROM (EU) | T-25403H-50 (Alt) V2.000 | |||||||||||
|
459,025,728 | CD-ROM (US) | T-9701H V1.006 | |||||||||||
|
1996-02-07 | Page |
References
- ↑ http://www.sega-saturn.com/saturn/other/june-n.htm (Wayback Machine: 1997-06-06 05:51)
- ↑ https://groups.google.com/g/rec.games.video.sega/c/10dWSDzl-Eg/m/fuBFo0_nYCIJ
- ↑ https://groups.google.com/g/rec.games.video.sega/c/mWd1tfu0z2Q/m/j1eryuvwWXYJ
- ↑ 4.0 4.1 Game Players, "Vol. 9 No. 6 June 1996" (US; 1996-05-04), page 60
- ↑ 5.0 5.1 Computer & Video Games, "June 1996" (UK; 1996-05-09), page 72
- ↑ 6.0 6.1 6.2 Mean Machines Sega, "June 1996" (UK; 1996-05-03), page 60
- ↑ Videogame Advisor, "Volume 2, Number 10: October 1996" (US; 1996-0x-xx), page 44
- ↑ https://groups.google.com/g/rec.games.video.sega/c/2zJ-syvc6fg/m/YXgzJomHq7AJ
- ↑ GamePro, "September 1996" (US; 1996-xx-xx), page 76
- ↑ Computer & Video Games, "January 1997" (UK; 1996-12-11), page 68
- ↑ 11.0 11.1 http://www.tectoy.com.br/releases/index.htm (Wayback Machine: 1998-06-25 19:48)
- ↑ Sega Saturn Magazine, "1996-15 (1996-09-13)" (JP; 1996-08-23), page 149
- ↑ File:Ultimate Mortal Kombat 3 MD credits.pdf
- ↑ File:Ultimate Mortal Kombat 3 Saturn credits.pdf
- ↑ 576 KByte, "Szeptember 1996" (HU; 1996-xx-xx), page 20
- ↑ Consoles +, "Mai 1996" (FR; 1996-0x-xx), page 93
- ↑ Electronic Gaming Monthly, "June 1996" (US; 1996-xx-xx), page 20
- ↑ Freak, "9/96" (IL; 1996-xx-xx), page 1
- ↑ Gambler, "8/1996" (PL; 1996-xx-xx), page 32
- ↑ GameFan, "Volume 4, Issue 6: June 1996" (US; 1996-xx-xx), page 21
- ↑ GamePro, "July 1996" (US; 1996-xx-xx), page 68
- ↑ Joypad, "Mai 1996" (FR; 1996-0x-xx), page 74
- ↑ Maximum, "April 1996" (UK; 1996-04-27), page 126
- ↑ Mega Force, "Mai 1996" (FR; 1996-0x-xx), page 85
- ↑ Next Generation, "July 1996" (US; 1996-06-18), page 80
- ↑ Player One, "Mai 1996" (FR; 1996-0x-xx), page 94
- ↑ Secret Service, "Październik 1996" (PL; 1996-10-01), page 27
- ↑ Sega News, "Říjen 1996" (CZ; 1996-xx-xx), page 12
- ↑ Sega Power, "July 1996" (UK; 1996-05-09), page 40
- ↑ Sega Saturn Magazine, "June 1996" (UK; 1996-05-22), page 66
- ↑ Total Saturn, "Volume One Issue Four" (UK; 1996-12-29), page 38
- ↑ VideoGames, "June 1996" (US; 1996-05-21), page 63
| Ultimate Mortal Kombat 3 (Saturn) | |
|---|---|
|
Main page | Comparisons | Hidden content | Magazine articles | Video coverage | Reception | |
| Mortal Kombat games for Sega systems | |
|---|---|
| Mortal Kombat (1993) | Mortal Kombat II (1994) | Mortal Kombat 3 (1995) | Ultimate Mortal Kombat 3 (1996) | |
| Mortal Kombat (1993) | Mortal Kombat II (1994) | Mortal Kombat 3 (1996) | |
| Mortal Kombat (1994) | |
| Mortal Kombat II (1994) | |
| Mortal Kombat II (1996) | Ultimate Mortal Kombat 3 (1996) | Mortal Kombat Trilogy (1997) | |
| Mortal Kombat Gold (1999) | |
| Unlicensed Mortal Kombat games for Sega systems | |
| Mortal Kombat 5 (1999) | |
- Pages to be split
- Six Button Control Pad-compatible games
- 1-2 player games
- US Saturn games
- EU Saturn games
- DE Saturn games
- PT Saturn games
- UK Saturn games
- PL Saturn games
- AU Saturn games
- BR Saturn games
- Saturn games
- 1996 Saturn games
- All 1996 games
- Saturn fighting games
- US Mega Drive games
- EU Mega Drive games
- PT Mega Drive games
- UK Mega Drive games
- GR Mega Drive games
- BR Mega Drive games
- Mega Drive games
- 1996 Mega Drive games
- Mega Drive fighting games
- All games
- No ratings
- Pages with broken file links
- Old-style rating (gamesmaster)
- Rating without PDF source
- Update ratings template
- 1 old ratings
- Missing ROM hashes
- Games with known prototypes
- Old technical information
- Ultimate Mortal Kombat 3 (Saturn)
- Mortal Kombat (franchise)