Difference between revisions of "The Last Blade 2: Heart of the Samurai"
From Sega Retro
m (→Gameplay) |
SEGAAA2004 (talk | contribs) |
||
| (6 intermediate revisions by 2 users not shown) | |||
| Line 6: | Line 6: | ||
| publisher={{company|[[Agetec]]|region=US}}, {{company|[[SNK]]|region=Japan}}, {{company|[[Playmore]]|region=Japan; SNK Best Buy}} | | publisher={{company|[[Agetec]]|region=US}}, {{company|[[SNK]]|region=Japan}}, {{company|[[Playmore]]|region=Japan; SNK Best Buy}} | ||
| developer=[[SNK]] | | developer=[[SNK]] | ||
| + | | licensor={{company|[[SNK]]|region=US}} | ||
| system=[[Sega Dreamcast]] | | system=[[Sega Dreamcast]] | ||
| sounddriver= | | sounddriver= | ||
| Line 54: | Line 55: | ||
Characters can become dizzy and stunned momentarily after taking repeated damage, and some moves cause the character to stagger backwards in a dazed state after being hit. The player can recover from either state more quickly by moving the D-Pad and pressing the attack buttons rapidly. When characters are knocked into the air, they can recover by pressing {{Y}} while still ascending (though this makes the character vulnerable to attack again until landing). Characters can also recover after being knocked to the ground by pressing {{Y}} after bouncing off the ground. Not all knockdowns cause the character to bounce off the ground and offer the opportunity for recovery. Characters can also perform a recovery roll after being knocked down by holding {{left}} or {{right}}. | Characters can become dizzy and stunned momentarily after taking repeated damage, and some moves cause the character to stagger backwards in a dazed state after being hit. The player can recover from either state more quickly by moving the D-Pad and pressing the attack buttons rapidly. When characters are knocked into the air, they can recover by pressing {{Y}} while still ascending (though this makes the character vulnerable to attack again until landing). Characters can also recover after being knocked to the ground by pressing {{Y}} after bouncing off the ground. Not all knockdowns cause the character to bounce off the ground and offer the opportunity for recovery. Characters can also perform a recovery roll after being knocked down by holding {{left}} or {{right}}. | ||
| − | Each character has a power gauge that is increased by hitting with normal moves (even if guarded by the opponent), performing special moves (whether or not they connect with the opponent), or taking damage ( | + | Each character has a power gauge that is increased by hitting with normal moves (even if guarded by the opponent), performing special moves (whether or not they connect with the opponent), or taking damage (including blocked attacks). The power in the gauge is retained between rounds but not matches. When either the character's life gauge is low and flashing or the power gauge is full, characters can perform desperation moves, called Super Secret Slashes (超奥義). These are more powerful special moves that can do a large amount of damage if they connect, but they cost the entire power gauge to perform (but can be performed an unlimited number of times when the life gauge is flashing). There are additional types of super moves that can be performed depending on the mode that the player has selected. Characters can also spend half of the power gauge to perform a guard cancel by pressing {{QCBD}} {{Y}} (or {{QCFD}} {{Y}} when facing left) while guarding. This allows the character to break out of the block sooner than usual and counterattack. |
===Fighting styles=== | ===Fighting styles=== | ||
| Line 62: | Line 63: | ||
| title=Power (力) | | title=Power (力) | ||
| sprite={{sprite | Last Blade 2 DC, Modes.png | crop_width=96 | crop_height=96 | crop_x=0 | crop_y=0}} | | sprite={{sprite | Last Blade 2 DC, Modes.png | crop_width=96 | crop_height=96 | crop_x=0 | crop_y=0}} | ||
| − | | desc=This mode gives the character | + | | desc=This mode gives the character increased damage output. Normal slashes inflict chip damage on block, like special moves, but also have increased recoil when blocked (pushing back and momentarily stunning the character). Every character has one move that can cancel into a super move, known as a super cancel (昇華), allowing the character to combo into a super move if the first move connects. |
Characters can perform a "no guard slice" by pressing {{B}}+{{X}}. These attacks are unblockable and knock down on hit but have a delayed startup. They can be charged for a more powerful strike by holding {{B}}+{{X}} for longer before releasing. | Characters can perform a "no guard slice" by pressing {{B}}+{{X}}. These attacks are unblockable and knock down on hit but have a delayed startup. They can be charged for a more powerful strike by holding {{B}}+{{X}} for longer before releasing. | ||
| Line 75: | Line 76: | ||
Characters can perform a "launching slice" by pressing {{B}}+{{X}}, which is an upward slice that launches the opponent into the air. This attack can only be blocked standing; if blocked crouching, the opponent is hit but staggers backward instead of being launched. | Characters can perform a "launching slice" by pressing {{B}}+{{X}}, which is an upward slice that launches the opponent into the air. This attack can only be blocked standing; if blocked crouching, the opponent is hit but staggers backward instead of being launched. | ||
| − | Characters can initiate a Furious Fandango (乱舞奥義) when the power gauge is full by pressing {{down}} {{down}} {{ | + | Characters can initiate a Furious Fandango (乱舞奥義) when the power gauge is full by pressing {{down}} {{down}} {{A}} or {{B}}. While in this state, characters can string multiple attacks together into long combos, similar to the Deadly Rave move used by Geese Howard (first seen in ''[[Real Bout Garou Densetsu]]''). Each character has a different combo chain, with multiple branches that vary in difficulty and damage inflicted, usually ending with a special move. These moves cost the entire power gauge. Pressing {{R}} performs the character's regular super move. |
}} | }} | ||
{{InfoRow | {{InfoRow | ||
| Line 97: | Line 98: | ||
*'''Art Gallery:''' The game includes an artwork gallery with character art. | *'''Art Gallery:''' The game includes an artwork gallery with character art. | ||
*'''Demo Viewer:''' This mode allows the player to view the opening sequences and the rankings for the Story Mode and the Time Attack Mode (which are saved to a [[VMU]]). Additionally, after completing the game with a character, the dialogue scene for the character's rival battle ("Innen Start" and "Innen Win," though not all characters have the latter) and the character's ending are unlocked so they can be viewed at any time. The cutscene preceding the final boss ("Story Demo") is unlocked after completing the game with any character. In the Japanese release of the game, an additional "Memorial Movie" section can be unlocked by completing a game in the hidden Hanafuda mode. This contains all of the cutscenes and endings (including the opening sequence) for the original ''The Last Blade''. | *'''Demo Viewer:''' This mode allows the player to view the opening sequences and the rankings for the Story Mode and the Time Attack Mode (which are saved to a [[VMU]]). Additionally, after completing the game with a character, the dialogue scene for the character's rival battle ("Innen Start" and "Innen Win," though not all characters have the latter) and the character's ending are unlocked so they can be viewed at any time. The cutscene preceding the final boss ("Story Demo") is unlocked after completing the game with any character. In the Japanese release of the game, an additional "Memorial Movie" section can be unlocked by completing a game in the hidden Hanafuda mode. This contains all of the cutscenes and endings (including the opening sequence) for the original ''The Last Blade''. | ||
| − | *'''Hanafuda:''' This mode is exclusive to the Japanese release of the game and unlocks after completing the game with any character. It is a [[wikipedia:Hanafuda|Hanafuda]] card game. Completing a game unlocks | + | *'''Hanafuda:''' This mode is exclusive to the Japanese release of the game and unlocks after completing the game with any character. It is a [[wikipedia:Hanafuda|Hanafuda]] card game. Completing a game unlocks Hanafuda card artwork in the Art Gallery and the Memorial Movie section in the Demo Viewer. |
===Characters=== | ===Characters=== | ||
| Line 129: | Line 130: | ||
{{MoveListRow | '''Hidden:''' Kasshin Kou Ryuu | {{QCB}} {{downleft}} {{right}} {{HS}} | Kaede stabs the ground with his sword, then a lightning dragon sweeps up and down the screen in front of him in a line. The move can be delayed by holding {{HS}} for longer before releasing.}} | {{MoveListRow | '''Hidden:''' Kasshin Kou Ryuu | {{QCB}} {{downleft}} {{right}} {{HS}} | Kaede stabs the ground with his sword, then a lightning dragon sweeps up and down the screen in front of him in a line. The move can be delayed by holding {{HS}} for longer before releasing.}} | ||
{{MoveListRow | '''Hidden:''' Kasshin Sou Ryuu | {{QCF}} {{QCF}} {{HS}} (close) | Kaede stabs his opponent with his sword, then launches the opponent with a rising sword slash as a giant lightning dragon follows.}} | {{MoveListRow | '''Hidden:''' Kasshin Sou Ryuu | {{QCF}} {{QCF}} {{HS}} (close) | Kaede stabs his opponent with his sword, then launches the opponent with a rising sword slash as a giant lightning dragon follows.}} | ||
| + | {{MoveListRow | Furious Fandango | {{down}} {{down}} {{LS}} or {{HS}} | | ||
| + | *{{LS}} {{HS}} {{kick}}, {{LS}} {{HS}} {{kick}}, {{LS}} {{HS}}, {{QCF}} {{kick}} | ||
| + | *{{LS}} {{HS}} {{kick}}, {{LS}} {{HS}} {{kick}}, {{kick}} {{HS}}, {{QCF}} {{LS}} | ||
| + | *{{LS}} {{HS}} {{kick}}, {{down}}+{{kick}}, {{LS}}, {{HS}}+{{kick}}, {{LS}}, {{QCF}} {{HS}} | ||
| + | *{{LS}} {{HS}} {{kick}}, {{down}}+{{kick}}, {{LS}}, {{down}}+{{kick}}, {{right}}+{{HS}}+{{kick}}}} | ||
}} | }} | ||
}} | }} | ||
| Line 139: | Line 145: | ||
| info2name=Rival battle | | info2name=Rival battle | ||
| info2=Kaede | | info2=Kaede | ||
| − | | desc=A young swordsman who trained under the legendary teacher Gaisei, along with Kaede and Yuki. One day, he discovered his master dying and the assassin fleeing. Gaisei asks Moriya not to reveal the identity of the murderer to Kaede because he fears that | + | | desc=A young swordsman who trained under the legendary teacher Gaisei, along with Kaede and Yuki. One day, he discovered his master dying and the assassin fleeing. Gaisei asks Moriya not to reveal the identity of the murderer to Kaede because he fears that Kaede will be killed trying to avenge him. Moriya flees in order to avoid Kaede and to find the real killer. However, after years of searching, Kaede finds and defeats the killer before Moriya can. Having failed in his mission, he secludes himself in the wilderness to improve his skills. Sensing a great evil rising, he decides to journey to Hell's Gate for answers. |
{{MoveListTable | desc=Special moves | | {{MoveListTable | desc=Special moves | | ||
{{MoveListRow | Ittou Shingetsu | {{DPF}} {{slash}} | Moriya turns to the side and slashes his sword in a large crescent around him, which knocks his opponent down on impact. When the move is performed with {{HS}}, he takes two steps forward while slashing. When the move is performed with {{LS}} in Speed mode, he can follow up with a second circular slash (Ittou Sogetsu) by quickly pressing {{DPF}} {{HS}}.}} | {{MoveListRow | Ittou Shingetsu | {{DPF}} {{slash}} | Moriya turns to the side and slashes his sword in a large crescent around him, which knocks his opponent down on impact. When the move is performed with {{HS}}, he takes two steps forward while slashing. When the move is performed with {{LS}} in Speed mode, he can follow up with a second circular slash (Ittou Sogetsu) by quickly pressing {{DPF}} {{HS}}.}} | ||
| Line 149: | Line 155: | ||
{{MoveListRow | Kassatsu Izayoi Gekka | {{right}} {{HCF}} {{LS}}+{{HS}} | Moriya repeatedly slashes his sword high, mid, and low. The move can be delayed by holding {{HS}} for longer before releasing.}} | {{MoveListRow | Kassatsu Izayoi Gekka | {{right}} {{HCF}} {{LS}}+{{HS}} | Moriya repeatedly slashes his sword high, mid, and low. The move can be delayed by holding {{HS}} for longer before releasing.}} | ||
{{MoveListRow | '''Hidden:''' Kassatsu Midare Setsu Gekka | {{right}} {{HCF}} {{HS}} | Moriya runs forward, then hits his opponent with a swift series of sword slashes, ending by swirling his sword in a large crescent around him.}} | {{MoveListRow | '''Hidden:''' Kassatsu Midare Setsu Gekka | {{right}} {{HCF}} {{HS}} | Moriya runs forward, then hits his opponent with a swift series of sword slashes, ending by swirling his sword in a large crescent around him.}} | ||
| + | {{MoveListRow | Furious Fandango | {{down}} {{down}} {{LS}} or {{HS}} | | ||
| + | *{{LS}} {{HS}} {{kick}}, {{LS}} {{HS}} {{kick}}, {{LS}} {{HS}}, {{QCF}} {{kick}} | ||
| + | *{{LS}} {{HS}} {{kick}}, {{LS}} {{HS}} {{kick}}, {{kick}} {{HS}} {{LS}}, {{QCF}} {{kick}} | ||
| + | *{{LS}} {{HS}} {{kick}}, {{down}}+{{kick}}, {{LS}}, {{right}}+{{HS}}+{{kick}}, {{LS}} {{HS}}, {{QCF}} {{HS}} | ||
| + | *{{LS}} {{HS}} {{kick}}, {{down}}+{{kick}}, {{LS}}, {{down}}+{{kick}}, {{right}}+{{HS}}+{{kick}}}} | ||
}} | }} | ||
}} | }} | ||
| Line 170: | Line 181: | ||
{{MoveListRow | Juuyou | {{QCF}} {{QCF}} {{LS}}+{{HS}} | Yuki stabs her naginata forward, as it is encased in a cone of ice that freezes the opponent momentarily.}} | {{MoveListRow | Juuyou | {{QCF}} {{QCF}} {{LS}}+{{HS}} | Yuki stabs her naginata forward, as it is encased in a cone of ice that freezes the opponent momentarily.}} | ||
{{MoveListRow | '''Hidden:''' Shin Yukishi Maki | {{QCB}} {{right}} {{HS}} | Yuki spins her naginata above her head with one hand, creating a whirlwind of snow that pulls the opponent in from any distance. Once caught in the vortex, the opponent is tossed into the air before falling onto Yuki's weapon and becoming suspended in midair. Yuki then leaps away and falls with a powerful slash. This move is unblockable.}} | {{MoveListRow | '''Hidden:''' Shin Yukishi Maki | {{QCB}} {{right}} {{HS}} | Yuki spins her naginata above her head with one hand, creating a whirlwind of snow that pulls the opponent in from any distance. Once caught in the vortex, the opponent is tossed into the air before falling onto Yuki's weapon and becoming suspended in midair. Yuki then leaps away and falls with a powerful slash. This move is unblockable.}} | ||
| + | {{MoveListRow | Furious Fandango | {{down}} {{down}} {{LS}} or {{HS}} | | ||
| + | *{{LS}} {{HS}} {{kick}}, {{LS}} {{HS}} {{kick}}, {{LS}} {{HS}}, {{QCF}} {{kick}} | ||
| + | *{{LS}} {{HS}} {{kick}}, {{LS}} {{HS}} {{kick}}, {{kick}} {{HS}}, {{QCF}} {{LS}} | ||
| + | *{{LS}} {{HS}} {{kick}}, {{down}}+{{kick}}, {{LS}}, {{HS}}+{{kick}}, {{LS}}, {{QCF}} {{HS}} | ||
| + | *{{LS}} {{HS}} {{kick}}, {{down}}+{{kick}}, {{LS}}, {{down}}+{{kick}}, {{right}}+{{HS}}+{{kick}}}} | ||
}} | }} | ||
}} | }} | ||
| Line 191: | Line 207: | ||
{{MoveListRow | Mumei (Zetsu) | {{QCF}} {{QCF}} {{LS}}+{{HS}} | Setsuna pulls his sword back, then slashes it down as it is followed by a very wide trail of electricity (which can negate projectiles). The move can be slightly by holding {{LS}}+{{HS}} for longer before releasing.}} | {{MoveListRow | Mumei (Zetsu) | {{QCF}} {{QCF}} {{LS}}+{{HS}} | Setsuna pulls his sword back, then slashes it down as it is followed by a very wide trail of electricity (which can negate projectiles). The move can be slightly by holding {{LS}}+{{HS}} for longer before releasing.}} | ||
{{MoveListRow | '''Hidden:''' Mumei (Kyoku) | {{HCB}} {{HCB}} {{HS}} | Setsuna holds his sword out in front of him, which surges with electricity. He flashes for 10 seconds; while this effect is active, he can be hit without being knocked out of whatever he is doing, and the effect only ends when its duration expires.}} | {{MoveListRow | '''Hidden:''' Mumei (Kyoku) | {{HCB}} {{HCB}} {{HS}} | Setsuna holds his sword out in front of him, which surges with electricity. He flashes for 10 seconds; while this effect is active, he can be hit without being knocked out of whatever he is doing, and the effect only ends when its duration expires.}} | ||
| + | {{MoveListRow | Furious Fandango | {{down}} {{down}} {{LS}} or {{HS}} | | ||
| + | *{{LS}} {{HS}} {{kick}}, {{LS}} {{HS}} {{kick}}, {{LS}} {{HS}}, {{QCF}} {{kick}} | ||
| + | *{{LS}} {{HS}} {{kick}}, {{LS}} {{HS}} {{kick}}, {{kick}}, {{QCF}} {{HS}} | ||
| + | *{{LS}} {{HS}} {{kick}}, {{down}}+{{kick}}, {{HS}}+{{kick}}, {{QCF}} {{HS}} | ||
| + | *{{LS}} {{HS}} {{kick}}, {{down}}+{{kick}}, {{down}}+{{kick}}, {{right}}+{{HS}}+{{kick}}}} | ||
}} | }} | ||
}} | }} | ||
| Line 213: | Line 234: | ||
{{MoveListRow | Shiki Gami Rikugou | {{QCB}} {{downleft}} {{right}} {{LS}}+{{HS}} | Akari hops forward and places a talisman card on the ground. If the opponent is standing over the card, a giant centipede-like demon slithers up the screen while being ridden by Akari and consumes, then spits out the opponent.}} | {{MoveListRow | Shiki Gami Rikugou | {{QCB}} {{downleft}} {{right}} {{LS}}+{{HS}} | Akari hops forward and places a talisman card on the ground. If the opponent is standing over the card, a giant centipede-like demon slithers up the screen while being ridden by Akari and consumes, then spits out the opponent.}} | ||
{{MoveListRow | '''Hidden:''' Shiki Gami Hyakki Yakou | {{HCB}} {{right}} {{HS}} | Akari throws her spinning staff straight up into the air as it sparkles with magic. If the opponent touches it, a parade of youkai rush across the screen from both sides and trample the opponent (and Akari, though she is not damaged by it).}} | {{MoveListRow | '''Hidden:''' Shiki Gami Hyakki Yakou | {{HCB}} {{right}} {{HS}} | Akari throws her spinning staff straight up into the air as it sparkles with magic. If the opponent touches it, a parade of youkai rush across the screen from both sides and trample the opponent (and Akari, though she is not damaged by it).}} | ||
| + | {{MoveListRow | Furious Fandango | {{down}} {{down}} {{LS}} or {{HS}} | | ||
| + | *{{LS}} {{HS}} {{kick}}, {{LS}} {{HS}} {{kick}}, {{LS}} {{HS}}, {{QCF}} {{kick}} | ||
| + | *{{LS}} {{HS}} {{kick}}, {{LS}} {{HS}} {{kick}}, {{kick}} {{HS}}, {{QCF}} {{LS}} | ||
| + | *{{LS}} {{HS}} {{kick}}, {{down}}+{{kick}}, {{LS}}, {{HS}}+{{kick}}, {{LS}}, {{QCF}} {{HS}} | ||
| + | *{{LS}} {{HS}} {{kick}}, {{down}}+{{kick}}, {{LS}}, {{down}}+{{kick}}, {{right}}+{{HS}}+{{kick}}}} | ||
}} | }} | ||
}} | }} | ||
| Line 236: | Line 262: | ||
{{MoveListRow | Daitan Muteki | {{HCB}} {{HCB}} {{LS}}+{{HS}} | Juzoh jumps high into the air, then comes down jabbing the butt of his kanabou downward, landing with a big explosion.}} | {{MoveListRow | Daitan Muteki | {{HCB}} {{HCB}} {{LS}}+{{HS}} | Juzoh jumps high into the air, then comes down jabbing the butt of his kanabou downward, landing with a big explosion.}} | ||
{{MoveListRow | '''Hidden:''' Chougekiretsubouzen Gyoutendaifunka | {{HCB}} {{right}} {{HS}} | Juzoh lunges forward with a headbutt, then swings his kanabou like a baseball bat, knocking the opponent into the air, and finishes by jamming the butt of his kanabou onto the ground, creating a huge explosion.}} | {{MoveListRow | '''Hidden:''' Chougekiretsubouzen Gyoutendaifunka | {{HCB}} {{right}} {{HS}} | Juzoh lunges forward with a headbutt, then swings his kanabou like a baseball bat, knocking the opponent into the air, and finishes by jamming the butt of his kanabou onto the ground, creating a huge explosion.}} | ||
| + | {{MoveListRow | Furious Fandango | {{down}} {{down}} {{LS}} or {{HS}} | | ||
| + | *{{LS}} {{HS}} {{kick}}, {{LS}} {{HS}} {{kick}}, {{LS}} {{HS}}, {{QCF}} {{kick}} | ||
| + | *{{LS}} {{HS}} {{kick}}, {{LS}} {{HS}} {{kick}}, {{kick}}, {{QCF}} {{HS}} | ||
| + | *{{LS}} {{HS}} {{kick}}, {{down}}+{{kick}}, {{HS}}+{{kick}}, {{QCF}} {{HS}} | ||
| + | *{{LS}} {{HS}} {{kick}}, {{down}}+{{kick}}, {{down}}+{{kick}}, {{right}}+{{HS}}+{{kick}}}} | ||
}} | }} | ||
}} | }} | ||
| Line 261: | Line 292: | ||
{{MoveListRow | '''Hidden:''' Banjouhi no Itte! "Hisya" | {{HCB}} {{HCB}} {{LS}} | Hyo pulls his bokken back, then swings it downward, throwing a shogi piece diagonally upwards that bounces the opponent off the ceiling and ground before exploding. The move can be delayed by holding {{LS}} for longer before releasing.}} | {{MoveListRow | '''Hidden:''' Banjouhi no Itte! "Hisya" | {{HCB}} {{HCB}} {{LS}} | Hyo pulls his bokken back, then swings it downward, throwing a shogi piece diagonally upwards that bounces the opponent off the ceiling and ground before exploding. The move can be delayed by holding {{LS}} for longer before releasing.}} | ||
{{MoveListRow | '''Hidden:''' Banjouhi no Itte! "Kaku" | {{HCB}} {{HCB}} {{HS}} | Hyo pulls his bokken back, then swings it downward, throwing a shogi piece straight ahead that bounces the opponent off the ceiling and ground before exploding. The move can be delayed by holding {{HS}} for longer before releasing.}} | {{MoveListRow | '''Hidden:''' Banjouhi no Itte! "Kaku" | {{HCB}} {{HCB}} {{HS}} | Hyo pulls his bokken back, then swings it downward, throwing a shogi piece straight ahead that bounces the opponent off the ceiling and ground before exploding. The move can be delayed by holding {{HS}} for longer before releasing.}} | ||
| + | {{MoveListRow | Furious Fandango | {{down}} {{down}} {{LS}} or {{HS}} | | ||
| + | *{{LS}} {{HS}} {{kick}}, {{LS}} {{HS}} {{kick}}, {{LS}} {{HS}}, {{QCF}} {{kick}} | ||
| + | *{{LS}} {{HS}} {{kick}}, {{LS}} {{HS}} {{kick}}, {{kick}}, {{QCF}} {{HS}} | ||
| + | *{{LS}} {{HS}} {{kick}}, {{down}}+{{kick}}, {{HS}}+{{kick}}, {{QCF}} {{HS}} | ||
| + | *{{LS}} {{HS}} {{kick}}, {{down}}+{{kick}}, {{down}}+{{kick}}, {{right}}+{{HS}}+{{kick}}}} | ||
}} | }} | ||
}} | }} | ||
| Line 283: | Line 319: | ||
{{MoveListRow | Hasshou Suru Shinki Nari | {{QCB}} {{right}} {{LS}}+{{HS}} | Hibiki quickly dashes past her opponent with a slash. As she is sheathing her blade, the opponent collapses from the wound.}} | {{MoveListRow | Hasshou Suru Shinki Nari | {{QCB}} {{right}} {{LS}}+{{HS}} | Hibiki quickly dashes past her opponent with a slash. As she is sheathing her blade, the opponent collapses from the wound.}} | ||
{{MoveListRow | '''Hidden:''' Shi o Osorenu Kokoro Nari | {{right}} {{HCF}} {{HS}} | If done from a distance, Hibiki's sword glows, and she slashes it in front of her, which knocks the opponent back on impact. If done in close range, the screen flashes with a slash, then Hibiki is shown resheathing her blade as her opponent stands incapacitated. The two figures are seen in silhouette, and a spurt of blood gushes from the opponent's body. The opponent collapses as the scene is restored to color.}} | {{MoveListRow | '''Hidden:''' Shi o Osorenu Kokoro Nari | {{right}} {{HCF}} {{HS}} | If done from a distance, Hibiki's sword glows, and she slashes it in front of her, which knocks the opponent back on impact. If done in close range, the screen flashes with a slash, then Hibiki is shown resheathing her blade as her opponent stands incapacitated. The two figures are seen in silhouette, and a spurt of blood gushes from the opponent's body. The opponent collapses as the scene is restored to color.}} | ||
| + | {{MoveListRow | Furious Fandango | {{down}} {{down}} {{LS}} or {{HS}} | | ||
| + | *{{LS}} {{HS}} {{kick}}, {{LS}} {{HS}} {{kick}}, {{LS}} {{HS}}, {{QCF}} {{kick}} | ||
| + | *{{LS}} {{HS}} {{kick}}, {{LS}} {{HS}} {{kick}}, {{kick}} {{HS}}, {{QCF}} {{LS}} | ||
| + | *{{LS}} {{HS}} {{kick}}, {{down}}+{{kick}}, {{LS}}, {{HS}}+{{kick}}, {{LS}}, {{QCF}} {{HS}} | ||
| + | *{{LS}} {{HS}} {{kick}}, {{down}}+{{kick}}, {{LS}}, {{down}}+{{kick}}, {{right}}+{{HS}}+{{kick}}}} | ||
}} | }} | ||
}} | }} | ||
| Line 303: | Line 344: | ||
{{MoveListRow | Shin Rouga | {{QCB}} {{downleft}} {{right}} {{LS}}+{{HS}} | Keiichiro charges forward most of the width of the screen and rams his opponent into the corner, then rapidly stabs his sword high, mid, and low, knocking the opponent into the air and finishing by stabbing his sword upwards at a diagonal angle and projecting a wide energy blast in the same trajectory.}} | {{MoveListRow | Shin Rouga | {{QCB}} {{downleft}} {{right}} {{LS}}+{{HS}} | Keiichiro charges forward most of the width of the screen and rams his opponent into the corner, then rapidly stabs his sword high, mid, and low, knocking the opponent into the air and finishing by stabbing his sword upwards at a diagonal angle and projecting a wide energy blast in the same trajectory.}} | ||
{{MoveListRow | '''Hidden:''' Saishu Rouga | {{QCB}} {{downleft}} {{right}} {{HS}} | Keiichiro dashes forward while holding his sword in front of him. If it connects with his opponent, the kanji 誠 (loyalty) appears imprinted behind him on a white background as the opponent collapses from the wound. The move can be delayed by holding {{HS}} for longer before releasing, which increases the damage it inflicts. The move is unblockable if fully charged.}} | {{MoveListRow | '''Hidden:''' Saishu Rouga | {{QCB}} {{downleft}} {{right}} {{HS}} | Keiichiro dashes forward while holding his sword in front of him. If it connects with his opponent, the kanji 誠 (loyalty) appears imprinted behind him on a white background as the opponent collapses from the wound. The move can be delayed by holding {{HS}} for longer before releasing, which increases the damage it inflicts. The move is unblockable if fully charged.}} | ||
| + | {{MoveListRow | Furious Fandango | {{down}} {{down}} {{LS}} or {{HS}} | | ||
| + | *{{LS}} {{HS}} {{kick}}, {{LS}} {{HS}} {{kick}}, {{LS}} {{HS}}, {{QCF}} {{kick}} | ||
| + | *{{LS}} {{HS}} {{kick}}, {{LS}} {{HS}} {{kick}}, {{kick}} {{HS}}, {{QCF}} {{LS}} | ||
| + | *{{LS}} {{HS}} {{kick}}, {{down}}+{{kick}}, {{LS}}, {{HS}}+{{kick}}, {{LS}}, {{QCF}} {{HS}} | ||
| + | *{{LS}} {{HS}} {{kick}}, {{down}}+{{kick}}, {{LS}}, {{down}}+{{kick}}, {{right}}+{{HS}}+{{kick}}}} | ||
}} | }} | ||
}} | }} | ||
| Line 324: | Line 370: | ||
{{MoveListRow | Mu Myou Ken Nie | {{QCB}} {{right}} {{LS}}+{{HS}} | Kaori runs forward most of the width of the screen, then stabs her sword repeatedly until the opponent collapses, finishing by stabbing her sword upwards at a diagonal angle and projecting a wide energy blast in the same trajectory.}} | {{MoveListRow | Mu Myou Ken Nie | {{QCB}} {{right}} {{LS}}+{{HS}} | Kaori runs forward most of the width of the screen, then stabs her sword repeatedly until the opponent collapses, finishing by stabbing her sword upwards at a diagonal angle and projecting a wide energy blast in the same trajectory.}} | ||
{{MoveListRow | '''Hidden:''' Rouga Zero | {{QCB}} {{right}} {{HS}} | Kaori dashes forward while holding her sword in front of her. If it connects with her opponent, the kanji 誅 (punishment) appears imprinted behind her on a white background as the opponent collapses from the wound. The move can be delayed by holding {{HS}} for longer before releasing, which increases the damage it inflicts. The move is unblockable if fully charged.}} | {{MoveListRow | '''Hidden:''' Rouga Zero | {{QCB}} {{right}} {{HS}} | Kaori dashes forward while holding her sword in front of her. If it connects with her opponent, the kanji 誅 (punishment) appears imprinted behind her on a white background as the opponent collapses from the wound. The move can be delayed by holding {{HS}} for longer before releasing, which increases the damage it inflicts. The move is unblockable if fully charged.}} | ||
| + | {{MoveListRow | Furious Fandango | {{down}} {{down}} {{LS}} or {{HS}} | | ||
| + | *{{LS}} {{HS}} {{kick}}, {{LS}} {{HS}} {{kick}}, {{LS}} {{HS}}, {{QCF}} {{kick}} | ||
| + | *{{LS}} {{HS}} {{kick}}, {{LS}} {{HS}} {{kick}}, {{kick}} {{HS}} {{LS}}, {{QCF}} {{kick}} | ||
| + | *{{LS}} {{HS}} {{kick}}, {{down}}+{{kick}}, {{LS}}, {{right}}+{{HS}}+{{kick}}, {{LS}} {{HS}}, {{QCF}} {{HS}} | ||
| + | *{{LS}} {{HS}} {{kick}}, {{down}}+{{kick}}, {{LS}}, {{down}}+{{kick}}, {{right}}+{{HS}}+{{kick}}}} | ||
}} | }} | ||
}} | }} | ||
| Line 345: | Line 396: | ||
{{MoveListRow | Genbu no Houkou | {{right}} {{HCF}} {{LS}}+{{HS}} | Genbu opens his basket, then spins around while moving forward as as a tall pillar of rapidly spinning water gushes out around him.}} | {{MoveListRow | Genbu no Houkou | {{right}} {{HCF}} {{LS}}+{{HS}} | Genbu opens his basket, then spins around while moving forward as as a tall pillar of rapidly spinning water gushes out around him.}} | ||
{{MoveListRow | '''Hidden:''' Genbu no Ikari | {{right}} {{HCF}} {{HS}} | Genbu opens his basket, and a giant dragon turtle jumps out and lands on his opponent, then walks away.}} | {{MoveListRow | '''Hidden:''' Genbu no Ikari | {{right}} {{HCF}} {{HS}} | Genbu opens his basket, and a giant dragon turtle jumps out and lands on his opponent, then walks away.}} | ||
| + | {{MoveListRow | Furious Fandango | {{down}} {{down}} {{LS}} or {{HS}} | | ||
| + | *{{LS}} {{HS}} {{kick}}, {{LS}} {{HS}} {{kick}}, {{LS}} {{HS}}, {{QCF}} {{kick}} | ||
| + | *{{LS}} {{HS}} {{kick}}, {{LS}} {{HS}} {{kick}}, {{kick}} {{HS}}, {{QCF}} {{LS}} | ||
| + | *{{LS}} {{HS}} {{kick}}, {{down}}+{{kick}}, {{LS}}, {{HS}}+{{kick}}, {{LS}}, {{QCF}} {{HS}} | ||
| + | *{{LS}} {{HS}} {{kick}}, {{down}}+{{kick}}, {{LS}}, {{down}}+{{kick}}, {{right}}+{{HS}}+{{kick}}}} | ||
}} | }} | ||
}} | }} | ||
| Line 367: | Line 423: | ||
{{MoveListRow | Mei Kyo Shisui Kyoki | {{QCF}} {{QCF}} {{LS}}+{{HS}} | Mukuro spins his lunatic blade in front of him like a pinwheel. This move hits many more times and covers a larger radius than the Kaiten Kimo Eguri.}} | {{MoveListRow | Mei Kyo Shisui Kyoki | {{QCF}} {{QCF}} {{LS}}+{{HS}} | Mukuro spins his lunatic blade in front of him like a pinwheel. This move hits many more times and covers a larger radius than the Kaiten Kimo Eguri.}} | ||
{{MoveListRow | '''Hidden:''' Mei Kyo Shisui Kyoki | {{QCF}} {{QCF}} {{HS}} | Mukuro crawls forward. If he reaches his opponent, he slashes across the opponent, then forms an X with two jumping slashes. The kanji 凶 (misfortune) appears over a black background, which is sliced in half as the opponent collapses from the wounds.}} | {{MoveListRow | '''Hidden:''' Mei Kyo Shisui Kyoki | {{QCF}} {{QCF}} {{HS}} | Mukuro crawls forward. If he reaches his opponent, he slashes across the opponent, then forms an X with two jumping slashes. The kanji 凶 (misfortune) appears over a black background, which is sliced in half as the opponent collapses from the wounds.}} | ||
| + | {{MoveListRow | Furious Fandango | {{down}} {{down}} {{LS}} or {{HS}} | | ||
| + | *{{LS}} {{HS}} {{kick}}, {{LS}} {{HS}} {{kick}}, {{LS}} {{HS}}, {{QCF}} {{kick}} | ||
| + | *{{LS}} {{HS}} {{kick}}, {{LS}} {{HS}} {{kick}}, {{kick}}, {{QCF}} {{HS}} | ||
| + | *{{LS}} {{HS}} {{kick}}, {{down}}+{{kick}}, {{HS}}+{{kick}}, {{QCF}} {{HS}} | ||
| + | *{{LS}} {{HS}} {{kick}}, {{down}}+{{kick}}, {{down}}+{{kick}}, {{right}}+{{HS}}+{{kick}}}} | ||
}} | }} | ||
}} | }} | ||
| Line 390: | Line 451: | ||
{{MoveListRow | Ougi Enryu Tenshin | {{QCB}} {{right}} {{LS}}+{{HS}} | Lee throws his flaming fan into the air and catches it, then rushes forward with it, exploding in a massive fiery pillar on impact.}} | {{MoveListRow | Ougi Enryu Tenshin | {{QCB}} {{right}} {{LS}}+{{HS}} | Lee throws his flaming fan into the air and catches it, then rushes forward with it, exploding in a massive fiery pillar on impact.}} | ||
{{MoveListRow | '''Hidden:''' Hiougi Soten Muei Kyaku | {{QCB}} {{right}} {{HS}} | Lee rushes forward, then hits his opponent with a barrage of kicks and rises into the air while spinning his flaming fan in circles, where a fire dragon flies up.}} | {{MoveListRow | '''Hidden:''' Hiougi Soten Muei Kyaku | {{QCB}} {{right}} {{HS}} | Lee rushes forward, then hits his opponent with a barrage of kicks and rises into the air while spinning his flaming fan in circles, where a fire dragon flies up.}} | ||
| + | {{MoveListRow | Furious Fandango | {{down}} {{down}} {{LS}} or {{HS}} | | ||
| + | *{{LS}} {{HS}} {{kick}}, {{LS}} {{HS}} {{kick}}, {{LS}} {{HS}}, {{QCF}} {{kick}} | ||
| + | *{{LS}} {{HS}} {{kick}}, {{LS}} {{HS}} {{kick}}, {{kick}} {{HS}} {{LS}}, {{QCF}} {{kick}} | ||
| + | *{{LS}} {{HS}} {{kick}}, {{down}}+{{kick}}, {{LS}}, {{right}}+{{HS}}+{{kick}}, {{LS}} {{HS}}, {{QCF}} {{HS}} | ||
| + | *{{LS}} {{HS}} {{kick}}, {{down}}+{{kick}}, {{LS}}, {{down}}+{{kick}}, {{right}}+{{HS}}+{{kick}}}} | ||
}} | }} | ||
}} | }} | ||
| Line 414: | Line 480: | ||
{{MoveListRow | Dankoujin | {{right}} {{HCF}} {{LS}}+{{HS}} | Zantetsu slashes the air with a tantou, creating a tall arc of energy, then swipes both of his tantou down to push the arc across the screen.}} | {{MoveListRow | Dankoujin | {{right}} {{HCF}} {{LS}}+{{HS}} | Zantetsu slashes the air with a tantou, creating a tall arc of energy, then swipes both of his tantou down to push the arc across the screen.}} | ||
{{MoveListRow | '''Hidden:''' Yami Gari | {{HCB}} {{HCB}} {{HS}} (close) | Zantetsu wraps his opponent in his cape, and they both vanish. The screen turns black, then Zantetsu is shown slashing the opponent multiple times with a shadow duplicate before hitting the ground with a downward slash as the darkness recedes.}} | {{MoveListRow | '''Hidden:''' Yami Gari | {{HCB}} {{HCB}} {{HS}} (close) | Zantetsu wraps his opponent in his cape, and they both vanish. The screen turns black, then Zantetsu is shown slashing the opponent multiple times with a shadow duplicate before hitting the ground with a downward slash as the darkness recedes.}} | ||
| + | {{MoveListRow | Furious Fandango | {{down}} {{down}} {{LS}} or {{HS}} | | ||
| + | *{{LS}} {{HS}} {{kick}}, {{LS}} {{HS}} {{kick}}, {{LS}} {{HS}}, {{QCF}} {{kick}} | ||
| + | *{{LS}} {{HS}} {{kick}}, {{LS}} {{HS}} {{kick}}, {{kick}} {{HS}} {{LS}}, {{QCF}} {{kick}} | ||
| + | *{{LS}} {{HS}} {{kick}}, {{down}}+{{kick}}, {{LS}}, {{right}}+{{HS}}+{{kick}}, {{LS}} {{HS}}, {{QCF}} {{HS}} | ||
| + | *{{LS}} {{HS}} {{kick}}, {{down}}+{{kick}}, {{LS}}, {{down}}+{{kick}}, {{right}}+{{HS}}+{{kick}}}} | ||
}} | }} | ||
}} | }} | ||
| Line 424: | Line 495: | ||
| info2name=Rival battle | | info2name=Rival battle | ||
| info2=Shigen Naoe | | info2=Shigen Naoe | ||
| − | | desc=One of the three guardians of Hell's Gate. Shinnosuke is inhabited by Suzaku, the Vermilion Sparrow, giving him the power to control fire. After deciding that the humans he | + | | desc=One of the three guardians of Hell's Gate. Shinnosuke is inhabited by Suzaku, the Vermilion Sparrow, giving him the power to control fire. After deciding that the humans he protects are weak and inferior to himself, he releases the seal on the portal and goes on a horrific killing spree, murdering countless warriors, including the master swordsman Gaisei. Shinnosuke is eventually found and defeated by Kaede, who has the latent power of Seiryuu, the Azure Dragon. He is reincarnated in a new form to fulfill his role as a guardian and atone for his misdeeds by ensuring that the portal is sealed again. |
{{MoveListTable | desc=Special moves | | {{MoveListTable | desc=Special moves | | ||
{{MoveListRow | Hien Yoku | {{QCF}} {{LS}} | Kagami conjures a ball of fire in his hand, then swings his arm upward, leaving a trail of fire in the air and shooting a flame arrow across the screen.}} | {{MoveListRow | Hien Yoku | {{QCF}} {{LS}} | Kagami conjures a ball of fire in his hand, then swings his arm upward, leaving a trail of fire in the air and shooting a flame arrow across the screen.}} | ||
| Line 437: | Line 508: | ||
{{MoveListRow | Houou Tenshou | {{right}} {{HCF}} {{LS}}+{{HS}} | Kagami conjures a ball of fire in his hand, then swings his arm upward, sending a fiery explosion surging across the ground. This move is unblockable and dissipates any other projectile.}} | {{MoveListRow | Houou Tenshou | {{right}} {{HCF}} {{LS}}+{{HS}} | Kagami conjures a ball of fire in his hand, then swings his arm upward, sending a fiery explosion surging across the ground. This move is unblockable and dissipates any other projectile.}} | ||
{{MoveListRow | '''Hidden:''' Funshokouju | {{HCF}} {{HS}} in midair | Kagami sets his body ablaze, then dives down from the air with his arms spread. If he hits his opponent, he twirls as multiple eruptions stagger in front of him, then he rises into the air while surrounded in flames in the shape of a bird.}} | {{MoveListRow | '''Hidden:''' Funshokouju | {{HCF}} {{HS}} in midair | Kagami sets his body ablaze, then dives down from the air with his arms spread. If he hits his opponent, he twirls as multiple eruptions stagger in front of him, then he rises into the air while surrounded in flames in the shape of a bird.}} | ||
| + | {{MoveListRow | Furious Fandango | {{down}} {{down}} {{LS}} or {{HS}} | | ||
| + | *{{LS}} {{HS}} {{kick}}, {{LS}} {{HS}} {{kick}}, {{LS}} {{HS}}, {{QCF}} {{kick}} | ||
| + | *{{LS}} {{HS}} {{kick}}, {{LS}} {{HS}} {{kick}}, {{kick}} {{HS}}, {{QCF}} {{LS}} | ||
| + | *{{LS}} {{HS}} {{kick}}, {{down}}+{{kick}}, {{LS}}, {{HS}}+{{kick}}, {{LS}}, {{QCF}} {{HS}} | ||
| + | *{{LS}} {{HS}} {{kick}}, {{down}}+{{kick}}, {{LS}}, {{down}}+{{kick}}, {{right}}+{{HS}}+{{kick}}}} | ||
}} | }} | ||
}} | }} | ||
| Line 462: | Line 538: | ||
{{MoveListRow | Inga Ohou | {{HCB}} {{HCB}} {{LS}}+{{HS}} (close) | Shigen grabs his opponent, flips through the air with a slam into a bed of crystals, then bashes the opponent with his clasped fists.}} | {{MoveListRow | Inga Ohou | {{HCB}} {{HCB}} {{LS}}+{{HS}} (close) | Shigen grabs his opponent, flips through the air with a slam into a bed of crystals, then bashes the opponent with his clasped fists.}} | ||
{{MoveListRow | '''Hidden:''' Fugu Taiten | {{HCB}} {{HCB}} {{HS}} (close) | Shigen grabs and chokes his opponent, flips through the air with a slam, then roars as several wind blades thrash the opponent.}} | {{MoveListRow | '''Hidden:''' Fugu Taiten | {{HCB}} {{HCB}} {{HS}} (close) | Shigen grabs and chokes his opponent, flips through the air with a slam, then roars as several wind blades thrash the opponent.}} | ||
| + | {{MoveListRow | Furious Fandango | {{down}} {{down}} {{LS}} or {{HS}} | | ||
| + | *{{LS}} {{HS}} {{kick}}, {{LS}} {{HS}} {{kick}}, {{LS}} {{HS}}, {{QCF}} {{kick}} | ||
| + | *{{LS}} {{HS}} {{kick}}, {{LS}} {{HS}} {{kick}}, {{kick}}, {{QCF}} {{HS}} | ||
| + | *{{LS}} {{HS}} {{kick}}, {{down}}+{{kick}}, {{HS}}+{{kick}}, {{QCF}} {{HS}} | ||
| + | *{{LS}} {{HS}} {{kick}}, {{down}}+{{kick}}, {{down}}+{{kick}}, {{right}}+{{HS}}+{{kick}}}} | ||
}} | }} | ||
}} | }} | ||
| Line 480: | Line 561: | ||
{{MoveListRow | Gorin Tsurane | {{HCB}} {{right}} {{LS}}+{{HS}} | Musashi charges forward while glowing with flames. If he hits his opponent, he performs a series of sword slashes.}} | {{MoveListRow | Gorin Tsurane | {{HCB}} {{right}} {{LS}}+{{HS}} | Musashi charges forward while glowing with flames. If he hits his opponent, he performs a series of sword slashes.}} | ||
{{MoveListRow | '''Hidden:''' Niten Muso Ken | {{HCB}} {{HCB}} {{HS}} | Musashi advances forward with multiple sword slashes. If they all connect, he lifts the opponent into the air with both blades, then slashes down in an X pattern.}} | {{MoveListRow | '''Hidden:''' Niten Muso Ken | {{HCB}} {{HCB}} {{HS}} | Musashi advances forward with multiple sword slashes. If they all connect, he lifts the opponent into the air with both blades, then slashes down in an X pattern.}} | ||
| + | {{MoveListRow | Furious Fandango | {{down}} {{down}} {{LS}} or {{HS}} | | ||
| + | *{{LS}} {{HS}} {{kick}}, {{LS}} {{HS}} {{kick}}, {{LS}} {{HS}}, {{QCF}} {{kick}} | ||
| + | *{{LS}} {{HS}} {{kick}}, {{LS}} {{HS}} {{kick}}, {{kick}}, {{QCF}} {{HS}} | ||
| + | *{{LS}} {{HS}} {{kick}}, {{down}}+{{kick}}, {{HS}}+{{kick}}, {{QCF}} {{HS}} | ||
| + | *{{LS}} {{HS}} {{kick}}, {{down}}+{{kick}}, {{down}}+{{kick}}, {{right}}+{{HS}}+{{kick}}}} | ||
}} | }} | ||
}} | }} | ||
| Line 506: | Line 592: | ||
{{MoveListRow | 青龍・天地共鳴ス怒号ノ雷鳴 | {{right}} {{HCF}} {{button|text=REPEL}} | Kouryuu jumps into the air while slashing his sword out. If it connects with his opponent, the kanji 青竜 (Seiryuu) appear in the background in blue, and the opponent is hit multiple times by a lightning dragon sweeping up and down the screen.}} | {{MoveListRow | 青龍・天地共鳴ス怒号ノ雷鳴 | {{right}} {{HCF}} {{button|text=REPEL}} | Kouryuu jumps into the air while slashing his sword out. If it connects with his opponent, the kanji 青竜 (Seiryuu) appear in the background in blue, and the opponent is hit multiple times by a lightning dragon sweeping up and down the screen.}} | ||
{{MoveListRow | '''Hidden:''' 四神ノ力集イテ是ナル騎レシ者黄泉国ヘト誘ワン | {{left}} {{HCB}} {{HS}} | Kouryuu rushes forward most of the width of the screen. If it connects, he slashes the opponent high into the heavens. A giant spear falls from Hell's Gate in the sky and impales the opponent back to the ground.}} | {{MoveListRow | '''Hidden:''' 四神ノ力集イテ是ナル騎レシ者黄泉国ヘト誘ワン | {{left}} {{HCB}} {{HS}} | Kouryuu rushes forward most of the width of the screen. If it connects, he slashes the opponent high into the heavens. A giant spear falls from Hell's Gate in the sky and impales the opponent back to the ground.}} | ||
| + | {{MoveListRow | Furious Fandango | {{down}} {{down}} {{LS}} or {{HS}} | | ||
| + | *{{LS}} {{HS}} {{kick}}, {{LS}} {{HS}} {{kick}}, {{LS}} {{HS}}, {{QCF}} {{kick}} | ||
| + | *{{LS}} {{HS}} {{kick}}, {{LS}} {{HS}} {{kick}}, {{kick}}, {{QCF}} {{HS}} | ||
| + | *{{LS}} {{HS}} {{kick}}, {{down}}+{{kick}}, {{HS}}+{{kick}}, {{QCF}} {{HS}} | ||
| + | *{{LS}} {{HS}} {{kick}}, {{down}}+{{kick}}, {{down}}+{{kick}}, {{right}}+{{HS}}+{{kick}}}} | ||
}} | }} | ||
}} | }} | ||
| Line 529: | Line 620: | ||
{{MoveListRow | Kasshin Fuku Ryuu | {{QCB}} {{downleft}} {{right}} {{LS}}+{{HS}} | Kaede stabs the ground with his sword, then a lightning strike hits the ground in front of him and creeps forward a short distance. The move can be delayed by holding {{LS}}+{{HS}} for longer before releasing.}} | {{MoveListRow | Kasshin Fuku Ryuu | {{QCB}} {{downleft}} {{right}} {{LS}}+{{HS}} | Kaede stabs the ground with his sword, then a lightning strike hits the ground in front of him and creeps forward a short distance. The move can be delayed by holding {{LS}}+{{HS}} for longer before releasing.}} | ||
{{MoveListRow | '''Hidden:''' Kasshin Kou Ryuu | {{QCB}} {{downleft}} {{right}} {{HS}} | Kaede stabs the ground with his sword, then a lightning dragon sweeps up and down the screen in front of him in a line. The move can be delayed by holding {{HS}} for longer before releasing.}} | {{MoveListRow | '''Hidden:''' Kasshin Kou Ryuu | {{QCB}} {{downleft}} {{right}} {{HS}} | Kaede stabs the ground with his sword, then a lightning dragon sweeps up and down the screen in front of him in a line. The move can be delayed by holding {{HS}} for longer before releasing.}} | ||
| + | {{MoveListRow | Furious Fandango | {{down}} {{down}} {{LS}} or {{HS}} | | ||
| + | *{{LS}} {{HS}} {{kick}}, {{LS}} {{HS}} {{kick}}, {{LS}} {{HS}}, {{QCF}} {{kick}} | ||
| + | *{{LS}} {{HS}} {{kick}}, {{LS}} {{HS}} {{kick}}, {{kick}} {{HS}}, {{QCF}} {{LS}} | ||
| + | *{{LS}} {{HS}} {{kick}}, {{down}}+{{kick}}, {{LS}}, {{HS}}+{{kick}}, {{LS}}, {{QCF}} {{HS}} | ||
| + | *{{LS}} {{HS}} {{kick}}, {{down}}+{{kick}}, {{LS}}, {{down}}+{{kick}}, {{right}}+{{HS}}+{{kick}}}} | ||
}} | }} | ||
}} | }} | ||
| Line 601: | Line 697: | ||
| manual=LastBlade2 DC US Manual.pdf | | manual=LastBlade2 DC US Manual.pdf | ||
}} | }} | ||
| + | |||
| + | ==Compliance== | ||
| + | {{mainArticle|{{PAGENAME}}/Compliance}} | ||
==Technical information== | ==Technical information== | ||
{{mainArticle|{{PAGENAME}}/Technical information}} | {{mainArticle|{{PAGENAME}}/Technical information}} | ||
| − | |||
| − | |||
| − | |||
| − | |||
| − | |||
==External links== | ==External links== | ||
Latest revision as of 19:39, 30 December 2024
| ||||||||||||||||||||
| The Last Blade 2: Heart of the Samurai | ||||||||||||||||||||
|---|---|---|---|---|---|---|---|---|---|---|---|---|---|---|---|---|---|---|---|---|
| System(s): Sega Dreamcast | ||||||||||||||||||||
| Publisher: Agetec (US), SNK (Japan), Playmore (Japan; SNK Best Buy) | ||||||||||||||||||||
| Developer: SNK | ||||||||||||||||||||
| Licensor: SNK (US) | ||||||||||||||||||||
| Original system(s): Neo Geo | ||||||||||||||||||||
| Peripherals supported: Jump Pack, Dreamcast Arcade Stick, Visual Memory Unit | ||||||||||||||||||||
| Genre: Fighting Action/Kakutou Action (格闘アクション)[1][2], Action[3] | ||||||||||||||||||||
| Number of players: 1-2 | ||||||||||||||||||||
| ||||||||||||||||||||
|
The Last Blade 2: Heart of the Samurai, known as Bakumatsu Rouman Dai Ni Maku: Gekka no Kenshi Final Edition (幕末浪漫第二幕 月華の剣士 ファイナルエディション) in Japan, is a versus fighting game by SNK, originally released for the Neo Geo. It was ported to the Sega Dreamcast and released in Japan in 2000. It was released in the United States in 2001 by Agetec.
Contents
Story
The Four Gods of the world possess the spirits of people who are found worthy of their powers. They are Seiryuu, the Azure Dragon; Suzaku, the Vermilion Sparrow; Byakko, the White Tiger; and Genbu, the Black Tortoise. There is also a fifth god, Kouryuu, the Yellow Dragon, whose possessor gains the abilities of the Four Gods.
Our world and the underworld, Makai, are linked by a great portal called Hell's Gate. The Four Gods have the responsibility of protecting the seal on the portal and separating the two worlds. Suzaku, inhabiting the body of Shinnosuke Kagami, is offended by the people's indifference to their existence with the growing acceptance of European ideals, so he shirks his duty and opens the gate. This act of defiance awakens the other gods in their avatars. Suzaku is defeated by Seiryuu, inhabiting the body of the young swordsman Kaede, but the portal remains open.
In order to close the gate again, a Sealing Maiden must perform a ritual with the Four Gods and seal it again. The maiden is protected by the avatars of the Four Gods, but she is threatened by the Yellow Dragon and by a warrior known only as the "Messenger from Afar," who was born from the first death in the world.
Gameplay
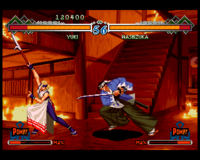
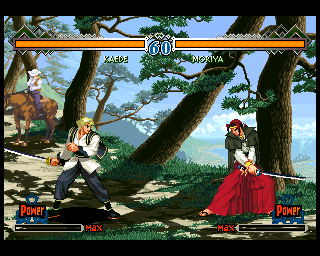
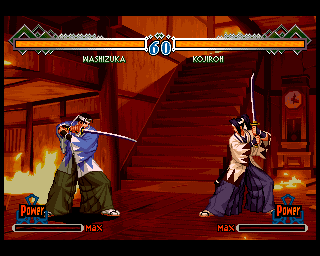
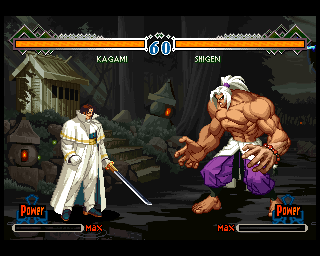
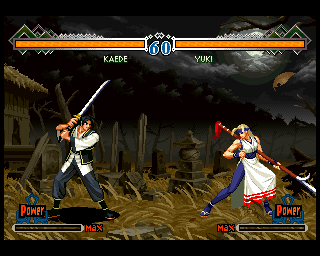
The game is a weapons-based 2D fighting game that takes place during the Bakumatsu era in Japan (about a century after the setting of the similar Samurai Shodown), at the end of the Sakoku period of isolation. Every character has three modes (Power, Speed, or EX) that change the playstyle in certain ways. Compared to the first game, the EX mode has been added, characters can no longer be disarmed, and repelling can now be done in midair. Matches are fought to the best of three rounds. Each round is timed (with the winner being the combatant with the most health remaining if time runs out).
Characters move with ![]() or
or ![]() . They backstep or dash with
. They backstep or dash with ![]()
![]() or
or ![]()
![]() . They jump upward with
. They jump upward with ![]() and jump behind and ahead with
and jump behind and ahead with ![]() or
or ![]() . Tapping the direction does a short hop, while holding it for slightly longer does a full jump. They crouch with
. Tapping the direction does a short hop, while holding it for slightly longer does a full jump. They crouch with ![]() . Characters can attack with a weak slash with
. Characters can attack with a weak slash with ![]() , a strong slash with
, a strong slash with ![]() , or a kick with
, or a kick with ![]() . Attacks can be done while standing, crouching, jumping, or dashing. The weak slash is quicker but weaker, and the strong slash is stronger but slower. Both slashes have variations that can be performed while standing: the character can perform a quick jab by pressing
. Attacks can be done while standing, crouching, jumping, or dashing. The weak slash is quicker but weaker, and the strong slash is stronger but slower. Both slashes have variations that can be performed while standing: the character can perform a quick jab by pressing ![]() +
+![]() (or
(or ![]() +
+![]() when facing left) or a longer-ranged, typically lunging stab or slash by pressing
when facing left) or a longer-ranged, typically lunging stab or slash by pressing ![]() +
+![]() (or
(or ![]() +
+![]() ). Similarly, there are two special kicks available to every character: a kick that sends the opponent flying into the side of the screen and bouncing off by pressing
). Similarly, there are two special kicks available to every character: a kick that sends the opponent flying into the side of the screen and bouncing off by pressing ![]() +
+![]() (or
(or ![]() +
+![]() when facing left) and a sweep that trips the opponent by pressing
when facing left) and a sweep that trips the opponent by pressing ![]() +
+![]() (or
(or ![]() +
+![]() ). Characters can perform a taunt by pressing
). Characters can perform a taunt by pressing ![]() .
.
Guarding is done by holding the D-Pad away from the opponent, which can be done while standing or crouching. Characters can also guard in midair when jumping straight up or backwards, but grounded normal moves and several special moves cannot be guarded in midair, and the character is knocked back a distance after air guarding. Most attacks can be guarded while standing or crouching, but many attacks must specifically be guarded high (such as sweeps) or low (such as jumping attacks and overhead strikes). Similar to parries in Street Fighter III and Just Defends in Fatal Fury: Mark of the Wolves, attacks can be repelled instead of blocked by pressing ![]() . This requires timing the repel precisely with the opponent's attack hitting. If successful, the opponent is left vulnerable to counterattack for a moment; if mistimed, the character is left open for attack instead. Special moves can be repelled in addition to normal moves, but the timing required is more precise. Like guarding, repelling can be done while standing or crouching or in midair. If done on the ground, the repel can be directly followed up with a knockdown counterattack by pressing
. This requires timing the repel precisely with the opponent's attack hitting. If successful, the opponent is left vulnerable to counterattack for a moment; if mistimed, the character is left open for attack instead. Special moves can be repelled in addition to normal moves, but the timing required is more precise. Like guarding, repelling can be done while standing or crouching or in midair. If done on the ground, the repel can be directly followed up with a knockdown counterattack by pressing ![]() again.
again.
Throws are done by pressing ![]() +
+![]() simultaneously when close to the opponent. Throws cannot be blocked, but they can be whiffed if the opponent is outside of range, which leaves the character open to attack. Downed fighters can be hit with a pounce attack by pressing
simultaneously when close to the opponent. Throws cannot be blocked, but they can be whiffed if the opponent is outside of range, which leaves the character open to attack. Downed fighters can be hit with a pounce attack by pressing ![]() +
+![]() or
or ![]() (or
(or ![]() +
+![]() or
or ![]() when facing left) or
when facing left) or ![]() +
+![]() or
or ![]() . They can also be kicked by pressing
. They can also be kicked by pressing ![]() if near enough.
if near enough.
Characters can become dizzy and stunned momentarily after taking repeated damage, and some moves cause the character to stagger backwards in a dazed state after being hit. The player can recover from either state more quickly by moving the D-Pad and pressing the attack buttons rapidly. When characters are knocked into the air, they can recover by pressing ![]() while still ascending (though this makes the character vulnerable to attack again until landing). Characters can also recover after being knocked to the ground by pressing
while still ascending (though this makes the character vulnerable to attack again until landing). Characters can also recover after being knocked to the ground by pressing ![]() after bouncing off the ground. Not all knockdowns cause the character to bounce off the ground and offer the opportunity for recovery. Characters can also perform a recovery roll after being knocked down by holding
after bouncing off the ground. Not all knockdowns cause the character to bounce off the ground and offer the opportunity for recovery. Characters can also perform a recovery roll after being knocked down by holding ![]() or
or ![]() .
.
Each character has a power gauge that is increased by hitting with normal moves (even if guarded by the opponent), performing special moves (whether or not they connect with the opponent), or taking damage (including blocked attacks). The power in the gauge is retained between rounds but not matches. When either the character's life gauge is low and flashing or the power gauge is full, characters can perform desperation moves, called Super Secret Slashes (超奥義). These are more powerful special moves that can do a large amount of damage if they connect, but they cost the entire power gauge to perform (but can be performed an unlimited number of times when the life gauge is flashing). There are additional types of super moves that can be performed depending on the mode that the player has selected. Characters can also spend half of the power gauge to perform a guard cancel by pressing ![]()
![]()
![]()
![]() (or
(or ![]()
![]()
![]()
![]() when facing left) while guarding. This allows the character to break out of the block sooner than usual and counterattack.
when facing left) while guarding. This allows the character to break out of the block sooner than usual and counterattack.
Fighting styles
After selecting a character, players can choose from three different playstyles, which affect the way the character is played.
| Power (力) | |
|---|---|
| This mode gives the character increased damage output. Normal slashes inflict chip damage on block, like special moves, but also have increased recoil when blocked (pushing back and momentarily stunning the character). Every character has one move that can cancel into a super move, known as a super cancel (昇華), allowing the character to combo into a super move if the first move connects.
Characters can perform a "no guard slice" by pressing Characters can perform Hidden Secret Slashes (潜在奥義). Similar to the Super Desperation moves in The King of Fighters, these moves can be performed when both the character's life gauge is low and flashing and the power gauge is full, and they cost the entire power gauge. The button combination for these moves varies by character, but they can also be performed by pressing | |
| Speed (技) | |
| This mode does less damage but allows the character to easily chain normal attacks together into combos, from weak to strong slashes, and more normal attacks can cancel into special moves. Blocked attacks do not cause recoil, so the character can attack more aggressively since there is less consequence to having an attack blocked. Normal attacks also do not cause chip damage.
Characters can perform a "launching slice" by pressing Characters can initiate a Furious Fandango (乱舞奥義) when the power gauge is full by pressing | |
| EX (極) | |
| This mode is new to The Last Blade 2, and it is a mix between the Power and Speed modes. The character inflicts slightly more damage than Speed mode but less than Power mode and takes more damage from attacks. Normal slashes inflict chip damage on block, like special moves, but do not have recoil. However, normal moves that are blocked by the opponent no longer increase the character's power gauge. Normal moves link together into combos or special moves more easily, as in Speed mode, and every character has a super cancel (昇華), as in Power mode.
Characters can perform a "launching slice" by pressing Characters have access to both the Hidden Secret Slashes from Power mode, which requires flashing red life and a full power gauge, and the Furious Fandango from Speed mode, which requires a full power gauge. Both cost the entire power gauge to perform. As a consequence, the power gauge increases more slowly in EX mode. Pressing |
Modes
The game has the following modes:
- Story Mode: The main single-player mode. The player selects any character and fights eight opponents. There are special dialogue scenes before and after the seventh match (with Japanese voice acting), which is a rival battle where the opponent depends on the chosen character, and the eighth match, which is always the final boss Kouryuu. There are eight difficulty levels. The game can be continued an unlimited number of times if the player loses a match; when continuing, the player may optionally accept a bonus to help. There is an extended ending if the player finishes without using a continue. A second player can enter the game at any time by pressing START to start a two-player match.
- Vs Mode: A dedicated two-player mode where players can choose any character, a handicap, and any stage. Players also have the option to "mask" (conceal) their life or power gauges.
- Time Attack Mode: A single-player mode where the player has 90 seconds to try to defeat as many opponents as possible. The player's character has unlimited life, and opponents are fought in a random order. When one opponent is defeated, the next one drops into the battlefield immediately. The faster an opponent is defeated, the less life the next character has. When there are only 30 seconds remaining, the character's life drops and begins to flash, indicating that the player can perform unlimited Super Secret Slashes for the remainder of the bout.
- Training Mode: A practice mode where the player can choose a character and an opponent. Both characters have unlimited life, and there is no time limit. The opponent can be set to stand, crouch, or jump and to be passive, attack, or block, and the power gauge can be set to normal or max.
- Art Gallery: The game includes an artwork gallery with character art.
- Demo Viewer: This mode allows the player to view the opening sequences and the rankings for the Story Mode and the Time Attack Mode (which are saved to a VMU). Additionally, after completing the game with a character, the dialogue scene for the character's rival battle ("Innen Start" and "Innen Win," though not all characters have the latter) and the character's ending are unlocked so they can be viewed at any time. The cutscene preceding the final boss ("Story Demo") is unlocked after completing the game with any character. In the Japanese release of the game, an additional "Memorial Movie" section can be unlocked by completing a game in the hidden Hanafuda mode. This contains all of the cutscenes and endings (including the opening sequence) for the original The Last Blade.
- Hanafuda: This mode is exclusive to the Japanese release of the game and unlocks after completing the game with any character. It is a Hanafuda card game. Completing a game unlocks Hanafuda card artwork in the Art Gallery and the Memorial Movie section in the Demo Viewer.
Characters
Note: Move lists assume that the character is facing right. When facing left, ![]() and
and ![]() should be reversed.
should be reversed.
| S | Any slash button |
| LS | Light slash |
| HS | Hard slash |
| K | Kick |
| TAUNT | Taunt |
| REPEL | Repel |
Playable
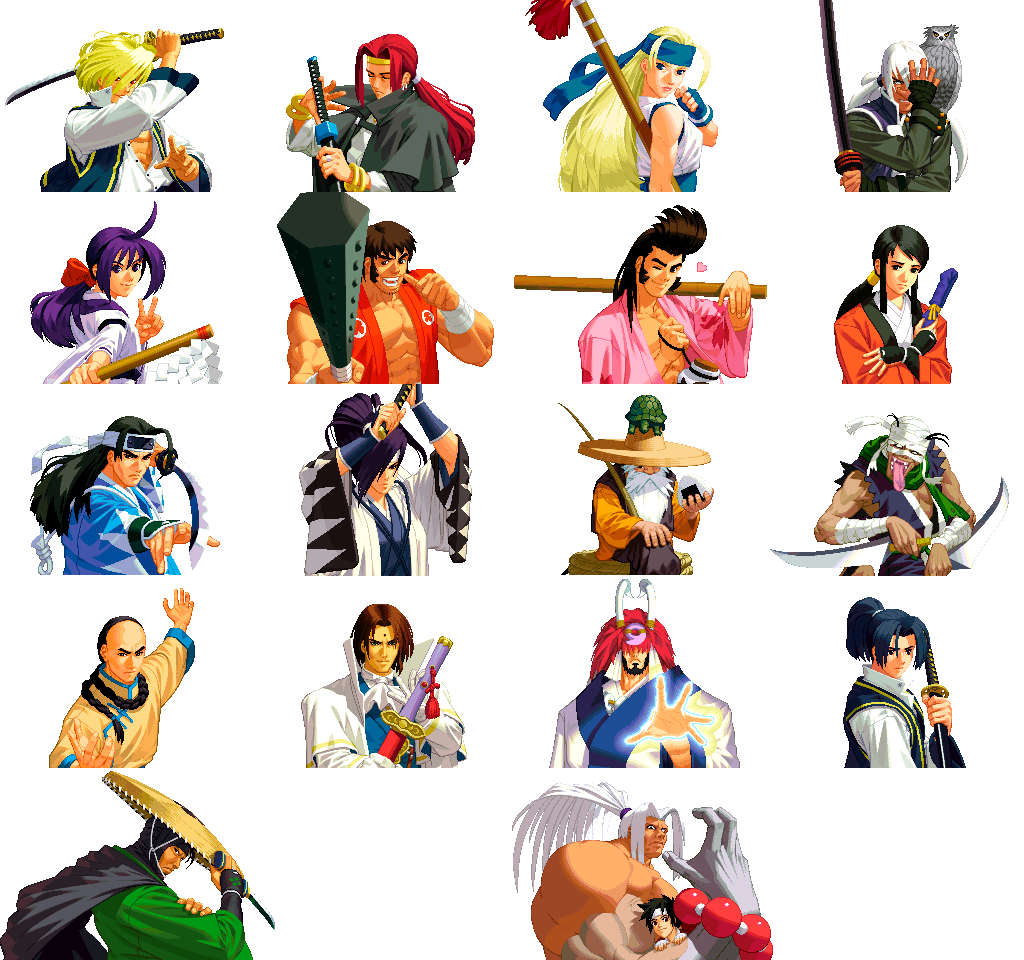
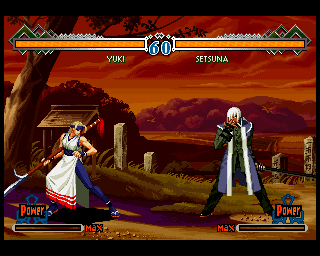
The game introduces three new characters: Setsuna, Hibiki Takane, and Kaori Sanada (in disguise as her brother Kojiroh). Shikyoh returns in a zombified form as Mukuro. The boss of the previous game, Shinnosuke Kagami, is now a normally selectable character.
Musashi Akatsuki is exclusive to the Dreamcast and Neo Geo CD versions of the game. He can only be used in the Vs Mode and the Training Mode.
Bosses
Nickname: Dragon Emperor (和する帝王)
Rival battle: Kaede
|
Kouryuu | |||||||||||||||||||||||||||||||||||
The legendary warrior once known as Gaisei, who trained Kaede, Moriya, and Yuki, was killed by Shinnosuke Kagami after trying to prevent him from removing the seal on Hell's Gate. Though an honorable man in life, he has now been possessed by Kouryuu, the Yellow Dragon, and driven to madness. His sword is infused with four gems representing the powers of Seiryuu (lightning), Suzaku (fire), Byakko (wind), and Genbu (water).
|
Hidden
- Main article: The Last Blade 2: Heart of the Samurai/Hidden content.
In addition to these characters, Kotetsu, the daughter of Shigen Naoe, can be selected using a cheat code. However, she only appears at the beginning of the match before Shigen interrupts and tosses her away, taking her place in the fight.
|
Original Kaede | ||||||||||||||||||||||||||||||||
This is an alternate version of Kaede that represents his form in the first game, before the awakening of Seiryuu within him.
| |||||||||||||||||||||||||||||||||
|
|
Hagure Hitogata | ||||||||||||||||||||||||||||||||
| One of Akari's paper dolls that has become self-aware. He is a shikigami trickster with the ability to shapeshift. He always transforms into his current opponent, making every match with him a mirror match. |
Stages
The stages are always played in the same order in the Story Mode.
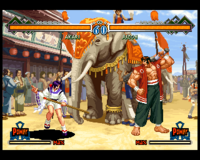
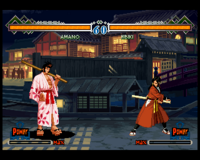
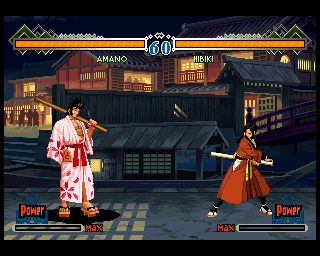
The stage can be manually chosen in the Vs Mode. The Graveyard stage is exclusive to this mode.
History
Legacy
Hibiki Takane would reappear as a playable character in Capcom vs. SNK 2 Millionaire Fighting 2001 in 2001 and as a DLC character in the 2019 reboot of Samurai Shodown. Kaede, Moriya Minakata, Akari Ichijou, and Keiichiro Washizuka appeared in NeoGeo Battle Coliseum in 2005.
Versions
Localised names
| Language | Localised Name | English Translation |
|---|---|---|
| English (US) | The Last Blade 2: Heart of the Samurai | The Last Blade 2: Heart of the Samurai |
| Japanese | 幕末浪漫第二幕 月華の剣士 Final edition | Bakumatsu Rouman Dai Ni Maku: Gekka no Kenshi Final Edition |
Magazine articles
- Main article: The Last Blade 2: Heart of the Samurai/Magazine articles.
Physical scans
| Sega Retro Average | ||||||||||||||||||||||||||||||||||||||||||||||||||||||||||||||||||||||||||||||||||||
|---|---|---|---|---|---|---|---|---|---|---|---|---|---|---|---|---|---|---|---|---|---|---|---|---|---|---|---|---|---|---|---|---|---|---|---|---|---|---|---|---|---|---|---|---|---|---|---|---|---|---|---|---|---|---|---|---|---|---|---|---|---|---|---|---|---|---|---|---|---|---|---|---|---|---|---|---|---|---|---|---|---|---|---|---|
|
| 67 | |
|---|---|
| Based on 16 reviews | |
Compliance
- Main article: The Last Blade 2: Heart of the Samurai/Compliance.
Technical information
- Main article: The Last Blade 2: Heart of the Samurai/Technical information.
External links
- Sega of Japan catalogue pages (Japanese): Dreamcast, Dreamcast (SNK Best Buy)
- Sega.com Asia webpage: Dreamcast
- Sega.com Asia webpage (Chinese): Dreamcast
- Agetec webpage: Dreamcast
References
- ↑ File:TLB2 DC JP Box Back.jpg
- ↑ 2.0 2.1 2.2 http://sega.jp/dc/001213/ (Wayback Machine: 2014-08-05 19:24)
- ↑ https://sega.jp/history/hard/dreamcast/software_l.html#tab01 (Wayback Machine: 2020-02-01 22:57)
- ↑ 4.0 4.1 http://sega.jp/dc/020503/ (Wayback Machine: 2014-08-06 09:25)
- ↑ http://www.gexpress.com/detailedspecs.cfm?returndept=DC&returnpage=1&number=093992057909 (Wayback Machine: 2002-08-18 22:27)
- ↑ https://groups.google.com/g/rec.games.video.sega/c/-Ito88XAWt4/m/jCbD2GDBsh0J
- ↑ 576 Konzol, "Március 2001" (HU; 2001-xx-xx), page 32
- ↑ Dreamcast Magazine, "2000-41 extra (2000-12-29ex)" (JP; 2000-12-15), page 21
- ↑ Dreamcast Magazine, "No. 22" (UK; 2001-05-17), page 74
- ↑ Dorimaga, "2002-18 (2002-10-11)" (JP; 2002-09-27), page 34
- ↑ Edge, "February 2001" (UK; 2001-01-30), page 102
- ↑ Electronic Gaming Monthly, "October 2001" (US; 2001-09-04), page 148
- ↑ Entsiklopediya igr dlya Dreamcast, "Izdaniye chetvertoye, dopolnennoye" (RU; 2002-xx-xx), page 113
- ↑ Famitsu, "2000-12-29" (JP; 2000-12-15), page 33
- ↑ Game Informer, "September 2001" (US; 2001-0x-xx), page 88
- ↑ Gamers' Republic, "March 2001" (US; 2001-xx-xx), page 81
- ↑ MAN!AC, "10/2001" (DE; 2001-09-05), page 55
- ↑ Neo Plus, "Listopad 2001" (PL; 2001-xx-xx), page 53
- ↑ Next Generation, "May 2001" (US; 2001-04-17), page 86
- ↑ Play, "Listopad 2001" (PL; 2001-xx-xx), page 17
- ↑ PSX Extreme, "09/2001" (PL; 2001-0x-xx), page 44
- ↑ Power Unlimited, "Jaargang 09, Nummer 10, Oktober 2001" (NL; 2001-xx-xx), page 62
| The Last Blade 2: Heart of the Samurai | |
|---|---|
|
Main page | Comparisons | Hidden content | Development | Magazine articles | Reception | Compliance | Technical information | Bootlegs
| |
- Dreamcast Arcade Stick-compatible games
- Jump Pack-compatible games
- Visual Memory Unit-compatible games
- 1-2 player games
- JP Dreamcast games
- All JP games
- US Dreamcast games
- All US games
- Dreamcast games
- 2000 Dreamcast games
- All 2000 games
- Dreamcast fighting games
- All fighting games
- Dreamcast games with ADX audio
- Dreamcast games with Sofdec video
- All games
- The Last Blade 2: Heart of the Samurai
