Nightmare Circus
From Sega Retro
Contents
To do
- Learn better wiki code so I can both get sub-stages showing within Levels, and so I can somehow ensure the eventual Abilities section won't be massive by using breakouts/etc.
- Verify stage names with JP fansite, I might have "The Ticket Office" labelled incorrectly. The JP fansite states The Completion is the Staff Roll. Might be amending staff roll onto the end of it, but there's a chance that The Circus' Final Act might be the Jester fight, and The Completion is truly just the staff roll.
- The game autosaves stage clears, defeated bosses, and acquired special abilities. Unlocked abilities (and stages?) are able to be used/played in 1v1 mode.
- Holding A+B+C while resetting the game will restore the Tweaker's settings to default.
- I believe completing the game with the Tweaker activated doesn't count it as "fully-cleared", whatever that means.
- I believe the Tweaker is automatically enabled upon completing a game.
- Sega Channel release window: May 23,1997 - June 5, 1997[1], also a ref for it being a Sega Channel exclusive.
- "From a fan: I just checked the beta version, and the area that's blanked out, in the beta, it puts you on the bottom of the bridge area."
- "From a fan: Nightmare Circus almost seems as if it were programmed in an object-oriented manner or at least in a higher level language using structures. Did you code this in pure 68000, or is it something more like C? It's very impressive you were able to cram so many diverse structures for entities or actors into the small amount of RAM a Mega Drive has."
- Is the Nightmare Circus Sega Channel game guide lost to time?
- Create a section on the cancelled US release in History, and include a picture of it appearing in This Is Sega Test.
- Is the game's soundtrack unfinished too? A few instruments seem misaligned, and more than just in "an unsettling, purposeful kind of way"
- It seems you need to wait about 8 seconds or so after defeating every boss for the level to end. I believe this is a Tweaker-alterable variable, and its just set at 8-10seconds by default.
- The Tweaker is only usable with a 6-button controller for some reason, per the manual.
- Mention the art's excellent use of color and dithering.
- Mention graphical effects and object-based programming.
- Create a Tweaker subpage.
- Create a section about Raven's Native American heritage/I-PSI ability allowing him to enter/interact with the carnival.
- JP fansite keeps using the term "Sea of MP" very specifically, unsure if this is a proper term.
- White Eagle is Raven's "twin brother", per pg. 11 of manual.
- Your HP is C-PSI, and your MP is your I-PSI. Raven can expend MP for HP recovery.
- Enemies also have individual HP and MP, and can recover their HP in the same way.
- Upon defeating an enemy, their soul floats out, which can be grabbed to refill some of Raven's MP meter. Apparently the amount of MP restored is equal to the amount of MP the enemy has left when its killed.
- The goal is to free all the spirits. That explains why most (all?) areas only let you proceed one you've killed every single enemy. But there are also a few areas where enemies will constantly respawn (likely), so not sure how consistent this is.
- JP fansite: "There is an alternative element of "MP Sea" called "I-PSI Reserve" in the game, Unfortunately it doesn't seem to work. In the really small parts, There is a possibility that the development period has ended without being completed." ???
- In his Spirit Warrior form, I believe Raven's MP meter acts in place of his HP meter, and is drained upon damage.
- JP fansite says Raven can spend MP to stop the basic enemies from spawning?
- Bosses have a one-time ability where they borrow MP from Jester to replenish its HP. Jester's face appears behind said boss and laughs maniacally. Raven can ALSO borrow MP from Jester, I believe.
- All stages cannot be exited once entered. Except for the Ticket Office.
- Initial starting values: 2000/2000 HP, 0/1000 MP
- One death means game over, with no continues.
- Defeating a boss expands Raven's MP meter by 1000. With six bosses, that means a max of 7000 MP. HP is capped at 2000.
- Defeating a boss also awards Raven a new ability. But he can only have one ability (active?) at a time. So once you defeat the next boss, the ability gets overwritten and you get a new one, forcing you to use different strategies and to choose the stage order carefully (I believe.)
- When playing in 2P coop mode, all enemy HP is doubled, and two additional (new?) mid-bosses are introduced. If one player dies, they can keep playing, and the game will bring enemy health back down to normal levels (and not spawn the two extra mid-bosses I assume?)
- 2P "competitive mode": One player plays Raven, the other controls the/an on-screen enemy (or gets to spawn an extra enemy? this needs investigating). The first player tries to play the game as normal while the second player tries to mess with/kill the first one. Mode+X or Y or Z selects the enemy type, and Mode+left or right will select between individual enemies in that type.
- Add following unknown codes: LITTLEPUPPET, SPIRITSHADOW, INDIAN SWAMP
HUD
- The interior of crouching red silhouette in the center is HP, and the blue oval background is MP. The sphere being held by the red silhouette lights up when Raven enters Spirit Warrior mode.
- To the left of the center meters is where Raven's special abilities appear. When activated, it lights up (and may drain?)
- To the right of the center meters is where Raven's extra MP bars appear, appearing as a stick figure representing 1000MP. I believe this figure "drains" as the MP is depleted.
- The twelve empty spaces on each side of the HUD are actually six spaces, with two spaces vertically for each enemy. The top is enemy HP, the bottom is enemy MP; each represented by a blue sphere which drains/grows dimmer as it depletes. I believe in-area enemies' values appear in this bar from right to left. What the little white fringes around the HP mean, I have no idea. Maybe it's just decoration, or maybe it highlights the enemy closest to Raven/last attacked? Probably just decoration. Also, I've only seen screenshots with enemies in the left slots, and I don't know if the game ever puts more than 6 enemies on-screen.
Stages
- AMUSEMENTS
- House of Fun
- Hall of Mirrors
- Kaleidoscope
- ROLLER COASTER
- Roller Coaster
- Work Yard
- RIDES
- Twin Wheels
- Wall of Death
- Dodgems Rink
- CIRCUS
- The Ticket Office
- Maggot-Men Act
- Body Snatching Act
- Final Act
Amusements
- The building with the AMUSEMENTS sign.
- Stage 1 - House of Fun: A funhouse-like maze with connecting rooms designed in a three-dimensional space (but with 2D visuals and no room transitions whatsoever.) Raven can turn himself to a new cardinal direction by running to the edge of the screen (or holding up/down?) He can also climb ladders to ascend to a new room, or enter trapdoors to descend a level. I believe you can attack parts of the walls to reveal things or open new passages? There are also enemies attacking Raven during all of this. There may also be different room types with different (movement?) properties? The JP fansite's map shows a few different types, check this.
- Stage 2 - Hall of Mirrors: A long hallway lined with mirrors, where you fight a bunch of mirror images of yourself. Basically a bunch of Dark Links who die easily but constantly come out of the mirrors. The AI looks pretty involved, its likely running off Raven's own Tweaker variables.
- Stage 3 - Kaleidoscope: A psychedelic rotating cylinder thing. Its got some really crazy background art that palette cycles for a trippy effect, really does give off a neon vibe. This room holds a bunch of rotating pillars that seem to be "pushing" the background along. They can be defeated with enough damage, and you have to destroy all of them. But, there's a super Dark Link that seems to be more aggressive and singular: he spawns the easily-defeatable mirror Ravens but himself is treated like a proper boss. Destroy all the pillars, defeat the super Dark Link, wait 8-10 seconds and the level ends.
Roller Coaster
- The rollercoaster on the very left.
- Stage 1 - Roller Coaster: Platforming rollercoaster level, in which you can either run around on foot, or wait for one of passing rollercoaster trains and hop in. Hopping in the train that spawns after standing about 8 seconds at the spawn point will take you to Stage 2 in about fifteen seconds.
- Stage 2 - Work Yard: The workyard, a maintenance area for the rollercoaster trains. There's a train stopper-thing directly in front of spawn which can be pushed to protect Raven from the quickly-thrown sawblades which appear from the left. The stopper has limited durability, and eventually breaks. The source of the sawblades is further to the left, a unique wooden-robot enemy. It's also standing right next to The Carnival's boss. They both attack when you're close enough to either so the intention is likely to fight them both at once - although the robot dies pretty easily. The boss is a big ugly dude with a chainsaw.
Rides
- The ferris wheel.
- Stage 1 - Twin Wheels: A pair of ferris wheels placed beside each other, facing the camera and traveling in opposite directions. Their gondolas can be jumped on and ridden (with limited durability), and taking the upward-turning wheel will take Raven over the top of the wheel, where the game loads a new screen containing the opposite side of the wheels. There's fire at the bottom of the wheels, so you can't stay in place for too long. Really works with the anxious, uneasy feeling the game goes for: you're never safe for too long. As long as you pay attention and switch sides every so often you'll be fine, but that slight tension will always be there. It's also pretty easy to fall off the gondolas too, and there's just enough black emptiness on either side of the wheels to make it a legitimate gameplay hazard and give the wheels a real feeling of height. While keeping Raven from getting too close to the bottom of the wheels, there are also ghostly Roadies which spawn pretty much right on top of the player (a theme in this game.) They're easy to kill but I'm assuming they can knock Raven off the wheels, and they can easily overwhelm players - which I'd imagine is part of the intended challenge. After a certain amount of time (or after all enemies have been killed?), the fire at the bottom of the wheels goes out, and Raven can fall to the bottom. And then unceremoniously walk offscreen to end the stage.
- Stage 2 - Wall of Death: A worn-down spinning carnival ride (where you're pushed to the wall as it spins) constructed with chainlink fence and rotting wood, and populated with crawling skinless dogs. The very far background layer is a dark shot of the actual circus, and this scrolls to simulate the movement of the "ride" rotating. Gameplay-wise, it acts as a turntable to reach different areas. Hitting the switch on one of the ride's metal clown doors stops the spinning and allows Raven to enter. I'm assuming this is some alignment puzzle with different sub-areas, but the available TAS jumps past a lot of this, so this stage definitely needs more research.
- Stage 3 - Dodgems Rink: A decrepit bumper car rink. The art here is pretty nice, sickly but pretty green colors and nice use of dithering, gives the scene an awesome mood. The stage itself is fairly open and straightforward. After fighting some Roadies for a while, the boss - Helter Skelter - just spawns out of nowhere. Like all of the game's bosses, he does some kung-fu. I also assume he has "magic" attacks or can maybe spawn enemies, but again, the available TAS whumps him pretty fast. This boss also needs research.
Circus
- The big top at the very back.
- Stage 1 - The Ticket Office: Raven starts off on the ground in front of a long metal ladder. Climbing it reveals the stage to be an absolutely massive wooden "billboard" featuring some decrepit creepy clown artwork, with multiple walkways across its face. Honestly looks really cool. The billboard is made of numerous door-sized wooden panels, and attacking (spin attacking?) in front of one will destroy that panel. As for the objective, the TAS smacks a bunch of these and about three-fourths through getting them all, the boss spawns from behind one. I believe this means the boss is hidden behind a random panel and you have to smack them all while being attacked by a pair of those folded-legs spike-haired sword-throwing dudes (swamis?) However, you may have to destroy a certain number of panels before the boss spawns, I'm not sure. Basically, if there's a panel in front of a open walkway, you have to destroy it. The boss is Ying Yang Brother, a gymnast? in black spandex, a skull mask, and white boots, wielding a pair of spiked green fans. It moves very fast, flipping and sliding all over. Once defeated, Raven waits another 8 seconds in silence, then it loads the next stage.
- Stage 2 - Maggot-Men Act: The stage begins with Raven strapped to a circular wooden wheel in some dark wooden laboratory for a knife-tossing minigame. Knifes are tossed at Raven from the center of the screen and the objective is to spin the wheel around so that the knives land between his legs or the side of his body. There's a second wheel for the second player as well. Like the rest of the game, there's no warning or context to this. After avoiding enough knives, Raven falls off the wheel and begins the stage proper, no loading or anything. The stage itself is honestly one of the game's most memorable: a wooden laboratory where the level's floors, walls, and ceilings are constructed entirely out of wooden blocks housing a maze of interconnected glass vials. In this maze are a bunch of wriggling grubs crawling to different blocks. Most of the blocks have openings where these grubs can briefly pop out and bite you. The vials aren't always connected consistently, so its not easy to track where the grubs are going. Their AI is pretty smart too. The background layer is a second vial maze connected to the first, meaning you have to keep track of the grubs in the background too. There isn't any safe place to stand still, which is a feeling the game imparts well here. Raven has a cool animation here of his "sidling"? his way up up gaps between platforms. Every movement has to be timed so that Raven doesn't pass by a grub. Once you climb to the top of the stage, there's nothing there - just the top of this huge wooden block stretching on for some time. Running down this block to the right will eventually spawn the boss: Hydra. She's a contortionist/grub-lady wearing green spandex with yellow highlights, in a somewhat out-of-place superhero outfit. Her gimmick is that she can, at any time, hop into the vial maze, where she looks no different than the other grubs. She'll crawl off and appear somewhere else to surprise Raven. Defeat her, wait 8 seconds in silence, and the next stage begins.
- Stage 3 - Body Snatching Act: A trapeze set on the main floor of the big top, and in front of an actual audience. There are clay people? that you have to fight, and they come in a few different varieties: some do trapeze, some walk tightropes, and others juggle. Smack it enough and it curls into a ball for about 8 seconds before it gets up again. I believe doing this enough despawns them for good, with the objective being to trapeze around to them and clear the stage. Raven can also properly trapeze with much of the environment here too. Eventually the boss will spawn, Body Snatcher. He's one of the clay guys but looks vaguely bird/demon like, and can take more punishment. Once defeated, a final enemy appears to begin spawning in the center of the level, but instead just displays its "about to spawn" smoke cloud for again about 8 seconds, then the game cuts to black for the final boss.
- Stage 4 - Final Act: The final boss. Suddenly, the big top has taken on a deep-red tint. The final boss is Diablo, a three horned demon which appears on the game's box art. His gimmick is the ability to morph into the previous bosses while you fight him. He starts in his devil form, then switches to the boss forms as the fight progresses. Unfortunately, again, the available TAS beats him so fast that there's not much known on his strategy now. Smack him enough and he spazzes for a bit, and fire rises from the floor, as if hell is opening up to pull him back in. He gets pulled into the fire, the fire shuts off, Raven waits 8 seconds, and immediate credits.
Abilities (WIP)
| Raven | |||||||||||||||||||||||||||||||||||||||||||||||||||||||||||||||||||||||||||||||||||||||||||||||||||||||||||||||||||||||||||||||||
|---|---|---|---|---|---|---|---|---|---|---|---|---|---|---|---|---|---|---|---|---|---|---|---|---|---|---|---|---|---|---|---|---|---|---|---|---|---|---|---|---|---|---|---|---|---|---|---|---|---|---|---|---|---|---|---|---|---|---|---|---|---|---|---|---|---|---|---|---|---|---|---|---|---|---|---|---|---|---|---|---|---|---|---|---|---|---|---|---|---|---|---|---|---|---|---|---|---|---|---|---|---|---|---|---|---|---|---|---|---|---|---|---|---|---|---|---|---|---|---|---|---|---|---|---|---|---|---|---|---|
DESCRIPTION
|

WHILE CLIMBING LADDERS
- Ladder Kick
- Ladder Punch
- Ladder Slide
WHILE CLIMBING POLES
- Pole Flip
- Pole Kick
- Pole Slide
- Pole Spin
WHILE ON THE WALL OF DEATH
- Wall of Death Kick
- Wall of Death Kick Down
- Wall of Death Punch
- Wall of Death Punch Up
WHILE PLAYING CO-OP
- Co-op Flip
- Co-op Spin
- Co-op Spin Flip
Images to incorporate
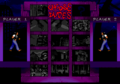
1v1 stage select screen

User:CartridgeCulture learns basic formatting
Nightmare Circus dismystified - Part 1 - https://www.youtube.com/watch?v=sHTfV6e_hXE
Having a lot of trouble with both the proper text link, and the reference for this YouTube video. EDIT: Thank you for this and for fixing that youtube link! CartridgeCulture (talk) 02:01, 20 March 2021 (EDT)
- Template:Ref ... to add your signature (with date and time) to a conversation, add four tildes (~) at the end of each of your replies (in the not too distant past, you just needed to click on an icon at the top of the page to add your signature , but this feature is "broken" and still needs to be fixed) --Asagoth (talk) 00:03, 20 March 2021 (EDT)
Is there a style guide for this wiki? Also is there a list of these special codes that we use for replacing words with other things? ALSO could you assist me in adding an Interviews section to this page, and then adding this into it?: https://segaretro.org/Interview:_Stefano_Arnhold_(2015-11-16)_by_Sega-16 I know there’s a wway to do it all properly and cleanly but I have no idea how to do it. Thanks if you can, appreciate all the help too c;
- Image tagging, Sega Retro templates, Help page... another good way to learn is to see how others do it (just look for a similar page to see how it was edited) ... if you have any more doubts about something just ask our Experts Black Squirrel and SorachiJirachi a.k.a. BSonirachi on Sonic Retro (Wiki Sysops) and Hivebrain (Administrator)... I'll add an interview section to Stefano Arnhold's page for you... and again... don't forget to add your signature at the end of each of your replies...Asagoth (talk) 07:11, 20 March 2021 (EDT)
Some observations...
In the back cover the story is told this way... :
- "The maniac Jester resurrected the El Diablo traveling carnival (it says "parque de diversões" which in Portuguese means "theme park"... a "traveling carnival" would be a "parque de diversões itinerante"... but that's exactly what we have in Nightmare Circus... a traveling carnival) from the flames of hell. Now, terrifying demons roam the carnival, spreading fear and destruction where once there were children and lots of fun.
- Only, Raven a native (American) with mystic and telepathic powers can defeat Jester and his followers in this carnival. Well, "fun" is not the most appropriate word to define this place..."--Asagoth (talk) 22:48, 22 December 2021 (EST)
- Thank you, this is awesome. I wanted text confirmation that Raven was Native American. Also those refs are so cool. I saw the missing photo of the dev team too, so sad :( Maybe if I send enough emails I can find whoever has the original :p 20:51, 23 December 2021 (EST)
Tweaker
- For Tweaker subpage: substubhereThe Tweaker is Nightmare Circus ' user-accessible debug mode, allowing players precise control over everything from hitboxes, gravity, timing, and nearly every single gameplay variable used in the Mega Drive game's object oriented-like programming.
- Scene Selection
- Title Screen
- Options Screen
- 1-on-1 Combat Screen
- The Carnival
- Amusements
- House of Fun
- Entrance Room
- Jack in the Floor
- Active Limit
- Ambush Radius
- Materialization Interval
- Toy Cannon
- Active Limit
- Ambush Radius
- Materialization Interval
- Tumbling Jack
- Active Limit
- Materialization Interval
- Zeppelin
- Active Limit
- Ambush Radius
- Materialization Interval
- See-Saw Room
- X-Amplitude
- Y-Amplitude
- Speed
- Active Limit
- Dude Movement Rate
- Turning Region Radius
- Drop Trapdoor Delay
- Rotten Wood Lifetime
- Active Limit
- Jack in the Floor
- Elevator Room
- Jack in the Floor
- Active Limit
- Ambush Radius
- Materialization Interval
- Toy Cannon
- Active Limit
- Ambush Radius
- Materialization Interval
- Tumbling Jack
- Active Limit
- Materialization Interval
- Zeppelin
- Active Limit
- Ambush Radius
- Materialization Interval
- See-Saw Room
- X-Amplitude
- Y-Amplitude
- Speed
- Active Limit
- Dude Movement Rate
- Turning Region Radius
- Drop Trapdoor Delay
- Rotten Wood Lifetime
- Active Limit
- Jack in the Floor
- Room of Ladders
- Jack in the Floor
- Active Limit
- Ambush Radius
- Materialization Interval
- Toy Cannon
- Active Limit
- Ambush Radius
- Materialization Interval
- Tumbling Jack
- Active Limit
- Materialization Interval
- Zeppelin
- Active Limit
- Ambush Radius
- Materialization Interval
- See-Saw Room
- X-Amplitude
- Y-Amplitude
- Speed
- Active Limit
- Dude Movement Rate
- Turning Region Radius
- Drop Trapdoor Delay
- Rotten Wood Lifetime
- Active Limit
- Jack in the Floor
- Rotating Room
- Jack in the Floor
- Active Limit
- Ambush Radius
- Materialization Interval
- Toy Cannon
- Active Limit
- Ambush Radius
- Materialization Interval
- Tumbling Jack
- Active Limit
- Materialization Interval
- Zeppelin
- Active Limit
- Ambush Radius
- Materialization Interval
- See-Saw Room
- X-Amplitude
- Y-Amplitude
- Speed
- Active Limit
- Dude Movement Rate
- Turning Region Radius
- Drop Trapdoor Delay
- Rotten Wood Lifetime
- Active Limit
- Jack in the Floor
- See-Saw Room
- Jack in the Floor
- Active Limit
- Ambush Radius
- Materialization Interval
- Toy Cannon
- Active Limit
- Ambush Radius
- Materialization Interval
- Tumbling Jack
- Active Limit
- Materialization Interval
- Zeppelin
- Active Limit
- Ambush Radius
- Materialization Interval
- See-Saw Room
- X-Amplitude
- Y-Amplitude
- Speed
- Active Limit
- Dude Movement Rate
- Turning Region Radius
- Drop Trapdoor Delay
- Rotten Wood Lifetime
- Active Limit
- Jack in the Floor
- Bridge
- Jack in the Floor
- Active Limit
- Ambush Radius
- Materialization Interval
- Toy Cannon
- Active Limit
- Ambush Radius
- Materialization Interval
- Tumbling Jack
- Active Limit
- Materialization Interval
- Zeppelin
- Active Limit
- Ambush Radius
- Materialization Interval
- See-Saw Room
- X-Amplitude
- Y-Amplitude
- Speed
- Active Limit
- Dude Movement Rate
- Turning Region Radius
- Drop Trapdoor Delay
- Rotten Wood Lifetime
- Active Limit
- Jack in the Floor
- Entrance Room
- Hall of Mirrors
- Hall of Mirrors I
- Active Limit
- Initial Materialization Delay
- Maximum Materialization Delay
- Materialization Delay Reduction
- Minimum Materialization Delay
- Hall of Mirrors II
- Active Limit
- Initial Materialization Delay
- Maximum Materialization Delay
- Materialization Delay Reduction
- Minimum Materialization Delay
- Hall of Mirrors I
- Kaleidoscope
- Doppelganger
- Initial Materialization Delay
- Ambush Radius
- Mirror Drum
- C-PSI
- Speed
- Damage Factor
- Impact Factor
- Shard
- Active Limit
- Life Time (Lifetime?)
- Damage Factor
- Speed
- Minimum Speed
- Speed Limit
- Cycle Speed
- Exit Delay
- Doppelganger (different?)
- Clone Special Ability
- Active Limit
- Materialization Interval
- Clone Special Ability
- Doppelganger
- House of Fun
- Rides
- Twin Wheels
- Roadie
- Materialization Interval
- Falling Punter
- Materialization Interval
- Random Interval Extension
- I-PSI
- Airspeed Limit
- Damage Factor
- Impact Factor
- Chair Fire
- Probability
- Lifetime
- Damage Factor
- Active Limit
- Initial Speed
- Acceleration
- Speed Limit
- 1 on 1 Combat Speed Limit
- Animation I-PSI Usage Rate
- Fire Heat
- Fire Burn Rate
- Rotten Wood Lifetime
- Roadie
- Wall of Death
- Crawler
- Materialization Interval
- Ambush Radius
- Nasty Crawler
- Materialization Interval
- Ambush Radius
- Active Limit
- Entry Delay
- Music Tempo Change
- Time to Reach Speed Limit
- Gravity Change
- Y/Z Gravity Change
- Maximum Weak-Metal Lifetime
- Speed Limit
- Minimum Weak-Metal Lifetime
- Weak-Metal Collapse Rate
- Animation I-PSI Usage Rate
- Mimimum Speed
- Exit Delay
- Crawler
- Dodgems Rink
- Roadie
- Total Number
- Active Limit
- Materialization Interval
- Ambush Radius
- Helter Skelter
- Ambush Radius
- Dodgem Car
- Animation I-PSI Usage Rate
- Acceleration
- Friction
- Speed Limit
- Brake Speed
- Control Loss Bump Speed
- Impact Damage Factor
- Electric Rail
- Spark Interval
- Damage Factor
- Exit Delay
- Helter Skelter (different?)
- Haste Special Ability: Tornado
- Failure Probability
- I-PSI Usage Limit
- Acceleration
- Friction
- Speed Limit
- Deceleration
- Lifetime
- Haste Special Ability: Tornado
- Roadie
- Twin Wheels
- Roller Coaster
- Roller Coaster
- Roller Coaster Car
- Active Limit
- Materialization Interval
- Initial Speed
- Acceleration
- Friction
- Impact Speed Threshold
- Crash Speed Threshold
- Dematerialization Delay
- Roadie
- Active Limit
- Materialization Interval
- Ambush Radius
- Random Points Change Rate
- Tower Transition Duration
- Pre-winch Delay
- Winch Speed
- Roller Coaster Car
- Work Yard
- Bumper
- C-PSI
- Wheel
- Total Number
- Active Limit
- Materialization Interval
- Maximum Height
- X-Speed
- Y-Speed
- Dematerialization Position
- Damage Factor
- Impact Factor
- Rightmost Trigger Position
- Leftmost Trigger Position
- Wrench
- Total Number
- Active Limit
- Materialization Interval
- Maximum Height
- X-Speed
- Y-Speed
- Dematerialization Position
- Damage Factor
- Impact Factor
- Rightmost Trigger Position
- Leftmost Trigger Position
- Exit Delay
- Chainsaw
- Combat
- Kata
- Travel Speed
- Nails
- Travel Speed
- Kata
- Combat
- Bumper
- Roller Coaster
- Amusements
- The Ticket Office
- Exit Delay
- Ying Yang Brother
- Puppeteering Special Ability
- Puppets per Brother
- Puppeteering Special Ability
- Ying Yang Brother
- Exit Delay
- The Circus
- Body-Snatching Act
- Bar Morph
- Total Number
- Active Limit
- Pole Morph
- Total Number
- Active Limit
- Ring Morph
- Total Number
- Active Limit
- Rope Morph
- Total Number
- Active Limit
- See-Saw Morph
- Total Number
- Active Limit
- Trampoline Morph
- Total Number
- Active Limit
- Coalescence Theshold
- Coalescence Theshold Reduction
- Morph Egg
- Hatch Delay
- Dematerialization Delay
- Fall
- Damage Factor
- Impact Factor
- Roll
- Damage Factor
- Impact Factor
- Bar Morph
- Maggot-Men Act
- Turntable
- Acceleration
- Speed Limit
- Turntable Knife
- Materialization Interval
- Target Change Interval
- Damage Factor
- Maggot-Man
- Total Number
- Aggressiveness
- Fatal Number of Bites
- Hydra
- Initial Materialization Delay
- Turntable
- Final Act (only available once all other stages are cleared)
- The Jester
- Initial Materialization Delay
- Ambush Radius
- Burning Debris
- Initial Materialization Delay
- Materialization Delay Reduction
- Minimum Materialization Delay
- Lower Speed Limit
- Upper Speed Limit
- Fire Burn Rate
- Big Debris
- Probability
- Damage Factor
- Medium Debris
- Probability
- Damage Factor
- Small Debris
- Probability
- Damage Factor
- Fire Burn Rate
- The Jester (different?)
- General
- I-PSI Reserve
- Special Ability
- Animate Special Ability
- Animate Fire Probability
- Haste Special Ability: Tornado
- Acceleration
- Friction
- Speed Limit
- Deceleration
- Lifetime
- Transform Special Ability
- Minimum Transformation Delay
- Maximum Transformation Delay
- I-PSI Usage Rate
- Chainsaw Proportion
- Doppelganger Proportion
- Helter-Skelter Proportion
- Ying Yang Brother Proportion
- Hydra Proportion
- Jester Proportion
- Animate Special Ability
- General
- The Jester
- Body-Snatching Act
- The Completion
- Operational Control
- Tactics Editor
- Tactics Interrupt Time Editor
- Music
- Sound Effects
- Materializations
- Scene Restart
- Player 1
- Vulnerable/Invulnerable
- Corporeal PSI
- Incorporeal PSI
- Incorporeal PSI Capacity
- Special Ability
- Player 2
- Vulnerable/Invulnerable
- Corporeal PSI
- Incorporeal PSI
- Incorporeal PSI Capacity
- Special Ability
- Global Variables
- Raven
- General
- Incarnation Rate
- C-PSI
- Weakness C-PSI Threshold
- I-PSI
- Weakness PSI Threshold
- 1-on-1 Combat C-PSI
- 1-on-1 Combat I-PSI
- Animation I-PSI Usage Rate
- Bodysnatching I-PSI Usage Rate
- Combat
- Power
- Co-op Move Height Radius
- Co-op Move Height Range
- Co-op Move Width Radius
- Co-op Move Width Range
- Air Back Kick
- Air Kick
- Air Punch
- Back Flip
- Back Handspring
- Cartwheel
- Chain Roll
- Clothesline
- Co-op Flip
- Co-op Spin
- Co-op Spin Flip
- Crawling Headbutt
- Crouch Kick
- Crouch Punch
- Donkey Kick
- Double Kick
- Elbow Spin
- Headbutt
- Kick
- Kick Flip
- Knee
- Ladder Kick
- Ladder Punch
- Ladder Slide
- Overhead Stomp
- Piggyback Flip
- Piggyback Handspring
- Pike
- Pivot Pike
- Pivot Stomp
- Pole Flip
- Pole Kick
- Pole Slide
- Pole Spin
- Punch
- Spin
- Standing Overhead Stomp
- Super Upper Cut
- Sweep
- Swing
- Torpedo
- Upper Cut
- Wall of Death Kick
- Wall of Death Kick Down
- Wall of Death Punch
- Wall of Death Punch Up
- Recoil
- Draw-Back Threshold
- Draw-Back Speed
- Fall-Back Threshold
- Fall-Back Speed
- Back-Recovery Speed
- Prone Delay
- Topple-Back Threshold
- Topple-Back Speed
- Hard Landing Torelance
- Landing Topple Torelance
- Landing Run Threshold
- Landing Control Loss Threshold
- Perching Control Loss
- Pivot Control Loss X-Speed
- Pivot Control Loss Y-Speed
- Slide Friction
- Slide Friction Damage Factor
- Wall Impact Tolerance
- Dazed Threshold
- Dazed Duration
- Burning Duration
- Travel
- Travel Backwards Speed
- Push Speed
- Random Travel Duration
- Travel Speed
- Initial Run Speed
- Run Acceleration
- Maximum Run Speed
- Jump Up Y-Speed
- Jump X-Speed
- Jump Y-Speed
- Acceleration
- Air Friction
- Air Speed Limit
- Hand-Walk Speed
- Climb Chimney Speed
- Ladder Climbing Speed
- Pole Climbing Speed
- Wall of Death X-Speed
- Wall of Death Y-Speed
- Special Ability
- Spirit: Spirit Door
- Spirit: Spirit Warrior Projective (Projectile? Also verify if this is listed on the same line as Spirit Warrior)
- Incaration (Incarnation?)
- Animate
- Clone
- Haste: Rush Mode
- Haste: Tornado
- Puppeteering
- Hydrastrength
- Bodysnatch
- General
- White Eagle
- General
- Incarnation Rate
- C-PSI
- Weakness C-PSI Threshold
- I-PSI
- Weakness PSI Threshold
- 1-on-1 Combat C-PSI
- 1-on-1 Combat I-PSI
- Animation I-PSI Usage Rate
- Bodysnatching I-PSI Usage Rate
- Combat
- Power
- Co-op Move Height Radius
- Co-op Move Height Range
- Co-op Move Width Radius
- Co-op Move Width Range
- Air Back Kick
- Air Kick
- Air Punch
- Back Flip
- Back Handspring
- Cartwheel
- Chain Roll
- Clothesline
- Co-op Flip
- Co-op Spin
- Co-op Spin Flip
- Crawling Headbutt
- Crouch Kick
- Crouch Punch
- Donkey Kick
- Double Kick
- Elbow Spin
- Headbutt
- Kick
- Kick Flip
- Knee
- Ladder Kick
- Ladder Punch
- Ladder Slide
- Overhead Stomp
- Piggyback Flip
- Piggyback Handspring
- Pike
- Pivot Pike
- Pivot Stomp
- Pole Flip
- Pole Kick
- Pole Slide
- Pole Spin
- Punch
- Spin
- Standing Overhead Stomp
- Super Upper Cut
- Sweep
- Swing
- Torpedo
- Upper Cut
- Wall of Death Kick
- Wall of Death Kick Down
- Wall of Death Punch
- Wall of Death Punch Up
- Recoil
- Draw-Back Threshold
- Draw-Back Speed
- Fall-Back Threshold
- Fall-Back Speed
- Back-Recovery Speed
- Prone Delay
- Topple-Back Threshold
- Topple-Back Speed
- Hard Landing Torelance
- Landing Topple Torelance
- Landing Run Threshold
- Landing Control Loss Threshold
- Perching Control Loss
- Pivot Control Loss X-Speed
- Pivot Control Loss Y-Speed
- Slide Friction
- Slide Friction Damage Factor
- Wall Impact Tolerance
- Dazed Threshold
- Dazed Duration
- Burning Duration
- Travel
- Travel Backwards Speed
- Push Speed
- Random Travel Duration
- Travel Speed
- Initial Run Speed
- Run Acceleration
- Maximum Run Speed
- Jump Up Y-Speed
- Jump X-Speed
- Jump Y-Speed
- Acceleration
- Air Friction
- Air Speed Limit
- Hand-Walk Speed
- Climb Chimney Speed
- Ladder Climbing Speed
- Pole Climbing Speed
- Wall of Death X-Speed
- Wall of Death Y-Speed
- Special Ability
- Spirit: Spirit Door
- Spirit: Spirit Warrior Projective (Projectile? Also verify if this is listed on the same line as Spirit Warrior)
- Incaration (Incarnation?)
- Animate
- Clone
- Haste: Rush Mode
- Haste: Tornado
- Puppeteering
- Hydrastrength
- Bodysnatch
- General
- Level Difficulty
- Level2 Power Factor
- Level3 Power Factor
- Level4 Power Factor
- Level5 Power Factor
- Level6 Power Factor
- Level7 Power Factor
- 1-on-1 Combat Screen
- Rounds
- Acceleration due to Gravity
- Landing Tolerance
- Impact Damage Factor
- Clear Space Radius
- Close Space Radius
- Incarnation C-PSI Limit
- Jester Loan I-PSI Threshold
- Jester I-PSI Loan Amount
- Boss Dematerialization Duration
- Raven