Difference between revisions of "Night Warriors: Darkstalkers' Revenge"
From Sega Retro
m (→Gameplay: typo) |
(corrections) |
||
| Line 40: | Line 40: | ||
| otherformats={{NonSega|Arcade}} | | otherformats={{NonSega|Arcade}} | ||
| properties={{Properties|SAT|qsound}} | | properties={{Properties|SAT|qsound}} | ||
| + | | savetype={{SaveType | ||
| + | |SAT|internal | ||
| + | }} | ||
}} | }} | ||
'''''{{PAGENAME}}''''', known as '''''Vampire Hunter: Darkstalkers' Revenge''''' (ヴァンパイア ハンター) in Japan, is a versus fighting game released for the [[Sega Saturn]] by [[Capcom]]. It is the second game in the ''[[:Category:Darkstalkers|Darkstalkers]]'' series. It was followed by ''[[Vampire Savior: The Lord of Vampire]]''. | '''''{{PAGENAME}}''''', known as '''''Vampire Hunter: Darkstalkers' Revenge''''' (ヴァンパイア ハンター) in Japan, is a versus fighting game released for the [[Sega Saturn]] by [[Capcom]]. It is the second game in the ''[[:Category:Darkstalkers|Darkstalkers]]'' series. It was followed by ''[[Vampire Savior: The Lord of Vampire]]''. | ||
| Line 47: | Line 50: | ||
==Gameplay== | ==Gameplay== | ||
| − | The game is a fighting game similar to the ''[[:Category:Street Fighter|Street Fighter]]'' series, but it is set in a gothic horror universe with characters based on monsters from folklore. | + | The game is a fighting game similar to the ''[[:Category:Street Fighter|Street Fighter]]'' series, but it is set in a gothic horror universe with characters based on monsters from folklore. The series has been celebrated for its bizarre aesthetics and lively, exaggerated animation, featuring a cast of outlandish characters who often change in size and form while performing their moves. New gameplay features include air blocking, air throws, and chain combos. In each battle, two characters fight to drain each other's vitality gauges. The winner of the best of three rounds wins the match. Each round has a 99-second timer; if time runs out, the fighter with the most life left wins. |
There is a single-player mode where the player chooses any character and fights eight opponents before facing the bosses Huitzil and Pyron. A second player can challenge the first at any point by pressing {{Start}} on a second control pad, with the winner of the match moving on to the next opponent. There are eight different difficulty levels for the computer-controlled combatants. There is also a two-player versus mode where each player can choose any character, a handicap, and any stage. | There is a single-player mode where the player chooses any character and fights eight opponents before facing the bosses Huitzil and Pyron. A second player can challenge the first at any point by pressing {{Start}} on a second control pad, with the winner of the match moving on to the next opponent. There are eight different difficulty levels for the computer-controlled combatants. There is also a two-player versus mode where each player can choose any character, a handicap, and any stage. | ||
| − | Characters move with {{left}} and {{right}} and dash with {{left}} {{left}} and {{right}} {{right}}. They jump upward with {{up}} and jump behind and ahead with {{upleft}} and {{upright}}. They crouch with {{down}}. Punches are done with {{X}} (light), {{Y}} (medium), and {{Z}} (hard) and kicks are done with {{A}} (light), {{B}} (medium), and {{C}} (hard). Light attacks are faster and hard attacks deal more damage. Special moves for each character are done by pairing specific directional combinations with an attack button. ES moves are done by pressing the same directional combinations but holding two attack buttons of the same type (punches or kicks). | + | Characters move with {{left}} and {{right}} and dash with {{left}} {{left}} and {{right}} {{right}}. They jump upward with {{up}} and jump behind and ahead with {{upleft}} and {{upright}}. They crouch with {{down}}. Punches are done with {{X}} (light), {{Y}} (medium), and {{Z}} (hard) and kicks are done with {{A}} (light), {{B}} (medium), and {{C}} (hard). Light attacks are faster and hard attacks deal more damage. Chain combos can be performed by linking attacks from lightest to hardest, canceling the recovery of a normal move by starting another. Special moves for each character are done by pairing specific directional combinations with an attack button. Projectile attacks move slowly through each other, with the stronger projectile dissipating the other (depending on the strength of the attack button used and which was launched first) rather than canceling each other out as in most fighting games (unless they were launched at the same time with the same strength). ES moves are done by pressing the same directional combinations but holding two attack buttons of the same type (punches or kicks). |
Throws and grabs are done by holding the D-Pad toward an opponent and pressing a medium or hard punch or kick button. Different characters have different throws available to them, and most characters can throw in midair. Characters can pursue knocked down opponents by holding {{up}} with the medium or hard kick button simultaneously. Knocked down characters can recover and leap away with {{left}} or {{right}}. | Throws and grabs are done by holding the D-Pad toward an opponent and pressing a medium or hard punch or kick button. Different characters have different throws available to them, and most characters can throw in midair. Characters can pursue knocked down opponents by holding {{up}} with the medium or hard kick button simultaneously. Knocked down characters can recover and leap away with {{left}} or {{right}}. | ||
| Line 57: | Line 60: | ||
Guarding is done by holding the D-Pad away from the opponent and can also be done in midair. Characters can become dizzy from being attacked repeatedly; they are uncontrollable and vulnerable in this state but can recover more quickly by rapidly pressing back and forth on the D-Pad along with the attack buttons. It is also possible to escape grabs in this way. Most characters have one special move, called a guard cancel, that can be performed while guarding to cancel out of the block and immediately counterattack their opponent. | Guarding is done by holding the D-Pad away from the opponent and can also be done in midair. Characters can become dizzy from being attacked repeatedly; they are uncontrollable and vulnerable in this state but can recover more quickly by rapidly pressing back and forth on the D-Pad along with the attack buttons. It is also possible to escape grabs in this way. Most characters have one special move, called a guard cancel, that can be performed while guarding to cancel out of the block and immediately counterattack their opponent. | ||
| − | The game features a Special meter similar to the Super Combo gauge from ''Super Street Fighter II Turbo'', which fills as characters perform regular and special moves. When it is full, characters can perform two types of special moves: ES moves ("enhanced special" moves), which are enhanced versions of their special moves that can typically hit more times, and EX moves ("extra special" moves), which are unique special abilities that are usually more flashy and do more damage. The Special | + | The game features a Special meter similar to the Super Combo gauge from ''Super Street Fighter II Turbo'', which fills as characters perform regular and special moves. When it is full, characters can perform two types of special moves: ES moves ("enhanced special" moves), which are enhanced versions of their special moves that can typically hit more times, and EX moves ("extra special" moves), which are unique special abilities that are usually more flashy and do more damage. Many characters can cancel chain combos into EX moves. The Special meter can have multiple levels, gaining a new level each time it fills, and using an ES or EX move costs a level. The Special meter levels are retained between rounds but not battles. |
| − | Players can choose between Normal and Turbo speed for battles. There are two playing styles that can be selected after choosing a character: Normal and Auto. The character automatically guards against attacks in Auto mode. | + | Players can choose between Normal and Turbo speed for battles. There are two playing styles that can be selected after choosing a character: Normal and Auto. The character automatically guards against a limited number of attacks in Auto mode and automatically performs chain combos when attacking with normal moves. |
===Characters=== | ===Characters=== | ||
| Line 98: | Line 101: | ||
}} | }} | ||
{{MoveListTable | desc=Command throws | | {{MoveListTable | desc=Command throws | | ||
| − | {{MoveListRow | Wild Circular | {{HCB}} | + | {{MoveListRow | Wild Circular | {{HCB}} {{button|text=MK}} or {{button|text=HK}} (close) | Jon grabs his opponent, jumps into the air with them in a ball, and slams them on the ground.}} |
}} | }} | ||
{{MoveListTable | desc=EX moves | | {{MoveListTable | desc=EX moves | | ||
| Line 108: | Line 111: | ||
| title=Victor von Gerdenheim | | title=Victor von Gerdenheim | ||
| sprite={{ScaleX|{{sprite | Night Warriors, Characters.png | crop_width=352 | crop_height=144 | crop_x=704 | crop_y=0}}|currentwidth=352|wantedwidth=320}} | | sprite={{ScaleX|{{sprite | Night Warriors, Characters.png | crop_width=352 | crop_height=144 | crop_x=704 | crop_y=0}}|currentwidth=352|wantedwidth=320}} | ||
| − | | desc=A Frankstein-like monster created by a mad scientist | + | | desc=A Frankstein-like monster from Germany created by a mad scientist named Professor Gerdenheim. |
{{MoveListTable | desc=Special moves | | {{MoveListTable | desc=Special moves | | ||
{{MoveListRow | Giga Hammer | Hold {{left}} for 2 seconds, then {{right}}+{{punch}} | Victor charges forward with an electrified fist.}} | {{MoveListRow | Giga Hammer | Hold {{left}} for 2 seconds, then {{right}}+{{punch}} | Victor charges forward with an electrified fist.}} | ||
| Line 127: | Line 130: | ||
| title=Hsien-Ko (Lei-Lei) | | title=Hsien-Ko (Lei-Lei) | ||
| sprite={{ScaleX|{{sprite | Night Warriors, Characters.png | crop_width=352 | crop_height=144 | crop_x=1056 | crop_y=0}}|currentwidth=352|wantedwidth=320}} | | sprite={{ScaleX|{{sprite | Night Warriors, Characters.png | crop_width=352 | crop_height=144 | crop_x=1056 | crop_y=0}}|currentwidth=352|wantedwidth=320}} | ||
| − | | desc=A jiang shi (reanimated corpse) of a young Chinese girl whose village was attacked by monsters. She and her twin sister Mei-Ling wish to free their mother's soul. | + | | desc=A jiang shi (reanimated corpse) of a young Chinese girl whose village was attacked by monsters. She and her twin sister Mei-Ling, who appears as a talisman on Hsien-Ko's hat, wish to free their mother's soul. |
{{MoveListTable | desc=Special moves | | {{MoveListTable | desc=Special moves | | ||
{{MoveListRow | Anki Hou | {{QCF}} {{punch}} | Hsien-Ko tosses an item in the air. The type of item is randomized (examples are axes, shurikens, or boomerangs), and the arc of travel depends on the button used: {{button|text=LP}} for low and downward, {{button|text=MP}} for high, and {{button|text=HP}} for very high.}} | {{MoveListRow | Anki Hou | {{QCF}} {{punch}} | Hsien-Ko tosses an item in the air. The type of item is randomized (examples are axes, shurikens, or boomerangs), and the arc of travel depends on the button used: {{button|text=LP}} for low and downward, {{button|text=MP}} for high, and {{button|text=HP}} for very high.}} | ||
| Line 153: | Line 156: | ||
{{MoveListRow | Death Hurricane<br>''(guard counter)'' | {{QCB}} {{kick}} | Lord Raptor spins his body like a top diagonally upward. This move can be performed in midair.}} | {{MoveListRow | Death Hurricane<br>''(guard counter)'' | {{QCB}} {{kick}} | Lord Raptor spins his body like a top diagonally upward. This move can be performed in midair.}} | ||
{{MoveListRow | Skull Sting | {{down}} {{up}} {{kick}} | Lord Raptor jumps in the air, then dives down with a sawblade on his leg. This move can be performed in midair.}} | {{MoveListRow | Skull Sting | {{down}} {{up}} {{kick}} | Lord Raptor jumps in the air, then dives down with a sawblade on his leg. This move can be performed in midair.}} | ||
| − | {{MoveListRow | Hell's Gate | {{HCF}} {{kick}} | Le Malta pops out of the ground and swallows Lord Raptor, then spits him out somewhere depending on the button used: {{button|text= | + | {{MoveListRow | Hell's Gate | {{HCF}} {{kick}} | Le Malta pops out of the ground and swallows Lord Raptor, then spits him out somewhere depending on the button used: {{button|text=LK}} spits him out in the same location, {{button|text=MK}} spits him out a half-screen away, and {{button|text=HK}} spits him out a full screen away.}} |
}} | }} | ||
{{MoveListTable | desc=Command normals | | {{MoveListTable | desc=Command normals | | ||
| Line 159: | Line 162: | ||
{{MoveListRow | Air Walk | {{left}} {{left}} or {{right}} {{right}} in midair | Lord Raptor can walk in midair. His walk lasts about half the screen length unless interrupted by attacking or being hit.}} | {{MoveListRow | Air Walk | {{left}} {{left}} or {{right}} {{right}} in midair | Lord Raptor can walk in midair. His walk lasts about half the screen length unless interrupted by attacking or being hit.}} | ||
{{MoveListRow | Alternate Attacks | {{right}}+{{punch}} or {{kick}} | All of Lord Raptor's standing punches and kicks have alternate forms with longer reach when combined with {{right}}.}} | {{MoveListRow | Alternate Attacks | {{right}}+{{punch}} or {{kick}} | All of Lord Raptor's standing punches and kicks have alternate forms with longer reach when combined with {{right}}.}} | ||
| − | {{MoveListRow | Aerial Punches | {{down}}+{{punch}} in midair | Lord Raptor downward.}} | + | {{MoveListRow | Aerial Punches | {{down}}+{{punch}} in midair | Lord Raptor punches downward.}} |
{{MoveListRow | Loudness Screw | {{down}}+{{kick}} in midair | Lord Raptor glides downward while spinning his body like a drill.}} | {{MoveListRow | Loudness Screw | {{down}}+{{kick}} in midair | Lord Raptor glides downward while spinning his body like a drill.}} | ||
}} | }} | ||
| Line 187: | Line 190: | ||
}} | }} | ||
{{MoveListTable | desc=EX moves | | {{MoveListTable | desc=EX moves | | ||
| − | {{MoveListRow | Darkness Illusion | {{button|text=LP}} {{button|text=LP}} {{right}} {{button|text=LK}} {{button|text=HP}} (half screen away or closer) | Morrigan transforms her wings into a jetpack and flies toward her opponent, then performs a series of attacks.}} | + | {{MoveListRow | Darkness Illusion | {{button|text=LP}} {{button|text=LP}} {{right}} {{button|text=LK}} {{button|text=HP}} (half screen away or closer) | Morrigan transforms her wings into a jetpack and flies toward her opponent, then performs a series of attacks with a duplicate of herself. This move can be performed in midair.}} |
| − | {{MoveListRow | Valkyrie Turn | {{HCB}} + two {{kick}} simultaneously, then {{punch}} or {{kick}} | Morrigan flies off the screen, then flies back in. If the player presses {{punch}} or {{kick}}, she attacks with her Shell Kick move.}} | + | {{MoveListRow | Valkyrie Turn | {{HCB}} + two {{kick}} simultaneously, then {{punch}} or {{kick}} | Morrigan flies off the screen, then flies back in. If the player presses {{punch}} or {{kick}}, she attacks with her Shell Kick move. This move can be performed in midair.}} |
| − | {{MoveListRow | Astral Vision | {{button|text=LP}} {{button|text=LP}} {{right}} {{button|text=MP}} {{button|text=HP}} | A double of Morrigan appears on the other side of the screen and mirrors her moves.}} | + | {{MoveListRow | Astral Vision | {{button|text=LP}} {{button|text=LP}} {{right}} {{button|text=MP}} {{button|text=HP}} | A double of Morrigan appears on the other side of the screen and mirrors her moves. This move can be performed in midair.}} |
}} | }} | ||
}} | }} | ||
| Line 198: | Line 201: | ||
{{MoveListTable | desc=Special moves | | {{MoveListTable | desc=Special moves | | ||
{{MoveListRow | Hitsugi no Mai | {{punch}} and {{kick}} of the same strength | Anakaris drops a sarcophagus on his opponent. Stronger buttons drop the sarcophagus further away from him. This move can be performed in midair.}} | {{MoveListRow | Hitsugi no Mai | {{punch}} and {{kick}} of the same strength | Anakaris drops a sarcophagus on his opponent. Stronger buttons drop the sarcophagus further away from him. This move can be performed in midair.}} | ||
| − | {{MoveListRow | Ouke no Sabaki | {{QCF}} {{punch}} in midair | Anakaris blows out ghosts that | + | {{MoveListRow | Ouke no Sabaki | {{QCF}} {{punch}} in midair | Anakaris blows out ghosts that curse his opponent, temporarily transforming them into a helpless version of themselves.}} |
{{MoveListRow | Kotodama Gaeshi (inhale) | {{QCB}} {{kick}} | Anakaris swallows a projectile with his body. This move can be performed in midair.}} | {{MoveListRow | Kotodama Gaeshi (inhale) | {{QCB}} {{kick}} | Anakaris swallows a projectile with his body. This move can be performed in midair.}} | ||
{{MoveListRow | Kotodama Gaeshi (exhale) | {{QCF}} {{kick}} | Anakaris launches a projectile after swallowing it. This move can be performed in midair.}} | {{MoveListRow | Kotodama Gaeshi (exhale) | {{QCF}} {{kick}} | Anakaris launches a projectile after swallowing it. This move can be performed in midair.}} | ||
| + | {{MoveListRow | Cobra Blow | {{left}} {{right}} {{punch}} | Anakaris turns his arms into a long cobra and punches with them.}} | ||
}} | }} | ||
{{MoveListTable | desc=Command normals | | {{MoveListTable | desc=Command normals | | ||
| Line 208: | Line 212: | ||
{{MoveListRow | Seinaru Bohi | {{down}}+{{kick}} during diagonal jump | Anakaris transforms the bottom of his body into a pyramid and drops to the ground.}} | {{MoveListRow | Seinaru Bohi | {{down}}+{{kick}} during diagonal jump | Anakaris transforms the bottom of his body into a pyramid and drops to the ground.}} | ||
{{MoveListRow | Ooinaru Bohi | {{downright}}+{{kick}} during diagonal jump | Anakaris transforms the bottom of his body into a pyramid and dives diagonally down.}} | {{MoveListRow | Ooinaru Bohi | {{downright}}+{{kick}} during diagonal jump | Anakaris transforms the bottom of his body into a pyramid and dives diagonally down.}} | ||
| − | |||
}} | }} | ||
{{MoveListTable | desc=Command throws | | {{MoveListTable | desc=Command throws | | ||
| Line 216: | Line 219: | ||
{{MoveListRow | Naraku Ana | {{HCF}} + two {{kick}} simultaneously | Anakaris drops his opponent through a hole in the ground, causing them to fall back down from the top of the screen.}} | {{MoveListRow | Naraku Ana | {{HCF}} + two {{kick}} simultaneously | Anakaris drops his opponent through a hole in the ground, causing them to fall back down from the top of the screen.}} | ||
{{MoveListRow | Pharaoh Magic | {{button|text=MK}} {{button|text=LP}} {{down}} {{button|text=LK}} {{button|text=MP}} | Anakaris curses his opponent, freezing them, then drops a giant sarcophagus on them.}} | {{MoveListRow | Pharaoh Magic | {{button|text=MK}} {{button|text=LP}} {{down}} {{button|text=LK}} {{button|text=MP}} | Anakaris curses his opponent, freezing them, then drops a giant sarcophagus on them.}} | ||
| − | {{MoveListRow | Pharoah Split | {{button|text=LP}} {{button|text=LP}} {{down}} {{button|text=MK}} {{button|text=HK}} | Anakaris separates his waist and legs from the rest of his body, which can both be controlled to attack his opponent.}} | + | {{MoveListRow | Pharoah Split | {{button|text=LP}} {{button|text=LP}} {{down}} {{button|text=MK}} {{button|text=HK}} | Anakaris separates his waist and legs from the rest of his body, which can both be controlled to attack his opponent (with {{punch}} attacking with the top half and {{kick}} attacking with the bottom half).}} |
}} | }} | ||
}} | }} | ||
| Line 227: | Line 230: | ||
{{MoveListRow | Rolling Scratch | {{QCB}} {{punch}} | Felicia rolls into a ball and bounces on the ground while moving forward. If she lands on her opponent from above, she can follow up this move with scratches by pressing {{punch}}.}} | {{MoveListRow | Rolling Scratch | {{QCB}} {{punch}} | Felicia rolls into a ball and bounces on the ground while moving forward. If she lands on her opponent from above, she can follow up this move with scratches by pressing {{punch}}.}} | ||
{{MoveListRow | Sand Splash | {{QCF}} {{kick}} | Felicia kicks dirt off the ground at her opponent.}} | {{MoveListRow | Sand Splash | {{QCF}} {{kick}} | Felicia kicks dirt off the ground at her opponent.}} | ||
| − | {{MoveListRow | Delta Kick<br>''(guard counter)'' | {{RDP}} {{kick}} | Felicia jumps into the air, then dives diagonally downward with her clawed foot first.}} | + | {{MoveListRow | Delta Kick<br>''(guard counter)'' | {{RDP}} {{kick}} | Felicia jumps into the air, attacking with her knee, then dives diagonally downward with her clawed foot first.}} |
| + | }} | ||
| + | {{MoveListTable | desc=Command normals | | ||
| + | {{MoveListRow | Wall Jump | Hold {{right}} when jumping onto the edge of the screen | Felicia can jump off the side of the screen.}} | ||
| + | {{MoveListRow | EX Charge | {{down}} {{down}} + two {{kick}} simultaneously | Felicia increases her Special meter for as long as the {{kick}} buttons are held, though she is vulnerable to attack while doing this.}} | ||
}} | }} | ||
{{MoveListTable | desc=Command throws | | {{MoveListTable | desc=Command throws | | ||
| Line 234: | Line 241: | ||
{{MoveListTable | desc=EX moves | | {{MoveListTable | desc=EX moves | | ||
{{MoveListRow | Dancing Flash | {{DPF}} + two {{punch}} simultaneously | Felicia rolls forward and then pummels her opponent with a series of slashes and kicks.}} | {{MoveListRow | Dancing Flash | {{DPF}} + two {{punch}} simultaneously | Felicia rolls forward and then pummels her opponent with a series of slashes and kicks.}} | ||
| − | {{MoveListRow | Please Help Me! | {{HCF}} + two {{kick}} simultaneously (half screen away or closer) | Felicia cries for help, and a group of other | + | {{MoveListRow | Please Help Me! | {{HCF}} + two {{kick}} simultaneously (half screen away or closer) | Felicia cries for help, and a group of other catwomen pounce her opponent.}} |
}} | }} | ||
}} | }} | ||
| Line 245: | Line 252: | ||
{{MoveListRow | Karame Dama | {{up}} {{upright}} {{right}} {{punch}} in midair | Bishamon swings his sword and shoots a fireball diagonally downward while airborne.}} | {{MoveListRow | Karame Dama | {{up}} {{upright}} {{right}} {{punch}} in midair | Bishamon swings his sword and shoots a fireball diagonally downward while airborne.}} | ||
{{MoveListRow | Hane Ha | {{HCF}} {{punch}} | Bishamon throws his sword at his opponent, which then returns to him. While the sword is in his opponent, he can pull both the sword and the opponent towards him with {{left}}+{{punch}} or he can dash forward, pull the sword out, and dash back with {{QCF}} {{punch}}.}} | {{MoveListRow | Hane Ha | {{HCF}} {{punch}} | Bishamon throws his sword at his opponent, which then returns to him. While the sword is in his opponent, he can pull both the sword and the opponent towards him with {{left}}+{{punch}} or he can dash forward, pull the sword out, and dash back with {{QCF}} {{punch}}.}} | ||
| − | {{MoveListRow | Kaeshi Ha | {{left}}+{{punch}} | After performing the Hane Ha, while the sword is in his opponent, Bishamon can pull both the sword and the opponent back towards him with {{left}}+{{punch}} or he can dash forward, pull the sword out, and dash back with {{QCF}} {{punch}}.}} | + | {{MoveListRow | Kaeshi Ha | {{left}}+{{punch}} after Hane Ha | After performing the Hane Ha, while the sword is in his opponent, Bishamon can pull both the sword and the opponent back towards him with {{left}}+{{punch}} or he can dash forward, pull the sword out, and dash back with {{QCF}} {{punch}}.}} |
| − | {{MoveListRow | Tsuji Hayate | {{QCF}} {{punch}} | After performing the Hane Ha, while the sword is in his opponent, Bishamon can dash forward, pull the sword out, and dash back | + | {{MoveListRow | Tsuji Hayate | {{QCF}} {{punch}} after Hane Ha | After performing the Hane Ha, while the sword is in his opponent, Bishamon can dash forward, pull the sword out, and dash back.}} |
| − | {{MoveListRow | Kien Zan<br>''(guard counter)'' | {{DPF}} {{punch}} | + | {{MoveListRow | Kien Zan<br>''(guard counter)'' | {{DPF}} {{punch}} while blocking | Bishamon jumps high while uppercutting with his sword. This move can only be performed as a reversal or after performing the Kaeshi Ha.}} |
}} | }} | ||
{{MoveListTable | desc=Command normals | | {{MoveListTable | desc=Command normals | | ||
| Line 268: | Line 275: | ||
{{MoveListRow | Poison Breath | {{QCF}} {{kick}} | Rikuo releases a poison gas, which does a light amount of damage but momentarily stuns his opponent.}} | {{MoveListRow | Poison Breath | {{QCF}} {{kick}} | Rikuo releases a poison gas, which does a light amount of damage but momentarily stuns his opponent.}} | ||
{{MoveListRow | Screw Shot | {{left}} {{right}} {{punch}} | Rikuo shoots himself at his opponent like a torpedo.}} | {{MoveListRow | Screw Shot | {{left}} {{right}} {{punch}} | Rikuo shoots himself at his opponent like a torpedo.}} | ||
| + | {{MoveListRow | Trick Fish | {{left}} {{left}} {{kick}} | Rikuo jumps diagonally into the air feet first from a retreating dash.}} | ||
}} | }} | ||
{{MoveListTable | desc=Command normals | | {{MoveListTable | desc=Command normals | | ||
| − | {{MoveListRow | Spinning Current | | + | {{MoveListRow | Spinning Current | {{button|text=HP}} while dashing | Rikuo turns into a giant shell and drills his opponent while dashing.}} |
| − | |||
}} | }} | ||
{{MoveListTable | desc=Command throws | | {{MoveListTable | desc=Command throws | | ||
| Line 281: | Line 288: | ||
{{MoveListRow | Sea Rage | {{HCF}} + two {{punch}} simultaneously | Rikuo calls forth a flood.}} | {{MoveListRow | Sea Rage | {{HCF}} + two {{punch}} simultaneously | Rikuo calls forth a flood.}} | ||
{{MoveListRow | Water Jail | {{DPF}} + two {{punch}} simultaneously | Rikuo creates a giant bubble that can capture his opponent.}} | {{MoveListRow | Water Jail | {{DPF}} + two {{punch}} simultaneously | Rikuo creates a giant bubble that can capture his opponent.}} | ||
| + | {{MoveListRow | Direct Scissors | {{down}} {{down}} + two {{punch}} simultaneously (close) | Rikuo crouches and pinches with his arms, which become lobster claws. This move can only be performed if Rikuo is selected using his original color (green, selected with {{button|text=HK}}).}} | ||
}} | }} | ||
}} | }} | ||
| Line 288: | Line 296: | ||
| desc=A dhamphir (a cross between a vampire and a human) of unknown origin who watches over a young and emotionless girl named Anita. | | desc=A dhamphir (a cross between a vampire and a human) of unknown origin who watches over a young and emotionless girl named Anita. | ||
{{MoveListTable | desc=Special moves | | {{MoveListTable | desc=Special moves | | ||
| − | {{MoveListRow | Killshread | {{punch}} and {{kick}} of the same strength | Donovan plants his sword into the ground | + | {{MoveListRow | Killshread | {{punch}} and {{kick}} of the same strength | Donovan plants his sword into the ground. While the sword is planted, he can summon it back to him by again pressing a {{punch}} and {{kick}} of the same strength (which can be done in midair), causing it to attack opponents on the ground as it returns. Donovan's standing normal punches are changed and he cannot perform any moves that use his sword until he summons it back to him.}} |
{{MoveListRow | Ifrit Sword<br>''(guard counter)'' | {{DPF}} {{punch}} | Donovan summons a fire spirit, which slashes a fiery sword upward.}} | {{MoveListRow | Ifrit Sword<br>''(guard counter)'' | {{DPF}} {{punch}} | Donovan summons a fire spirit, which slashes a fiery sword upward.}} | ||
{{MoveListRow | Blizzard Sword | {{HCF}} {{punch}} | Donovan summons an ice spirit, which tosses a large snowflake downward.}} | {{MoveListRow | Blizzard Sword | {{HCF}} {{punch}} | Donovan summons an ice spirit, which tosses a large snowflake downward.}} | ||
| Line 331: | Line 339: | ||
{{MoveListTable | desc=Special moves | | {{MoveListTable | desc=Special moves | | ||
{{MoveListRow | Plasma Beam | {{QCF}} {{punch}} | Huitzil shoots a laser beam. The angle of the beam depends on the button used: {{button|text=LP}} for a crouching beam forward, {{button|text=MP}} for a standing beam forward, and {{button|text=HP}} for a beam straight above.}} | {{MoveListRow | Plasma Beam | {{QCF}} {{punch}} | Huitzil shoots a laser beam. The angle of the beam depends on the button used: {{button|text=LP}} for a crouching beam forward, {{button|text=MP}} for a standing beam forward, and {{button|text=HP}} for a beam straight above.}} | ||
| − | {{MoveListRow | Might Launcher | {{QCF}} {{kick}} | Huitzil shoots a rocket across the screen.}} | + | {{MoveListRow | Might Launcher | {{QCF}} {{kick}} | Huitzil shoots a rocket across the screen, which knocks over opponents. This move can be performed in midair.}} |
{{MoveListRow | Genocide Vulcan | {{RDP}} {{punch}} | Huitzil raises its arm (which can harm nearby opponents) and shoots a laser diagonally into the air.}} | {{MoveListRow | Genocide Vulcan | {{RDP}} {{punch}} | Huitzil raises its arm (which can harm nearby opponents) and shoots a laser diagonally into the air.}} | ||
| − | {{MoveListRow | Reflect Wall<br>''(guard counter)'' | {{DPF}} {{punch}} while blocking | Huitzil generates a barrier to shield him, then pushes it (and the opponent with it) away from him.}} | + | {{MoveListRow | Reflect Wall<br>''(guard counter)'' | {{DPF}} {{punch}} while blocking | Huitzil generates a barrier to shield him, then pushes it (and the opponent with it) away from him. This move can be performed in midair.}} |
}} | }} | ||
{{MoveListTable | desc=Command normals | | {{MoveListTable | desc=Command normals | | ||
{{MoveListRow | Crouch Walk | {{downleft}} or {{downright}} | Huitzil can walk while crouched.}} | {{MoveListRow | Crouch Walk | {{downleft}} or {{downright}} | Huitzil can walk while crouched.}} | ||
| − | {{MoveListRow | Hover | {{upleft}}, {{up}}, or {{upright}} | Huitzil hovers in the air for a duration instead of jumping.}} | + | {{MoveListRow | Hover | {{upleft}}, {{up}}, or {{upright}} in midair | Huitzil hovers in the air for a duration instead of jumping.}} |
{{MoveListRow | Air Dash | {{left}} {{left}} or {{right}} {{right}} in midair | Huitzil moves horizontally in midair.}} | {{MoveListRow | Air Dash | {{left}} {{left}} or {{right}} {{right}} in midair | Huitzil moves horizontally in midair.}} | ||
}} | }} | ||
{{MoveListTable | desc=Command throws | | {{MoveListTable | desc=Command throws | | ||
| − | {{MoveListRow | Circuit Scrapper | {{HCB}} {{button|text=MP}} or {{button|text=HP}} (close) | Huitzil throws its opponent high into the air.}} | + | {{MoveListRow | Circuit Scrapper | {{HCB}} {{button|text=MP}} or {{button|text=HP}} (close) | Huitzil throws its opponent high into the air with giant magnets.}} |
}} | }} | ||
{{MoveListTable | desc=EX moves | | {{MoveListTable | desc=EX moves | | ||
| Line 361: | Line 369: | ||
}} | }} | ||
{{MoveListTable | desc=Command normals | | {{MoveListTable | desc=Command normals | | ||
| − | {{MoveListRow | Rushing Punch | {{right}}+{{ | + | {{MoveListRow | Rushing Punch | {{right}}+{{punch}} | Pyron punches forward while moving.}} |
| − | {{MoveListRow | Diving Punch | {{ | + | {{MoveListRow | Diving Punch | {{down}}+{{punch}} in midair | Pyron punches while diving diagonally downward.}} |
}} | }} | ||
{{MoveListTable | desc=Command throws | | {{MoveListTable | desc=Command throws | | ||
| Line 368: | Line 376: | ||
}} | }} | ||
{{MoveListTable | desc=EX moves | | {{MoveListTable | desc=EX moves | | ||
| − | {{MoveListRow | Cosmo Disruption | {{HCF}} + two {{punch}} or {{kick}} simultaneously | Pyron fires a series of pyrotechnics.}} | + | {{MoveListRow | Cosmo Disruption | {{HCF}} + two {{punch}} or {{kick}} simultaneously | Pyron fires a series of pyrotechnics. The attack can be charged before starting by holding {{punch}} or {{kick}} for longer, which increases the damage dealt.}} |
}} | }} | ||
}} | }} | ||
Revision as of 05:38, 9 July 2023
| ||||||||||||||||||||||||||||||||||||||||
| Night Warriors: Darkstalkers' Revenge | ||||||||||||||||||||||||||||||||||||||||
|---|---|---|---|---|---|---|---|---|---|---|---|---|---|---|---|---|---|---|---|---|---|---|---|---|---|---|---|---|---|---|---|---|---|---|---|---|---|---|---|---|
| System(s): Sega Saturn | ||||||||||||||||||||||||||||||||||||||||
| Publisher: Capcom (Japan, US), Virgin Interactive Entertainment (Europe) | ||||||||||||||||||||||||||||||||||||||||
| Developer: Capcom | ||||||||||||||||||||||||||||||||||||||||
| Original system(s): Capcom CPS-2 | ||||||||||||||||||||||||||||||||||||||||
| Sound driver: SCSP (1 track) | ||||||||||||||||||||||||||||||||||||||||
| Genre: Action[1][2] | ||||||||||||||||||||||||||||||||||||||||
| Number of players: 1-2 | ||||||||||||||||||||||||||||||||||||||||
| ||||||||||||||||||||||||||||||||||||||||
|


Night Warriors: Darkstalkers' Revenge, known as Vampire Hunter: Darkstalkers' Revenge (ヴァンパイア ハンター) in Japan, is a versus fighting game released for the Sega Saturn by Capcom. It is the second game in the Darkstalkers series. It was followed by Vampire Savior: The Lord of Vampire.
Contents
Story
The powerful alien demon Pyron invades Earth to add to his collection of planets that he has devoured. The world's most fearsome monsters are the last defense of mankind.
Gameplay
The game is a fighting game similar to the Street Fighter series, but it is set in a gothic horror universe with characters based on monsters from folklore. The series has been celebrated for its bizarre aesthetics and lively, exaggerated animation, featuring a cast of outlandish characters who often change in size and form while performing their moves. New gameplay features include air blocking, air throws, and chain combos. In each battle, two characters fight to drain each other's vitality gauges. The winner of the best of three rounds wins the match. Each round has a 99-second timer; if time runs out, the fighter with the most life left wins.
There is a single-player mode where the player chooses any character and fights eight opponents before facing the bosses Huitzil and Pyron. A second player can challenge the first at any point by pressing START on a second control pad, with the winner of the match moving on to the next opponent. There are eight different difficulty levels for the computer-controlled combatants. There is also a two-player versus mode where each player can choose any character, a handicap, and any stage.
Characters move with ![]() and
and ![]() and dash with
and dash with ![]()
![]() and
and ![]()
![]() . They jump upward with
. They jump upward with ![]() and jump behind and ahead with
and jump behind and ahead with ![]() and
and ![]() . They crouch with
. They crouch with ![]() . Punches are done with
. Punches are done with ![]() (light),
(light), ![]() (medium), and
(medium), and ![]() (hard) and kicks are done with
(hard) and kicks are done with ![]() (light),
(light), ![]() (medium), and
(medium), and ![]() (hard). Light attacks are faster and hard attacks deal more damage. Chain combos can be performed by linking attacks from lightest to hardest, canceling the recovery of a normal move by starting another. Special moves for each character are done by pairing specific directional combinations with an attack button. Projectile attacks move slowly through each other, with the stronger projectile dissipating the other (depending on the strength of the attack button used and which was launched first) rather than canceling each other out as in most fighting games (unless they were launched at the same time with the same strength). ES moves are done by pressing the same directional combinations but holding two attack buttons of the same type (punches or kicks).
(hard). Light attacks are faster and hard attacks deal more damage. Chain combos can be performed by linking attacks from lightest to hardest, canceling the recovery of a normal move by starting another. Special moves for each character are done by pairing specific directional combinations with an attack button. Projectile attacks move slowly through each other, with the stronger projectile dissipating the other (depending on the strength of the attack button used and which was launched first) rather than canceling each other out as in most fighting games (unless they were launched at the same time with the same strength). ES moves are done by pressing the same directional combinations but holding two attack buttons of the same type (punches or kicks).
Throws and grabs are done by holding the D-Pad toward an opponent and pressing a medium or hard punch or kick button. Different characters have different throws available to them, and most characters can throw in midair. Characters can pursue knocked down opponents by holding ![]() with the medium or hard kick button simultaneously. Knocked down characters can recover and leap away with
with the medium or hard kick button simultaneously. Knocked down characters can recover and leap away with ![]() or
or ![]() .
.
Guarding is done by holding the D-Pad away from the opponent and can also be done in midair. Characters can become dizzy from being attacked repeatedly; they are uncontrollable and vulnerable in this state but can recover more quickly by rapidly pressing back and forth on the D-Pad along with the attack buttons. It is also possible to escape grabs in this way. Most characters have one special move, called a guard cancel, that can be performed while guarding to cancel out of the block and immediately counterattack their opponent.
The game features a Special meter similar to the Super Combo gauge from Super Street Fighter II Turbo, which fills as characters perform regular and special moves. When it is full, characters can perform two types of special moves: ES moves ("enhanced special" moves), which are enhanced versions of their special moves that can typically hit more times, and EX moves ("extra special" moves), which are unique special abilities that are usually more flashy and do more damage. Many characters can cancel chain combos into EX moves. The Special meter can have multiple levels, gaining a new level each time it fills, and using an ES or EX move costs a level. The Special meter levels are retained between rounds but not battles.
Players can choose between Normal and Turbo speed for battles. There are two playing styles that can be selected after choosing a character: Normal and Auto. The character automatically guards against a limited number of attacks in Auto mode and automatically performs chain combos when attacking with normal moves.
Characters
Move lists assume the player is facing right. If facing left, ![]() and
and ![]() should be reversed. P refers to any of the punch buttons, while K refers to any of the kick buttons.
should be reversed. P refers to any of the punch buttons, while K refers to any of the kick buttons.
All special moves can be performed as ES moves if two P or K buttons are used instead of one, with the exception of teleports and command throws.
Donovan Baine and Hsien-Ko are new characters. Huitzil and Pyron, the two bosses from the first game, are now playable. Anakaris is the only character without a guard counter or any throws.
| Demitri Maximoff | ||||||||||||||||||||||||||||||||||||||||||||||||||||||
|---|---|---|---|---|---|---|---|---|---|---|---|---|---|---|---|---|---|---|---|---|---|---|---|---|---|---|---|---|---|---|---|---|---|---|---|---|---|---|---|---|---|---|---|---|---|---|---|---|---|---|---|---|---|---|
A noble vampire from Romania, resembling Dracula, with the ability to control dark energy.
| ||||||||||||||||||||||||||||||||||||||||||||||||||||||
| Jon Talbain (Gallon) | ||||||||||||||||||||||||||||||||||||||||||||||||||||||
An English werewolf seeking to lift the curse of his lycanthropy.
| ||||||||||||||||||||||||||||||||||||||||||||||||||||||
| Victor von Gerdenheim | ||||||||||||||||||||||||||||||||||||||||||||||||||||||
A Frankstein-like monster from Germany created by a mad scientist named Professor Gerdenheim.
| ||||||||||||||||||||||||||||||||||||||||||||||||||||||
| Hsien-Ko (Lei-Lei) | ||||||||||||||||||||||||||||||||||||||||||||||||||||||
A jiang shi (reanimated corpse) of a young Chinese girl whose village was attacked by monsters. She and her twin sister Mei-Ling, who appears as a talisman on Hsien-Ko's hat, wish to free their mother's soul.
| ||||||||||||||||||||||||||||||||||||||||||||||||||||||
| Lord Raptor (Zabel Zarock) | ||||||||||||||||||||||||||||||||||||||||||||||||||||||
A zombie rock star from Australia. He is accompanied by his pet monster Le Malta.
| ||||||||||||||||||||||||||||||||||||||||||||||||||||||
| Morrigan Aensland | ||||||||||||||||||||||||||||||||||||||||||||||||||||||
A Scottish succubus with a particular fascination with the souls of human men.
| ||||||||||||||||||||||||||||||||||||||||||||||||||||||
| Anakaris | ||||||||||||||||||||||||||||||||||||||||||||||||||||||
A 5,000-year-old Egyptian mummy who was once the pharaoh of a powerful empire before his death.
| ||||||||||||||||||||||||||||||||||||||||||||||||||||||
| Felicia | ||||||||||||||||||||||||||||||||||||||||||||||||||||||
A cheerful catwoman from the United States.
| ||||||||||||||||||||||||||||||||||||||||||||||||||||||
| Bishamon | ||||||||||||||||||||||||||||||||||||||||||||||||||||||
A ghostly Japanese samurai who wears a cursed suit of armor.
| ||||||||||||||||||||||||||||||||||||||||||||||||||||||
| Rikuo (Aulbath) | ||||||||||||||||||||||||||||||||||||||||||||||||||||||
A merman living in Brazil's Amazon River and the sole survivor of a colossal earthquake that demolished his underwater empire.
| ||||||||||||||||||||||||||||||||||||||||||||||||||||||
| Donovan Baine | ||||||||||||||||||||||||||||||||||||||||||||||||||||||
A dhamphir (a cross between a vampire and a human) of unknown origin who watches over a young and emotionless girl named Anita.
| ||||||||||||||||||||||||||||||||||||||||||||||||||||||
| Sasquatch | ||||||||||||||||||||||||||||||||||||||||||||||||||||||
A bigfoot from the mountains of Canada.
| ||||||||||||||||||||||||||||||||||||||||||||||||||||||
| Huitzil (Phobos) | ||||||||||||||||||||||||||||||||||||||||||||||||||||||
One of a legion of robots created to destroy all life on Earth, buried underground in Mexico for millions of years after an earthquake. The penultimate boss of the game.
| ||||||||||||||||||||||||||||||||||||||||||||||||||||||
| Pyron | ||||||||||||||||||||||||||||||||||||||||||||||||||||||
An alien that can control fire. The final boss of the game.
|
Stages
Each character has his or her own stage where matches are hosted. The stage can be manually chosen in the two-player mode.


History
Development
Night Warriors can be considered an upgrade to the original Darkstalkers rather than a sequel, since it revisits the same story and reuses many of the same assets, while refining the mechanics and adding new characters, moves, animations, and stages (similar to the relationship between Street Fighter Alpha and Street Fighter Alpha 2). There is a cheat code that unlocks the old backgrounds, music, and character palettes.
The original game had about 128 MB of character animations, while the sequel has about 256 MB, amounting to approximately 500 additional patterns per character.[9] While the original game was ported to the PlayStation by Psygnosis, Night Warriors was ported to the Saturn by Capcom themselves. However, because of difficulties encountered when producing the PlayStation version, the Saturn port of Night Warriors was released in Japan and North America about a month before the PlayStation port of its prequel.[10]
Though uncredited in-game, music porting for the Sega Saturn version was handled to some extent by Sega's own Teruhiko Nakagawa, with Tatsuya Kouzaki handling miscellaneous data porting.
Legacy
The game was also included in the Darkstalkers series compilation release Vampire: Darkstalkers Collection for the PlayStation 2 in 2005. It was remastered as part of Darkstalkers Resurrection for the PlayStation 3 and Xbox 360 in 2013. It was re-released as part of the Capcom Fighting Collection compilation for the PlayStation 4, Xbox One, Nintendo Switch, and Windows PCs in 2022.
Versions
The Saturn version of Night Warriors is a close match to its arcade counterpart, but uses slightly fewer frames of animation during normal play. The full set of graphics do exist on the disc, however, and will be utilised if a hidden "animation mode" is set to "full". The catch is that the missing frames will only be rendered if the player and opponent are using the same character.
Loading screens are also introduced on the Saturn due to its use of disc-based media, and the game is more susceptible to slowdown in busy scenes.
Due to the differences in screen resolution between the two systems (384x224 in the arcades versus 352x224 on the Saturn), all of the Saturn's graphics are stretched slightly in the horizontal axis, and borders are added at the top and bottom. Perhaps the biggest side effect of this change is the titles and menus, where the logo does not fully fit on the screen.
Localised names
| Language | Localised Name | English Translation |
|---|---|---|
| English | Night Warriors: Darkstalkers' Revenge | Night Warriors: Darkstalkers' Revenge |
| English (US) | Night Warriors: Darkstalkers' Revenge | Night Warriors: Darkstalkers' Revenge |
| Japanese | ヴァンパイア ハンター | Vampire Hunter: Darkstalkers' Revenge |
Magazine articles
- Main article: Night Warriors: Darkstalkers' Revenge/Magazine articles.
Promotional material
also published in:
- Electronic Gaming Monthly (US) #82: "May 1996" (1996-xx-xx)[11]
- Next Generation (US) #18: "June 1996" (1996-05-21)[12]
- GamePro (US) #93: "June 1996" (1996-xx-xx)[13]

Artwork
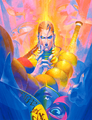
JP cover

Physical scans
| 86 | |
|---|---|
| Based on 34 reviews | |
| Saturn, JP |
|---|
  Cover
|
Spinecard  Disc Manual |
| Saturn, US |
|---|
  Cover
|
 Disc Manual |
| Saturn, EU |
|---|
 Cover
|
| Saturn, FR (Blister pack) |
|---|
 Cover
|
| Saturn, DE |
|---|
 Cover
|
| Saturn, BR |
|---|
  Cover
|
Technical information
- Main article: Night Warriors: Darkstalkers' Revenge/Technical information.
External links
- Sega of America webpage: Saturn
References
- ↑ File:NightWarriors Saturn JP Box Back.jpg
- ↑ 2.0 2.1 https://sega.jp/fb/segahard/ss/soft_licensee2.html (Wayback Machine: 2020-03-20 23:05)
- ↑ htt (Wayback Machine: 1997-06-06 05:51)
- ↑ https://groups.google.com/g/rec.games.video.sega/c/Vj-KUuDXwto/m/_AMq34nsvk4J
- ↑ 5.0 5.1 GamePro, "May 1996" (US; 1996-xx-xx), page 66
- ↑ Computer & Video Games, "October 1996" (UK; 1996-09-09), page 53
- ↑ 7.0 7.1 Computer & Video Games, "June 1996" (UK; 1996-05-09), page 62
- ↑ http://www.tectoy.com.br/releases/index.htm (Wayback Machine: 1998-06-25 19:48)
- ↑ Mean Machines Sega, "February 1996" (UK; 1995-12-xx), page 18
- ↑ Mean Machines Sega, "February 1996" (UK; 1995-12-xx), page 19
- ↑ Electronic Gaming Monthly, "May 1996" (US; 1996-xx-xx), page 48
- ↑ Next Generation, "June 1996" (US; 1996-05-21), page 6
- ↑ GamePro, "June 1996" (US; 1996-xx-xx), page 30
- ↑ 576 KByte, "Október 1996" (HU; 1996-xx-xx), page 34
- ↑ Consoles +, "Mai 1996" (FR; 1996-0x-xx), page 102
- ↑ Edge, "May 1996" (UK; 1996-04-05), page 68
- ↑ Electronic Gaming Monthly, "May 1996" (US; 1996-xx-xx), page 31
- ↑ Famitsu, "1996-03-08" (JP; 1996-02-23), page 1
- ↑ Fun Generation, "05/96" (DE; 1996-04-10), page 56
- ↑ GameFan, "Volume 4, Issue 4: April 1996" (US; 1996-xx-xx), page 14
- ↑ Game Players, "Vol. 9 No. 5 May 1996" (US; 1996-04-xx), page 62
- ↑ Game Informer, "May 1996" (US; 1996-0x-xx), page 41
- ↑ Hobby Consolas, "Noviembre 1996" (ES; 1996-xx-xx), page 84
- ↑ Intelligent Gamer's Fusion, "Volume 2, Number 8: April 1996" (US; 1996-02-27), page 82
- ↑ Joypad, "Mai 1996" (FR; 1996-0x-xx), page 56
- ↑ LeveL, "Únor 1997" (CZ; 1997-02-01), page 83
- ↑ MAN!AC, "04/96" (DE; 1996-03-13), page 44
- ↑ MAN!AC, "06/96" (DE; 1996-05-08), page 60
- ↑ Maximum, "May 1996" (UK; 1996-05-30), page 124
- ↑ Mega Force, "Mai 1996" (FR; 1996-0x-xx), page 60
- ↑ Mega Fun, "05/96" (DE; 1996-04-xx), page 41
- ↑ Mean Machines Sega, "June 1996" (UK; 1996-05-03), page 66
- ↑ Mean Machines Sega, "August 1996" (UK; 1996-07-05), page 75
- ↑ Next Generation, "June 1996" (US; 1996-05-21), page 119
- ↑ neXt Level, "Mai 1996" (DE; 1996-0x-xx), page 64
- ↑ Player One, "Mai 1996" (FR; 1996-0x-xx), page 102
- ↑ Saturn Fan, "1996 No. 8" (JP; 1996-03-29), page 54
- ↑ Sega Power, "July 1996" (UK; 1996-05-09), page 44
- ↑ Sega Saturn Magazine, "May 1996" (UK; 1996-04-24), page 76
- ↑ Sega Saturn Magazine, "1996-04 (1996-03-08)" (JP; 1996-02-23), page 225
- ↑ Sega Saturn Magazine, "Readers rating final data" (JP; 2000-03), page 11
- ↑ Total Saturn, "Volume One Issue Three" (UK; 1996-11-29), page 48
- ↑ Total Saturn, "Volume One Issue Four" (UK; 1996-12-29), page 39
- ↑ Video Games, "4/96" (DE; 1996-03-20), page 90
- ↑ VideoGames, "June 1996" (US; 1996-05-21), page 60
| Night Warriors: Darkstalkers' Revenge | |
|---|---|
|
Main page | Comparisons | Hidden content | Magazine articles | Reception | Technical information
| |
| Darkstalkers/Vampire games for Sega systems | |
|---|---|
| Night Warriors: Darkstalkers' Revenge (1996) | Vampire Savior: The Lord of Vampire (1998) | Vampire Chronicle for Matching Service (2000) | |
| Related games | |
| Super Puzzle Fighter II Turbo (1996) | Pocket Fighter (1998) | |
- 1-2 player games
- JP Saturn games
- All JP games
- US Saturn games
- All US games
- EU Saturn games
- All EU games
- DE Saturn games
- All DE games
- UK Saturn games
- All UK games
- PL Saturn games
- All PL games
- BR Saturn games
- All BR games
- Saturn games
- 1996 Saturn games
- All 1996 games
- Saturn action games
- All action games
- Saturn games with QSound support
- All games
- Pages with broken file links
- Old-style rating (gamesmaster)
- Rating without PDF source
- Update ratings template
- 1 old ratings
- Night Warriors: Darkstalkers' Revenge
- Darkstalkers