Difference between revisions of "Capcom vs. SNK 2 Millionaire Fighting 2001"
From Sega Retro
(→Characters: SNK) |
Hyperspeed34 (talk | contribs) |
||
| (17 intermediate revisions by 3 users not shown) | |||
| Line 5: | Line 5: | ||
| tab2=Dreamcast | | tab2=Dreamcast | ||
| publisher={{company|[[Capcom]]|system=NAOMI,NAOMIGD,DC|region=JP}} | | publisher={{company|[[Capcom]]|system=NAOMI,NAOMIGD,DC|region=JP}} | ||
| − | {{company|[[Sega]]|system=NAOMI,NAOMIGD|region=US}} | + | {{company|[[Sega Enterprises, Inc. (U.S.A.)]]|system=NAOMI,NAOMIGD|region=US}} |
| developer=[[Capcom]] | | developer=[[Capcom]] | ||
| licensor=[[SNK]] | | licensor=[[SNK]] | ||
| Line 38: | Line 38: | ||
}} | }} | ||
}} | }} | ||
| − | '''''{{PAGENAME}}''''' (カプコン バーサス エス・エヌ・ケイ 2 ミリオネア ファイティング 2001) is a 2D fighting game developed and published by [[Capcom]] as the direct sequel to ''[[Capcom vs. SNK: Millennium Fight 2000]]''. It was released for [[Sega NAOMI]] arcade hardware in 2001, | + | '''''{{PAGENAME}}''''' (カプコン バーサス エス・エヌ・ケイ 2 ミリオネア ファイティング 2001) is a 2D fighting game developed and published by [[Capcom]] as the direct sequel to ''[[Capcom vs. SNK: Millennium Fight 2000]]''. It was released for [[Sega NAOMI]] arcade hardware in 2001, with the American arcade release distributed by [[Sega]]. It was subsequently ported to the [[Sega Dreamcast]] and [[PlayStation 2]] later in the year. |
==Story== | ==Story== | ||
| Line 44: | Line 44: | ||
==Gameplay== | ==Gameplay== | ||
| − | ''Capcom vs. SNK 2'' is a 2D fighting game that combines characters and gameplay elements from | + | {{ScreenThumb|Capcom vs SNK 2 DC, Character Select.png|width=200|Character select}} |
| + | {{ScreenThumb|Capcom vs SNK 2 DC, Gameplay.png|width=200|Gameplay}} | ||
| + | ''Capcom vs. SNK 2'' is a 2D fighting game that combines characters and gameplay elements primarily from [[Capcom]]'s ''[[:Category:Street Fighter|Street Fighter]]'' and [[SNK]]'s ''[[:Category:The King of Fighters|The King of Fighters]]'' series, with elements also taken from the ''[[:Category:Fatal Fury (franchise)|Fatal Fury]]'' and ''[[:Category:Samurai Shodown (franchise)|Samurai Shodown]]'' series. The game uses 3D-rendered backgrounds, and several new characters have been added, pulled from more varied sources than the original game's roster. The number of attack buttons has been increased from four (as used in ''The King of Fighters'') to six (as used in ''Street Fighter''). Players can choose from six different fighting styles called "grooves," which mimic the mechanics of other Capcom and SNK games. The selected groove determines the character's power gauge as well as the availability of special techniques such as dashes, running, and guard cancels. | ||
| − | + | Like ''The King of Fighters'', players assemble teams of multiple characters, which fight each other in one-on-one battles. In contrast to the fixed system of the original, players can now freely select characters and assign each of them a number from one to four that determines their relative strength. Teams now consist of up to three characters (as opposed to four in the first game); players can choose fewer than three characters, but the overall team ratio must total four. Players can choose the order in which their team's characters fight before every match (by holding {{X}}+{{A}} to start with the first character, {{Y}}+{{B}} for the second, or {{L}}+{{R}} for the third). When a character is defeated, the next character in the team takes his or her place in the next round, and the winning team continues with the same character (with a segment of health restored in proportion to the time left over in the previous round). The match continues until every character on one of the teams is eliminated. There is also an option to play one-on-one matches to the best of three rounds, as in a conventional fighting game. If time runs out before a character can be defeated, the character with the most life remaining is the winner. Both characters are eliminated in the case of a draw. | |
| − | + | Characters move with {{left}} and {{right}} and crouch with {{down}}. They jump with {{up}} and flip back and forth with {{upleft}} and {{upright}}. They can "super jump" (a faster and farther jump, trailed by afterimages) by pressing {{down}}, then {{upleft}}, {{up}}, or {{upright}} quickly. Characters can perform a light punch with {{X}}, a medium punch with {{Y}}, and a hard punch with {{Z}}, and they perform a light kick with {{A}}, a medium kick with {{B}}, and a hard kick with {{C}}. Light attacks are quick but do light damage, while hard attacks do more damage but have a longer startup delay and recovery time. Special moves for each character are done by pairing specific directional combinations with an attack button. Characters can perform a taunt with {{hold|{{A}}|{{Start}}}}, which is a short animation during which the character is vulnerable to attack. Taunting fills the opponent's power gauge by a slight amount. | |
| − | + | Throws and grabs are done by holding {{left}} or {{right}} when near an opponent and pressing a strong punch or kick button. Some characters have midair throws as well. Grapple moves cannot be blocked (including special moves involving grappling), but a character can escape a throw and take no damage by likewise holding {{left}} or {{right}} and pressing a strong punch or kick button immediately upon being grabbed. | |
| + | |||
| + | Blocking is done by holding the D-Pad away from the opponent. Characters can block while standing, which blocks against high and mid attacks but not low attacks (such as sweeps), or crouching, which blocks against mid and low attacks but not high attacks (such as jumping attacks and overhead strikes). Special moves still do a small amount of "chip damage" if blocked. If characters block too much, they become "guard crushed" and momentarily stunned and vulnerable to attack; there is a guard gauge under the health gauge that shows how close the character is to being guard crushed. The guard gauge replenishes over time if the character does not block, and it fully refills after it is emptied. | ||
| + | |||
| + | Characters can become dizzy from being attacked repeatedly; they are uncontrollable and vulnerable in this state but can recover more quickly by rapidly pressing back and forth on the D-Pad along with the attack buttons. It is also possible to escape grabs in this way. | ||
===Grooves=== | ===Grooves=== | ||
| − | Players choose from six different playstyles before selecting their characters | + | Players choose from six different playstyles before selecting their characters. Three are based on Capcom games, and three are based on SNK games. |
{{InfoTable| | {{InfoTable| | ||
{{InfoRow | {{InfoRow | ||
| title=C | | title=C | ||
| sprite={{sprite | Capcom vs SNK 2 DC, Grooves, Capcom.png | 0.5 | crop_width=200 | crop_height=402 | crop_x=0 | crop_y=0}} | | sprite={{sprite | Capcom vs SNK 2 DC, Grooves, Capcom.png | 0.5 | crop_width=200 | crop_height=402 | crop_x=0 | crop_y=0}} | ||
| − | | desc= | + | | desc=This groove is based on A-ism in ''[[Street Fighter Alpha 3]]''. |
| + | |||
| + | Characters can backstep or dash with {{left}} {{left}} or {{right}} {{right}}. Characters can perform an evasive roll forward by pressing the light punch and kick buttons ({{X}}+{{A}}) simultaneously. They are invulnerable during most of the roll, and they can roll through nearby opponents to the other side. Characters can perform a tactical recovery after being knocked down by holding two punch buttons simultaneously, which delays the character from getting back up. | ||
| + | |||
| + | This is the only groove that can air block by holding the D-Pad away from the opponent in midair. However, characters cannot air block against normal attacks from an opponent that is standing on the ground and cannot air block after performing an attack in the air. | ||
| + | |||
| + | Characters have a three-tiered power gauge that fills as they perform normal attacks and special moves or take damage (including blocked attacks). When at least one level of the gauge has been filled, the character can perform a super move. There are three different levels of each super move, with higher levels generally hitting more times. Each level costs as many levels of the gauge as the level of the attack, and the level is decided by the strength of the button used to perform the move ({{LP}} or {{LK}} for level 1, {{MP}} or {{MK}} for level 2, and {{HP}} or {{HK}} for level 3). Level 2 super moves can be canceled into a level 1 super move, which can sometimes do more overall damage than performing a level 3 super move for the same amount of gauge levels. | ||
| + | |||
| + | If the power gauge has at least one level, the character can perform a counterattack to immediately cancel out of a block by pressing the medium punch and kick buttons ({{Y}}+{{B}}) simultaneously. This is similar to the Alpha Counters in ''[[Street Fighter Alpha]]'' and costs one level of the gauge. | ||
}} | }} | ||
{{InfoRow | {{InfoRow | ||
| title=A | | title=A | ||
| sprite={{sprite | Capcom vs SNK 2 DC, Grooves, Capcom.png | 0.5 | crop_width=200 | crop_height=402 | crop_x=200 | crop_y=0}} | | sprite={{sprite | Capcom vs SNK 2 DC, Grooves, Capcom.png | 0.5 | crop_width=200 | crop_height=402 | crop_x=200 | crop_y=0}} | ||
| − | | desc= | + | | desc=This groove is based on V-ism in ''[[Street Fighter Alpha 3]]''. |
| + | |||
| + | Characters can backstep or dash with {{left}} {{left}} or {{right}} {{right}}. Characters can perform an evasive roll forward by pressing the light punch and kick buttons ({{X}}+{{A}}) simultaneously. They are invulnerable during most of the roll, and they can roll through nearby opponents to the other side. Characters can recover from a fall after a knockdown by pressing two punch buttons simultaneously, which causes the character to repel away from the opponent after hitting the ground. | ||
| + | |||
| + | Characters have a two-tiered power gauge that fills as they perform normal attacks and special moves or take damage (including blocked attacks). When at least one level of the gauge has been filled, the character can perform a level 1 super move at the cost of one level of the gauge. When both levels of the gauge are full, characters can perform Custom Combos (Original Combos in the Japanese versions) by pressing the hard punch and kick buttons ({{L}}+{{R}}) simultaneously. This causes the character to move more quickly and attack with much less recovery time, making it easier to chain moves together. There is a moment of invulnerability after initiating a Custom Combo. The power gauge drains while it is active, and the combo ends when the gauge is empty or if the character is hit out of it. Furthermore, characters can perform a level 1 super move at any point while the Custom Combo is active, which drains the rest of the gauge. Characters cannot block while performing a Custom Combo. Charge moves can be performed without charging (for example, the player only needs to press {{left}} {{right}} {{punch}} for a Sonic Boom). | ||
| + | |||
| + | If the power gauge has at least one level, the character can perform a counterattack to immediately cancel out of a block by pressing the medium punch and kick buttons ({{Y}}+{{B}}) simultaneously. This is similar to the Alpha Counters in ''[[Street Fighter Alpha]]'' and costs one level of the gauge. | ||
}} | }} | ||
{{InfoRow | {{InfoRow | ||
| title=P | | title=P | ||
| sprite={{sprite | Capcom vs SNK 2 DC, Grooves, Capcom.png | 0.5 | crop_width=200 | crop_height=402 | crop_x=400 | crop_y=0}} | | sprite={{sprite | Capcom vs SNK 2 DC, Grooves, Capcom.png | 0.5 | crop_width=200 | crop_height=402 | crop_x=400 | crop_y=0}} | ||
| − | | desc= | + | | desc=This groove is based on ''[[Street Fighter III]]''. |
| + | |||
| + | Characters can backstep or dash with {{left}} {{left}} or {{right}} {{right}}. They can perform small jumps by pressing {{upleft}}, {{up}}, or {{upright}} briefly from a neutral standing or crouching position. They can do normal attacks or throws but not special moves from a small jump (though doing so imposes a short recovery time after landing). Characters can recover from a fall after a knockdown by pressing two punch buttons simultaneously, which causes the character to repel away from the opponent after hitting the ground. | ||
| + | |||
| + | Characters can parry incoming attacks by pressing the D-Pad toward the opponent to parry a high or mid attack or by pressing {{down}} to parry a low attack. Parries can be done in midair by pressing the D-Pad toward the opponent (regardless of the type of attack that is being parried). If this is done right as the attack hits, the attack is parried. The defending character takes no damage (including chip damage from special moves) and recovers more quickly than the opponent, creating an opening for a counterattack. The guard gauge fills easier than other grooves, so the player is incentivized to parry instead of blocking. | ||
| + | |||
| + | Characters have a single-level power gauge that fills as they perform normal attacks and special moves, parry, or take damage. The gauge fills more slowly than the other grooves. When it is full, characters can perform a level 3 super move at the cost of the entire gauge. | ||
}} | }} | ||
{{InfoRow | {{InfoRow | ||
| title=S | | title=S | ||
| sprite={{sprite | Capcom vs SNK 2 DC, Grooves, SNK.png | 0.5 | crop_width=200 | crop_height=402 | crop_x=0 | crop_y=0}} | | sprite={{sprite | Capcom vs SNK 2 DC, Grooves, SNK.png | 0.5 | crop_width=200 | crop_height=402 | crop_x=0 | crop_y=0}} | ||
| − | | desc= | + | | desc=This groove is based on the Extra mode in ''[[The King of Fighters: Dream Match 1999|The King of Fighters '98]]'' (which is itself based on the playstyle of ''The King of Fighters '94'' and ''[[The King of Fighters '95]]''). |
| + | |||
| + | Characters can backstep or run with {{left}} {{left}} or {{right}} {{right}}. They continue running as long as the direction is held. Characters can perform a tactical recovery after being knocked down by holding two punch buttons simultaneously, which delays the character from getting back up. | ||
| + | |||
| + | This is the only groove where characters can dodge attacks by pressing the light punch and kick buttons ({{X}}+{{A}}) simultaneously. This causes the character to quickly lean into the background and evade any attacks made in that moment. Pressing any punch or kick button during a dodge causes the character to perform a quick, short-ranged counterattack when coming out of the dodge. | ||
| + | |||
| + | The power gauge is filled by blocking attacks or taking damage. It can also be charged by holding the strong punch and kick buttons ({{L}}+{{R}}) simultaneously while standing, though this leaves the character vulnerable to attack. Once the power gauge is filled, the character enters "MAX mode," and attack damage is increased by 15% while the gauge drains. When characters are in this state, players can perform a level 1 super move that immediately consumes the entire power gauge. When the health gauge is nearly empty and flashing red, characters can perform level 1 super moves indefinitely, and attack damage is increased by 5%. If both requirements are fulfilled (the character's health gauge is flashing red and the character's power gauge is full), the character can perform a level 3 super move instead that does more damage. Every round starts with an empty gauge. | ||
| + | |||
| + | While in "MAX mode," the character can perform a counterattack to immediately cancel out of a block by pressing the medium punch and kick buttons ({{Y}}+{{B}}) simultaneously. This drains the gauge when it is used. | ||
}} | }} | ||
{{InfoRow | {{InfoRow | ||
| title=N | | title=N | ||
| sprite={{sprite | Capcom vs SNK 2 DC, Grooves, SNK.png | 0.5 | crop_width=200 | crop_height=402 | crop_x=200 | crop_y=0}} | | sprite={{sprite | Capcom vs SNK 2 DC, Grooves, SNK.png | 0.5 | crop_width=200 | crop_height=402 | crop_x=200 | crop_y=0}} | ||
| − | | desc= | + | | desc=This groove is based on the Advanced mode in ''[[The King of Fighters: Dream Match 1999|The King of Fighters '98]]'' (which is itself based on the playstyle of ''[[The King of Fighters '96]]''). |
| + | |||
| + | Characters can backstep or run with {{left}} {{left}} or {{right}} {{right}}. They continue running as long as the direction is held. Characters can perform small jumps by pressing {{upleft}}, {{up}}, or {{upright}} briefly from a neutral standing or crouching position. They can do normal attacks or throws but not special moves from a small jump (though doing so imposes a short recovery time after landing). Characters can perform an evasive roll forward by pressing the light punch and kick buttons ({{X}}+{{A}}) simultaneously. They are invulnerable during most of the roll, and they can roll through nearby opponents to the other side. Characters can recover from a fall after a knockdown by pressing two punch buttons simultaneously, which causes the character to repel away from the opponent after hitting the ground. | ||
| + | |||
| + | The power gauge is filled by performing normal attacks and special moves or taking damage (including blocked attacks). When the gauge is filled, it is kept in stock and reset, up to three times. A character can use one stock of the gauge to perform a level 1 super move or to enter "MAX mode" by pressing the strong punch and kick buttons ({{L}}+{{R}}) simultaneously, increasing the damage dealt by the character by 20%. Performing a super move while in "MAX mode" performs a level 3 super move (costing only two total stocks of the gauge, one to enter "MAX mode" and one to perform the super move). | ||
| + | |||
| + | While in "MAX mode," the character can perform a counterattack to immediately cancel out of a block by pressing the medium punch and kick buttons ({{Y}}+{{B}}) simultaneously. This drains the gauge when it is used. | ||
}} | }} | ||
{{InfoRow | {{InfoRow | ||
| title=K | | title=K | ||
| sprite={{sprite | Capcom vs SNK 2 DC, Grooves, SNK.png | 0.5 | crop_width=200 | crop_height=402 | crop_x=400 | crop_y=0}} | | sprite={{sprite | Capcom vs SNK 2 DC, Grooves, SNK.png | 0.5 | crop_width=200 | crop_height=402 | crop_x=400 | crop_y=0}} | ||
| − | | desc= | + | | desc=This groove combines the "Rage gauge" from ''[[:Category:Samurai Shodown (franchise)|Samurai Shodown]]'' with the Just Defend mechanic from ''[[Garou: Mark of the Wolves]]''. |
| + | |||
| + | Characters can backstep or run with {{left}} {{left}} or {{right}} {{right}}. They continue running as long as the direction is held. They can perform small jumps by pressing {{upleft}}, {{up}}, or {{upright}} briefly from a neutral standing or crouching position. They can do normal attacks or throws but not special moves or Just Defends from a small jump (though doing so imposes a short recovery time after landing). Characters can recover from a fall after a knockdown by pressing two punch buttons simultaneously, which causes the character to repel away from the opponent after hitting the ground. | ||
| + | |||
| + | Blocking an attack at the moment before it hits is called a "Just Defend," which blocks the attack, replenishes a small amount of health, and recovers faster than a regular block (creating an opening for a counterattack). This can also be done in midair (unlike regular blocking). | ||
| + | |||
| + | Characters have a single-level "Rage gauge" (怒), which only fills when the character is attacked or guards an attack with a Just Defend (but not a regular block). When the gauge fills completely, it starts draining, and the character turns red and gains a 35% bonus to attack damage and a 12.5% bonus to defense until it is emptied. While in this state, the character can perform a level 3 super move, which drains the rest of the gauge. | ||
}} | }} | ||
}} | }} | ||
===Modes=== | ===Modes=== | ||
| − | The Dreamcast version of the game has multiple modes: | + | {{ScreenThumb|Capcom vs SNK 2 DC, All Survival.png|width=200|All Survival}} |
| − | *''' | + | {{ScreenThumb|Capcom vs SNK 2 DC, Training Mode.png|width=200|Training Mode}} |
| − | *'''Survival Mode:''' | + | {{ScreenThumb|Capcom vs SNK 2 DC, Color Edit Mode.png|width=200|Color Edit Mode}} |
| − | *'''Vs Mode:''' | + | {{ScreenThumb3|Capcom vs SNK 2 DC, Groove Edit Mode, Gauge.png|Capcom vs SNK 2 DC, Groove Edit Mode, Systems.png|Capcom vs SNK 2 DC, Groove Edit Mode, Subsystems.png|width=100|Groove Edit Mode}} |
| − | *'''Training Mode:''' | + | The Dreamcast version of the game has multiple modes. As in the original ''[[Capcom vs. SNK]]'', the player can accumulate Groove Points during single-player games by hitting opponents with attacks (with special moves and super moves earning more points), by using special mechanics (such as a guard break or Just Defend), or by defeating opponents. Finishing an opponent with a counterattack super move or by countering a super move with a special move is called a "Finest K.O." and worth 50 to 100 Groove Points. Getting hit or losing a match costs points. The number of Groove Points earned during a game is shown above the timer. The player's total amount of Groove Points is saved to a [[VMU]]. These points can be spent in the Groove Edit Mode, unlocked after finishing the Arcade Mode, to create custom grooves. |
| − | *'''Color Edit Mode:''' | + | *'''Arcade Mode:''' A single-player mode where the player forms a team of up to three characters and fights a series of elimination matches against five randomly selected teams. If the player fulfills certain requirements, a mid-boss fight against Geese Howard or M. Bison is unlocked before the fourth match. If the player fulfills additional requirements, a final boss fight against either Rugal or Akuma is unlocked after defeating the last team. If the player fulfills more stringent requirements, a secret final fight against Ultimate Rugal or Shin Akuma is unlocked instead. There are three formats for this mode: Ratio Match (players assemble teams of three with a combined ratio of four and fight an elimination match), 3-on-3 Match (players choose any three characters, which are all treated as having a ratio of one, and fight an elimination match), or Single Match (players choose one character, which is treated as having a ratio of two, and fight a match to the best of three rounds). The game ends if the player loses a match but can be continued an unlimited number of times. A second player can challenge the first by pressing {{Start}}, with the victor of the match continuing the game. There are eight difficulty levels for computer-controlled opponents. |
| − | *'''Replay Mode:''' | + | *'''Boss Battle Mode:''' After defeating both Ultimate Rugal and Shin Akuma at least once, a hidden boss battle mode is unlocked, which can be accessed by holding {{X}}+{{Y}} when starting the Arcade Mode. It is the same as the Arcade Mode, except it consists solely of matches against all of the boss characters (M. Bison, Geese Howard, Evil Ryu, Orochi Iori, Akuma, Rugal, Shin Akuma, and Ultimate Rugal). This mode cannot be continued if a match is lost. Completing it unlocks an "Extra Option" menu in the options. |
| + | *'''Survival Mode:''' A single-player mode where the player chooses a groove and a character and tries to defeat as many. characters as possible in one-round matches on a single health gauge. All combatants are treated as having a ratio of two. Some health is replenished after each round, depending on the player's score. The contents of the character's power gauge is carried over to the next match (except in the S groove). There are two formats for this mode: All Survival (where the player fights against every character in the game) and ∞ Survival (where the player fights against endless opponents until defeated). | ||
| + | *'''Vs Mode:''' A two-player mode where players pick a stage, their grooves, and their characters and fight each other. Pressing {{Start}} when selecting a groove cycles through the grooves quickly like a slot machine (for choosing one randomly). Each player can also set a handicap. The game keeps track of each player's wins, losses, and win ratio. As in the Arcade Mode, there are three formats for this mode: Ratio Match, 3-on-3 Match, or Single Match. | ||
| + | *'''Training Mode:''' A practice mode where the player chooses any character and any opponent and can choose a groove and a ratio (between one and four) for either character. The player can set the whether the dummy opponent is non-hostile, hostile, or controlled by a second control pad. Non-hostile opponents can be set to stand, crouch, or jump and guarding or not guard. The player can also toggle the health gauge (normal or flashing red) and power gauge (normal or max). The player can toggle the display of button presses and attack data. | ||
| + | *'''Groove Edit Mode:''' This mode is unlocked after completing the game. This allows the player to create two custom grooves (EX1 and EX2) by mixing and matching elements of the default grooves. The resulting grooves can be saved to a [[VMU]] and used in any mode. The player can select any of the six different gauges (or no gauge), then toggle systems and subsystems from the existing grooves. However, all of these elements cost a different amount of Groove Points to unlock, and the player initially starts with 4,000 Groove Points. | ||
| + | *'''Color Edit Mode:''' A customization mode where the player can create custom color schemes for any character. Each character has 15 colors that can be changed (by adjusting the red, green, or blue color bars). Pressing {{Start}} opens a menu with additional options. Custom color schemes can be saved to a [[VMU]]. | ||
| + | *'''Replay Mode:''' This mode allows the player to load and watch a replay of a match from a VMU. Players are given the chance to save replays after completing a match in the Vs Mode. A replay takes 30 blocks of storage. | ||
| + | *'''Network Mode:''' This mode supported competitive online matches over Capcom's [[Matching Service]]. | ||
| + | |||
| + | The game also supports linking to the [[Neo Geo Pocket Color]] game ''SNK vs. Capcom: Card Fighters 2 Expand Edition'' over a [[Neo Geo Pocket/Dreamcast Setsuzoku Cable]]. | ||
===Characters=== | ===Characters=== | ||
{{MoveListNote|legend=StreetFighterAlpha}} | {{MoveListNote|legend=StreetFighterAlpha}} | ||
The game features a total of 48 playable characters, including the entire returning roster of ''[[Capcom vs. SNK Millennium Fight 2000 Pro]]''. | The game features a total of 48 playable characters, including the entire returning roster of ''[[Capcom vs. SNK Millennium Fight 2000 Pro]]''. | ||
| + | |||
| + | Every character has a different color scheme depending on which button is used to select him or her ({{X}}, {{Y}}, {{A}}, {{B}}, {{L}}, or {{R}}). Additional bonus color schemes can be used by selecting the character with all three punch buttons ({{X}}+{{Y}}+{{L}}) or all three kick buttons ({{A}}+{{B}}+{{R}}). If the player has made a custom color scheme for the character in the Color Edit Mode, it can be selected with {{Start}}. | ||
====Capcom==== | ====Capcom==== | ||
| − | + | There are five new Capcom characters. Eagle appears for the first time since the original ''Street Fighter''. Yun is added as the only new character from ''[[Street Fighter III]]'' (though Chun-Li is also updated to her ''[[Street Fighter III: 3rd Strike|3rd Strike]]'' version). While the first ''Capcom vs. SNK'' only featured characters from the ''[[:Category:Street Fighter|Street Fighter]]'' series (with the exception of Morrigan from ''[[:Category:Darkstalkers|Darkstalkers]]'' as a hidden character), this roster adds new characters from other series: Kyosuke Kagami from ''Rival Schools'' and Rolento and Maki from ''[[:Category:Final Fight (franchise)|Final Fight]]'' (though Rolento appears as he did in ''[[Street Fighter Alpha 2]]''). | |
{{InfoTable|imagewidths=200| | {{InfoTable|imagewidths=200| | ||
{{InfoFighter| | {{InfoFighter| | ||
| name=Balrog (M. Bison) | | name=Balrog (M. Bison) | ||
| − | | | + | | image=Capcom vs SNK 2, Character Art, SNK, M Bison.jpg |
| sprite={{sprite | Street Fighter Zero 3, Sprites, M. Bison.gif}} | | sprite={{sprite | Street Fighter Zero 3, Sprites, M. Bison.gif}} | ||
| info1name=Originally appeared in | | info1name=Originally appeared in | ||
| Line 112: | Line 169: | ||
{{MoveListRow | Dash Straight or Upper | Hold {{left}} for 2 seconds, then {{right}}+{{punch}} or {{kick}} | Balrog dashes forward while standing and smashes his opponent with a straight punch if performed with {{punch}} or an uppercut if performed with {{kick}}. He dashes farther when a stronger button is used.}} | {{MoveListRow | Dash Straight or Upper | Hold {{left}} for 2 seconds, then {{right}}+{{punch}} or {{kick}} | Balrog dashes forward while standing and smashes his opponent with a straight punch if performed with {{punch}} or an uppercut if performed with {{kick}}. He dashes farther when a stronger button is used.}} | ||
{{MoveListRow | Dash Ground Straight or Upper | Hold {{left}} for 2 seconds, then {{downright}}+{{punch}} or {{kick}} | Balrog dashes forward low to the ground and smashes his opponent with a straight punch if performed with {{punch}} or an uppercut if performed with {{kick}}. He dashes farther when a stronger button is used.}} | {{MoveListRow | Dash Ground Straight or Upper | Hold {{left}} for 2 seconds, then {{downright}}+{{punch}} or {{kick}} | Balrog dashes forward low to the ground and smashes his opponent with a straight punch if performed with {{punch}} or an uppercut if performed with {{kick}}. He dashes farther when a stronger button is used.}} | ||
| − | {{MoveListRow | Buffalo Headbutt | Hold {{down}} for 2 seconds, then {{up}}+{{punch}} | Balrog jumps up with a | + | {{MoveListRow | Buffalo Headbutt | Hold {{down}} for 2 seconds, then {{up}}+{{punch}} | Balrog jumps up with a flying headbutt, which knocks his opponent over on impact.}} |
{{MoveListRow | Turn Punch | Hold two {{punch}} or {{kick}} simultaneously, then release | Balrog turns around and delivers a powerful punch. The longer the attack buttons are held down, the greater the punch's power.}} | {{MoveListRow | Turn Punch | Hold two {{punch}} or {{kick}} simultaneously, then release | Balrog turns around and delivers a powerful punch. The longer the attack buttons are held down, the greater the punch's power.}} | ||
}} | }} | ||
| Line 122: | Line 179: | ||
{{InfoFighter| | {{InfoFighter| | ||
| name=Blanka | | name=Blanka | ||
| − | | | + | | image=Capcom vs SNK 2, Character Art, SNK, Blanka.jpg |
| sprite={{sprite | Street Fighter Zero 3, Sprites, Blanka.gif}} | | sprite={{sprite | Street Fighter Zero 3, Sprites, Blanka.gif}} | ||
| info1name=Originally appeared in | | info1name=Originally appeared in | ||
| Line 128: | Line 185: | ||
| desc=Blanka is a feral beastman from the jungles of Brazil with the ability to generate electricity. | | desc=Blanka is a feral beastman from the jungles of Brazil with the ability to generate electricity. | ||
{{MoveListTable | desc=Special moves | | {{MoveListTable | desc=Special moves | | ||
| − | {{MoveListRow | Electric Thunder | {{repeat|{{punch}}}} | Blanka charges | + | {{MoveListRow | Electric Thunder | {{repeat|{{punch}}}} | Blanka charges his body with electricity, zapping his opponent on contact. He charges faster when a stronger button is used.}} |
| − | {{MoveListRow | Rolling Attack | Hold {{left}} for 2 seconds, then {{right}}+{{punch}} | Blanka curls into a ball and rolls straight ahead | + | {{MoveListRow | Rolling Attack | Hold {{left}} for 2 seconds, then {{right}}+{{punch}} | Blanka curls into a ball and rolls straight ahead. The move travels farther when a stronger button is used.}} |
{{MoveListRow | Backstep Rolling Attack | Hold {{left}} for 2 seconds, then {{right}}+{{kick}} | Blanka does a handstand, then leaps high into the air for a rolling attack. He leaps higher when a stronger button is used.}} | {{MoveListRow | Backstep Rolling Attack | Hold {{left}} for 2 seconds, then {{right}}+{{kick}} | Blanka does a handstand, then leaps high into the air for a rolling attack. He leaps higher when a stronger button is used.}} | ||
{{MoveListRow | Vertical Rolling Attack | Hold {{down}} for 2 seconds, then {{up}}+{{kick}} | Blanka launches upwards to hit an airborne opponent (or drop on them from above). The move travels higher and further forward when a stronger button is used.}} | {{MoveListRow | Vertical Rolling Attack | Hold {{down}} for 2 seconds, then {{up}}+{{kick}} | Blanka launches upwards to hit an airborne opponent (or drop on them from above). The move travels higher and further forward when a stronger button is used.}} | ||
| Line 147: | Line 204: | ||
{{InfoFighter| | {{InfoFighter| | ||
| name=Cammy | | name=Cammy | ||
| − | | | + | | image=Capcom vs SNK 2, Character Art, SNK, Cammy.jpg |
| sprite={{sprite | Street Fighter Alpha 2, Sprites, Cammy.gif}} | | sprite={{sprite | Street Fighter Alpha 2, Sprites, Cammy.gif}} | ||
| info1name=Originally appeared in | | info1name=Originally appeared in | ||
| Line 153: | Line 210: | ||
| desc=Cammy is a genetically engineered assassin for Shadaloo, operating under the code name "Killer Bee." | | desc=Cammy is a genetically engineered assassin for Shadaloo, operating under the code name "Killer Bee." | ||
{{MoveListTable | desc=Special moves | | {{MoveListTable | desc=Special moves | | ||
| − | {{MoveListRow | Spiral Arrow | {{QCF}} {{kick}} | Cammy spirals forward feet first like a spinning arrow, which knocks | + | {{MoveListRow | Spiral Arrow | {{QCF}} {{kick}} | Cammy spirals forward feet first like a spinning arrow, which knocks her opponent over on impact. The move travels further when a stronger button is used.}} |
| − | {{MoveListRow | Cannon Spike | {{DPF}} {{kick}} | Cammy leaps into the air with a front kick, which knocks | + | {{MoveListRow | Cannon Spike | {{DPF}} {{kick}} | Cammy leaps into the air with a front kick, which knocks her opponent over on impact. She leaps higher when a stronger button is used.}} |
| − | {{MoveListRow | Axle Spin Knuckle | {{HCB}} {{punch}} | Cammy hops forward and does an elbow smash and a backfist, which knocks | + | {{MoveListRow | Axle Spin Knuckle | {{HCB}} {{punch}} | Cammy hops forward and does an elbow smash and a backfist, which knocks her opponent over on impact. This move passes through projectiles. She hops further when a stronger button is used.}} |
{{MoveListRow | Cannon Strike | {{QCB}} {{kick}} before the apex of the jump while flipping forward in the air | Cammy dive kicks diagonally downward.}} | {{MoveListRow | Cannon Strike | {{QCB}} {{kick}} before the apex of the jump while flipping forward in the air | Cammy dive kicks diagonally downward.}} | ||
{{MoveListRow | Hooligan Combination | {{HCF}} {{upright}} {{punch}} | Cammy curls into a ball and hurls herself at her opponent. If no button is pressed, she ends with a sweep when she lands (Razor Edge Slicer). Otherwise, the player can perform a takedown when Cammy is near the opponent's body (Fatal Leg Twister) by pressing {{left}}+{{punch}} or {{right}}+{{punch}}. Cammy grabs the opponent by the neck with her legs and slams them to the ground (Cross Scissor Pressure) if the takedown is performed when she is near the opponent's head, or she grabs the opponent by the legs and stomps their face into the ground if the takedown is performed when she is near the opponent's waist.}} | {{MoveListRow | Hooligan Combination | {{HCF}} {{upright}} {{punch}} | Cammy curls into a ball and hurls herself at her opponent. If no button is pressed, she ends with a sweep when she lands (Razor Edge Slicer). Otherwise, the player can perform a takedown when Cammy is near the opponent's body (Fatal Leg Twister) by pressing {{left}}+{{punch}} or {{right}}+{{punch}}. Cammy grabs the opponent by the neck with her legs and slams them to the ground (Cross Scissor Pressure) if the takedown is performed when she is near the opponent's head, or she grabs the opponent by the legs and stomps their face into the ground if the takedown is performed when she is near the opponent's waist.}} | ||
| Line 166: | Line 223: | ||
{{InfoFighter| | {{InfoFighter| | ||
| name=Chun-Li | | name=Chun-Li | ||
| − | | | + | | image=Capcom vs SNK 2, Character Art, SNK, Chun-Li.jpg |
| sprite={{sprite | Capcom vs SNK, Sprites, Chun-Li.gif}} | | sprite={{sprite | Capcom vs SNK, Sprites, Chun-Li.gif}} | ||
| info1name=Originally appeared in | | info1name=Originally appeared in | ||
| Line 188: | Line 245: | ||
{{InfoFighter| | {{InfoFighter| | ||
| name=Dan Hibiki | | name=Dan Hibiki | ||
| − | | | + | | image=Capcom vs SNK 2, Character Art, SNK, Dan Hibiki.jpg |
| sprite={{sprite | Capcom vs SNK Pro, Sprites, Dan Hibiki.gif}} | | sprite={{sprite | Capcom vs SNK Pro, Sprites, Dan Hibiki.gif}} | ||
| info1name=Originally appeared in | | info1name=Originally appeared in | ||
| info1=''[[Street Fighter Alpha]]'' | | info1=''[[Street Fighter Alpha]]'' | ||
| − | | desc=Dan is a cocky martial artist who fights in a style of his own design called Saikyou-ryuu. | + | | desc=Dan is a cocky martial artist who fights in a style of his own design called Saikyou-ryuu. He was created as a parody of the SNK characters Ryo Sakazaki and Robert Garcia from ''[[Art of Fighting]]'', whom Capcom considered to be copies of the ''Street Fighter'' characters Ryu and Ken, with his moves made deliberately weak. |
{{MoveListTable | desc=Special moves | | {{MoveListTable | desc=Special moves | | ||
{{MoveListRow | Gadouken | {{QCF}} {{punch}} | Dan channels his ki and thrusts a very short-ranged fireball directly in front of him with a single hand. The projectile travels slightly farther when a stronger button is used.}} | {{MoveListRow | Gadouken | {{QCF}} {{punch}} | Dan channels his ki and thrusts a very short-ranged fireball directly in front of him with a single hand. The projectile travels slightly farther when a stronger button is used.}} | ||
{{MoveListRow | Kouryuuken | {{DPF}} {{punch}} | Dan jumps into the air with a flying uppercut, knocking down his opponent on impact. He ascends higher when a stronger button is used.}} | {{MoveListRow | Kouryuuken | {{DPF}} {{punch}} | Dan jumps into the air with a flying uppercut, knocking down his opponent on impact. He ascends higher when a stronger button is used.}} | ||
| − | {{MoveListRow | Dankuukyaku | {{QCB}} {{kick}} | Dan leaps forward and performs a sequence of kicks in midair. He performs a knee strike with {{LK}}, a knee strike and a kick with {{MK}}, and a knee strike and two kicks with {{HK}}. This move can be performed in midair.}} | + | {{MoveListRow | Dankuukyaku | {{QCB}} {{kick}} | Dan leaps forward and performs a sequence of kicks in midair that knock his opponent over on impact. He performs a knee strike with {{LK}}, a knee strike and a kick with {{MK}}, and a knee strike and two kicks with {{HK}}. This move can be performed in midair.}} |
{{MoveListRow | Zenten Chouhatsu | {{QCF}} {{Taunt}} | Dan rolls forward, then performs his taunt. This move can pass through opponents (if close enough) but not attacks.}} | {{MoveListRow | Zenten Chouhatsu | {{QCF}} {{Taunt}} | Dan rolls forward, then performs his taunt. This move can pass through opponents (if close enough) but not attacks.}} | ||
{{MoveListRow | Kouten Chouhatsu | {{QCB}} {{Taunt}} | Dan rolls backwards, then performs his taunt. This move can pass through opponents (if close enough) but not attacks.}} | {{MoveListRow | Kouten Chouhatsu | {{QCB}} {{Taunt}} | Dan rolls backwards, then performs his taunt. This move can pass through opponents (if close enough) but not attacks.}} | ||
| Line 213: | Line 270: | ||
{{InfoFighter| | {{InfoFighter| | ||
| name=Dhalsim | | name=Dhalsim | ||
| − | | | + | | image=Capcom vs SNK 2, Character Art, SNK, Dhalsim.jpg |
| sprite={{sprite | Street Fighter Alpha 2, Sprites, Dhalsim.gif}} | | sprite={{sprite | Street Fighter Alpha 2, Sprites, Dhalsim.gif}} | ||
| info1name=Originally appeared in | | info1name=Originally appeared in | ||
| Line 219: | Line 276: | ||
| desc=Dhalsim is a Yoga mystic who has gained exceptional control over his mind and body, giving him the ability to stretch his limbs and breathe fire. | | desc=Dhalsim is a Yoga mystic who has gained exceptional control over his mind and body, giving him the ability to stretch his limbs and breathe fire. | ||
{{MoveListTable | desc=Special moves | | {{MoveListTable | desc=Special moves | | ||
| − | {{MoveListRow | Yoga Fire | {{QCF}} {{punch}} | Dhalsim | + | {{MoveListRow | Yoga Fire | {{QCF}} {{punch}} | Dhalsim spews a fireball across the screen. The projectile moves faster but not as far when a stronger button is used. It knocks the opponent over on impact when the move is performed with {{MP}} or {{HP}}.}} |
{{MoveListRow | Yoga Flame | {{HCB}} {{punch}} | Dhalsim breathes a large mass of flame in front of him, which knocks the opponent over on impact. He holds the flame for longer when a stronger button is used.}} | {{MoveListRow | Yoga Flame | {{HCB}} {{punch}} | Dhalsim breathes a large mass of flame in front of him, which knocks the opponent over on impact. He holds the flame for longer when a stronger button is used.}} | ||
{{MoveListRow | Yoga Blast | {{HCB}} {{kick}} | Dhalsim breathes a large mass of flame at a diagonal angle in front of him. He holds the flame for longer when a stronger button is used.}} | {{MoveListRow | Yoga Blast | {{HCB}} {{kick}} | Dhalsim breathes a large mass of flame at a diagonal angle in front of him. He holds the flame for longer when a stronger button is used.}} | ||
| Line 238: | Line 295: | ||
{{InfoFighter| | {{InfoFighter| | ||
| name=Eagle | | name=Eagle | ||
| − | | | + | | image=Capcom vs SNK 2, Character Art, SNK, Eagle.jpg |
| sprite={{sprite | Capcom vs SNK, Sprites, Eagle.gif}} | | sprite={{sprite | Capcom vs SNK, Sprites, Eagle.gif}} | ||
| info1name=Originally appeared in | | info1name=Originally appeared in | ||
| Line 257: | Line 314: | ||
{{InfoFighter| | {{InfoFighter| | ||
| name=Edmond Honda | | name=Edmond Honda | ||
| − | | | + | | image=Capcom vs SNK 2, Character Art, SNK, Edmond Honda.jpg |
| sprite={{sprite | Street Fighter Zero 3, Sprites, E. Honda.gif}} | | sprite={{sprite | Street Fighter Zero 3, Sprites, E. Honda.gif}} | ||
| info1name=Originally appeared in | | info1name=Originally appeared in | ||
| Line 266: | Line 323: | ||
{{MoveListRow | Super Zutsuki | Hold {{left}} for 2 seconds, then {{right}}+{{punch}} | E. Honda propels himself forward head first like a torpedo, which knocks his opponent over on impact. He shoots himself further when a stronger button is used.}} | {{MoveListRow | Super Zutsuki | Hold {{left}} for 2 seconds, then {{right}}+{{punch}} | E. Honda propels himself forward head first like a torpedo, which knocks his opponent over on impact. He shoots himself further when a stronger button is used.}} | ||
{{MoveListRow | Super Hyakkan Otoshi | Hold {{down}} for 2 seconds, then {{up}}+{{kick}} | E. Honda leaps high into the air and drops himself down like a cannonball, which knocks his opponent over on impact. He leaps higher when a stronger button is used.}} | {{MoveListRow | Super Hyakkan Otoshi | Hold {{down}} for 2 seconds, then {{up}}+{{kick}} | E. Honda leaps high into the air and drops himself down like a cannonball, which knocks his opponent over on impact. He leaps higher when a stronger button is used.}} | ||
| − | {{MoveListRow | Ooichou Nage | D-Pad in a 360° rotation, then {{punch}} (close) | E. Honda grabs and slams his opponent against the ground, then flattens his opponent with a | + | {{MoveListRow | Ooichou Nage | D-Pad in a 360° rotation, then {{punch}} (close) | E. Honda grabs and slams his opponent against the ground, then flattens his opponent with a Super Hyakkan Otoshi.}} |
}} | }} | ||
{{MoveListTable | desc=Command normals | | {{MoveListTable | desc=Command normals | | ||
| Line 275: | Line 332: | ||
{{MoveListRow | Oni Musou | Hold {{left}} for 2 seconds, then {{right}} {{left}} {{right}}+{{punch}} | E. Honda performs two consecutive Super Zutsukis. He performs a third Super Zutsuki at level 2 or an advancing Hyakuretsu Harite at level 3.}} | {{MoveListRow | Oni Musou | Hold {{left}} for 2 seconds, then {{right}} {{left}} {{right}}+{{punch}} | E. Honda performs two consecutive Super Zutsukis. He performs a third Super Zutsuki at level 2 or an advancing Hyakuretsu Harite at level 3.}} | ||
{{MoveListRow | Orochi Kudaki | D-Pad in a 360° rotation twice, then {{punch}} (close, at max level) | E. Honda throws his opponent into the ground twice, followed by a Super Hyakkan Otoshi. The power gauge must be at level 3 to perform this move.}} | {{MoveListRow | Orochi Kudaki | D-Pad in a 360° rotation twice, then {{punch}} (close, at max level) | E. Honda throws his opponent into the ground twice, followed by a Super Hyakkan Otoshi. The power gauge must be at level 3 to perform this move.}} | ||
| − | |||
| − | |||
| − | |||
| − | |||
| − | |||
| − | |||
| − | |||
| − | |||
| − | |||
| − | |||
| − | |||
| − | |||
| − | |||
| − | |||
| − | |||
| − | |||
| − | |||
| − | |||
| − | |||
| − | |||
| − | |||
| − | |||
| − | |||
| − | |||
| − | |||
| − | |||
| − | |||
| − | |||
}} | }} | ||
}} | }} | ||
{{InfoFighter| | {{InfoFighter| | ||
| name=Guile | | name=Guile | ||
| − | | | + | | image=Capcom vs SNK 2, Character Art, SNK, Guile.jpg |
| sprite={{sprite | Street Fighter Zero 3, Sprites, Guile.gif}} | | sprite={{sprite | Street Fighter Zero 3, Sprites, Guile.gif}} | ||
| info1name=Originally appeared in | | info1name=Originally appeared in | ||
| Line 319: | Line 348: | ||
{{MoveListRow | Spin Back Knuckle | {{right}}+{{HP}} | Guile rotates around and swings his fist like a club.}} | {{MoveListRow | Spin Back Knuckle | {{right}}+{{HP}} | Guile rotates around and swings his fist like a club.}} | ||
{{MoveListRow | Knee Bazooka | {{left}}+{{LK}} or {{right}}+{{LK}} | Guile hops forward with a knee strike.}} | {{MoveListRow | Knee Bazooka | {{left}}+{{LK}} or {{right}}+{{LK}} | Guile hops forward with a knee strike.}} | ||
| − | {{MoveListRow | Rolling Sobat | {{left}}+{{ | + | {{MoveListRow | Rolling Sobat | {{left}}+{{MK}} or {{right}}+{{MK}} | Guile hops with a turning kick.}} |
}} | }} | ||
{{MoveListTable | desc=Super moves | | {{MoveListTable | desc=Super moves | | ||
| Line 329: | Line 358: | ||
{{InfoFighter| | {{InfoFighter| | ||
| name=Ken Masters | | name=Ken Masters | ||
| − | | | + | | image=Capcom vs SNK 2, Character Art, SNK, Ken Masters.jpg |
| sprite={{sprite | Capcom vs SNK, Sprites, Ken Masters.gif}} | | sprite={{sprite | Capcom vs SNK, Sprites, Ken Masters.gif}} | ||
| info1name=Originally appeared in | | info1name=Originally appeared in | ||
| Line 356: | Line 385: | ||
{{InfoFighter| | {{InfoFighter| | ||
| name=Kyosuke Kagami | | name=Kyosuke Kagami | ||
| − | | | + | | image=Capcom vs SNK 2, Character Art, SNK, Kyosuke Kagami.jpg |
| sprite={{sprite | Capcom vs SNK, Sprites, Kyosuke Kagami.gif}} | | sprite={{sprite | Capcom vs SNK, Sprites, Kyosuke Kagami.gif}} | ||
| info1name=Originally appeared in | | info1name=Originally appeared in | ||
| Line 379: | Line 408: | ||
}} | }} | ||
{{InfoFighter| | {{InfoFighter| | ||
| − | + | | name=Maki | |
| − | + | | image=Capcom vs SNK 2, Character Art, SNK, Maki.jpg | |
| − | |||
| − | |||
| − | |||
| − | |||
| − | |||
| − | |||
| − | |||
| − | |||
| − | |||
| − | |||
| − | |||
| − | |||
| − | |||
| − | |||
| − | |||
| − | |||
| − | |||
| − | |||
| − | |||
| − | | name=Maki | ||
| − | | | ||
| sprite={{sprite | Capcom vs SNK, Sprites, Maki.gif}} | | sprite={{sprite | Capcom vs SNK, Sprites, Maki.gif}} | ||
| info1name=Originally appeared in | | info1name=Originally appeared in | ||
| info1=''Final Fight 2'' | | info1=''Final Fight 2'' | ||
| − | | desc=Maki is a speedy ninja who wields a tonfa. She is a student of Bushin-ryuu ninjutsu and the sister of Guy's fiancée. | + | | desc=Maki is a speedy ninja who wields a tonfa. She is a student of Bushin-ryuu ninjutsu and the sister of Guy's fiancée. After her father Genryusai passes away, Maki is trying to find and defeat Guy in order to become the next master of Bushin-ryuu. |
{{MoveListTable | desc=Special moves | | {{MoveListTable | desc=Special moves | | ||
{{MoveListRow | Genkou | {{QCF}} {{punch}} | Maki steps forward with a hook punch that knocks her opponent over on impact. She steps further forward when a stronger button is used.}} | {{MoveListRow | Genkou | {{QCF}} {{punch}} | Maki steps forward with a hook punch that knocks her opponent over on impact. She steps further forward when a stronger button is used.}} | ||
| Line 429: | Line 437: | ||
{{InfoFighter| | {{InfoFighter| | ||
| name=Morrigan Aensland | | name=Morrigan Aensland | ||
| − | | | + | | image=Capcom vs SNK 2, Character Art, SNK, Morrigan Aensland.jpg |
| sprite={{sprite | Vampire Savior, Sprites, Morrigan.gif}} | | sprite={{sprite | Vampire Savior, Sprites, Morrigan.gif}} | ||
| info1name=Originally appeared in | | info1name=Originally appeared in | ||
| Line 451: | Line 459: | ||
{{InfoFighter| | {{InfoFighter| | ||
| name=Rolento | | name=Rolento | ||
| − | | | + | | image=Capcom vs SNK 2, Character Art, SNK, Rolento.jpg |
| sprite={{sprite | Street Fighter Alpha 2, Sprites, Rolento.gif}} | | sprite={{sprite | Street Fighter Alpha 2, Sprites, Rolento.gif}} | ||
| info1name=Originally appeared in | | info1name=Originally appeared in | ||
| Line 476: | Line 484: | ||
{{InfoFighter| | {{InfoFighter| | ||
| name=Ryu | | name=Ryu | ||
| − | | | + | | image=Capcom vs SNK 2, Character Art, SNK, Ryu 2.jpg |
| sprite={{sprite | Capcom vs SNK, Sprites, Ryu.gif}} | | sprite={{sprite | Capcom vs SNK, Sprites, Ryu.gif}} | ||
| info1name=Originally appeared in | | info1name=Originally appeared in | ||
| Line 500: | Line 508: | ||
{{InfoFighter| | {{InfoFighter| | ||
| name=Sagat | | name=Sagat | ||
| − | | | + | | image=Capcom vs SNK 2, Character Art, SNK, Sagat.jpg |
| sprite={{sprite | Street Fighter Alpha 2, Sprites, Sagat.gif}} | | sprite={{sprite | Street Fighter Alpha 2, Sprites, Sagat.gif}} | ||
| info1name=Originally appeared in | | info1name=Originally appeared in | ||
| Line 507: | Line 515: | ||
{{MoveListTable | desc=Special moves | | {{MoveListTable | desc=Special moves | | ||
{{MoveListRow | Tiger Shot | {{QCF}} {{punch}} or {{kick}} | Sagat punches into the air, shooting a crescent-shaped projectile across the screen. If performed with {{punch}}, he shoots a high shot while standing; if performed with {{kick}}, he shoots a low shot while kneeling. The projectile moves faster when a stronger button is used.}} | {{MoveListRow | Tiger Shot | {{QCF}} {{punch}} or {{kick}} | Sagat punches into the air, shooting a crescent-shaped projectile across the screen. If performed with {{punch}}, he shoots a high shot while standing; if performed with {{kick}}, he shoots a low shot while kneeling. The projectile moves faster when a stronger button is used.}} | ||
| − | {{MoveListRow | Tiger Uppercut | {{DPF}} {{punch}} | Sagat | + | {{MoveListRow | Tiger Uppercut | {{DPF}} {{punch}} | Sagat rises off the ground while punching upwards, knocking down his opponent on impact. The move ascends higher and hits more times when a stronger button is used.}} |
{{MoveListRow | Tiger Crush | {{DPF}} {{kick}} | Sagat jumps forward, ramming his opponent with his knee, hitting up to two times and knocking his opponent over.}} | {{MoveListRow | Tiger Crush | {{DPF}} {{kick}} | Sagat jumps forward, ramming his opponent with his knee, hitting up to two times and knocking his opponent over.}} | ||
}} | }} | ||
| Line 513: | Line 521: | ||
{{MoveListRow | Tiger Cannon | {{QCF}} {{QCF}} {{punch}} or {{kick}} | Sagat fires a large Tiger Shot while standing, which can hit his opponent multiple times.}} | {{MoveListRow | Tiger Cannon | {{QCF}} {{QCF}} {{punch}} or {{kick}} | Sagat fires a large Tiger Shot while standing, which can hit his opponent multiple times.}} | ||
{{MoveListRow | Ground Tiger Cannon | {{QCB}} {{QCB}} {{punch}} | Sagat fires a large Tiger Shot while kneeling, which can hit his opponent multiple times.}} | {{MoveListRow | Ground Tiger Cannon | {{QCB}} {{QCB}} {{punch}} | Sagat fires a large Tiger Shot while kneeling, which can hit his opponent multiple times.}} | ||
| − | {{MoveListRow | Tiger Genocide | {{QCF}} {{QCF}} {{kick}} | Sagat leaps ahead with a Tiger Crush and follows it up with a Tiger | + | {{MoveListRow | Tiger Genocide | {{QCF}} {{QCF}} {{kick}} | Sagat leaps ahead with a Tiger Crush and follows it up with a Tiger Uppercut. He does an additional Tiger Uppercut at level 3.}} |
{{MoveListRow | Tiger Raid | {{QCB}} {{QCB}} {{kick}} | Sagat performs a barrage of kicks, finishing with a flying side kick.}} | {{MoveListRow | Tiger Raid | {{QCB}} {{QCB}} {{kick}} | Sagat performs a barrage of kicks, finishing with a flying side kick.}} | ||
}} | }} | ||
| Line 519: | Line 527: | ||
{{InfoFighter| | {{InfoFighter| | ||
| name=Sakura Kasugano | | name=Sakura Kasugano | ||
| − | | | + | | image=Capcom vs SNK 2, Character Art, SNK, Sakura Kasugano 2.jpg |
| sprite={{sprite | Street Fighter Alpha 2, Sprites, Sakura.gif}} | | sprite={{sprite | Street Fighter Alpha 2, Sprites, Sakura.gif}} | ||
| info1name=Originally appeared in | | info1name=Originally appeared in | ||
| info1=''[[Street Fighter Alpha 2]]'' | | info1=''[[Street Fighter Alpha 2]]'' | ||
| − | | desc=Sakura is a Japanese schoolgirl who idolizes Ryu, | + | | desc=Sakura is a Japanese schoolgirl who idolizes Ryu and fights with similar moves. The word "sakura" (さくら) refers to the cherry blossom tree or its flowers. She is thought to be a response to the popularity of the SNK character Yuri Sakazaki, as they are both young girls who imitate the fighting style of the main character of their series. |
{{MoveListTable | desc=Special moves | | {{MoveListTable | desc=Special moves | | ||
{{MoveListRow | Hadouken | {{QCF}} {{punch}} | Sakura releases a short-ranged burst of ki from her hands, which knocks her opponent down on impact. The move covers hits more times when a stronger button is used.}} | {{MoveListRow | Hadouken | {{QCF}} {{punch}} | Sakura releases a short-ranged burst of ki from her hands, which knocks her opponent down on impact. The move covers hits more times when a stronger button is used.}} | ||
| Line 529: | Line 537: | ||
{{MoveListRow | Shunpuu Renkyaku | {{QCB}} {{kick}} | Sakura jumps into the air and spins around an axis with her leg extended, moving forward in an arc. The move covers more distance when it is performed with {{HK}}. After landing, she can follow up with a back kick with {{QCB}} {{kick}}.}} | {{MoveListRow | Shunpuu Renkyaku | {{QCB}} {{kick}} | Sakura jumps into the air and spins around an axis with her leg extended, moving forward in an arc. The move covers more distance when it is performed with {{HK}}. After landing, she can follow up with a back kick with {{QCB}} {{kick}}.}} | ||
{{MoveListRow | Ouka Kyaku | {{QCB}} {{kick}} before the apex of the jump | Sakura dives diagonally downwards with a stomp kick.}} | {{MoveListRow | Ouka Kyaku | {{QCB}} {{kick}} before the apex of the jump | Sakura dives diagonally downwards with a stomp kick.}} | ||
| − | {{MoveListRow | Sakura Otoshi | {{DPF}} {{kick}} | Sakura leaps high into the air with her arms and legs back. She jumps higher when a stronger button is used. She can cancel the jump and drop to the ground by pressing {{kick}} while in midair. This move can be followed up with {{punch}} to perform a knifehand strike with both hands as she is landing. If it hits, it can be repeated two more times by pressing {{punch}} two more times in quick succession.}} | + | {{MoveListRow | Sakura Otoshi | {{DPF}} {{kick}} | Sakura leaps high into the air with her arms and legs back. She jumps higher when a stronger button is used. She can cancel the jump and drop to the ground by pressing {{kick}} while in midair. This move can be followed up with {{punch}} to perform a knifehand strike with both hands as she is landing, which knocks her opponent over on impact. If it hits, it can be repeated two more times by pressing {{punch}} two more times in quick succession.}} |
}} | }} | ||
{{MoveListTable | desc=Command normals | | {{MoveListTable | desc=Command normals | | ||
| Line 542: | Line 550: | ||
{{InfoFighter| | {{InfoFighter| | ||
| name=Vega (Balrog) | | name=Vega (Balrog) | ||
| − | | | + | | image=Capcom vs SNK 2, Character Art, SNK, Balrog.jpg |
| sprite={{sprite | Street Fighter Zero 3, Sprites, Balrog.gif}} | | sprite={{sprite | Street Fighter Zero 3, Sprites, Balrog.gif}} | ||
| info1name=Originally appeared in | | info1name=Originally appeared in | ||
| Line 550: | Line 558: | ||
{{MoveListRow | Rolling Crystal Flash | Hold {{left}} for 2 seconds, then {{right}}+{{punch}} | Vega rolls along the ground, ending with a claw thrust. He rolls further when a stronger button is used.}} | {{MoveListRow | Rolling Crystal Flash | Hold {{left}} for 2 seconds, then {{right}}+{{punch}} | Vega rolls along the ground, ending with a claw thrust. He rolls further when a stronger button is used.}} | ||
{{MoveListRow | Sky High Claw | Hold {{down}} for 2 seconds, then {{up}}+{{punch}} | Vega jumps to the edge of the screen and then thrusts himself forward while stabbing with his claw. He thrusts straight ahead with {{LP}}, then at lower angles with {{MP}} and {{HP}}.}} | {{MoveListRow | Sky High Claw | Hold {{down}} for 2 seconds, then {{up}}+{{punch}} | Vega jumps to the edge of the screen and then thrusts himself forward while stabbing with his claw. He thrusts straight ahead with {{LP}}, then at lower angles with {{MP}} and {{HP}}.}} | ||
| − | {{MoveListRow | Flying Barcelona Attack | Hold {{down}} for 2 seconds, then {{up}}+{{kick}}, then {{punch}} | Vega jumps to the edge of the screen, | + | {{MoveListRow | Flying Barcelona Attack | Hold {{down}} for 2 seconds, then {{up}}+{{kick}}, then {{punch}} | Vega jumps to the edge of the screen. If the player presses {{punch}} while he is airborne, Vega dives onto his opponent with his arms spread, which knocks his opponent down on impact.}} |
{{MoveListRow | Izuna Drop | Hold {{down}} for 2 seconds, then {{up}}+{{kick}}, then {{left}}+{{punch}} or {{right}}+{{punch}} | Vega jumps to the edge of the screen, then drops on his opponent and quickly does an air suplex if the player presses {{left}}+{{punch}} or {{right}}+{{punch}} when near the opponent.}} | {{MoveListRow | Izuna Drop | Hold {{down}} for 2 seconds, then {{up}}+{{kick}}, then {{left}}+{{punch}} or {{right}}+{{punch}} | Vega jumps to the edge of the screen, then drops on his opponent and quickly does an air suplex if the player presses {{left}}+{{punch}} or {{right}}+{{punch}} when near the opponent.}} | ||
{{MoveListRow | Backslash | Two {{punch}} or {{kick}} simultaneously | Vega performs a backflip. He does a full backflip with {{punch}} and half a backflip with {{kick}}. He is invulnerable while performing this move.}} | {{MoveListRow | Backslash | Two {{punch}} or {{kick}} simultaneously | Vega performs a backflip. He does a full backflip with {{punch}} and half a backflip with {{kick}}. He is invulnerable while performing this move.}} | ||
| − | {{MoveListRow | Scarlet Terror | Hold {{downleft}} for 2 seconds, then {{right}}+{{kick}} | Vega does a backflip kick into the air.}} | + | {{MoveListRow | Scarlet Terror | Hold {{downleft}} for 2 seconds, then {{right}}+{{kick}} | Vega does a backflip kick into the air, which knocks his opponent over on impact.}} |
}} | }} | ||
{{MoveListTable | desc=Command normals | | {{MoveListTable | desc=Command normals | | ||
| Line 569: | Line 577: | ||
{{InfoFighter| | {{InfoFighter| | ||
| name=Yun | | name=Yun | ||
| − | | | + | | image=Capcom vs SNK 2, Character Art, SNK, Yun.jpg |
| sprite={{sprite | Capcom vs SNK, Sprites, Yun.gif}} | | sprite={{sprite | Capcom vs SNK, Sprites, Yun.gif}} | ||
| info1name=Originally appeared in | | info1name=Originally appeared in | ||
| Line 575: | Line 583: | ||
| desc=Yun is a young skateboarder and skillful kung fu practitioner from Hong Kong. | | desc=Yun is a young skateboarder and skillful kung fu practitioner from Hong Kong. | ||
{{MoveListTable | desc=Special moves | | {{MoveListTable | desc=Special moves | | ||
| − | {{MoveListRow | Zesshou Hohou | {{QCF}} {{punch}} | Yun lunges forward with a straight punch in a leaping stride. He leaps further when a stronger button is used.}} | + | {{MoveListRow | Zesshou Hohou | {{QCF}} {{punch}} | Yun lunges forward with a straight punch in a leaping stride, which knocks his opponent over on impact. He leaps further when a stronger button is used.}} |
{{MoveListRow | Tetsuzan Kou | {{DPF}} {{punch}} | Yun steps to his opponent while turning, then strikes his opponent with the back of his shoulder, knocking the opponent into the air. He moves farther when a stronger button is used.}} | {{MoveListRow | Tetsuzan Kou | {{DPF}} {{punch}} | Yun steps to his opponent while turning, then strikes his opponent with the back of his shoulder, knocking the opponent into the air. He moves farther when a stronger button is used.}} | ||
| − | {{MoveListRow | Senkyuutai | {{QCF}} {{kick}} | Yang flies into the air with an upward kick. He ascends higher when a stronger button is used.}} | + | {{MoveListRow | Senkyuutai | {{QCF}} {{kick}} | Yang flies into the air with an upward kick, which knocks his opponent over on impact. He ascends higher when a stronger button is used.}} |
{{MoveListRow | Kobokushi | {{QCB}} {{punch}} | Yun shoves with both open palms, knocking over his opponent on impact.}} | {{MoveListRow | Kobokushi | {{QCB}} {{punch}} | Yun shoves with both open palms, knocking over his opponent on impact.}} | ||
{{MoveListRow | Fake Kobokushi | {{QCB}} + two {{punch}} simultaneously | Yun pulls back his arms as if to perform a Kobukushi but does not. This move recovers more quickly than a real Kobokushi, so it can be used to bait a response from an opponent.}} | {{MoveListRow | Fake Kobokushi | {{QCB}} + two {{punch}} simultaneously | Yun pulls back his arms as if to perform a Kobukushi but does not. This move recovers more quickly than a real Kobokushi, so it can be used to bait a response from an opponent.}} | ||
| Line 591: | Line 599: | ||
{{MoveListRow | Raishin Mahha Ken | {{QCF}} {{QCF}} {{kick}} | Yun's brother Yang drops down with a kick and a hand thrust. If it connects, he walks through his opponent with a single hand thrust that does multiple hits, then he leaves.}} | {{MoveListRow | Raishin Mahha Ken | {{QCF}} {{QCF}} {{kick}} | Yun's brother Yang drops down with a kick and a hand thrust. If it connects, he walks through his opponent with a single hand thrust that does multiple hits, then he leaves.}} | ||
{{MoveListRow | Youhou | {{QCB}} {{QCB}} {{punch}} (at max level) | Yun lashes his arms outward, then performs a Tetsuzan Kou, knocking the opponent into the air. He uppercuts them as they land. The power gauge must be at level 3 to perform this move.}} | {{MoveListRow | Youhou | {{QCB}} {{QCB}} {{punch}} (at max level) | Yun lashes his arms outward, then performs a Tetsuzan Kou, knocking the opponent into the air. He uppercuts them as they land. The power gauge must be at level 3 to perform this move.}} | ||
| − | {{MoveListRow | Hiten Souryujin | {{QCB}} {{QCB}} {{kick}} in midair | Yun falls with a stomping kick. If it connects, his brother Yang appears on the other side of the opponent, and they both pummel the opponent with a series of strikes, ending with mirrored flying kicks.}} | + | {{MoveListRow | Hiten Souryujin | {{QCB}} {{QCB}} {{kick}} in midair (at max level) | Yun falls with a stomping kick. If it connects, his brother Yang appears on the other side of the opponent, and they both pummel the opponent with a series of strikes, ending with mirrored flying kicks. The power gauge must be at level 3 to perform this move.}} |
}} | }} | ||
}} | }} | ||
{{InfoFighter| | {{InfoFighter| | ||
| name=Zangief | | name=Zangief | ||
| − | | | + | | image=Capcom vs SNK 2, Character Art, SNK, Zangief.jpg |
| sprite={{sprite | Street Fighter Alpha 2, Sprites, Zangief.gif}} | | sprite={{sprite | Street Fighter Alpha 2, Sprites, Zangief.gif}} | ||
| info1name=Originally appeared in | | info1name=Originally appeared in | ||
| Line 623: | Line 631: | ||
}} | }} | ||
====SNK==== | ====SNK==== | ||
| − | Athena Asamiya | + | Athena Asamiya and Chang Koehan (with Choi Bounge) are added from ''[[:Category:The King of Fighters|The King of Fighters]]'', Rock Howard is added from ''[[Garou: Mark of the Wolves]]'', Haohmaru is added from ''[[:Category:Samurai Shodown (franchise)|Samurai Shodown]]'', Hibiki Takane is added from ''[[The Last Blade 2]]'', and Ryuhaku Todo is added from ''[[Art of Fighting]]''. |
{{InfoTable|imagewidths=200| | {{InfoTable|imagewidths=200| | ||
{{InfoFighter| | {{InfoFighter| | ||
| name=Athena Asamiya | | name=Athena Asamiya | ||
| − | | | + | | image=Capcom vs SNK 2, Character Art, Capcom, Athena Asamiya.jpg |
| sprite={{sprite | Capcom vs SNK, Sprites, Athena Asamiya.gif}} | | sprite={{sprite | Capcom vs SNK, Sprites, Athena Asamiya.gif}} | ||
| info1name=Originally appeared in | | info1name=Originally appeared in | ||
| Line 635: | Line 643: | ||
{{MoveListRow | Psycho Ball | {{QCB}} {{punch}} | Athena generates and throws a ball of psychic energy. The projectile moves faster when a stronger button is used.}} | {{MoveListRow | Psycho Ball | {{QCB}} {{punch}} | Athena generates and throws a ball of psychic energy. The projectile moves faster when a stronger button is used.}} | ||
{{MoveListRow | Phoenix Arrow | {{QCB}} {{kick}} in midair | Athena curls into a ball and dives diagonally downwards while glowing like a meteor. She finishes with a sweep kick after landing when the move is performed with {{HK}}.}} | {{MoveListRow | Phoenix Arrow | {{QCB}} {{kick}} in midair | Athena curls into a ball and dives diagonally downwards while glowing like a meteor. She finishes with a sweep kick after landing when the move is performed with {{HK}}.}} | ||
| − | {{MoveListRow | Psycho Sword | {{DPF}} {{punch}} | Athena rises upward while her hand slices the air with psychic power. The move ascends higher and hits more times when a stronger button is used. This move can be performed in midair.}} | + | {{MoveListRow | Psycho Sword | {{DPF}} {{punch}} | Athena rises upward while her hand slices the air with psychic power, knocking her opponent over on impact. The move ascends higher and hits more times when a stronger button is used. This move can be performed in midair.}} |
| − | {{MoveListRow | Psycho Reflector | {{HCB}} {{kick}} | Athena holds her palms out and | + | {{MoveListRow | Nu Psycho Reflector | {{HCB}} {{kick}} | Athena holds her palms out and projects a large orb of psychic power in front of her. It knocks back opponents that touch it and also reflects projectiles. She hops forward before generating the orb when the move is performed with {{MK}} and hops slightly further with {{HK}}.}} |
{{MoveListRow | Psycho Teleport | {{QCF}} {{kick}} | Athena runs forward at high speed. She can be hit while doing this but can pass through opponents. She moves about a third of the way across the screen with {{LK}}, about two thirds of the way across the screen with {{MK}}, or all the way across the screen and to the other side of the opponent with {{HK}}.}} | {{MoveListRow | Psycho Teleport | {{QCF}} {{kick}} | Athena runs forward at high speed. She can be hit while doing this but can pass through opponents. She moves about a third of the way across the screen with {{LK}}, about two thirds of the way across the screen with {{MK}}, or all the way across the screen and to the other side of the opponent with {{HK}}.}} | ||
{{MoveListRow | Super Psychic Throw | {{HCF}} {{punch}} (close) | Athena psychically throws her opponent into the air.}} | {{MoveListRow | Super Psychic Throw | {{HCF}} {{punch}} (close) | Athena psychically throws her opponent into the air.}} | ||
| Line 652: | Line 660: | ||
{{InfoFighter| | {{InfoFighter| | ||
| name=Benimaru Nikaido | | name=Benimaru Nikaido | ||
| − | | | + | | image=Capcom vs SNK 2, Character Art, Capcom, Benimaru Nikaido.jpg |
| sprite={{sprite | Capcom vs SNK, Sprites, Benimaru Nikaido.gif}} | | sprite={{sprite | Capcom vs SNK, Sprites, Benimaru Nikaido.gif}} | ||
| info1name=Originally appeared in | | info1name=Originally appeared in | ||
| Line 662: | Line 670: | ||
{{MoveListRow | Iai Geri | {{QCF}} {{kick}} | Benimaru does a rapid knee strike. If the player presses {{down}} {{up}}+{{kick}} during the move, Benimaru follows up with a hopping side kick, then backflips into the air with an electrically charged kick that knocks his opponent over (Handou Sandan Geri).}} | {{MoveListRow | Iai Geri | {{QCF}} {{kick}} | Benimaru does a rapid knee strike. If the player presses {{down}} {{up}}+{{kick}} during the move, Benimaru follows up with a hopping side kick, then backflips into the air with an electrically charged kick that knocks his opponent over (Handou Sandan Geri).}} | ||
{{MoveListRow | Super Inazuma Kick | {{DPF}} {{kick}} | Benimaru backflips into the air with an electrically charged kick that knocks his opponent over. He flips higher when a stronger button is used.}} | {{MoveListRow | Super Inazuma Kick | {{DPF}} {{kick}} | Benimaru backflips into the air with an electrically charged kick that knocks his opponent over. He flips higher when a stronger button is used.}} | ||
| − | {{MoveListRow | Shinkuu Kakate Goma | {{HCB}} {{kick}} | Benimaru stands on one hand and spins his body around, kicking with both | + | {{MoveListRow | Shinkuu Kakate Goma | {{HCB}} {{kick}} | Benimaru stands on one hand and spins his body around, kicking with both legs, knocking his opponent far back on impact. He spins for longer when a stronger button is used, and he can cancel out of the move early by pressing all three {{kick}} simultaneously.}} |
{{MoveListRow | Benimaru Corridor Crunch | {{HCB}} {{right}} {{punch}} (close) | Benimaru grabs and electrocutes his opponent.}} | {{MoveListRow | Benimaru Corridor Crunch | {{HCB}} {{right}} {{punch}} (close) | Benimaru grabs and electrocutes his opponent.}} | ||
}} | }} | ||
| Line 678: | Line 686: | ||
{{InfoFighter| | {{InfoFighter| | ||
| name=Chang Koehan and Choi Bounge | | name=Chang Koehan and Choi Bounge | ||
| − | | | + | | image=Capcom vs SNK 2, Character Art, Capcom, Chang Koehan and Choi Bounge.jpg |
| sprite={{sprite | Capcom vs SNK, Sprites, Chang Koehan.gif}} | | sprite={{sprite | Capcom vs SNK, Sprites, Chang Koehan.gif}} | ||
| sprite2={{sprite | Capcom vs SNK, Sprites, Choi Bounge.gif}} | | sprite2={{sprite | Capcom vs SNK, Sprites, Choi Bounge.gif}} | ||
| Line 688: | Line 696: | ||
{{MoveListRow | Tekkyuu Funsai Geki | Hold {{left}} for 2 seconds, then {{right}}+{{punch}} | Chang flings his ball by its chain in front of him, which knocks down his opponent on impact. He slides forward slightly when the move is performed with {{MP}} and slides slightly further with {{HP}}.}} | {{MoveListRow | Tekkyuu Funsai Geki | Hold {{left}} for 2 seconds, then {{right}}+{{punch}} | Chang flings his ball by its chain in front of him, which knocks down his opponent on impact. He slides forward slightly when the move is performed with {{MP}} and slides slightly further with {{HP}}.}} | ||
{{MoveListRow | Hishou Kuuretsu Zan | {{HCF}} {{kick}} | Choi jumps to the back edge of the screen, then repels off with a spiraling claw attack. He jumps further when a stronger button is used.}} | {{MoveListRow | Hishou Kuuretsu Zan | {{HCF}} {{kick}} | Choi jumps to the back edge of the screen, then repels off with a spiraling claw attack. He jumps further when a stronger button is used.}} | ||
| − | {{MoveListRow | Tatsumaki Shippuu Zan | {{HCB}} {{kick}} | Choi spirals upward in a tornado while slashing around him with his claws. The move covers more horizontal distance when a stronger button is used.}} | + | {{MoveListRow | Tatsumaki Shippuu Zan | {{HCB}} {{kick}} | Choi spirals upward in a tornado while slashing around him with his claws, knocking down the opponent on impact. The move covers more horizontal distance when a stronger button is used.}} |
| − | {{MoveListRow | Hishou Shissou Zan | {{DPF}} {{kick}} | Choi runs forward, then jumps into the air while slashing with both claws. He runs farther and jumps higher when a stronger button is used.}} | + | {{MoveListRow | Hishou Shissou Zan | {{DPF}} {{kick}} | Choi runs forward, then jumps into the air while slashing with both claws, knocking down the opponent on impact. He runs farther and jumps higher when a stronger button is used.}} |
{{MoveListRow | Dai Hakai Nage | {{HCB}} {{right}} {{punch}} (close) | Chang grabs and slams his opponent back and forth multiple times.}} | {{MoveListRow | Dai Hakai Nage | {{HCB}} {{right}} {{punch}} (close) | Chang grabs and slams his opponent back and forth multiple times.}} | ||
}} | }} | ||
{{MoveListTable | desc=Command normals | | {{MoveListTable | desc=Command normals | | ||
| − | {{MoveListRow | Hiki Nige | {{downright}}+{{HP}} | Chang slides along the ground, holding his ball out in front of him.}} | + | {{MoveListRow | Hiki Nige | {{downright}}+{{HP}} | Chang slides along the ground, holding his ball out in front of him, which sweeps his opponent.}} |
}} | }} | ||
| − | {{MoveListTable | desc= | + | {{MoveListTable | desc=Super moves | |
{{MoveListRow | Tekkyuu Dai Bousou | {{down}} {{downright}} {{HCB}} {{punch}} | Chang charges forward with a series of strikes, then swings his ball by its chain over his head and finishes with one of several moves chosen at random. He grabs and slams his opponent back and forth multiple times before finishing at level 3.}} | {{MoveListRow | Tekkyuu Dai Bousou | {{down}} {{downright}} {{HCB}} {{punch}} | Chang charges forward with a series of strikes, then swings his ball by its chain over his head and finishes with one of several moves chosen at random. He grabs and slams his opponent back and forth multiple times before finishing at level 3.}} | ||
{{MoveListRow | Shin! Chouzetsu Tatsumaki Shinkuu Zan | {{HCB}} {{HCB}} {{kick}} | Choi spins on one leg, producing a large tornado that covers the full height of the screen.}} | {{MoveListRow | Shin! Chouzetsu Tatsumaki Shinkuu Zan | {{HCB}} {{HCB}} {{kick}} | Choi spins on one leg, producing a large tornado that covers the full height of the screen.}} | ||
| − | |||
| − | |||
| − | |||
| − | |||
| − | |||
| − | |||
| − | |||
| − | |||
| − | |||
| − | |||
| − | |||
| − | |||
| − | |||
| − | |||
| − | |||
| − | |||
| − | |||
| − | |||
| − | |||
| − | |||
| − | |||
| − | |||
| − | |||
}} | }} | ||
}} | }} | ||
{{InfoFighter| | {{InfoFighter| | ||
| name=Haohmaru | | name=Haohmaru | ||
| − | | | + | | image=Capcom vs SNK 2, Character Art, Capcom, Haohmaru.jpg |
| sprite={{sprite | Capcom vs SNK, Sprites, Haohmaru.gif}} | | sprite={{sprite | Capcom vs SNK, Sprites, Haohmaru.gif}} | ||
| info1name=Originally appeared in | | info1name=Originally appeared in | ||
| Line 743: | Line 728: | ||
{{InfoFighter| | {{InfoFighter| | ||
| name=Hibiki Takane | | name=Hibiki Takane | ||
| − | | | + | | image=Capcom vs SNK 2, Character Art, Capcom, Hibiki Takane.jpg |
| sprite={{sprite | Capcom vs SNK, Sprites, Hibiki Takane.gif}} | | sprite={{sprite | Capcom vs SNK, Sprites, Hibiki Takane.gif}} | ||
| info1name=Originally appeared in | | info1name=Originally appeared in | ||
| info1=''[[The Last Blade 2]]'' | | info1=''[[The Last Blade 2]]'' | ||
| − | | desc=Hibiki is an innocent but | + | | desc=Hibiki is an innocent but proficient swordswoman who is on a mission to avenge her father. |
{{MoveListTable | desc=Special moves | | {{MoveListTable | desc=Special moves | | ||
{{MoveListRow | Touma ni te Kiru Nari | {{QCF}} {{punch}} | Hibiki draws and slashes her sword laterally in a wide arc, then sheathes her blade. She slashes high with {{LP}} or {{MP}} and slashes low with {{HP}} and knocks the opponent over.}} | {{MoveListRow | Touma ni te Kiru Nari | {{QCF}} {{punch}} | Hibiki draws and slashes her sword laterally in a wide arc, then sheathes her blade. She slashes high with {{LP}} or {{MP}} and slashes low with {{HP}} and knocks the opponent over.}} | ||
| Line 757: | Line 742: | ||
{{MoveListTable | desc=Super moves | | {{MoveListTable | desc=Super moves | | ||
{{MoveListRow | Hasshou Suru Shinki Nari | {{down}} {{downleft}} {{HCF}} {{punch}} | Hibiki quickly dashes past her opponent with a slash. As she is sheathing her blade, the opponent collapses from the wound.}} | {{MoveListRow | Hasshou Suru Shinki Nari | {{down}} {{downleft}} {{HCF}} {{punch}} | Hibiki quickly dashes past her opponent with a slash. As she is sheathing her blade, the opponent collapses from the wound.}} | ||
| − | {{MoveListRow | Shi o Osorenu Kokoro Nari | {{right}} {{HCF}} {{punch}} ( | + | {{MoveListRow | Shi o Osorenu Kokoro Nari | {{right}} {{HCF}} {{punch}} (at max level) | If done from a distance, Hibiki slashes her sword at an upward diagonal angle. If done in close range, the screen flashes with a slash. The two fighters are seen in silhouette, then Hibiki resheathes her blade as her opponent collapses from the wound and the scene is restored to color. The power gauge must be at level 3 to perform this move.}} |
{{MoveListRow | Shikabane o Koete Iku Nari | {{HCB}} {{right}} {{kick}} (at max level) | Hibiki runs forward, then slashes her sword upward. If it connects, she can follow up with one of the following combos: | {{MoveListRow | Shikabane o Koete Iku Nari | {{HCB}} {{right}} {{kick}} (at max level) | Hibiki runs forward, then slashes her sword upward. If it connects, she can follow up with one of the following combos: | ||
| − | *{{LP}} {{MP}} {{HP}} {{LP}} {{MP}} {{HP}} {{LP}} {{MP}} {{QCF}} {{HP}} | + | *{{LP}} {{MP}} {{HP}} {{LP}} {{MP}} {{HP}} {{LP}} {{MP}}, {{QCF}} {{HP}} |
| − | *{{LP}} {{MP}} {{HP}} {{LP}} {{MP}} {{HP}} {{LK}} {{MK}} {{QCF}} {{HK}} | + | *{{LP}} {{MP}} {{HP}} {{LP}} {{MP}} {{HP}} {{LK}} {{MK}}, {{QCF}} {{HK}} |
*{{LP}} {{MP}} {{HP}} {{LK}} {{MK}} {{LK}} {{HK}}}} | *{{LP}} {{MP}} {{HP}} {{LK}} {{MK}} {{LK}} {{HK}}}} | ||
}} | }} | ||
| Line 766: | Line 751: | ||
{{InfoFighter| | {{InfoFighter| | ||
| name=Iori Yagami | | name=Iori Yagami | ||
| − | | | + | | image=Capcom vs SNK 2, Character Art, Capcom, Iori Yagami.jpg |
| sprite={{sprite | Capcom vs SNK, Sprites, Iori Yagami.gif}} | | sprite={{sprite | Capcom vs SNK, Sprites, Iori Yagami.gif}} | ||
| info1name=Originally appeared in | | info1name=Originally appeared in | ||
| Line 772: | Line 757: | ||
| desc=Iori is the heir to the Yagami clan, which sealed away the snake demon Orochi along with the Kusanagi and Yata clans. He can create fire, which is purple because of the blood pact his clan made with Orochi hundreds of years ago. He has an intense dislike of Kyo because of the longstanding feud between their clans. | | desc=Iori is the heir to the Yagami clan, which sealed away the snake demon Orochi along with the Kusanagi and Yata clans. He can create fire, which is purple because of the blood pact his clan made with Orochi hundreds of years ago. He has an intense dislike of Kyo because of the longstanding feud between their clans. | ||
{{MoveListTable | desc=Special moves | | {{MoveListTable | desc=Special moves | | ||
| − | {{MoveListRow | 108 Shiki Yami Barai | {{QCF}} {{punch}} | Iori throws fiery purple sparks across the ground. The projectile moves faster when a stronger button is used.}} | + | {{MoveListRow | 108 Shiki: Yami Barai | {{QCF}} {{punch}} | Iori throws fiery purple sparks across the ground. The projectile moves faster when a stronger button is used.}} |
| − | {{MoveListRow | 127 Shiki Aoi Hana | {{QCB}} {{punch}} (up to 3 times) | Iori advances with an uppercut. The motion can be repeated up to three times, in which case he follows up with an additional uppercut, then jumps and comes down with a double axe-handle punch. He advances slightly further when a stronger button is used.}} | + | {{MoveListRow | 127 Shiki: Aoi Hana | {{QCB}} {{punch}} (up to 3 times) | Iori advances with an uppercut. The motion can be repeated up to three times, in which case he follows up with an additional uppercut that knocks his opponent into the air, then jumps and comes down with a double axe-handle punch on the falling opponent. He advances slightly further when a stronger button is used.}} |
| − | {{MoveListRow | 100 Shiki Oniyaki | {{DPF}} {{punch}} | Iori twirls into the air while surrounded in a streak of purple fire, which knocks down his opponent on impact. He ascends higher when a stronger button is used.}} | + | {{MoveListRow | 100 Shiki: Oniyaki | {{DPF}} {{punch}} | Iori twirls into the air while surrounded in a streak of purple fire, which knocks down his opponent on impact. He ascends higher when a stronger button is used.}} |
| − | {{MoveListRow | 212 Shiki Kototsuki In | {{HCB}} {{kick}} | Iori runs forward and tries to grab his opponent by the head. If he succeeds, he takes the opponent down, then causes an explosion of purple fire. He runs further when a stronger button is used.}} | + | {{MoveListRow | 212 Shiki: Kototsuki In | {{HCB}} {{kick}} | Iori runs forward and tries to grab his opponent by the head. If he succeeds, he takes the opponent down, then causes an explosion of purple fire. He runs further when a stronger button is used.}} |
{{MoveListRow | Kuzukaze | {{HCB}} {{right}} {{punch}} (close) | Iori grabs and shoves his opponent away.}} | {{MoveListRow | Kuzukaze | {{HCB}} {{right}} {{punch}} (close) | Iori grabs and shoves his opponent away.}} | ||
}} | }} | ||
{{MoveListTable | desc=Command normals | | {{MoveListTable | desc=Command normals | | ||
| − | {{MoveListRow | Ge Shiki Yumebiki | {{right}}+{{MP}} | Iori swings his fist back in front of him.}} | + | {{MoveListRow | Ge Shiki: Yumebiki | {{right}}+{{MP}} | Iori swings his fist back in front of him.}} |
| − | {{MoveListRow | Ge Shiki Gou Fu In Shinigami | {{right}}+{{MK}} | Iori pulls his leg up high, then does axe kick that can hit twice. The second hit is an overhead strike that can hit characters who are crouch blocking.}} | + | {{MoveListRow | Ge Shiki: Gou Fu In Shinigami | {{right}}+{{MK}} | Iori pulls his leg up high, then does axe kick that can hit twice. The second hit is an overhead strike that can hit characters who are crouch blocking.}} |
| − | {{MoveListRow | Ge Shiki Yuri Ori | {{left}}+{{LK}} in midair | Iori kicks behind him.}} | + | {{MoveListRow | Ge Shiki: Yuri Ori | {{left}}+{{LK}} in midair | Iori kicks behind him.}} |
}} | }} | ||
{{MoveListTable | desc=Super moves | | {{MoveListTable | desc=Super moves | | ||
| − | {{MoveListRow | Kin 1211 Shiki Ya Otome | {{down}} {{downright}} {{HCB}} {{punch}} | Iori dashes forward and performs a series of hand strikes, ending by grabbing the opponent and creating an explosion of purple fire. He dashes further at higher levels. He grabs and takes down the opponent at levels 2 and 3.}} | + | {{MoveListRow | Kin 1211 Shiki: Ya Otome | {{down}} {{downright}} {{HCB}} {{punch}} | Iori dashes forward and performs a series of hand strikes, ending by grabbing the opponent and creating an explosion of purple fire. He dashes further at higher levels. He grabs and takes down the opponent at levels 2 and 3.}} |
| − | {{MoveListRow | Ura 108 Shiki Ya Sakazuki | {{down}} {{downleft}} {{HCF}} {{punch}} | Iori throws fiery purple sparks that slide along the ground, then explode in a pillar of purple fire. If it hits, the opponent is trapped in a stasis effect until knocked out of it. The projectile explodes into four successive pillars at level 2 and eight successive pillars at level 3.}} | + | {{MoveListRow | Ura 108 Shiki: Ya Sakazuki | {{down}} {{downleft}} {{HCF}} {{punch}} | Iori throws fiery purple sparks that slide along the ground, then explode in a pillar of purple fire. If it hits, the opponent is trapped in a stasis effect until knocked out of it. The projectile explodes into four successive pillars at level 2 and eight successive pillars at level 3.}} |
}} | }} | ||
}} | }} | ||
{{InfoFighter| | {{InfoFighter| | ||
| name=Joe Higashi | | name=Joe Higashi | ||
| − | | | + | | image=Capcom vs SNK 2, Character Art, Capcom, Joe Higashi.jpg |
| sprite={{sprite | Capcom vs SNK Pro, Sprites, Joe Higashi.gif}} | | sprite={{sprite | Capcom vs SNK Pro, Sprites, Joe Higashi.gif}} | ||
| info1name=Originally appeared in | | info1name=Originally appeared in | ||
| Line 810: | Line 795: | ||
{{InfoFighter| | {{InfoFighter| | ||
| name=Kim Kaphwan | | name=Kim Kaphwan | ||
| − | | | + | | image=Capcom vs SNK 2, Character Art, Capcom, Kim Kaphwan.jpg |
| sprite={{sprite | Capcom vs SNK, Sprites, Kim Kaphwan.gif}} | | sprite={{sprite | Capcom vs SNK, Sprites, Kim Kaphwan.gif}} | ||
| info1name=Originally appeared in | | info1name=Originally appeared in | ||
| info1=''[[Fatal Fury 2]]'' | | info1=''[[Fatal Fury 2]]'' | ||
| − | | desc=Kim is a taekwondo master with a strong sense of justice. | + | | desc=Kim is a Korean taekwondo master with a strong sense of justice. |
{{MoveListTable | desc=Special moves | | {{MoveListTable | desc=Special moves | | ||
| − | {{MoveListRow | Han Getsu Zan | {{QCB}} {{kick}} | Kim | + | {{MoveListRow | Han Getsu Zan | {{QCB}} {{kick}} | Kim flips forward with a semicircular split-leg kick, which can hit with the heel of each leg. The move covers a wider arc when a stronger button is used.}} |
| − | {{MoveListRow | Hien Zan | Hold {{down}} for 2 seconds, then {{up}}+{{kick}} | Kim flips backward, slicing through the air with a circular kick, which knocks down his opponent on impact. He ascends higher when a stronger button is used. When the move is performed with {{HK}}, it can be followed up with another kick ( | + | {{MoveListRow | Hien Zan | Hold {{down}} for 2 seconds, then {{up}}+{{kick}} | Kim flips backward, slicing through the air with a circular kick, which knocks down his opponent on impact. He ascends higher when a stronger button is used. When the move is performed with {{HK}}, it can be followed up with another kick (Tenshou Zan) by pressing {{down}}+{{HK}}.}} |
{{MoveListRow | Hishou Kyaku | {{QCF}} {{kick}} in midair | Kim dives diagonally downward while stomping repeatedly.}} | {{MoveListRow | Hishou Kyaku | {{QCF}} {{kick}} in midair | Kim dives diagonally downward while stomping repeatedly.}} | ||
| − | {{MoveListRow | Ryuusei Ranku | Hold {{left}} for 2 seconds, then {{right}}+{{kick}} | Kim slides forward with a sweep kick, then jumps in the air and | + | {{MoveListRow | Ryuusei Ranku | Hold {{left}} for 2 seconds, then {{right}}+{{kick}} | Kim slides forward with a sweep kick, then jumps in the air and follows up with an axe kick that knocks his opponent down. He slides further when a stronger button is used.}} |
| − | {{MoveListRow | Kuusajin | Hold {{down}} for 2 seconds, then {{up}}+{{punch}} | Kim spins diagonally upward while kicking. He ascends higher and kicks more times when a stronger button is used.}} | + | {{MoveListRow | Kuusajin | Hold {{down}} for 2 seconds, then {{up}}+{{punch}} | Kim spins diagonally upward while kicking, knocking his opponent into the air. He ascends higher and kicks more times when a stronger button is used.}} |
| − | {{MoveListRow | Haki Kyaku | {{down}} {{down}} {{kick}} | Kim stomps the ground, hitting opponents in front of him.}} | + | {{MoveListRow | Haki Kyaku | {{down}} {{down}} {{kick}} | Kim stomps the ground, hitting opponents in front of him. This move can neutralize ground projectiles.}} |
{{MoveListRow | Stance Change | Hold {{HK}} after {{HK}} or Neri Chagi | Kim changes his stance to face the background. He cannot move while in this stance, and releasing {{HK}} returns him to his normal stance. While holding this stance, he can perform a side kick with {{LP}}, an edge kick with {{MP}}, a high back kick that knocks his opponent over with {{HP}}, a stomp with {{LK}}, or an axe kick that can hit opponents who are crouch blocking with {{MK}}.}} | {{MoveListRow | Stance Change | Hold {{HK}} after {{HK}} or Neri Chagi | Kim changes his stance to face the background. He cannot move while in this stance, and releasing {{HK}} returns him to his normal stance. While holding this stance, he can perform a side kick with {{LP}}, an edge kick with {{MP}}, a high back kick that knocks his opponent over with {{HP}}, a stomp with {{LK}}, or an axe kick that can hit opponents who are crouch blocking with {{MK}}.}} | ||
}} | }} | ||
| Line 835: | Line 820: | ||
{{InfoFighter| | {{InfoFighter| | ||
| name=King | | name=King | ||
| − | | | + | | image=Capcom vs SNK 2, Character Art, Capcom, King.jpg |
| sprite={{sprite | Capcom vs SNK, Sprites, King.gif}} | | sprite={{sprite | Capcom vs SNK, Sprites, King.gif}} | ||
| info1name=Originally appeared in | | info1name=Originally appeared in | ||
| Line 843: | Line 828: | ||
{{MoveListRow | Venom Strike | {{QCF}} {{kick}} | King performs a jumping kick, lobbing a fireball through the air. The projectile moves faster when a stronger button is used.}} | {{MoveListRow | Venom Strike | {{QCF}} {{kick}} | King performs a jumping kick, lobbing a fireball through the air. The projectile moves faster when a stronger button is used.}} | ||
{{MoveListRow | Double Strike | {{QCF}} {{QCF}} {{kick}} | King performs two jumping kicks in quick succession, lobbing two fireballs through the air. The projectiles move faster when a stronger button is used.}} | {{MoveListRow | Double Strike | {{QCF}} {{QCF}} {{kick}} | King performs two jumping kicks in quick succession, lobbing two fireballs through the air. The projectiles move faster when a stronger button is used.}} | ||
| − | {{MoveListRow | Trap Shot | {{RDP}} {{kick}} | King performs a somersault kick. If it hits, she follows up with a barrage of fast kicks.}} | + | {{MoveListRow | Trap Shot | {{RDP}} {{kick}} | King performs a somersault kick. If it hits, she follows up with a barrage of fast kicks, ending by kicking her opponent away.}} |
{{MoveListRow | Tornado Kick | {{HCB}} {{kick}} | King spins forward through into the air while kicking, knocking her opponent over on impact. The move covers more horizontal distance when a stronger button is used.}} | {{MoveListRow | Tornado Kick | {{HCB}} {{kick}} | King spins forward through into the air while kicking, knocking her opponent over on impact. The move covers more horizontal distance when a stronger button is used.}} | ||
| − | {{MoveListRow | Mirage Kick | {{QCB}} {{punch}} | King slides forward, then hits her opponent with alternating high and low kicks. She slides slightly further forward and kicks more times when a stronger button is used.}} | + | {{MoveListRow | Mirage Kick | {{QCB}} {{punch}} | King slides forward, then hits her opponent with alternating high and low kicks that knock her opponent over. She slides slightly further forward and kicks more times when a stronger button is used.}} |
| − | {{MoveListRow | Surprise Rose | {{DPF}} {{kick}} | King | + | {{MoveListRow | Surprise Rose | {{DPF}} {{kick}} | King rises into the air with a knee strike, then comes down with multiple stomping kicks that knock her opponent over. The move covers more horizontal distance when a stronger button is used.}} |
}} | }} | ||
{{MoveListTable | desc=Command normals | | {{MoveListTable | desc=Command normals | | ||
| Line 858: | Line 843: | ||
{{InfoFighter| | {{InfoFighter| | ||
| name=Kyo Kusanagi | | name=Kyo Kusanagi | ||
| − | | | + | | image=Capcom vs SNK 2, Character Art, Capcom, Kyo Kusanagi.jpg |
| sprite={{sprite | Capcom vs SNK, Sprites, Kyo Kusanagi.gif}} | | sprite={{sprite | Capcom vs SNK, Sprites, Kyo Kusanagi.gif}} | ||
| info1name=Originally appeared in | | info1name=Originally appeared in | ||
| Line 864: | Line 849: | ||
| desc=Kyo is the heir to the Kusanagi clan, which sealed away the snake demon Orochi along with the Yagami and Yata clans. He is one of the last members of his clan who can still create fire. | | desc=Kyo is the heir to the Kusanagi clan, which sealed away the snake demon Orochi along with the Yagami and Yata clans. He is one of the last members of his clan who can still create fire. | ||
{{MoveListTable | desc=Special moves | | {{MoveListTable | desc=Special moves | | ||
| − | {{MoveListRow | 114 Shiki: Aragami | {{QCF}} {{LP}} or {{MP}} | Kyo lunges forward with an explosive hook punch using his following arm. While the move is being performed, it can be followed up by a fiery uppercut (128 Shiki: Kono Kizu) with {{QCF}} {{punch}} or an elbow smash (127 Shiki: Yano Sabi) with {{HCB}} {{punch}}. The follow-up move can be followed up with an elbow smash (127 Shiki: Yano Sabi, after 128 Shiki: Kono Kizu) or a downward punch (Ge Shiki: Migiri Ugachi, after 127 Shiki: Yano Sabi) with {{punch}} or a side kick (125 Shiki: Nanase) with {{kick}}.}} | + | {{MoveListRow | 114 Shiki: Aragami | {{QCF}} {{LP}} or {{MP}} | Kyo lunges forward with an explosive hook punch using his following arm. This move can neutralize projectiles. While the move is being performed, it can be followed up by a fiery uppercut (128 Shiki: Kono Kizu) with {{QCF}} {{punch}} or an elbow smash (127 Shiki: Yano Sabi) with {{HCB}} {{punch}}. The follow-up move can be followed up with an elbow smash (127 Shiki: Yano Sabi, after 128 Shiki: Kono Kizu) or a downward punch (Ge Shiki: Migiri Ugachi, after 127 Shiki: Yano Sabi) with {{punch}} or a side kick (125 Shiki: Nanase) with {{kick}}.}} |
| − | {{MoveListRow | 115 Shiki: Dokugami | {{QCF}} {{HP}} | Kyo steps forward with an explosive hook punch using his leading arm. While the move is being performed, it can be followed up by a backhand (401 Shiki: Tsumi Yomi) with {{HCB}} {{punch}} | + | {{MoveListRow | 115 Shiki: Dokugami | {{QCF}} {{HP}} | Kyo steps forward with an explosive hook punch using his leading arm. This move can neutralize projectiles. While the move is being performed, it can be followed up by a backhand (401 Shiki: Tsumi Yomi) with {{HCB}} {{punch}}, then a jumping attack (402 Shiki: Batsu Yomi) with {{right}}+{{punch}}.}} |
| − | {{MoveListRow | 100 Shiki Oni Yaki | {{DPF}} {{punch}} | Kyo twirls into the air while surrounded in a streak of red fire, which knocks down his opponent on impact. He ascends higher when a stronger button is used.}} | + | {{MoveListRow | 100 Shiki: Oni Yaki | {{DPF}} {{punch}} | Kyo twirls into the air while surrounded in a streak of red fire, which knocks down his opponent on impact. He ascends higher when a stronger button is used.}} |
| − | {{MoveListRow | 101 Shiki Oboro Guruma | {{RDP}} {{kick}} | Kyo flies through the air with a spinning back kick, which knocks down his opponent on impact. He kicks more times when a stronger button is used.}} | + | {{MoveListRow | 101 Shiki: Oboro Guruma | {{RDP}} {{kick}} | Kyo flies through the air with a spinning back kick, which knocks down his opponent on impact. He kicks more times when a stronger button is used.}} |
| − | {{MoveListRow | 75 Shiki Kai | {{QCF}} {{kick}} | Kyo hops forward with a front kick that knocks his opponent over. He slides slightly further before hopping when a stronger button is used. It can be followed up with another kick by pressing {{kick}} again.}} | + | {{MoveListRow | 75 Shiki: Kai | {{QCF}} {{kick}} | Kyo hops forward with a front kick that knocks his opponent over. He slides slightly further before hopping when a stronger button is used. It can be followed up with another kick by pressing {{kick}} again.}} |
| − | {{MoveListRow | 202 Shiki Koto Tsuki You | {{HCB}} {{kick}} | Kyo runs into his opponent with an elbow strike, then lifts the opponent into the air with his hand and causes an explosion of red fire. He runs most of the width of the screen with {{LK}} and the full width of the screen with {{MK}} and {{HK}}.}} | + | {{MoveListRow | 202 Shiki: Koto Tsuki You | {{HCB}} {{kick}} | Kyo runs into his opponent with an elbow strike, then lifts the opponent into the air with his hand and causes an explosion of red fire. He runs most of the width of the screen with {{LK}} and the full width of the screen with {{MK}} and {{HK}}.}} |
{{MoveListRow | R.E.D. Kick | {{RDP}} {{kick}} | Kyo rolls through the air with a kick that knocks his opponent to the ground on impact. He jumps higher when a stronger button is used.}} | {{MoveListRow | R.E.D. Kick | {{RDP}} {{kick}} | Kyo rolls through the air with a kick that knocks his opponent to the ground on impact. He jumps higher when a stronger button is used.}} | ||
}} | }} | ||
{{MoveListTable | desc=Command normals | | {{MoveListTable | desc=Command normals | | ||
| − | {{MoveListRow | Ge Shiki Naraku Otoshi | {{down}}+{{HP}} in midair | Kyo clasps his hands together and swings them down like a hammer, which knocks down opponents on impact.}} | + | {{MoveListRow | Ge Shiki: Naraku Otoshi | {{down}}+{{HP}} in midair | Kyo clasps his hands together and swings them down like a hammer, which knocks down opponents on impact.}} |
{{MoveListRow | Shoulder Charge | {{right}}+{{HP}} | Kyo lean forward and knocks his opponent far back with a shoulder ram.}} | {{MoveListRow | Shoulder Charge | {{right}}+{{HP}} | Kyo lean forward and knocks his opponent far back with a shoulder ram.}} | ||
| − | {{MoveListRow | Ge Shiki Gou Fu You | {{right}}+{{MK}} | Kyo pulls his leg up high, then does axe kick that can hit twice. The second hit is an overhead strike that can hit characters who are crouch blocking.}} | + | {{MoveListRow | Ge Shiki: Gou Fu You | {{right}}+{{MK}} | Kyo pulls his leg up high, then does axe kick that can hit twice. The second hit is an overhead strike that can hit characters who are crouch blocking.}} |
{{MoveListRow | 88 Shiki | {{downright}}+{{HK}} | Kyo kicks twice while crouched.}} | {{MoveListRow | 88 Shiki | {{downright}}+{{HK}} | Kyo kicks twice while crouched.}} | ||
}} | }} | ||
{{MoveListTable | desc=Super moves | | {{MoveListTable | desc=Super moves | | ||
| − | {{MoveListRow | Ura 108 Shiki Orochi Nagi | {{down}} {{downleft}} {{HCF}} {{punch}} | Kyo holds a hand into the air and foments a flame while {{punch}} is held. When the button is released, he swipes his hand down, igniting the air around him, and slides forward while surrounded in flames.}} | + | {{MoveListRow | Ura 108 Shiki: Orochi Nagi | {{down}} {{downleft}} {{HCF}} {{punch}} | Kyo holds a hand into the air and foments a flame while {{punch}} is held. When the button is released, he swipes his hand down, igniting the air around him, and slides forward while surrounded in flames.}} |
{{MoveListRow | Saishuu Kessen Ougi "Mu Shiki" | {{QCF}} {{QCF}} {{punch}} | Kyo ignites his hand and throws a burst of fire onto the ground. He steps through the fire, setting himself ablaze, and performs several rapid punches. He finishes by twirling into the air while surrounded in a streak of red fire at higher levels.}} | {{MoveListRow | Saishuu Kessen Ougi "Mu Shiki" | {{QCF}} {{QCF}} {{punch}} | Kyo ignites his hand and throws a burst of fire onto the ground. He steps through the fire, setting himself ablaze, and performs several rapid punches. He finishes by twirling into the air while surrounded in a streak of red fire at higher levels.}} | ||
}} | }} | ||
| Line 885: | Line 870: | ||
{{InfoFighter| | {{InfoFighter| | ||
| name=Mai Shiranui | | name=Mai Shiranui | ||
| − | | | + | | image=Capcom vs SNK 2, Character Art, Capcom, Mai Shiranui.jpg |
| sprite={{sprite | Capcom vs SNK, Sprites, Mai Shiranui.gif}} | | sprite={{sprite | Capcom vs SNK, Sprites, Mai Shiranui.gif}} | ||
| info1name=Originally appeared in | | info1name=Originally appeared in | ||
| info1=''[[Fatal Fury 2]]'' | | info1=''[[Fatal Fury 2]]'' | ||
| − | | desc=Mai is a kunoichi who was trained in her family's ninjutsu arts. | + | | desc=Mai is a kunoichi who was trained in her family's ninjutsu arts. The word "mai" (舞) means "dance," and "shiranui" (不知火) means "unknown fire" (after the optical phenomenon of the same name in which flames seem to appear over an open body of water), both referencing her fighting style of dance-like movements and fire-conjuring special abilities. |
{{MoveListTable | desc=Special moves | | {{MoveListTable | desc=Special moves | | ||
{{MoveListRow | Ka Chou Sen | {{QCF}} {{punch}} | Mai throws her folding fan at her opponent. The projectile moves faster when a stronger button is used.}} | {{MoveListRow | Ka Chou Sen | {{QCF}} {{punch}} | Mai throws her folding fan at her opponent. The projectile moves faster when a stronger button is used.}} | ||
| − | {{MoveListRow | Ryuu En Bu | {{QCB}} {{punch}} | Mai twirls around, whipping her opponent with the sash around her waist, which is set alight and knocks her opponent over on impact. The move can hit two times when it is performed with {{HP}}.}} | + | {{MoveListRow | Ryuu En Bu | {{QCB}} {{punch}} | Mai twirls around, whipping her opponent with the sash around her waist, which is set alight and knocks her opponent over on impact. This move can neutralize projectiles. The move can hit two times when it is performed with {{HP}}.}} |
| − | {{MoveListRow | Hissatsu Shinobi Bachi | {{HCF}} {{kick}} | Mai performs a cartwheel, then drops to the ground with an elbow strike. The move travels more distance when a stronger button is used.}} | + | {{MoveListRow | Hissatsu Shinobi Bachi | {{HCF}} {{kick}} | Mai performs a cartwheel, then drops to the ground with an elbow strike that knocks her opponent over. The move travels more distance when a stronger button is used.}} |
| − | {{MoveListRow | Musasabi no Mai (Chijou) | Hold {{down}} for 2 seconds, then {{up}}+{{punch}} | Mai jumps to the back edge of the screen, then dives diagonally downward with her arms spread out. The move covers more horizontal distance when a stronger button is used.}} | + | {{MoveListRow | Musasabi no Mai (Chijou) | Hold {{down}} for 2 seconds, then {{up}}+{{punch}} | Mai jumps to the back edge of the screen, then dives diagonally downward with her arms spread out, knocking her opponent over on impact. The move covers more horizontal distance when a stronger button is used.}} |
| − | {{MoveListRow | Musasabi no Mai (Kuuchuu) | {{QCB}} {{punch}} in midair | Mai dives diagonally downward with her arms spread out. The move covers more horizontal distance when a stronger button is used.}} | + | {{MoveListRow | Musasabi no Mai (Kuuchuu) | {{QCB}} {{punch}} in midair | Mai dives diagonally downward with her arms spread out, knocking her opponent over on impact. The move covers more horizontal distance when a stronger button is used.}} |
| − | {{MoveListRow | Kageroh no Mai | Hold {{down}} for 2 seconds, then {{up}}+{{kick}} | Mai clasps her hands and creates two flame pillars that revolve around her. The move hits more times when a stronger button is used.}} | + | {{MoveListRow | Kageroh no Mai | Hold {{down}} for 2 seconds, then {{up}}+{{kick}} | Mai clasps her hands and creates two flame pillars that revolve around her, which knocks her opponent over on impact. The move hits more times when a stronger button is used.}} |
}} | }} | ||
{{MoveListTable | desc=Command normals | | {{MoveListTable | desc=Command normals | | ||
| Line 910: | Line 895: | ||
{{InfoFighter| | {{InfoFighter| | ||
| name=Nakoruru | | name=Nakoruru | ||
| − | | | + | | image=Capcom vs SNK 2, Character Art, Capcom, Nakoruru.jpg |
| sprite={{sprite | Capcom vs SNK, Sprites, Nakoruru.gif}} | | sprite={{sprite | Capcom vs SNK, Sprites, Nakoruru.gif}} | ||
| info1name=Originally appeared in | | info1name=Originally appeared in | ||
| Line 917: | Line 902: | ||
{{MoveListTable | desc=Special moves | | {{MoveListTable | desc=Special moves | | ||
{{MoveListRow | Annu Mutsube | {{QCBD}} {{punch}} | Nakoruru flies along the ground while holding her kodachi in front of her, which knocks over and slides to the other side of her opponent. She flies further when a stronger button is used. This attack must be blocked crouching. It can pass under many projectiles.}} | {{MoveListRow | Annu Mutsube | {{QCBD}} {{punch}} | Nakoruru flies along the ground while holding her kodachi in front of her, which knocks over and slides to the other side of her opponent. She flies further when a stronger button is used. This attack must be blocked crouching. It can pass under many projectiles.}} | ||
| − | {{MoveListRow | Lela Mutsube | {{QCF}} {{punch}} | Nakoruru flies diagonally upwards while holding her kodachi in front of her. She flies further forward when a stronger button is used.}} | + | {{MoveListRow | Lela Mutsube | {{QCF}} {{punch}} | Nakoruru flies diagonally upwards while holding her kodachi in front of her, which knocks her opponent over on impact. She flies further forward when a stronger button is used.}} |
{{MoveListRow | Kamui Rimuse | {{RDP}} {{punch}} | Nakoruru whips her cape downward while turning. She can follow up with an upward whip by pressing {{punch}} before she finishes. This move can reflect projectiles.}} | {{MoveListRow | Kamui Rimuse | {{RDP}} {{punch}} | Nakoruru whips her cape downward while turning. She can follow up with an upward whip by pressing {{punch}} before she finishes. This move can reflect projectiles.}} | ||
| − | {{MoveListRow | Amube Yatoro | {{HCB}} {{punch}} | Nakoruru calls her hawk Mamahaha to strike her opponent from above with a dive attack. Mamahaha dives downward at a wider angle when a stronger button is used.}} | + | {{MoveListRow | Amube Yatoro | {{HCB}} {{punch}} | Nakoruru calls her hawk Mamahaha to strike her opponent from above with a dive attack, which knocks her opponent over on impact. Mamahaha dives downward at a wider angle when a stronger button is used.}} |
{{MoveListRow | Mamahaha ni Tsukamaru | {{QCB}} {{kick}} | Nakoruru leaps into the air to be carried by her hawk Mamahaha for a limited duration. While in flight, Nakoruru can move in any direction using the D-Pad, attack by swinging her kodachi with {{LP}} or {{MP}}, attack by falling with a spinning slash with {{MP}} or {{HP}}, attack by kicking with {{LK}} or {{MK}}, or fall to the ground with {{HK}}.}} | {{MoveListRow | Mamahaha ni Tsukamaru | {{QCB}} {{kick}} | Nakoruru leaps into the air to be carried by her hawk Mamahaha for a limited duration. While in flight, Nakoruru can move in any direction using the D-Pad, attack by swinging her kodachi with {{LP}} or {{MP}}, attack by falling with a spinning slash with {{MP}} or {{HP}}, attack by kicking with {{LK}} or {{MK}}, or fall to the ground with {{HK}}.}} | ||
| − | {{MoveListRow | Kamui Mutsube | {{QCB}} {{punch}} while carried by Mamahaha | Nakoruru dives diagonally downwards while holding her kodachi out. Nakoruru dives downward at a wider angle when a stronger button is used.}} | + | {{MoveListRow | Kamui Mutsube | {{QCB}} {{punch}} while carried by Mamahaha | Nakoruru dives diagonally downwards while holding her kodachi out, which knocks her opponent over on impact. Nakoruru dives downward at a wider angle when a stronger button is used.}} |
| − | {{MoveListRow | Shichikapu Ai | {{QCF}} {{punch}} while carried by Mamahaha | Mamahaha charges downward and stabs the opponent with her beak while engulfed in flames. Mamahaha dives downward at a wider angle when a stronger button is used.}} | + | {{MoveListRow | Shichikapu Ai | {{QCF}} {{punch}} while carried by Mamahaha | Mamahaha charges downward and stabs the opponent with her beak while engulfed in flames, which knocks the opponent over on impact. Mamahaha dives downward at a wider angle when a stronger button is used.}} |
}} | }} | ||
{{MoveListTable | desc=Command normals | | {{MoveListTable | desc=Command normals | | ||
| Line 936: | Line 921: | ||
{{InfoFighter| | {{InfoFighter| | ||
| name=Raiden | | name=Raiden | ||
| − | | | + | | image=Capcom vs SNK 2, Character Art, Capcom, Raiden.jpg |
| sprite={{sprite | Capcom vs SNK, Sprites, Raiden.gif}} | | sprite={{sprite | Capcom vs SNK, Sprites, Raiden.gif}} | ||
| info1name=Originally appeared in | | info1name=Originally appeared in | ||
| Line 943: | Line 928: | ||
{{MoveListTable | desc=Special moves | | {{MoveListTable | desc=Special moves | | ||
{{MoveListRow | Poison Spray | {{HCB}} {{punch}} | Raiden blows a poisonous mist in front of him, which knocks his opponent over on impact. He blows for longer when a stronger button is used.}} | {{MoveListRow | Poison Spray | {{HCB}} {{punch}} | Raiden blows a poisonous mist in front of him, which knocks his opponent over on impact. He blows for longer when a stronger button is used.}} | ||
| − | {{MoveListRow | Giant Bomb | Hold {{left}} for 2 seconds, then {{right}}+{{punch}} | Raiden charges forward with a shoulder tackle. He charges further when a stronger button is used.}} | + | {{MoveListRow | Giant Bomb | Hold {{left}} for 2 seconds, then {{right}}+{{punch}} | Raiden charges forward with a shoulder tackle, which knocks his opponent over on impact. He charges further when a stronger button is used.}} |
{{MoveListRow | Jumping Lariat Drop | {{DPF}} {{punch}} | Raiden leaps forward with his arm hooked and tries to take his opponent down with a lariat.}} | {{MoveListRow | Jumping Lariat Drop | {{DPF}} {{punch}} | Raiden leaps forward with his arm hooked and tries to take his opponent down with a lariat.}} | ||
| − | {{MoveListRow | Super Drop Kick | Hold two {{kick}} simultaneously, then release | Raiden jumps forward with a dropkick.}} | + | {{MoveListRow | Super Drop Kick | Hold two {{kick}} simultaneously, then release | Raiden jumps forward with a dropkick, which knocks his opponent over on impact.}} |
{{MoveListRow | Thunder Crush Bomb | D-Pad in a 360° rotation, then {{kick}} (close) | Raiden grabs his opponent, drops them to the ground with a powerbomb, then jumps up in the air and throws them to the ground. He jumps higher when a stronger button is used.}} | {{MoveListRow | Thunder Crush Bomb | D-Pad in a 360° rotation, then {{kick}} (close) | Raiden grabs his opponent, drops them to the ground with a powerbomb, then jumps up in the air and throws them to the ground. He jumps higher when a stronger button is used.}} | ||
{{MoveListRow | Raiden Combination/Body Blow | {{RDP}} {{punch}} | Raiden steps forward with a body blow. He steps slightly further when a stronger button is used. It can be followed up with a headbutt by pressing {{QCB}} {{punch}} or a front suplex by pressing {{QCB}} {{kick}}.}} | {{MoveListRow | Raiden Combination/Body Blow | {{RDP}} {{punch}} | Raiden steps forward with a body blow. He steps slightly further when a stronger button is used. It can be followed up with a headbutt by pressing {{QCB}} {{punch}} or a front suplex by pressing {{QCB}} {{kick}}.}} | ||
| Line 961: | Line 946: | ||
{{InfoFighter| | {{InfoFighter| | ||
| name=Rock Howard | | name=Rock Howard | ||
| − | | | + | | image=Capcom vs SNK 2, Character Art, Capcom, Rock Howard.jpg |
| sprite={{sprite | Capcom vs SNK, Sprites, Rock Howard.gif}} | | sprite={{sprite | Capcom vs SNK, Sprites, Rock Howard.gif}} | ||
| info1name=Originally appeared in | | info1name=Originally appeared in | ||
| Line 968: | Line 953: | ||
{{MoveListTable | desc=Special moves | | {{MoveListTable | desc=Special moves | | ||
{{MoveListRow | Reppuu Ken | {{QCF}} {{punch}} | Rock waves a hand and sends a violent shockwave across the ground. The projectile moves faster when a stronger button is used. He waves with each hand when the move is performed with {{HP}}, which increases the startup time of the move but can hit two times if the opponent is near.}} | {{MoveListRow | Reppuu Ken | {{QCF}} {{punch}} | Rock waves a hand and sends a violent shockwave across the ground. The projectile moves faster when a stronger button is used. He waves with each hand when the move is performed with {{HP}}, which increases the startup time of the move but can hit two times if the opponent is near.}} | ||
| − | {{MoveListRow | Rising Tackle | Hold {{down}} for 2 seconds, then {{up}}+{{punch}} | Rock spins into the air while upside down and holding an arm out, which knocks his opponent over on impact. | + | {{MoveListRow | Rising Tackle | Hold {{down}} for 2 seconds, then {{up}}+{{punch}} | Rock spins into the air while upside down and holding an arm out, which knocks his opponent over on impact. The move ascends higher and hits more times when a stronger button is used.}} |
{{MoveListRow | Hard Edge | {{QCB}} {{punch}} | Rock runs forward with an elbow strike that knocks his opponent over. He follows up with a straight punch if the first hit connects when the move is performed with {{HP}}.}} | {{MoveListRow | Hard Edge | {{QCB}} {{punch}} | Rock runs forward with an elbow strike that knocks his opponent over. He follows up with a straight punch if the first hit connects when the move is performed with {{HP}}.}} | ||
| − | {{MoveListRow | Rage Run | {{QCB}} {{LK}} | Rock runs forward | + | {{MoveListRow | Rage Run "Dunk" | {{QCB}} {{LK}} | Rock runs forward. If the opponent is close enough, Rock hops in the air and smashes downward with his fist.}} |
| − | {{MoveListRow | Crack Counter | {{QCF}} {{ | + | {{MoveListRow | Rage Run "Save" | {{QCB}} {{MK}} | Rock runs forward, then stops short at the end of his run.}} |
| + | {{MoveListRow | Rage Run "Shift" | {{QCB}} {{HK}} | Rock runs forward. If the opponent is close enough, Rock shifts to the other side of the opponent.}} | ||
| + | {{MoveListRow | Crack Counter Joudan | {{QCF}} {{LK}} | Rock catches a high or jumping attack from his opponent and counters with a forward flipping heel drop.}} | ||
| + | {{MoveListRow | Crack Counter Chuudan | {{QCF}} {{MK}} | Rock catches a mid attack from his opponent and counters with a forward flipping heel drop.}} | ||
| + | {{MoveListRow | Crack Counter Gedan | {{QCF}} {{HK}} | Rock catches a low or sweep attack from his opponent and counters with a forward flipping heel drop.}} | ||
{{MoveListRow | Shinkuu Nage | D-Pad in a 360° rotation, then {{HP}} (close) | Rock throws his opponent, then waves his arms in a circle. Rock can release an explosive blast of energy after throwing his opponent by holding, then releasing {{LP}}+{{LK}}.}} | {{MoveListRow | Shinkuu Nage | D-Pad in a 360° rotation, then {{HP}} (close) | Rock throws his opponent, then waves his arms in a circle. Rock can release an explosive blast of energy after throwing his opponent by holding, then releasing {{LP}}+{{LK}}.}} | ||
}} | }} | ||
| Line 978: | Line 967: | ||
}} | }} | ||
{{MoveListTable | desc=Super moves | | {{MoveListTable | desc=Super moves | | ||
| − | {{MoveListRow | Raging Storm | {{QCF}} {{QCF}} {{ | + | {{MoveListRow | Raging Storm | {{QCF}} {{QCF}} {{punch}} | Rock ducks and calls a whirlwind of energy around him.}} |
| − | {{MoveListRow | Shine Knuckle | {{QCF}} {{QCF}} {{ | + | {{MoveListRow | Shine Knuckle | {{QCF}} {{QCF}} {{kick}} | Rock charges forward with a burning fist. He follows up with an elbow strike, then spins into the air while upside down and holding an arm out at level 3.}} |
| − | {{MoveListRow | Deadly Rave Neo | {{HCB}} {{right}} {{LP}}, {{LP}} {{LP}} {{LK}} {{LK}} {{HP}} {{HP}} {{HK}} {{HK}}, {{QCB}} {{HP}} | Rock performs a series of attacks, ending by throwing an energy burst from his hands.}} | + | {{MoveListRow | Deadly Rave Neo | {{HCB}} {{right}} {{LP}}, {{LP}} {{LP}} {{LK}} {{LK}} {{HP}} {{HP}} {{HK}} {{HK}}, {{QCB}} {{HP}} (at max level) | Rock performs a series of attacks, ending by throwing an energy burst from his hands. The power gauge must be at level 3 to perform this move.}} |
}} | }} | ||
}} | }} | ||
{{InfoFighter| | {{InfoFighter| | ||
| name=Ryo Sakazaki | | name=Ryo Sakazaki | ||
| − | | | + | | image=Capcom vs SNK 2, Character Art, Capcom, Ryo Sakazaki.jpg |
| sprite={{sprite | Capcom vs SNK, Sprites, Ryo Sakazaki.gif}} | | sprite={{sprite | Capcom vs SNK, Sprites, Ryo Sakazaki.gif}} | ||
| info1name=Originally appeared in | | info1name=Originally appeared in | ||
| info1=''[[Art of Fighting]]'' | | info1=''[[Art of Fighting]]'' | ||
| − | | desc=Ryo is a practitioner of Kyokugen-ryuu, a style of karate created by his father. | + | | desc=Ryo is a practitioner of Kyokugen-ryuu, a style of karate created by his father. He was created as an homage to the ''Street Fighter'' character Ryu.{{ref|https://web.archive.org/web/20160414031418/http://www.1up.com/features/the-man-who-created-street-fighter?pager.offset=3}} |
{{MoveListTable | desc=Special moves | | {{MoveListTable | desc=Special moves | | ||
{{MoveListRow | Ko'ou Ken | {{QCF}} {{punch}} | Ryo hurls a fireball from his palm. The projectile moves faster when a stronger button is used. If performed in midair, he shoots the projectile diagonally downward.}} | {{MoveListRow | Ko'ou Ken | {{QCF}} {{punch}} | Ryo hurls a fireball from his palm. The projectile moves faster when a stronger button is used. If performed in midair, he shoots the projectile diagonally downward.}} | ||
| Line 1,008: | Line 997: | ||
}} | }} | ||
{{InfoFighter| | {{InfoFighter| | ||
| − | | name=Ryuhaku | + | | name=Ryuhaku Todo |
| − | | | + | | image=Capcom vs SNK 2, Character Art, Capcom, Ryuhaku Todoh.jpg |
| sprite={{sprite | Capcom vs SNK, Sprites, Ryuhaku Todoh.gif}} | | sprite={{sprite | Capcom vs SNK, Sprites, Ryuhaku Todoh.gif}} | ||
| info1name=Originally appeared in | | info1name=Originally appeared in | ||
| info1=''[[Art of Fighting]]'' | | info1=''[[Art of Fighting]]'' | ||
| − | | desc= | + | | desc=Todo is a martial arts instructor who created his own style dervied from Aiki-juujutsu and Kendo. It is a running joke in the ''King of Fighters'' series that his daughter Kasumi is always searching for him and that he is never playable in any SNK games (aside from the console ports of the original ''Art of Fighting''), and this game remains his last playable appearance. |
{{MoveListTable | desc=Special moves | | {{MoveListTable | desc=Special moves | | ||
| − | {{MoveListRow | Kasane Ate | {{QCF}} {{punch}} | | + | {{MoveListRow | Kasane Ate | {{QCF}} {{punch}} | Todo swings his arms down, calling down a flame barrier in front of him. The barrier is further from him when a stronger button is used. This move can be performed in midair.}} |
| − | {{MoveListRow | Taikuu Kasane Ate | {{DPF}} {{punch}} | | + | {{MoveListRow | Taikuu Kasane Ate | {{DPF}} {{punch}} | Todo swings his arms down, then throws them down, calling down a flame barrier diagonally upwards. The barrier is further from him when a stronger button is used.}} |
| − | {{MoveListRow | Stunning Grab | {{HCB}} {{punch}} (close) | | + | {{MoveListRow | Stunning Grab | {{HCB}} {{punch}} (close) | Todo grabs his opponent and hits them with a concentrated palm strike.}} |
}} | }} | ||
{{MoveListTable | desc=Command normals | | {{MoveListTable | desc=Command normals | | ||
| − | {{MoveListRow | Low Kick | {{right}}+{{MK}} | | + | {{MoveListRow | Low Kick | {{right}}+{{MK}} | Todo leans over for a low kick that sweeps his opponent.}} |
}} | }} | ||
{{MoveListTable | desc=Super moves | | {{MoveListTable | desc=Super moves | | ||
| − | {{MoveListRow | Chou Kasane Ate | {{QCF}} {{QCF}} {{punch}} | | + | {{MoveListRow | Chou Kasane Ate | {{QCF}} {{QCF}} {{punch}} | Todo swings his arms down, calling down a rolling wave of fire that moves across the ground. It travels further at higher levels.}} |
| − | {{MoveListRow | Shingan: Kuzu Otoshi | {{down}} {{downright}} {{HCB}} {{punch}} | | + | {{MoveListRow | Shingan: Kuzu Otoshi | {{down}} {{downright}} {{HCB}} {{punch}} | Todo holds a defensive posture. If he is hit by his opponent while doing this, he counters by grabbing and slamming them, then striking them on the ground.}} |
}} | }} | ||
}} | }} | ||
{{InfoFighter| | {{InfoFighter| | ||
| name=Ryuji Yamazaki | | name=Ryuji Yamazaki | ||
| − | | | + | | image=Capcom vs SNK 2, Character Art, Capcom, Ryuji Yamazaki.jpg |
| sprite={{sprite | Capcom vs SNK, Sprites, Ryuji Yamazaki.gif}} | | sprite={{sprite | Capcom vs SNK, Sprites, Ryuji Yamazaki.gif}} | ||
| info1name=Originally appeared in | | info1name=Originally appeared in | ||
| info1=''[[Fatal Fury 3]]'' | | info1=''[[Fatal Fury 3]]'' | ||
| − | | desc= | + | | desc=Yamazaki is a deadly and insane Japanese mobster who fights with one hand in his pocket. |
{{MoveListTable | desc=Special moves | | {{MoveListTable | desc=Special moves | | ||
| − | {{MoveListRow | Sabaki no Aikuchi | {{DPF}} {{punch}} | | + | {{MoveListRow | Sabaki no Aikuchi | {{DPF}} {{punch}} | Yamazaki slides forward and slashes the knife that he conceals in his pocketed hand. He does an additional stab when the move is performed with {{HP}}.}} |
| − | {{MoveListRow | Hebi Tsukai Gedan | {{QCB}} {{LP}} | | + | {{MoveListRow | Hebi Tsukai Gedan | {{QCB}} {{LP}} | Yamazaki charges his arm. When {{LP}} is released, he performs a fast punch diagonally upwards. The longer the button is held, the more damage the punch does if it connects. The move can be canceled by pressing {{kick}}.}} |
| − | {{MoveListRow | Hebi Tsukai Uwadan | {{QCB}} {{MP}} | | + | {{MoveListRow | Hebi Tsukai Uwadan | {{QCB}} {{MP}} | Yamazaki charges his arm. When {{MP}} is released, he performs a fast punch straight ahead. The longer the button is held, the more damage the punch does if it connects. The move can be canceled by pressing {{kick}}.}} |
| − | {{MoveListRow | Hebi Tsukai Chuudan | {{QCB}} {{HP}} | | + | {{MoveListRow | Hebi Tsukai Chuudan | {{QCB}} {{HP}} | Yamazaki charges his arm. When {{HP}} is released, he performs a fast punch diagonally downwards. The longer the button is held, the more damage the punch does if it connects. The move can be canceled by pressing {{kick}}.}} |
| − | {{MoveListRow | Bai Gaeshi | {{QCF}} {{punch}} | | + | {{MoveListRow | Bai Gaeshi | {{QCF}} {{punch}} | Yamazaki swings his arm up, which can damage a nearby opponent or absorb a projectile. After a projectile has been absorbed, he immediately throws a fireball back toward the caster.}} |
| − | {{MoveListRow | Yakiire | {{DPF}} {{kick}} | | + | {{MoveListRow | Yakiire | {{DPF}} {{kick}} | Yamazaki does an axe kick that flattens his opponent. This is an overhead strike that can hit characters who are crouch blocking.}} |
| − | {{MoveListRow | Suna Kake | {{QCB}} {{kick}} | | + | {{MoveListRow | Suna Kake | {{QCB}} {{kick}} | Yamazaki kicks up dust from the ground.}} |
| − | {{MoveListRow | Sadomazo | {{HCF}} {{kick}} | | + | {{MoveListRow | Sadomazo | {{HCF}} {{kick}} | Yamazaki taunts his opponent. If his opponent attacks him while he is doing this, he counters with a charging punch.}} |
| − | {{MoveListRow | Badukan Pachiki | {{HCB}} {{right}} {{punch}} (close) | | + | {{MoveListRow | Badukan Pachiki | {{HCB}} {{right}} {{punch}} (close) | Yamazaki grabs and hits his opponent with an explosive headbutt.}} |
}} | }} | ||
{{MoveListTable | desc=Command normals | | {{MoveListTable | desc=Command normals | | ||
| − | {{MoveListRow | Bussashi | {{right}}+{{LP}} | | + | {{MoveListRow | Bussashi | {{right}}+{{LP}} | Yamazaki punches downward. This is an overhead strike that can hit characters who are crouch blocking.}} |
}} | }} | ||
{{MoveListTable | desc=Super moves | | {{MoveListTable | desc=Super moves | | ||
| − | {{MoveListRow | Guillotine | {{right}} {{HCF}} {{punch}} | | + | {{MoveListRow | Guillotine | {{right}} {{HCF}} {{punch}} | Yamazaki leaps forward, coming down with a flaming fist. If it connects, he drags his opponent along the ground with it before throwing them into the air. He stomps the opponent repeatedly before kicking them at level 3.}} |
| − | {{MoveListRow | Drill | D-Pad in a 360° rotation, then {{repeat|{{punch}}}} (close) | | + | {{MoveListRow | Drill | D-Pad in a 360° rotation, then {{repeat|{{punch}}}} (close) | Yamazaki knocks his opponent into the air, then pummels them with multiple strikes upon landing.}} |
| − | |||
| − | |||
| − | |||
| − | |||
| − | |||
| − | |||
| − | |||
| − | |||
| − | |||
| − | |||
| − | |||
| − | |||
| − | |||
| − | |||
| − | |||
| − | |||
| − | |||
| − | |||
| − | |||
| − | |||
}} | }} | ||
}} | }} | ||
{{InfoFighter| | {{InfoFighter| | ||
| name=Terry Bogard | | name=Terry Bogard | ||
| − | | | + | | image=Capcom vs SNK 2, Character Art, Capcom, Terry Bogard.jpg |
| sprite={{sprite | Capcom vs SNK, Sprites, Terry Bogard.gif}} | | sprite={{sprite | Capcom vs SNK, Sprites, Terry Bogard.gif}} | ||
| info1name=Originally appeared in | | info1name=Originally appeared in | ||
| Line 1,082: | Line 1,051: | ||
{{MoveListTable | desc=Special moves | | {{MoveListTable | desc=Special moves | | ||
{{MoveListRow | Burn Knuckle | {{QCB}} {{punch}} | Terry leaps forward with a burning fist, which knocks down his opponent on impact. He leaps farther when a stronger button is used.}} | {{MoveListRow | Burn Knuckle | {{QCB}} {{punch}} | Terry leaps forward with a burning fist, which knocks down his opponent on impact. He leaps farther when a stronger button is used.}} | ||
| − | {{MoveListRow | Power Wave | {{QCF}} {{punch}} | Terry punches the ground, causing a wave of energy to | + | {{MoveListRow | Power Wave | {{QCF}} {{punch}} | Terry punches the ground, causing a wave of energy to roll across the floor. The projectile moves faster when a stronger button is used.}} |
| − | {{MoveListRow | Power Dunk | {{DPF}} {{kick}} | Terry rises into the air with a knee strike, then smashes downward with a burning fist at the peak of the jump. He launches higher into the air when a stronger button is used.}} | + | {{MoveListRow | Power Dunk | {{DPF}} {{kick}} | Terry rises into the air with a knee strike, then smashes downward with a burning fist at the peak of the jump that knocks his opponent to the ground. He launches higher into the air when a stronger button is used.}} |
| − | {{MoveListRow | Rising Tackle | Hold {{down}} for 2 seconds, then {{up}}+{{punch}} | Terry spins into the air while upside down and holding an arm out, which knocks his opponent over on impact. | + | {{MoveListRow | Rising Tackle | Hold {{down}} for 2 seconds, then {{up}}+{{punch}} | Terry spins into the air while upside down and holding an arm out, which knocks his opponent over on impact. The move ascends higher and hits more times when a stronger button is used.}} |
{{MoveListRow | Crack Shoot | {{QCB}} {{kick}} | Terry jumps forward while kicking in a circle. The move covers a wider arc when a stronger button is used.}} | {{MoveListRow | Crack Shoot | {{QCB}} {{kick}} | Terry jumps forward while kicking in a circle. The move covers a wider arc when a stronger button is used.}} | ||
}} | }} | ||
| Line 1,097: | Line 1,066: | ||
{{InfoFighter| | {{InfoFighter| | ||
| name=Vice | | name=Vice | ||
| − | | | + | | image=Capcom vs SNK 2, Character Art, Capcom, Vice.jpg |
| sprite={{sprite | Capcom vs SNK, Sprites, Vice.gif}} | | sprite={{sprite | Capcom vs SNK, Sprites, Vice.gif}} | ||
| info1name=Originally appeared in | | info1name=Originally appeared in | ||
| Line 1,103: | Line 1,072: | ||
| desc=Vice is Rugal's sadistic secretary, who possesses preternatural strength. | | desc=Vice is Rugal's sadistic secretary, who possesses preternatural strength. | ||
{{MoveListTable | desc=Special moves | | {{MoveListTable | desc=Special moves | | ||
| − | {{MoveListRow | Mayhem | {{QCB}} {{punch}} | Vice charges forward with a shoulder ram that knocks her opponent into the air. She charges further when a stronger button is used. She can follow up by stretching her arm to grab the opponent in midair and slam them into the ground (Taikuu | + | {{MoveListRow | Mayhem | {{QCB}} {{punch}} | Vice charges forward with a shoulder ram that knocks her opponent into the air. She charges further when a stronger button is used. She can follow up by stretching her arm to grab the opponent in midair and slam them into the ground (Taikuu Deicide) by pressing {{DPF}} {{kick}}.}} |
{{MoveListRow | Outrage | {{QCB}} {{kick}} | Vice kicks rapidly in front of her. She hops first when the move is performed with {{HK}}.}} | {{MoveListRow | Outrage | {{QCB}} {{kick}} | Vice kicks rapidly in front of her. She hops first when the move is performed with {{HK}}.}} | ||
{{MoveListRow | Ravenous | {{QCB}} {{kick}} in midair | Vice kicks rapidly in front of her while falling.}} | {{MoveListRow | Ravenous | {{QCB}} {{kick}} in midair | Vice kicks rapidly in front of her while falling.}} | ||
| − | {{MoveListRow | | + | {{MoveListRow | Deicide | {{HCF}} {{kick}} | Vice swipes her hand out in front of her, which stretches to reach. If it connects, she grabs and throws her opponent back.}} |
| − | {{MoveListRow | Taikuu | + | {{MoveListRow | Taikuu Deicide | {{DPF}} {{kick}} | Vice swipes her hand out diagonally upwards, which stretches to reach. If it connects, she grabs and slams her opponent to the ground.}} |
{{MoveListRow | Nail Bomb | {{HCF}} {{punch}} (close) | Vice grabs her opponent, lifts them over her head, and slams them into the ground, which causes a pillar of dark energy to explode.}} | {{MoveListRow | Nail Bomb | {{HCF}} {{punch}} (close) | Vice grabs her opponent, lifts them over her head, and slams them into the ground, which causes a pillar of dark energy to explode.}} | ||
{{MoveListRow | Gore Fest | {{HCB}} {{right}} {{punch}} (close) | Vice grabs and flings her opponent into the ground, causing them to bounce off and into the air. When the move is performed with {{HP}}, she can follow up by jumping into the air, grabbing the opponent between her legs, and slamming them into the ground (Tranquility) by pressing {{DPF}} {{kick}}.}} | {{MoveListRow | Gore Fest | {{HCB}} {{right}} {{punch}} (close) | Vice grabs and flings her opponent into the ground, causing them to bounce off and into the air. When the move is performed with {{HP}}, she can follow up by jumping into the air, grabbing the opponent between her legs, and slamming them into the ground (Tranquility) by pressing {{DPF}} {{kick}}.}} | ||
| Line 1,118: | Line 1,087: | ||
{{InfoFighter| | {{InfoFighter| | ||
| name=Yuri Sakazaki | | name=Yuri Sakazaki | ||
| − | | | + | | image=Capcom vs SNK 2, Character Art, Capcom, Yuri Sakazaki.jpg |
| sprite={{sprite | Capcom vs SNK, Sprites, Yuri Sakazaki.gif}} | | sprite={{sprite | Capcom vs SNK, Sprites, Yuri Sakazaki.gif}} | ||
| info1name=Originally appeared in | | info1name=Originally appeared in | ||
| info1=''Art of Fighting 2'' | | info1=''Art of Fighting 2'' | ||
| − | | desc=Yuri is | + | | desc=Yuri is Ryo's young sister and an eager novice student of Kyokugen-ryuu. Some of her moves are parodies of the moves of ''Street Fighter'' characters. |
{{MoveListTable | desc=Special moves | | {{MoveListTable | desc=Special moves | | ||
{{MoveListRow | Ko'ou Ken | {{QCF}} {{punch}} | Yuri thrusts a short-ranged burst of ki energy from her hand, which knocks the opponent down on impact. The move covers a slightly longer distance when a stronger button is used.}} | {{MoveListRow | Ko'ou Ken | {{QCF}} {{punch}} | Yuri thrusts a short-ranged burst of ki energy from her hand, which knocks the opponent down on impact. The move covers a slightly longer distance when a stronger button is used.}} | ||
| Line 1,135: | Line 1,104: | ||
{{MoveListTable | desc=Super moves | | {{MoveListTable | desc=Super moves | | ||
{{MoveListRow | Haoh Shoukou Ken | {{right}} {{HCF}} {{punch}} | Yuri channels and throws a large fireball from both hands. The projectile moves faster at higher levels.}} | {{MoveListRow | Haoh Shoukou Ken | {{right}} {{HCF}} {{punch}} | Yuri channels and throws a large fireball from both hands. The projectile moves faster at higher levels.}} | ||
| − | {{MoveListRow | Hien Rekkou | {{QCF}} {{QCF}} {{punch}} | Yuri advances forward with | + | {{MoveListRow | Hien Rekkou | {{QCF}} {{QCF}} {{punch}} | Yuri advances forward with multiple spinning uppercuts, then a final, jumping uppercut. The move covers more horizontal distance at higher levels.}} |
{{MoveListRow | Hien Hou'ou Kyaku | {{right}} {{left}} {{HCB}} {{kick}} | Yuri dashes forward, then runs up her opponent with a series of stomps.}} | {{MoveListRow | Hien Hou'ou Kyaku | {{right}} {{left}} {{HCB}} {{kick}} | Yuri dashes forward, then runs up her opponent with a series of stomps.}} | ||
}} | }} | ||
| Line 1,141: | Line 1,110: | ||
}} | }} | ||
====Bosses==== | ====Bosses==== | ||
| − | Evil Ryu and Orochi Iori are exclusive to the console releases. Shin Akuma and Ultimate Rugal were non-playable bosses in the original arcade version but | + | Evil Ryu and Orochi Iori are exclusive to the console releases. Shin Akuma and Ultimate Rugal were non-playable bosses in the original arcade version, but they become playable in the Dreamcast version after defeating them in the Arcade Mode. |
{{InfoTable|imagewidths=200| | {{InfoTable|imagewidths=200| | ||
{{InfoFighter| | {{InfoFighter| | ||
| name=Evil Ryu | | name=Evil Ryu | ||
| − | | | + | | image=Capcom vs SNK 2, Character Art, SNK, Evil Ryu.jpg |
| sprite={{sprite | Capcom vs SNK, Sprites, Evil Ryu.gif}} | | sprite={{sprite | Capcom vs SNK, Sprites, Evil Ryu.gif}} | ||
| info1name=Originally appeared in | | info1name=Originally appeared in | ||
| Line 1,168: | Line 1,137: | ||
{{MoveListRow | Messatsu Gou Shouryuu | {{QCF}} {{QCF}} {{punch}} | Ryu performs a series of low Gou Shouryuukens while moving across the screen, culminating in a high Gou Shouryuuken.}} | {{MoveListRow | Messatsu Gou Shouryuu | {{QCF}} {{QCF}} {{punch}} | Ryu performs a series of low Gou Shouryuukens while moving across the screen, culminating in a high Gou Shouryuuken.}} | ||
{{MoveListRow | Metsu Hadouken | {{QCB}} {{QCB}} {{kick}} (at max level) | Ryu charges then throws a slow-moving, electrified Hadouken. This move cannot be blocked and stuns the opponent on impact. The power gauge must be at level 3 to perform this move.}} | {{MoveListRow | Metsu Hadouken | {{QCB}} {{QCB}} {{kick}} (at max level) | Ryu charges then throws a slow-moving, electrified Hadouken. This move cannot be blocked and stuns the opponent on impact. The power gauge must be at level 3 to perform this move.}} | ||
| − | {{MoveListRow | Shun Goku Satsu | {{LP}} {{LP}} {{right}} {{LK}} {{HP}} (at max level) | Ryu glides to his opponent, then performs a series of attacks that cannot be seen as the screen flashes white. This move is treated as a grab and cannot be blocked. The power gauge must be at level 3 to perform this move. This move is | + | {{MoveListRow | Shun Goku Satsu | {{LP}} {{LP}} {{right}} {{LK}} {{HP}} (at max level) | Ryu glides to his opponent, then performs a series of attacks that cannot be seen as the screen flashes white. This move is treated as a grab and cannot be blocked. The power gauge must be at level 3 to perform this move.}} |
| + | }} | ||
| + | }} | ||
| + | {{InfoFighter| | ||
| + | | name=Orochi Iori | ||
| + | | image=Capcom vs SNK 2, Character Art, Capcom, Orochi Iori.jpg | ||
| + | | sprite={{sprite | Capcom vs SNK, Sprites, Wild Iori.gif}} | ||
| + | | info1name=Originally appeared in | ||
| + | | info1=''[[The King of Fighters '97]]'' | ||
| + | | desc=Orochi Iori is a version of Iori when he is under the effects of the Riot of the Blood, due to the blood pact his clan made with Orochi hundreds of years ago that gave them greater powers but cursed the clan and their descendants forever. | ||
| + | {{MoveListTable | desc=Special moves | | ||
| + | {{MoveListRow | 108 Shiki: Yami Barai | {{QCF}} {{punch}} | Iori throws fiery purple sparks across the ground. The projectile moves faster when a stronger button is used.}} | ||
| + | {{MoveListRow | 127 Shiki: Aoi Hana | {{QCB}} {{punch}} (up to 3 times) | Iori advances with an uppercut. The motion can be repeated up to three times, in which case he follows up with an additional uppercut that knocks his opponent into the air, then jumps and comes down with a double axe-handle punch on the falling opponent. He advances slightly further when a stronger button is used.}} | ||
| + | {{MoveListRow | 100 Shiki: Oniyaki | {{DPF}} {{punch}} | Iori twirls into the air while surrounded in a streak of purple fire, which knocks down his opponent on impact. He ascends higher when a stronger button is used.}} | ||
| + | {{MoveListRow | 212 Shiki: Kototsuki In | {{HCB}} {{kick}} | Iori runs forward and tries to grab his opponent by the head. If he succeeds, he takes the opponent down, then causes an explosion of purple fire. He runs further when a stronger button is used.}} | ||
| + | }} | ||
| + | {{MoveListTable | desc=Command normals | | ||
| + | {{MoveListRow | Ge Shiki: Yumebiki | {{right}}+{{MP}} | Iori swings his fist back in front of him.}} | ||
| + | {{MoveListRow | Ge Shiki: Gou Fu In Shinigami | {{right}}+{{MK}} | Iori pulls his leg up high, then does axe kick that can hit twice. The second hit is an overhead strike that can hit characters who are crouch blocking.}} | ||
| + | {{MoveListRow | Ge Shiki: Yuri Ori | {{left}}+{{LK}} in midair | Iori kicks behind him.}} | ||
| + | }} | ||
| + | {{MoveListTable | desc=Super moves | | ||
| + | {{MoveListRow | Kin 1211 Shiki: Ya Otome | {{down}} {{downright}} {{HCB}} {{punch}} | Iori dashes forward and performs a series of hand strikes, ending by grabbing the opponent and creating an explosion of purple fire. He dashes further at higher levels. He grabs and takes down the opponent at levels 2 and 3.}} | ||
| + | {{MoveListRow | Ura 100 Shiki: Oni Honou | {{down}} {{downleft}} {{HCF}} {{punch}} | Iori twirls multiple times with his arms extended, then finishes by twirling into the air while surrounded in a streak of purple fire.}} | ||
| + | }} | ||
| + | }} | ||
| + | {{InfoFighter| | ||
| + | | name=M. Bison (Vega) | ||
| + | | image=Capcom vs SNK 2, Character Art, SNK, Vega.jpg | ||
| + | | sprite={{sprite | Capcom vs SNK, Sprites, M Bison.gif}} | ||
| + | | info1name=Originally appeared in | ||
| + | | info1=''[[Street Fighter II]]'' | ||
| + | | desc=M. Bison is the shadowy leader of the international crime syndicate Shadaloo. He is motivated solely by his lust for world domination and fights using a dark psychotic energy known as "Psycho Power." He can appear as a possible mid-boss before the fourth match if certain requirements are fulfilled. | ||
| + | {{MoveListTable | desc=Special moves | | ||
| + | {{MoveListRow | Psycho Vanish | {{DPF}} {{punch}} | M. Bison swings a hand down while it is infused with psycho power. This move can neutralize projectiles.}} | ||
| + | {{MoveListRow | Psycho Crusher | Hold {{left}} for 2 seconds, then {{right}}+{{punch}} | M. Bison spirals toward his opponent while infused with psycho energy, which knocks down his opponent on impact. He travels further when a stronger button is used.}} | ||
| + | {{MoveListRow | Double Knee Press | Hold {{left}} for 2 seconds, then {{right}}+{{kick}} | M. Bison leaps forward while kicking down with each leg, which knocks down his opponent on impact. The move covers more horizontal distance when it is performed with {{HK}}.}} | ||
| + | {{MoveListRow | Head Press | Hold {{down}} for 2 seconds, then {{up}}+{{kick}} | M. Bison flies into the air and stomps his opponent's head. After bouncing off his opponent's head, he can dive down again with a fist infused with psycho power (Somersault Skull Diver) by pressing {{punch}}, which can be aimed with {{left}} and {{right}}.}} | ||
| + | {{MoveListRow | Skull Diver | Hold {{down}} for 2 seconds, then {{up}}+{{punch}} | M. Bison flies into the air toward his opponent. This move can be followed by {{punch}} to dive his opponent with a fist infused with psycho power, which can be aimed with {{left}} and {{right}}.}} | ||
| + | {{MoveListRow | Warp Forward | {{DPF}} + two {{punch}} or {{kick}} simultaneously | M. Bison disappears and reappears the entire screen ahead with {{punch}} or half the screen ahead with {{kick}}.}} | ||
| + | {{MoveListRow | Warp Backward | {{RDP}} + two {{punch}} or {{kick}} simultaneously | M. Bison disappears and reappears the entire screen back with {{punch}} or half the screen back with {{kick}}.}} | ||
| + | }} | ||
| + | {{MoveListTable | desc=Super moves | | ||
| + | {{MoveListRow | Knee Press Nightmare | Hold {{left}} for 2 seconds, then {{right}} {{left}} {{right}}+{{kick}} | M. Bison does two consecutive Double Knee Press maneuvers. He finishes with a sliding sweep at level 2 and a backflip kick and a dropkick at level 3.}} | ||
| + | {{MoveListRow | Mega Psycho Crusher | Hold {{left}} for 2 seconds, then {{right}} {{left}} {{right}}+{{punch}} (at max level) | M. Bison spirals toward his opponent while radiating with intense psycho energy. The power gauge must be at level 3 to perform this move.}} | ||
| + | }} | ||
| + | }} | ||
| + | {{InfoFighter| | ||
| + | | name=Geese Howard | ||
| + | | image=Capcom vs SNK 2, Character Art, Capcom, Geese Howard.jpg | ||
| + | | sprite={{sprite | Capcom vs SNK, Sprites, Geese Howard.gif}} | ||
| + | | info1name=Originally appeared in | ||
| + | | info1=''[[Fatal Fury]]'' | ||
| + | | desc=Geese is the mafia kingpin of South Town and the nemesis of the Terry Bogard. He is an American who has studied and mastered Japanese fighting techniques. He can appear as a possible mid-boss before the fourth match if certain requirements are fulfilled. | ||
| + | {{MoveListTable | desc=Special moves | | ||
| + | {{MoveListRow | Reppuu Ken | {{QCF}} {{punch}} | Geese waves a hand and sends a violent shockwave across the ground. The projectile moves faster when a stronger button is used. He waves with each hand when the move is performed with {{HP}}, which increases the startup time of the move but can hit two times if the opponent is near.}} | ||
| + | {{MoveListRow | Shippuu Ken | {{QCB}} {{punch}} in midair | Geese throws a fireball a short distance diagonally downward. The projectile moves faster when a stronger button is used.}} | ||
| + | {{MoveListRow | Atemi Nage Joudan | {{HCB}} {{LP}} | Geese catches a high or jumping attack from his opponent and counters with a throw.}} | ||
| + | {{MoveListRow | Atemi Nage Chuudan | {{HCB}} {{HP}} | Geese catches a mid attack from his opponent and counters with a throw.}} | ||
| + | {{MoveListRow | Atemi Nage Gedan | {{HCB}} {{LK}} | Geese catches a low or sweep attack from his opponent and counters with a throw.}} | ||
| + | {{MoveListRow | Jaei Ken | {{HCB}} {{kick}} | Geese dashes forward while generating a fireball in his hands. He hits the opponent with an elbow ram and a palm strike, then unleashes the fireball, which knocks down the opponent on impact. He dashes farther when a stronger button is used.}} | ||
| + | }} | ||
| + | {{MoveListTable | desc=Command normals | | ||
| + | {{MoveListRow | Forehead Blow | {{right}}+{{HP}} | Geese steps forward with one leg and strikes with a hooked arm, which knocks his opponent over on impact.}} | ||
| + | }} | ||
| + | {{MoveListTable | desc=Super moves | | ||
| + | {{MoveListRow | Raging Storm | {{downleft}} {{HCB}} {{downright}} {{punch}} | Geese ducks and calls energy spikes around him.}} | ||
| + | {{MoveListRow | Deadly Rave | {{HCB}} {{right}}+{{LK}}, {{LP}} {{LP}} {{LK}} {{LK}} {{MP}} {{MK}} {{HP}} {{HK}}, {{QCB}} {{HP}} (at max level) | Geese performs a series of attacks, ending by throwing a fireball from his hands. The power gauge must be at level 3 to perform this move.}} | ||
}} | }} | ||
}} | }} | ||
{{InfoFighter| | {{InfoFighter| | ||
| − | | name= | + | | name=Akuma (Gouki) |
| − | | | + | | image=Capcom vs SNK 2, Character Art, SNK, Gouki.jpg |
| − | | sprite={{sprite | Capcom vs SNK, Sprites, | + | | sprite={{sprite | Capcom vs SNK, Sprites, Akuma.gif}} |
| info1name=Originally appeared in | | info1name=Originally appeared in | ||
| − | | info1=''[[Street Fighter | + | | info1=''[[Super Street Fighter II Turbo]]'' |
| − | | desc= | + | | desc=Akuma is a savage and merciless fighter who has mastered the Satsui no Hadou. He is one of the possible final bosses of the game. |
{{MoveListTable | desc=Special moves | | {{MoveListTable | desc=Special moves | | ||
{{MoveListRow | Gou Hadouken | {{QCF}} {{punch}} | Akuma channels his ki into his hands, then thrusts it from his palms in the form of a fireball. The projectile moves faster when a stronger button is used.}} | {{MoveListRow | Gou Hadouken | {{QCF}} {{punch}} | Akuma channels his ki into his hands, then thrusts it from his palms in the form of a fireball. The projectile moves faster when a stronger button is used.}} | ||
| − | {{MoveListRow | Zankuu Hadouken | {{QCF}} {{punch}} in midair | Akuma shoots | + | {{MoveListRow | Zankuu Hadouken | {{QCF}} {{punch}} in midair | Akuma shoots a single-handed Hadouken at a diagonal angle downward in midair. The projectile moves faster when a stronger button is used.}} |
{{MoveListRow | Shakunetsu Hadouken | {{HCB}} {{punch}} | Akuma shoots a flaming variant of the Hadouken, which hits multiple times and knocks down opponents on impact. The projectile moves faster and hits more times when a stronger button is used.}} | {{MoveListRow | Shakunetsu Hadouken | {{HCB}} {{punch}} | Akuma shoots a flaming variant of the Hadouken, which hits multiple times and knocks down opponents on impact. The projectile moves faster and hits more times when a stronger button is used.}} | ||
{{MoveListRow | Gou Shouryuuken | {{DPF}} {{punch}} | Akuma jumps into the air with a flying uppercut, which knocks his opponent over on impact. The move ascends higher and hits more times when a stronger button is used.}} | {{MoveListRow | Gou Shouryuuken | {{DPF}} {{punch}} | Akuma jumps into the air with a flying uppercut, which knocks his opponent over on impact. The move ascends higher and hits more times when a stronger button is used.}} | ||
{{MoveListRow | Tatsumaki Zankuukyaku | {{QCB}} {{kick}} | Akuma spins on an axis while gliding forward through the air and kicking, knocking down his opponent on impact. This move can be performed in midair. The move covers more horizontal distance and juggles the opponent for multiple hits when a stronger button is used.}} | {{MoveListRow | Tatsumaki Zankuukyaku | {{QCB}} {{kick}} | Akuma spins on an axis while gliding forward through the air and kicking, knocking down his opponent on impact. This move can be performed in midair. The move covers more horizontal distance and juggles the opponent for multiple hits when a stronger button is used.}} | ||
| − | {{MoveListRow | | + | {{MoveListRow | Hyakki Shuu | {{DPF}} {{kick}} | Akuma somersaults forward. He leaps farther when a stronger button is used. He performs a sliding sweep when he lands (Hyakki Gou Zan). Alternatively, the move can be followed up with {{punch}} for a palm strike (Hyakki Gou Shou) or {{kick}} for a falling kick (Hyakki Gou Sen). When Akuma is near his opponent, he can do a head throw with {{left}}+{{punch}} or {{right}}+{{punch}} (Hyakki Gou Sai) or a rolling slam with {{left}}+{{kick}} or {{right}}+{{kick}} (Hyakki Gou Tsui) instead. He somersaults further when a stronger button is used.}} |
| − | {{ | ||
{{MoveListRow | Ashura Senkuu Forward | {{DPF}} + two {{punch}} or {{kick}} simultaneously | Akuma glides forward. He is invulnerable in this state. He moves across the entire screen with {{punch}} or half the screen with {{kick}}.}} | {{MoveListRow | Ashura Senkuu Forward | {{DPF}} + two {{punch}} or {{kick}} simultaneously | Akuma glides forward. He is invulnerable in this state. He moves across the entire screen with {{punch}} or half the screen with {{kick}}.}} | ||
{{MoveListRow | Ashura Senkuu Backward | {{RDP}} + two {{punch}} or {{kick}} simultaneously | Akuma glides backward. He is invulnerable in this state. He moves across the entire screen with {{punch}} or half the screen with {{kick}}.}} | {{MoveListRow | Ashura Senkuu Backward | {{RDP}} + two {{punch}} or {{kick}} simultaneously | Akuma glides backward. He is invulnerable in this state. He moves across the entire screen with {{punch}} or half the screen with {{kick}}.}} | ||
| Line 1,197: | Line 1,232: | ||
{{MoveListRow | Messatsu Gou Shouryuu | {{QCF}} {{QCF}} {{punch}} | Akuma performs a series of low Gou Shouryuukens while moving across the screen, culminating in a high Gou Shouryuuken.}} | {{MoveListRow | Messatsu Gou Shouryuu | {{QCF}} {{QCF}} {{punch}} | Akuma performs a series of low Gou Shouryuukens while moving across the screen, culminating in a high Gou Shouryuuken.}} | ||
{{MoveListRow | Tenma Gou Zankuu | {{QCF}} {{QCF}} {{punch}} in midair | Akuma fires a larger, more powerful Zankuu Hadouken at his opponent.}} | {{MoveListRow | Tenma Gou Zankuu | {{QCF}} {{QCF}} {{punch}} in midair | Akuma fires a larger, more powerful Zankuu Hadouken at his opponent.}} | ||
| − | {{MoveListRow | Shun Goku Satsu | {{LP}} {{LP}} {{right}} {{LK}} {{HP}} (at max level) | Akuma glides to his opponent, then performs a series of attacks that cannot be seen as the screen flashes white. This move is treated as a grab and cannot be blocked. The power gauge must be at level 3 to perform this move. | + | {{MoveListRow | Shun Goku Satsu | {{LP}} {{LP}} {{right}} {{LK}} {{HP}} (at max level) | Akuma glides to his opponent, then performs a series of attacks that cannot be seen as the screen flashes white. This move is treated as a grab and cannot be blocked. The power gauge must be at level 3 to perform this move.}} |
| − | {{MoveListRow | | + | }} |
| + | }} | ||
| + | {{InfoFighter| | ||
| + | | name=Rugal Bernstein | ||
| + | | image=Capcom vs SNK 2, Character Art, Capcom, Rugal Bernstein.jpg | ||
| + | | sprite={{sprite | Capcom vs SNK, Sprites, Rugal Bernstein.gif}} | ||
| + | | info1name=Originally appeared in | ||
| + | | info1=''The King of Fighters '94'' | ||
| + | | desc=Rugal is a cruel and sophisticated crime lord who turns the fighters he defeats into living trophies. He is one of the possible final bosses of the game. | ||
| + | {{MoveListTable | desc=Special moves | | ||
| + | {{MoveListRow | Reppu Ken | {{QCF}} {{punch}} | Rugal sends a violent shockwave across the ground. The projectile moves faster when a stronger button is used.}} | ||
| + | {{MoveListRow | Dark Smash | {{QCF}} {{punch}} in midair | Rugal falls diagonally downward while his fist glows with energy, which knocks his opponent over on impact.}} | ||
| + | {{MoveListRow | Kaiser Wave | {{right}} {{HCF}} {{punch}} | Rugal holds his hands back, then throws a tall fireball across the screen that knocks his opponent over on impact. He can charge the move and increase its damage by holding {{punch}} for longer before releasing it. The projectile moves faster when a stronger button is used.}} | ||
| + | {{MoveListRow | Genocide Cutter | {{DPF}} {{kick}} | Rugal jumps in the air with a crescent kick, which knocks his opponent over on impact. He jumps higher when a stronger button is used.}} | ||
| + | {{MoveListRow | Dark Barrier | {{HCF}} {{kick}} | Rugal holds his hand out and generates a shield of dark energy. It knocks back opponents that touch it and also reflects projectiles. It lasts for longer when a stronger button is used.}} | ||
| + | {{MoveListRow | God Press | {{HCB}} {{punch}} | Rugal charges across the screen, grabbing and slamming the opponent against the wall. He runs farther when a stronger button is used.}} | ||
| + | }} | ||
| + | {{MoveListTable | desc=Super moves | | ||
| + | {{MoveListRow | Gigantic Pressure | {{down}} {{downright}} {{HCB}} {{punch}} | Rugal charges across the screen, tackling the opponent into the wall, which causes a pillar of dark energy to explode. He finishes by tackling the opponent into the opposite wall, causing another pillar of dark energy to explode, at level 3.}} | ||
| + | {{MoveListRow | Total Annihilation | {{QCF}} {{QCF}} {{kick}} | Rugal kicks multiple times quickly, then finishes with a Genocide Cutter. He finishes with a second Genocide Cutter in midair at level 3.}} | ||
}} | }} | ||
}} | }} | ||
{{InfoFighter| | {{InfoFighter| | ||
| − | | name= | + | | name=Shin Akuma (Shin Gouki) |
| − | | | + | | image=Capcom vs SNK 2, Character Art, SNK, Shin Gouki.jpg |
| − | | sprite={{sprite | Capcom vs SNK, Sprites, | + | | sprite={{sprite | Capcom vs SNK, Sprites, Shin Gouki.gif}} |
| info1name=Originally appeared in | | info1name=Originally appeared in | ||
| − | | info1=''[[ | + | | info1=''[[Street Fighter Alpha 2]]'' |
| − | | desc= | + | | desc=Shin Akuma is a version of Akuma that represents him when he becomes almost one with the Satsui no Hadou. If certain requirements are fulfilled, he can appear as one of the hidden final bosses. |
{{MoveListTable | desc=Special moves | | {{MoveListTable | desc=Special moves | | ||
| − | {{MoveListRow | | + | {{MoveListRow | Gou Hadouken | {{QCF}} {{punch}} | Akuma channels his ki into his hands, then thrusts it from his palms in the form of a fireball. The projectile moves faster when a stronger button is used.}} |
| − | {{MoveListRow | | + | {{MoveListRow | Zankuu Hadouken | {{QCF}} {{punch}} in midair | Akuma shoots two Hadoukens at a diagonal angle downward in midair. The projectile moves faster when a stronger button is used.}} |
| − | {{MoveListRow | | + | {{MoveListRow | Shakunetsu Hadouken | {{HCB}} {{punch}} | Akuma shoots a flaming variant of the Hadouken, which hits multiple times and knocks down opponents on impact. The projectile moves faster and hits more times when a stronger button is used.}} |
| − | {{MoveListRow | | + | {{MoveListRow | Gou Shouryuuken | {{DPF}} {{punch}} | Akuma jumps into the air with a flying uppercut, which knocks his opponent over on impact. The move ascends higher and hits more times when a stronger button is used.}} |
| + | {{MoveListRow | Tatsumaki Zankuukyaku | {{QCB}} {{kick}} | Akuma spins on an axis while gliding forward through the air and kicking, knocking down his opponent on impact. This move can be performed in midair. The move covers more horizontal distance and juggles the opponent for multiple hits when a stronger button is used.}} | ||
| + | {{MoveListRow | High Tenma Shurettou | {{down}} {{down}} + two {{punch}} simultaneously | Akuma holds a high defensive posture. If he is hit by a high or mid attack while doing this, he immediately counters by teleporting above his opponent and falling with a hand chop.}} | ||
| + | {{MoveListRow | Low Tenma Shurettou | {{down}} {{down}} + two {{kick}} simultaneously | Akuma holds a low defensive posture. If he is hit by a low attack while doing this, he immediately counters by teleporting above his opponent and falling with a hand chop.}} | ||
| + | {{MoveListRow | Ashura Senkuu Forward | {{DPF}} + two {{punch}} or {{kick}} simultaneously | Akuma glides forward. He is invulnerable in this state. He moves across the entire screen with {{punch}} or half the screen with {{kick}}.}} | ||
| + | {{MoveListRow | Ashura Senkuu Backward | {{RDP}} + two {{punch}} or {{kick}} simultaneously | Akuma glides backward. He is invulnerable in this state. He moves across the entire screen with {{punch}} or half the screen with {{kick}}.}} | ||
}} | }} | ||
{{MoveListTable | desc=Command normals | | {{MoveListTable | desc=Command normals | | ||
| − | {{MoveListRow | | + | {{MoveListRow | Tenma Kuujin Kyaku | {{down}}+{{MK}} before the apex of the jump while flipping forward in the air | Akuma dive kicks diagonally downward.}} |
| − | {{MoveListRow | | + | {{MoveListRow | Zugai Hasatsu | {{right}}+{{MP}} | Akuma performs an open-handed chop, potentially hitting twice. This is an overhead strike that can hit characters who are crouch blocking.}} |
| − | |||
}} | }} | ||
{{MoveListTable | desc=Super moves | | {{MoveListTable | desc=Super moves | | ||
| − | {{MoveListRow | | + | {{MoveListRow | Messatsu Gou Hadou | {{HCB}} {{HCB}} {{punch}} | Akuma fires a version of the Gou Hadouken that can hit his opponent multiple times.}} |
| − | {{MoveListRow | | + | {{MoveListRow | Messatsu Gou Shouryuu | {{QCF}} {{QCF}} {{punch}} | Akuma performs a series of low Gou Shouryuukens while moving across the screen, culminating in a high Gou Shouryuuken.}} |
| + | {{MoveListRow | Tenma Gou Zankuu | {{QCF}} {{QCF}} {{punch}} in midair | Akuma fires a larger, more powerful Zankuu Hadouken at his opponent.}} | ||
| + | {{MoveListRow | Shun Goku Satsu | {{LP}} {{LP}} {{right}} {{LK}} {{HP}} (at max level) | Akuma glides to his opponent, then performs a series of attacks that cannot be seen as the screen flashes white. This move is treated as a grab and cannot be blocked. The power gauge must be at level 3 to perform this move.}} | ||
| + | {{MoveListRow | Misogi | {{HCB}} {{HCB}} {{kick}} (at max level) | Akuma teleports above his opponent and falls with an explosive hand chop. The power gauge must be at level 3 to perform this move.}} | ||
}} | }} | ||
}} | }} | ||
{{InfoFighter| | {{InfoFighter| | ||
| name=Ultimate Rugal (God Rugal) | | name=Ultimate Rugal (God Rugal) | ||
| − | | | + | | image=Capcom vs SNK 2, Character Art, Capcom, Omega Rugal.jpg |
| sprite={{sprite | Capcom vs SNK, Sprites, Omega Rugal.gif}} | | sprite={{sprite | Capcom vs SNK, Sprites, Omega Rugal.gif}} | ||
| info1name=Originally appeared in | | info1name=Originally appeared in | ||
| info1=''[[The King of Fighters '95]]'' | | info1=''[[The King of Fighters '95]]'' | ||
| − | | desc=Ultimate Rugal is a version of Rugal that was revived with a small parcel of Orochi's blood. | + | | desc=Ultimate Rugal is a version of Rugal that was revived with a small parcel of Orochi's blood. If certain requirements are fulfilled, he can appear as one of the hidden final bosses. |
{{MoveListTable | desc=Special moves | | {{MoveListTable | desc=Special moves | | ||
{{MoveListRow | Reppu Ken | {{QCF}} {{punch}} | Rugal sends a violent shockwave across the ground. The projectile moves faster when a stronger button is used.}} | {{MoveListRow | Reppu Ken | {{QCF}} {{punch}} | Rugal sends a violent shockwave across the ground. The projectile moves faster when a stronger button is used.}} | ||
| − | {{MoveListRow | Dark Smash | {{QCF}} {{punch}} in midair | Rugal falls diagonally downward while his fist glows with energy.}} | + | {{MoveListRow | Dark Smash | {{QCF}} {{punch}} in midair | Rugal falls diagonally downward while his fist glows with energy, which knocks his opponent over on impact.}} |
| − | {{MoveListRow | Kaiser Wave | {{right}} {{HCF}} {{punch}} | Rugal holds his hands back, then throws a tall fireball across the screen. He can charge the move and increase its damage by holding {{punch}} for longer before releasing it. The projectile moves faster when a stronger button is used.}} | + | {{MoveListRow | Kaiser Wave | {{right}} {{HCF}} {{punch}} | Rugal holds his hands back, then throws a tall fireball across the screen that knocks his opponent over on impact. He can charge the move and increase its damage by holding {{punch}} for longer before releasing it. The projectile moves faster when a stronger button is used.}} |
| − | {{MoveListRow | Genocide Cutter | {{DPF}} {{kick}} | Rugal jumps in the air with a crescent kick, then kicks with his other leg while in the air. He jumps higher when a stronger button is used.}} | + | {{MoveListRow | Genocide Cutter | {{DPF}} {{kick}} | Rugal jumps in the air with a crescent kick that knocks his opponent into the air, then kicks with his other leg while in the air. He jumps higher when a stronger button is used.}} |
{{MoveListRow | Dark Barrier | {{HCF}} {{kick}} | Rugal holds his hand out and generates a shield of dark energy. It knocks back opponents that touch it and also reflects projectiles. It lasts for longer when a stronger button is used.}} | {{MoveListRow | Dark Barrier | {{HCF}} {{kick}} | Rugal holds his hand out and generates a shield of dark energy. It knocks back opponents that touch it and also reflects projectiles. It lasts for longer when a stronger button is used.}} | ||
{{MoveListRow | God Press | {{HCB}} {{punch}} | Rugal charges across the screen, grabbing and slamming the opponent against the wall. He runs farther when a stronger button is used.}} | {{MoveListRow | God Press | {{HCB}} {{punch}} | Rugal charges across the screen, grabbing and slamming the opponent against the wall. He runs farther when a stronger button is used.}} | ||
| Line 1,246: | Line 1,307: | ||
{{MoveListRow | Genocide Heaven | {{QCF}} {{QCF}} {{kick}} | Rugal kicks his opponent multiple times, ending with a jumping crescent kick. He performs a second crescent kick in midair at level 3.}} | {{MoveListRow | Genocide Heaven | {{QCF}} {{QCF}} {{kick}} | Rugal kicks his opponent multiple times, ending with a jumping crescent kick. He performs a second crescent kick in midair at level 3.}} | ||
{{MoveListRow | G. END | {{HCB}} {{HCB}} {{punch}} (at max level) | Rugal grabs and holds his opponent into the air as a pillar of dark energy envelops them. The power gauge must be at level 3 to perform this move.}} | {{MoveListRow | G. END | {{HCB}} {{HCB}} {{punch}} (at max level) | Rugal grabs and holds his opponent into the air as a pillar of dark energy envelops them. The power gauge must be at level 3 to perform this move.}} | ||
| − | {{MoveListRow | Last Judgment | {{LP}} {{LP}} {{right}} {{LK}} {{HP}} (at max level) | Rugal glides to his opponent, then performs a series of attacks that cannot be seen as the screen flashes white. This move is treated as a grab and cannot be blocked. The power gauge must be at level 3 to perform this move | + | {{MoveListRow | Last Judgment | {{LP}} {{LP}} {{right}} {{LK}} {{HP}} (at max level) | Rugal glides to his opponent, then performs a series of attacks that cannot be seen as the screen flashes white. This move is treated as a grab and cannot be blocked. The power gauge must be at level 3 to perform this move.}} |
}} | }} | ||
}} | }} | ||
| Line 1,252: | Line 1,313: | ||
===Stages=== | ===Stages=== | ||
| + | Stages are chosen randomly for most matches in the Arcade Mode. The last regular match always takes place in the Osaka stage. The final bosses Akuma or Rugal are always fought in the Osaka Tower Rooftop stage, and the secret bosses Shin Akuma or Ultimate Rugal are always fought in the Osaka in Flames stage. The mid-bosses M. Bison or Geese Howard are fought in the same stage as the previous match. | ||
| + | |||
| + | The stage can be chosen manually in the Vs Mode and Training Mode. There is a special Training Room stage that can be selected in these modes. | ||
{{gallery|widths=200|screens=yes| | {{gallery|widths=200|screens=yes| | ||
| + | {{gitem|Capcom vs SNK 2 DC, Stages, Aomori.png|Aomori, Japan}} | ||
| + | {{gitem|Capcom vs SNK 2 DC, Stages, Barentsburg.png|Barentsburg, Norway}} | ||
| + | {{gitem|Capcom vs SNK 2 DC, Stages, Kinderdijk.png|Kinderdijk, Netherlands}} | ||
| + | {{gitem|Capcom vs SNK 2 DC, Stages, London.png|London, England}} | ||
| + | {{gitem|Capcom vs SNK 2 DC, Stages, Nairobi.png|Nairobi, Kenya}} | ||
| + | {{gitem|Capcom vs SNK 2 DC, Stages, New York.png|New York, U.S.A.}} | ||
| + | {{gitem|Capcom vs SNK 2 DC, Stages, Osaka.png|Osaka, Japan}} | ||
| + | {{gitem|Capcom vs SNK 2 DC, Stages, Shanghai.png|Shanghai, China}} | ||
| + | {{gitem|Capcom vs SNK 2 DC, Stages, Osaka Tower Rooftop.png|Osaka Tower Rooftop}} | ||
| + | {{gitem|Capcom vs SNK 2 DC, Stages, Osaka in Flames.png|Osaka in Flames}} | ||
| + | {{gitem|Capcom vs SNK 2 DC, Stages, Training.png|Training Room}} | ||
}} | }} | ||
| Line 1,268: | Line 1,343: | ||
===Sequels and re-releases=== | ===Sequels and re-releases=== | ||
| − | Though the Dreamcast version of the game remained exclusive to Japan, the arcade version was brought overseas as '''''Capcom vs. SNK 2: Mark of the Millennium 2001'''''. Other | + | Though the Dreamcast version of the game remained exclusive to Japan, the arcade version was brought overseas as '''''Capcom vs. SNK 2: Mark of the Millennium 2001'''''. Other Western ports have retained that name. The [[Nintendo GameCube]] and [[Xbox]] received an upgraded version, called ''Capcom vs. SNK 2 EO'' ("Easy Operation" for Japanese releases{{ref|https://web.archive.org/web/20240623015248/https%3A%2F%2Fgamefaqs.gamespot.com%2Fgamecube%2F557563-capcom-vs-snk-2-eo%2Fboxes%2F22560}}, "Extreme Offence" for European{{ref|https://web.archive.org/web/20240623064551/https://www.mobygames.com/game/5003/capcom-vs-snk-2-mark-of-the-millennium/cover/group-17598/cover-42177/}}), making the game one of the few titles to be released for all four platforms of that console generation. |
==Production credits== | ==Production credits== | ||
| Line 1,294: | Line 1,369: | ||
*'''General Producer:''' Noritaka Funamizu | *'''General Producer:''' Noritaka Funamizu | ||
*'''Executive Producer:''' Yoshiki Okamoto | *'''Executive Producer:''' Yoshiki Okamoto | ||
| − | *'''Special Thanks:''' Yasuhiro Kobayashi, Eiichi Yaji, H.Furubeppu, Kensuke Nakahara, kokoro, J.Nagai, Hagee, Akuta, Ojee, Shouden, Naoto Satou, Tsutomu Ikai, Yuriko Yamamoto, Michiyo Aoki, Takuya Shiraiwa, Shizuku Abe, Kaori Funyakoshi, Ayumi Comebara, Erik Genazea Suzuki, D44 (Bas), Knnit, Nuki♥Black, Xiao, Dr.seno, Toshitaka Kawamoto, Kiyomatu★teacher, Ume-Zono, Bugcheck Team, Sarugakucho, Junnosuke Miyamoto, Akira Tateishi, Kouta Sasaki, Tatsuya Hasegawa, Kazuo Shouno, Hideki Ishizuka, Kohji Okada, Jinichi Tokutomi, Toshihiro Komiya, Takashi Kikuchi, Hiroshi Terada, Masafumi Chigusa, Ryuuji Kida, Jun Tamura, All SNK Staff, All Capcom Staff. ...And You | + | *'''Special Thanks:''' Yasuhiro Kobayashi, Eiichi Yaji, H.Furubeppu, Kensuke Nakahara, kokoro, J.Nagai, Hagee, Akuta, Ojee, Shouden, Naoto Satou, Tsutomu Ikai, Yuriko Yamamoto, Michiyo Aoki, Takuya Shiraiwa, Shizuku Abe, Kaori Funyakoshi, Ayumi Comebara, Erik Genazea Suzuki, D44 (Bas), Knnit, Nuki♥Black, Xiao, Dr.seno, Toshitaka Kawamoto, Kiyomatu★teacher, Ume-Zono, Bugcheck Team, [[Sarugakucho]], Junnosuke Miyamoto, Akira Tateishi, Kouta Sasaki, Tatsuya Hasegawa, Kazuo Shouno, Hideki Ishizuka, Kohji Okada, Jinichi Tokutomi, Toshihiro Komiya, Takashi Kikuchi, Hiroshi Terada, Masafumi Chigusa, Ryuuji Kida, Jun Tamura, All SNK Staff, All Capcom Staff. ...And You |
| source=In-game credits | | source=In-game credits | ||
| pdf=Capcom vs SNK 2 DC credits.pdf | | pdf=Capcom vs SNK 2 DC credits.pdf | ||
| Line 1,362: | Line 1,437: | ||
==Technical information== | ==Technical information== | ||
{{mainArticle|{{PAGENAME}}/Technical information}} | {{mainArticle|{{PAGENAME}}/Technical information}} | ||
| − | |||
| − | |||
| − | |||
| − | |||
==External links== | ==External links== | ||
Revision as of 03:57, 8 November 2024
| |||||||||||||||||||||||||||||||
| Capcom vs. SNK 2 Millionaire Fighting 2001 | |||||||||||||||||||||||||||||||
|---|---|---|---|---|---|---|---|---|---|---|---|---|---|---|---|---|---|---|---|---|---|---|---|---|---|---|---|---|---|---|---|
| System(s): Sega NAOMI, Sega NAOMI GD-ROM, Sega Dreamcast | |||||||||||||||||||||||||||||||
| Publisher: | |||||||||||||||||||||||||||||||
| Developer: Capcom | |||||||||||||||||||||||||||||||
| Licensor: SNK | |||||||||||||||||||||||||||||||
| Peripherals supported: | |||||||||||||||||||||||||||||||
| Genre: Fighting/Taisen Kakutou (対戦格闘)[1][2], Action[3] | |||||||||||||||||||||||||||||||
| Number of players: 1-2 | |||||||||||||||||||||||||||||||
| |||||||||||||||||||||||||||||||
|


Capcom vs. SNK 2 Millionaire Fighting 2001 (カプコン バーサス エス・エヌ・ケイ 2 ミリオネア ファイティング 2001) is a 2D fighting game developed and published by Capcom as the direct sequel to Capcom vs. SNK: Millennium Fight 2000. It was released for Sega NAOMI arcade hardware in 2001, with the American arcade release distributed by Sega. It was subsequently ported to the Sega Dreamcast and PlayStation 2 later in the year.
Contents
Story
A year has passed since the original tournament known as Millennium Fight 2000. The Garcia Financial Clique and the Masters Foundation have once again decided to hold a fighting tournament, this time with a million dollar prize, called Millionaire Fighting 2001.
Gameplay


Capcom vs. SNK 2 is a 2D fighting game that combines characters and gameplay elements primarily from Capcom's Street Fighter and SNK's The King of Fighters series, with elements also taken from the Fatal Fury and Samurai Shodown series. The game uses 3D-rendered backgrounds, and several new characters have been added, pulled from more varied sources than the original game's roster. The number of attack buttons has been increased from four (as used in The King of Fighters) to six (as used in Street Fighter). Players can choose from six different fighting styles called "grooves," which mimic the mechanics of other Capcom and SNK games. The selected groove determines the character's power gauge as well as the availability of special techniques such as dashes, running, and guard cancels.
Like The King of Fighters, players assemble teams of multiple characters, which fight each other in one-on-one battles. In contrast to the fixed system of the original, players can now freely select characters and assign each of them a number from one to four that determines their relative strength. Teams now consist of up to three characters (as opposed to four in the first game); players can choose fewer than three characters, but the overall team ratio must total four. Players can choose the order in which their team's characters fight before every match (by holding ![]() +
+![]() to start with the first character,
to start with the first character, ![]() +
+![]() for the second, or
for the second, or ![]() +
+![]() for the third). When a character is defeated, the next character in the team takes his or her place in the next round, and the winning team continues with the same character (with a segment of health restored in proportion to the time left over in the previous round). The match continues until every character on one of the teams is eliminated. There is also an option to play one-on-one matches to the best of three rounds, as in a conventional fighting game. If time runs out before a character can be defeated, the character with the most life remaining is the winner. Both characters are eliminated in the case of a draw.
for the third). When a character is defeated, the next character in the team takes his or her place in the next round, and the winning team continues with the same character (with a segment of health restored in proportion to the time left over in the previous round). The match continues until every character on one of the teams is eliminated. There is also an option to play one-on-one matches to the best of three rounds, as in a conventional fighting game. If time runs out before a character can be defeated, the character with the most life remaining is the winner. Both characters are eliminated in the case of a draw.
Characters move with ![]() and
and ![]() and crouch with
and crouch with ![]() . They jump with
. They jump with ![]() and flip back and forth with
and flip back and forth with ![]() and
and ![]() . They can "super jump" (a faster and farther jump, trailed by afterimages) by pressing
. They can "super jump" (a faster and farther jump, trailed by afterimages) by pressing ![]() , then
, then ![]() ,
, ![]() , or
, or ![]() quickly. Characters can perform a light punch with
quickly. Characters can perform a light punch with ![]() , a medium punch with
, a medium punch with ![]() , and a hard punch with
, and a hard punch with ![]() , and they perform a light kick with
, and they perform a light kick with ![]() , a medium kick with
, a medium kick with ![]() , and a hard kick with
, and a hard kick with ![]() . Light attacks are quick but do light damage, while hard attacks do more damage but have a longer startup delay and recovery time. Special moves for each character are done by pairing specific directional combinations with an attack button. Characters can perform a taunt with HOLD
. Light attacks are quick but do light damage, while hard attacks do more damage but have a longer startup delay and recovery time. Special moves for each character are done by pairing specific directional combinations with an attack button. Characters can perform a taunt with HOLD ![]() START , which is a short animation during which the character is vulnerable to attack. Taunting fills the opponent's power gauge by a slight amount.
START , which is a short animation during which the character is vulnerable to attack. Taunting fills the opponent's power gauge by a slight amount.
Throws and grabs are done by holding ![]() or
or ![]() when near an opponent and pressing a strong punch or kick button. Some characters have midair throws as well. Grapple moves cannot be blocked (including special moves involving grappling), but a character can escape a throw and take no damage by likewise holding
when near an opponent and pressing a strong punch or kick button. Some characters have midair throws as well. Grapple moves cannot be blocked (including special moves involving grappling), but a character can escape a throw and take no damage by likewise holding ![]() or
or ![]() and pressing a strong punch or kick button immediately upon being grabbed.
and pressing a strong punch or kick button immediately upon being grabbed.
Blocking is done by holding the D-Pad away from the opponent. Characters can block while standing, which blocks against high and mid attacks but not low attacks (such as sweeps), or crouching, which blocks against mid and low attacks but not high attacks (such as jumping attacks and overhead strikes). Special moves still do a small amount of "chip damage" if blocked. If characters block too much, they become "guard crushed" and momentarily stunned and vulnerable to attack; there is a guard gauge under the health gauge that shows how close the character is to being guard crushed. The guard gauge replenishes over time if the character does not block, and it fully refills after it is emptied.
Characters can become dizzy from being attacked repeatedly; they are uncontrollable and vulnerable in this state but can recover more quickly by rapidly pressing back and forth on the D-Pad along with the attack buttons. It is also possible to escape grabs in this way.
Grooves
Players choose from six different playstyles before selecting their characters. Three are based on Capcom games, and three are based on SNK games.
| C | |
|---|---|
| This groove is based on A-ism in Street Fighter Alpha 3.
Characters can backstep or dash with This is the only groove that can air block by holding the D-Pad away from the opponent in midair. However, characters cannot air block against normal attacks from an opponent that is standing on the ground and cannot air block after performing an attack in the air. Characters have a three-tiered power gauge that fills as they perform normal attacks and special moves or take damage (including blocked attacks). When at least one level of the gauge has been filled, the character can perform a super move. There are three different levels of each super move, with higher levels generally hitting more times. Each level costs as many levels of the gauge as the level of the attack, and the level is decided by the strength of the button used to perform the move ( LP or LK for level 1, MP or MK for level 2, and HP or HK for level 3). Level 2 super moves can be canceled into a level 1 super move, which can sometimes do more overall damage than performing a level 3 super move for the same amount of gauge levels. If the power gauge has at least one level, the character can perform a counterattack to immediately cancel out of a block by pressing the medium punch and kick buttons ( | |
| A | |
| This groove is based on V-ism in Street Fighter Alpha 3.
Characters can backstep or dash with Characters have a two-tiered power gauge that fills as they perform normal attacks and special moves or take damage (including blocked attacks). When at least one level of the gauge has been filled, the character can perform a level 1 super move at the cost of one level of the gauge. When both levels of the gauge are full, characters can perform Custom Combos (Original Combos in the Japanese versions) by pressing the hard punch and kick buttons ( If the power gauge has at least one level, the character can perform a counterattack to immediately cancel out of a block by pressing the medium punch and kick buttons ( | |
| P | |
| This groove is based on Street Fighter III.
Characters can backstep or dash with Characters can parry incoming attacks by pressing the D-Pad toward the opponent to parry a high or mid attack or by pressing Characters have a single-level power gauge that fills as they perform normal attacks and special moves, parry, or take damage. The gauge fills more slowly than the other grooves. When it is full, characters can perform a level 3 super move at the cost of the entire gauge. | |
| S | |
| This groove is based on the Extra mode in The King of Fighters '98 (which is itself based on the playstyle of The King of Fighters '94 and The King of Fighters '95).
Characters can backstep or run with This is the only groove where characters can dodge attacks by pressing the light punch and kick buttons ( The power gauge is filled by blocking attacks or taking damage. It can also be charged by holding the strong punch and kick buttons ( While in "MAX mode," the character can perform a counterattack to immediately cancel out of a block by pressing the medium punch and kick buttons ( | |
| N | |
| This groove is based on the Advanced mode in The King of Fighters '98 (which is itself based on the playstyle of The King of Fighters '96).
Characters can backstep or run with The power gauge is filled by performing normal attacks and special moves or taking damage (including blocked attacks). When the gauge is filled, it is kept in stock and reset, up to three times. A character can use one stock of the gauge to perform a level 1 super move or to enter "MAX mode" by pressing the strong punch and kick buttons ( While in "MAX mode," the character can perform a counterattack to immediately cancel out of a block by pressing the medium punch and kick buttons ( | |
| K | |
| This groove combines the "Rage gauge" from Samurai Shodown with the Just Defend mechanic from Garou: Mark of the Wolves.
Characters can backstep or run with Blocking an attack at the moment before it hits is called a "Just Defend," which blocks the attack, replenishes a small amount of health, and recovers faster than a regular block (creating an opening for a counterattack). This can also be done in midair (unlike regular blocking). Characters have a single-level "Rage gauge" (怒), which only fills when the character is attacked or guards an attack with a Just Defend (but not a regular block). When the gauge fills completely, it starts draining, and the character turns red and gains a 35% bonus to attack damage and a 12.5% bonus to defense until it is emptied. While in this state, the character can perform a level 3 super move, which drains the rest of the gauge. |
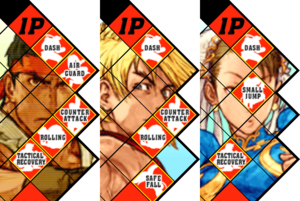
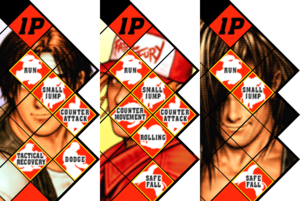
Modes


The Dreamcast version of the game has multiple modes. As in the original Capcom vs. SNK, the player can accumulate Groove Points during single-player games by hitting opponents with attacks (with special moves and super moves earning more points), by using special mechanics (such as a guard break or Just Defend), or by defeating opponents. Finishing an opponent with a counterattack super move or by countering a super move with a special move is called a "Finest K.O." and worth 50 to 100 Groove Points. Getting hit or losing a match costs points. The number of Groove Points earned during a game is shown above the timer. The player's total amount of Groove Points is saved to a VMU. These points can be spent in the Groove Edit Mode, unlocked after finishing the Arcade Mode, to create custom grooves.
- Arcade Mode: A single-player mode where the player forms a team of up to three characters and fights a series of elimination matches against five randomly selected teams. If the player fulfills certain requirements, a mid-boss fight against Geese Howard or M. Bison is unlocked before the fourth match. If the player fulfills additional requirements, a final boss fight against either Rugal or Akuma is unlocked after defeating the last team. If the player fulfills more stringent requirements, a secret final fight against Ultimate Rugal or Shin Akuma is unlocked instead. There are three formats for this mode: Ratio Match (players assemble teams of three with a combined ratio of four and fight an elimination match), 3-on-3 Match (players choose any three characters, which are all treated as having a ratio of one, and fight an elimination match), or Single Match (players choose one character, which is treated as having a ratio of two, and fight a match to the best of three rounds). The game ends if the player loses a match but can be continued an unlimited number of times. A second player can challenge the first by pressing START , with the victor of the match continuing the game. There are eight difficulty levels for computer-controlled opponents.
- Boss Battle Mode: After defeating both Ultimate Rugal and Shin Akuma at least once, a hidden boss battle mode is unlocked, which can be accessed by holding
 +
+ when starting the Arcade Mode. It is the same as the Arcade Mode, except it consists solely of matches against all of the boss characters (M. Bison, Geese Howard, Evil Ryu, Orochi Iori, Akuma, Rugal, Shin Akuma, and Ultimate Rugal). This mode cannot be continued if a match is lost. Completing it unlocks an "Extra Option" menu in the options.
 - Survival Mode: A single-player mode where the player chooses a groove and a character and tries to defeat as many. characters as possible in one-round matches on a single health gauge. All combatants are treated as having a ratio of two. Some health is replenished after each round, depending on the player's score. The contents of the character's power gauge is carried over to the next match (except in the S groove). There are two formats for this mode: All Survival (where the player fights against every character in the game) and ∞ Survival (where the player fights against endless opponents until defeated).
- Vs Mode: A two-player mode where players pick a stage, their grooves, and their characters and fight each other. Pressing START when selecting a groove cycles through the grooves quickly like a slot machine (for choosing one randomly). Each player can also set a handicap. The game keeps track of each player's wins, losses, and win ratio. As in the Arcade Mode, there are three formats for this mode: Ratio Match, 3-on-3 Match, or Single Match.
- Training Mode: A practice mode where the player chooses any character and any opponent and can choose a groove and a ratio (between one and four) for either character. The player can set the whether the dummy opponent is non-hostile, hostile, or controlled by a second control pad. Non-hostile opponents can be set to stand, crouch, or jump and guarding or not guard. The player can also toggle the health gauge (normal or flashing red) and power gauge (normal or max). The player can toggle the display of button presses and attack data.
- Groove Edit Mode: This mode is unlocked after completing the game. This allows the player to create two custom grooves (EX1 and EX2) by mixing and matching elements of the default grooves. The resulting grooves can be saved to a VMU and used in any mode. The player can select any of the six different gauges (or no gauge), then toggle systems and subsystems from the existing grooves. However, all of these elements cost a different amount of Groove Points to unlock, and the player initially starts with 4,000 Groove Points.
- Color Edit Mode: A customization mode where the player can create custom color schemes for any character. Each character has 15 colors that can be changed (by adjusting the red, green, or blue color bars). Pressing START opens a menu with additional options. Custom color schemes can be saved to a VMU.
- Replay Mode: This mode allows the player to load and watch a replay of a match from a VMU. Players are given the chance to save replays after completing a match in the Vs Mode. A replay takes 30 blocks of storage.
- Network Mode: This mode supported competitive online matches over Capcom's Matching Service.
The game also supports linking to the Neo Geo Pocket Color game SNK vs. Capcom: Card Fighters 2 Expand Edition over a Neo Geo Pocket/Dreamcast Setsuzoku Cable.
Characters
Note: Move lists assume that the character is facing right. When facing left, ![]() and
and ![]() should be reversed.
should be reversed.
| P | Any punch button |
| LP | Light punch |
| MP | Medium punch |
| HP | Hard punch |
| K | Any kick button |
| LK | Light kick |
| MK | Medium kick |
| HK | Hard kick |
| TAUNT | Taunt |
The game features a total of 48 playable characters, including the entire returning roster of Capcom vs. SNK Millennium Fight 2000 Pro.
Every character has a different color scheme depending on which button is used to select him or her (![]() ,
, ![]() ,
, ![]() ,
, ![]() ,
, ![]() , or
, or ![]() ). Additional bonus color schemes can be used by selecting the character with all three punch buttons (
). Additional bonus color schemes can be used by selecting the character with all three punch buttons (![]() +
+![]() +
+![]() ) or all three kick buttons (
) or all three kick buttons (![]() +
+![]() +
+![]() ). If the player has made a custom color scheme for the character in the Color Edit Mode, it can be selected with START .
). If the player has made a custom color scheme for the character in the Color Edit Mode, it can be selected with START .
Capcom
There are five new Capcom characters. Eagle appears for the first time since the original Street Fighter. Yun is added as the only new character from Street Fighter III (though Chun-Li is also updated to her 3rd Strike version). While the first Capcom vs. SNK only featured characters from the Street Fighter series (with the exception of Morrigan from Darkstalkers as a hidden character), this roster adds new characters from other series: Kyosuke Kagami from Rival Schools and Rolento and Maki from Final Fight (though Rolento appears as he did in Street Fighter Alpha 2).
 Originally appeared in:
|
Balrog (M. Bison) | ||||||||||||||||||||||||||||||||||||||||||||||||||
Balrog is a former heavyweight boxing champion who now works for M. Bison as an enforcer.
| |||||||||||||||||||||||||||||||||||||||||||||||||||
 Originally appeared in:
|
Blanka | ||||||||||||||||||||||||||||||||||||||||||||||||||
Blanka is a feral beastman from the jungles of Brazil with the ability to generate electricity.
| |||||||||||||||||||||||||||||||||||||||||||||||||||
 Originally appeared in:
|
Cammy | ||||||||||||||||||||||||||||||||||||||||||||||||||
Cammy is a genetically engineered assassin for Shadaloo, operating under the code name "Killer Bee."
| |||||||||||||||||||||||||||||||||||||||||||||||||||
 Originally appeared in:
|
Chun-Li | ||||||||||||||||||||||||||||||||||||||||||||||||||
Chun-Li is a Chinese wushu expert known for her quick motions and powerful kicks.
| |||||||||||||||||||||||||||||||||||||||||||||||||||
 Originally appeared in:
|
Dan Hibiki | ||||||||||||||||||||||||||||||||||||||||||||||||||
Dan is a cocky martial artist who fights in a style of his own design called Saikyou-ryuu. He was created as a parody of the SNK characters Ryo Sakazaki and Robert Garcia from Art of Fighting, whom Capcom considered to be copies of the Street Fighter characters Ryu and Ken, with his moves made deliberately weak.
| |||||||||||||||||||||||||||||||||||||||||||||||||||
 Originally appeared in:
|
Dhalsim | ||||||||||||||||||||||||||||||||||||||||||||||||||
Dhalsim is a Yoga mystic who has gained exceptional control over his mind and body, giving him the ability to stretch his limbs and breathe fire.
| |||||||||||||||||||||||||||||||||||||||||||||||||||
 Originally appeared in: Street Fighter
|
Eagle | ||||||||||||||||||||||||||||||||||||||||||||||||||
Eagle is a gentlemanly English bodyguard who has mastered the stick martial art bojutsu.
| |||||||||||||||||||||||||||||||||||||||||||||||||||
 Originally appeared in:
|
Edmond Honda | ||||||||||||||||||||||||||||||||||||||||||||||||||
E. Honda is a sumo wrestler who wants to prove to the world the strength of his technique.
| |||||||||||||||||||||||||||||||||||||||||||||||||||
 Originally appeared in:
|
Guile | ||||||||||||||||||||||||||||||||||||||||||||||||||
Guile is an officer in the United States Air Force who uses a mixed martial arts form combining elements of boxing, kickboxing, and wrestling.
| |||||||||||||||||||||||||||||||||||||||||||||||||||
 Originally appeared in: Street Fighter
|
Ken Masters | ||||||||||||||||||||||||||||||||||||||||||||||||||
Ken is a student of Shotokan karate and the best friend and training partner of Ryu. His family's Masters Foundation is co-hosting the tournament with the Garcia Financial Clique.
| |||||||||||||||||||||||||||||||||||||||||||||||||||
 Originally appeared in: Rival Schools
|
Kyosuke Kagami | ||||||||||||||||||||||||||||||||||||||||||||||||||
Kyosuke is a cool and calculating student at Taiyo Gakuen.
| |||||||||||||||||||||||||||||||||||||||||||||||||||
 Originally appeared in: Final Fight 2
|
Maki | ||||||||||||||||||||||||||||||||||||||||||||||||||
Maki is a speedy ninja who wields a tonfa. She is a student of Bushin-ryuu ninjutsu and the sister of Guy's fiancée. After her father Genryusai passes away, Maki is trying to find and defeat Guy in order to become the next master of Bushin-ryuu.
| |||||||||||||||||||||||||||||||||||||||||||||||||||
 Originally appeared in:
|
Morrigan Aensland | ||||||||||||||||||||||||||||||||||||||||||||||||||
Morrigan is a succubus who is obsessed with the human world.
| |||||||||||||||||||||||||||||||||||||||||||||||||||
 Originally appeared in:
|
Rolento | ||||||||||||||||||||||||||||||||||||||||||||||||||
Rolento is former member of the Mad Gear Gang who wants to build an army in order to establish a military utopian nation.
| |||||||||||||||||||||||||||||||||||||||||||||||||||
 Originally appeared in: Street Fighter
|
Ryu | ||||||||||||||||||||||||||||||||||||||||||||||||||
Ryu is a student of Shotokan karate who is highly focused on his training and becoming the strongest that he can. He enters the tournament in hopes of facing a legendary new competitor he has heard about, Kyo Kusanagi.
| |||||||||||||||||||||||||||||||||||||||||||||||||||
 Originally appeared in: Street Fighter
|
Sagat | ||||||||||||||||||||||||||||||||||||||||||||||||||
Sagat is a Muay Thai master from Thailand who bears a long scar on his chest from a fated fight with Ryu.
| |||||||||||||||||||||||||||||||||||||||||||||||||||
 Originally appeared in:
|
Sakura Kasugano | ||||||||||||||||||||||||||||||||||||||||||||||||||
Sakura is a Japanese schoolgirl who idolizes Ryu and fights with similar moves. The word "sakura" (さくら) refers to the cherry blossom tree or its flowers. She is thought to be a response to the popularity of the SNK character Yuri Sakazaki, as they are both young girls who imitate the fighting style of the main character of their series.
| |||||||||||||||||||||||||||||||||||||||||||||||||||
 Originally appeared in:
|
Vega (Balrog) | ||||||||||||||||||||||||||||||||||||||||||||||||||
Vega is a narcissistic Spanish bullfighter who works for M. Bison and fights with a clawed hand.
| |||||||||||||||||||||||||||||||||||||||||||||||||||
 Originally appeared in:
|
Yun | ||||||||||||||||||||||||||||||||||||||||||||||||||
Yun is a young skateboarder and skillful kung fu practitioner from Hong Kong.
| |||||||||||||||||||||||||||||||||||||||||||||||||||
 Originally appeared in:
|
Zangief | ||||||||||||||||||||||||||||||||||||||||||||||||||
Zangief is a massive Soviet wrestler who trains by wrestling bears.
|
SNK
Athena Asamiya and Chang Koehan (with Choi Bounge) are added from The King of Fighters, Rock Howard is added from Garou: Mark of the Wolves, Haohmaru is added from Samurai Shodown, Hibiki Takane is added from The Last Blade 2, and Ryuhaku Todo is added from Art of Fighting.
 Originally appeared in: Psycho Soldier
|
Athena Asamiya | ||||||||||||||||||||||||||||||||||||||||||||||||||
Athena is a Japanese pop idol with powerful psychic abilities and kung fu training.
| |||||||||||||||||||||||||||||||||||||||||||||||||||
 Originally appeared in: The King of Fighters '94
|
Benimaru Nikaido | ||||||||||||||||||||||||||||||||||||||||||||||||||
Benimaru is a model with a Japanese father and an American mother who fights with shootboxing techniques and can control electricity.
| |||||||||||||||||||||||||||||||||||||||||||||||||||
 Originally appeared in: The King of Fighters '94
|
Chang Koehan and Choi Bounge | ||||||||||||||||||||||||||||||||||||||||||||||||||
Chang and Choi are Korean criminals who were apprehended by Kim Kaphwan and forced to train in fighting as part of his "Rehabilitation Project." The player primarily controls Chang, with Choi following and contributing to some moves.
| |||||||||||||||||||||||||||||||||||||||||||||||||||
 Originally appeared in:
|
Haohmaru | ||||||||||||||||||||||||||||||||||||||||||||||||||
Haohmaru is a wandering samurai who fights to improve himself and to challenge evildoers.
| |||||||||||||||||||||||||||||||||||||||||||||||||||
 Originally appeared in:
|
Hibiki Takane | ||||||||||||||||||||||||||||||||||||||||||||||||||
Hibiki is an innocent but proficient swordswoman who is on a mission to avenge her father.
| |||||||||||||||||||||||||||||||||||||||||||||||||||
 Originally appeared in:
|
Iori Yagami | ||||||||||||||||||||||||||||||||||||||||||||||||||
Iori is the heir to the Yagami clan, which sealed away the snake demon Orochi along with the Kusanagi and Yata clans. He can create fire, which is purple because of the blood pact his clan made with Orochi hundreds of years ago. He has an intense dislike of Kyo because of the longstanding feud between their clans.
| |||||||||||||||||||||||||||||||||||||||||||||||||||
 Originally appeared in:
|
Joe Higashi | ||||||||||||||||||||||||||||||||||||||||||||||||||
Joe is a Japanese Muay Thai kickboxing champion and a friend of the Bogard brothers.
| |||||||||||||||||||||||||||||||||||||||||||||||||||
 Originally appeared in:
|
Kim Kaphwan | ||||||||||||||||||||||||||||||||||||||||||||||||||
Kim is a Korean taekwondo master with a strong sense of justice.
| |||||||||||||||||||||||||||||||||||||||||||||||||||
 Originally appeared in:
|
King | ||||||||||||||||||||||||||||||||||||||||||||||||||
King is a French bar owner who fights with a unique form of Muay Thai incorporating numerous acrobatic spinning kicks.
| |||||||||||||||||||||||||||||||||||||||||||||||||||
 Originally appeared in: The King of Fighters '94
|
Kyo Kusanagi | ||||||||||||||||||||||||||||||||||||||||||||||||||
Kyo is the heir to the Kusanagi clan, which sealed away the snake demon Orochi along with the Yagami and Yata clans. He is one of the last members of his clan who can still create fire.
| |||||||||||||||||||||||||||||||||||||||||||||||||||
 Originally appeared in:
|
Mai Shiranui | ||||||||||||||||||||||||||||||||||||||||||||||||||
Mai is a kunoichi who was trained in her family's ninjutsu arts. The word "mai" (舞) means "dance," and "shiranui" (不知火) means "unknown fire" (after the optical phenomenon of the same name in which flames seem to appear over an open body of water), both referencing her fighting style of dance-like movements and fire-conjuring special abilities.
| |||||||||||||||||||||||||||||||||||||||||||||||||||
 Originally appeared in:
|
Nakoruru | ||||||||||||||||||||||||||||||||||||||||||||||||||
Nakoruru is a young girl who is a guardian of nature.
| |||||||||||||||||||||||||||||||||||||||||||||||||||
 Originally appeared in:
|
Raiden | ||||||||||||||||||||||||||||||||||||||||||||||||||
Raiden is a heel pro wrestler known for his ruthlessness in the ring.
| |||||||||||||||||||||||||||||||||||||||||||||||||||
 Originally appeared in:
|
Rock Howard | ||||||||||||||||||||||||||||||||||||||||||||||||||
Rock is the son of Geese Howard, who was raised by Terry Bogard after his father's death.
| |||||||||||||||||||||||||||||||||||||||||||||||||||
 Originally appeared in:
|
Ryo Sakazaki | ||||||||||||||||||||||||||||||||||||||||||||||||||
Ryo is a practitioner of Kyokugen-ryuu, a style of karate created by his father. He was created as an homage to the Street Fighter character Ryu.[4]
| |||||||||||||||||||||||||||||||||||||||||||||||||||
 Originally appeared in:
|
Ryuhaku Todo | ||||||||||||||||||||||||||||||||||||||||||||||||||
Todo is a martial arts instructor who created his own style dervied from Aiki-juujutsu and Kendo. It is a running joke in the King of Fighters series that his daughter Kasumi is always searching for him and that he is never playable in any SNK games (aside from the console ports of the original Art of Fighting), and this game remains his last playable appearance.
| |||||||||||||||||||||||||||||||||||||||||||||||||||
 Originally appeared in:
|
Ryuji Yamazaki | ||||||||||||||||||||||||||||||||||||||||||||||||||
Yamazaki is a deadly and insane Japanese mobster who fights with one hand in his pocket.
| |||||||||||||||||||||||||||||||||||||||||||||||||||
 Originally appeared in:
|
Terry Bogard | ||||||||||||||||||||||||||||||||||||||||||||||||||
Terry is a young American fighter who learned various fighting techniques from his father.
| |||||||||||||||||||||||||||||||||||||||||||||||||||
 Originally appeared in:
|
Vice | ||||||||||||||||||||||||||||||||||||||||||||||||||
Vice is Rugal's sadistic secretary, who possesses preternatural strength.
| |||||||||||||||||||||||||||||||||||||||||||||||||||
 Originally appeared in: Art of Fighting 2
|
Yuri Sakazaki | ||||||||||||||||||||||||||||||||||||||||||||||||||
Yuri is Ryo's young sister and an eager novice student of Kyokugen-ryuu. Some of her moves are parodies of the moves of Street Fighter characters.
|
Bosses
Evil Ryu and Orochi Iori are exclusive to the console releases. Shin Akuma and Ultimate Rugal were non-playable bosses in the original arcade version, but they become playable in the Dreamcast version after defeating them in the Arcade Mode.
 Originally appeared in:
|
Evil Ryu | ||||||||||||||||||||||||||||||||||||||||||||||||||||||||
Evil Ryu is a hypothetical version of Ryu that fights with the dark Satsui no Hadou rather than the light Kyoi no Hadou.
| |||||||||||||||||||||||||||||||||||||||||||||||||||||||||
 Originally appeared in:
|
Orochi Iori | ||||||||||||||||||||||||||||||||||||||||||||||||||||||||
Orochi Iori is a version of Iori when he is under the effects of the Riot of the Blood, due to the blood pact his clan made with Orochi hundreds of years ago that gave them greater powers but cursed the clan and their descendants forever.
| |||||||||||||||||||||||||||||||||||||||||||||||||||||||||
 Originally appeared in:
|
M. Bison (Vega) | ||||||||||||||||||||||||||||||||||||||||||||||||||||||||
M. Bison is the shadowy leader of the international crime syndicate Shadaloo. He is motivated solely by his lust for world domination and fights using a dark psychotic energy known as "Psycho Power." He can appear as a possible mid-boss before the fourth match if certain requirements are fulfilled.
| |||||||||||||||||||||||||||||||||||||||||||||||||||||||||
 Originally appeared in:
|
Geese Howard | ||||||||||||||||||||||||||||||||||||||||||||||||||||||||
Geese is the mafia kingpin of South Town and the nemesis of the Terry Bogard. He is an American who has studied and mastered Japanese fighting techniques. He can appear as a possible mid-boss before the fourth match if certain requirements are fulfilled.
| |||||||||||||||||||||||||||||||||||||||||||||||||||||||||
 Originally appeared in:
|
Akuma (Gouki) | ||||||||||||||||||||||||||||||||||||||||||||||||||||||||
Akuma is a savage and merciless fighter who has mastered the Satsui no Hadou. He is one of the possible final bosses of the game.
| |||||||||||||||||||||||||||||||||||||||||||||||||||||||||
 Originally appeared in: The King of Fighters '94
|
Rugal Bernstein | ||||||||||||||||||||||||||||||||||||||||||||||||||||||||
Rugal is a cruel and sophisticated crime lord who turns the fighters he defeats into living trophies. He is one of the possible final bosses of the game.
| |||||||||||||||||||||||||||||||||||||||||||||||||||||||||
 Originally appeared in:
|
Shin Akuma (Shin Gouki) | ||||||||||||||||||||||||||||||||||||||||||||||||||||||||
Shin Akuma is a version of Akuma that represents him when he becomes almost one with the Satsui no Hadou. If certain requirements are fulfilled, he can appear as one of the hidden final bosses.
| |||||||||||||||||||||||||||||||||||||||||||||||||||||||||
 Originally appeared in:
|
Ultimate Rugal (God Rugal) | ||||||||||||||||||||||||||||||||||||||||||||||||||||||||
Ultimate Rugal is a version of Rugal that was revived with a small parcel of Orochi's blood. If certain requirements are fulfilled, he can appear as one of the hidden final bosses.
|
Stages
Stages are chosen randomly for most matches in the Arcade Mode. The last regular match always takes place in the Osaka stage. The final bosses Akuma or Rugal are always fought in the Osaka Tower Rooftop stage, and the secret bosses Shin Akuma or Ultimate Rugal are always fought in the Osaka in Flames stage. The mid-bosses M. Bison or Geese Howard are fought in the same stage as the previous match.
The stage can be chosen manually in the Vs Mode and Training Mode. There is a special Training Room stage that can be selected in these modes.


History
Development
Character sprites
Because Capcom vs. SNK 2 features a roster composed of characters from numerous games and hardware eras, the appearances of several of Capcom's characters have been considered substandard in comparison to the newly drawn SNK characters. Instead of choosing to redraw its characters, Capcom took the approach of reusing old character sprites from previous games and inserting them in among the other characters.
The result created a significant disparity, particularly in the case of characters like Morrigan, whose low-resolution sprite from the original Darkstalkers games appears washed out and lacking in detail when compared to Capcom's newly drawn characters, such as Maki, Eagle, Ryu, Ken, and Vega (M. Bison). Chun-Li and Yun also have new sprites, based on their CPS-3 sprites from the Street Fighter III series. This has led to criticism of Capcom's art department.
Cross-platform play
During its development, Capcom worked with KDDI to bring a cross-platform online Matching Service for Capcom vs. SNK 2, allowing, at launch, for Dreamcast owners to fight against PlayStation 2 owners of the game (exclusively in Japan). To achieve this, the Dreamcast could connect to KDDI's servers with its built-in modem, while the PlayStation 2 was forced to use an external modem (which Capcom bundled in a special package). This is the first of two known Dreamcast games to support cross-platform console play, the other being Kidou Senshi Gundam: Renpou vs. Zeon & DX, also developed by Capcom.
The specifics remain unclear, however Capcom vs. SNK 2's launch on 13 September 2001 potentially makes it not only the first PlayStation 2 game to support any kind of cross-platform online play, but also the first PlayStation 2 game to support online play at all, pre-dating the likes of Tony Hawk Pro Skater 3 (which currently holds a Guinness World Record for this feat[5]) by more than a month.
Sequels and re-releases
Though the Dreamcast version of the game remained exclusive to Japan, the arcade version was brought overseas as Capcom vs. SNK 2: Mark of the Millennium 2001. Other Western ports have retained that name. The Nintendo GameCube and Xbox received an upgraded version, called Capcom vs. SNK 2 EO ("Easy Operation" for Japanese releases[6], "Extreme Offence" for European[7]), making the game one of the few titles to be released for all four platforms of that console generation.
Production credits
Dreamcast version
- Planner: Neo_G (H. Ishizawa), Takechan♥, ☆Oni-Suzuki☆, Mitsuaki Araki, Haman♥Satoru, Buruma (Kojimax)
- Visual Planner: Haruo Murata, Tomonori Ohnuma
- Programmer: Hyper Shinchan, Senor, Hard.Yas -Groove-, Yu Kawamura, Yanagi, Kumiko Morita, tencho, Yoji Mikami, ♥Nae♥Cham♥
- Network Programmer: Tomohiro Ueno, Batayon, Masao Matsumoto, Miss, Tetsuy@ Koide, Kentaro★Kaneko, Kaz Yunde, Jun Matsumoto, Shin., Kohei Akiyama
- A.C.R. Programmer: Meijin, Hiro, Kobuta, Okaz@Kagawa, Kazuhito Nakai, Masakazu Matsusita, Hirotaka.A, Mikio, Hiroaki Watanabe, Shinichi.Y, Soji Seta, Zag2001, Kuwana, Katsumi Aoki
- Title Designer: Ukabin
- Illustrator: Kinu Nishimura, Shinkiro, Ikeno, Capcom Design Team
- Instruction Card Designer: Sakomizu, M★Ru, Y.Uchida
- Object Designer: G・Kamina, Zzak, Ikusan Z, akA maniA, Chimorin Shogun, Jun ★ Ikawa, Tomohiko Ohsumi, ★toshi@loveyuko★, RVT1000R (RC51), Yamancha, Hideya Takada, Rinboku, Hiranodaichi, Masatsugu Sato, Yoshihiko, Yo-He, A-Ko, Kana, Nara
- Effect Designer: Takep, Anz
- Background Designer: Chika Iwai, Yuki Kyotani, Tama, Saru, Kuwajima@C-ya, Goro Suzuki 2001, Inoyan, Naoko Niiyama, Ryo Uno, Akiko Hongou, Aya Saito, Takako Nakamura, Kisabon, Chie Morisaki, Akiko Ohnishi, Youichi Tanoue, Yasuhiro Yamamoto, Hiroyuki Imahori, Masanori Kajita
- Music Composer: Satoshi Ise
- Sound Designer: Masayuki Endo
- Recording Engineer: Kazuya Takimoto
- Dj: Hiroaki Asai
- Director: Hideaki Itsuno
- Assistant Producer: Takayoshi Terada, Kenji Itsuno
- Producer: Yoshihiro Sudo
- General Producer: Noritaka Funamizu
- Executive Producer: Yoshiki Okamoto
- Special Thanks: Yasuhiro Kobayashi, Eiichi Yaji, H.Furubeppu, Kensuke Nakahara, kokoro, J.Nagai, Hagee, Akuta, Ojee, Shouden, Naoto Satou, Tsutomu Ikai, Yuriko Yamamoto, Michiyo Aoki, Takuya Shiraiwa, Shizuku Abe, Kaori Funyakoshi, Ayumi Comebara, Erik Genazea Suzuki, D44 (Bas), Knnit, Nuki♥Black, Xiao, Dr.seno, Toshitaka Kawamoto, Kiyomatu★teacher, Ume-Zono, Bugcheck Team, Sarugakucho, Junnosuke Miyamoto, Akira Tateishi, Kouta Sasaki, Tatsuya Hasegawa, Kazuo Shouno, Hideki Ishizuka, Kohji Okada, Jinichi Tokutomi, Toshihiro Komiya, Takashi Kikuchi, Hiroshi Terada, Masafumi Chigusa, Ryuuji Kida, Jun Tamura, All SNK Staff, All Capcom Staff. ...And You
Digital manuals
US manual (kit)
Magazine articles
- Main article: Capcom vs. SNK 2 Millionaire Fighting 2001/Magazine articles.
Promotional material

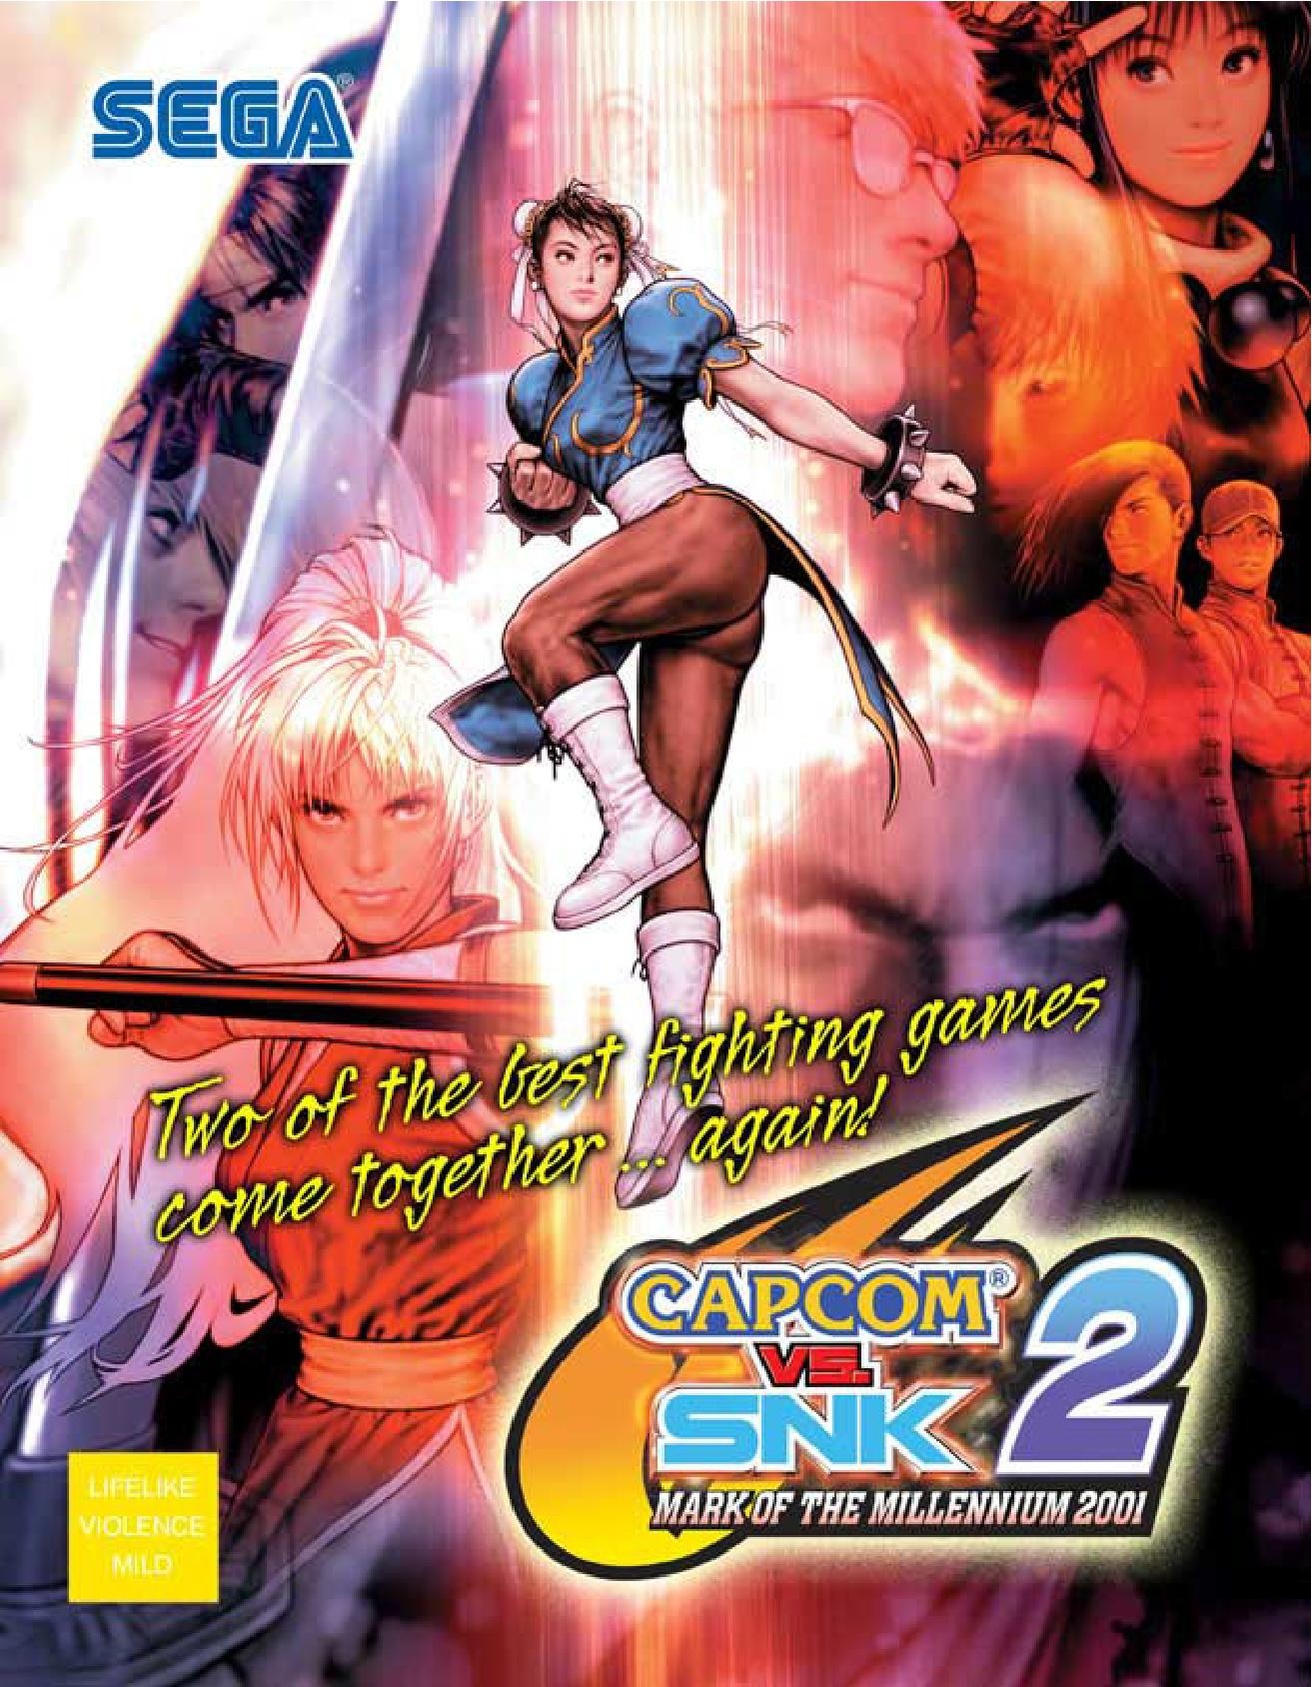
Artwork
- Main article: Capcom vs. SNK 2 Millionaire Fighting 2001/Artwork.
Physical scans
NAOMI version
| NAOMI, JP | ||||
|---|---|---|---|---|
| NAOMI GD-ROM, JP | ||||
|---|---|---|---|---|
Error creating thumbnail: /bin/bash: line 1: /usr/bin/convert: Permission denied Error code: 126 "Top" instructions "Long" instructions "Long" instructions (2) | ||||
 Disc Manual Dipswitch notice Warning stickers Stickers | ||||
Dreamcast version
| Sega Retro Average | ||||||||||||||||||||||||||||||||||||||||||||||||||||||
|---|---|---|---|---|---|---|---|---|---|---|---|---|---|---|---|---|---|---|---|---|---|---|---|---|---|---|---|---|---|---|---|---|---|---|---|---|---|---|---|---|---|---|---|---|---|---|---|---|---|---|---|---|---|---|
|
| 85 | |
|---|---|
| Based on 10 reviews | |
| Dreamcast, JP |
|---|
  Cover
|
Spinecard  Disc Manual |
| Dreamcast, JP (Dorikore) |
|---|
|
Technical information
External links
- Sega of Japan catalogue pages (Japanese): Dreamcast
References
- ↑ File:CvS2 DC JP Box back.jpg
- ↑ 2.0 2.1 2.2 2.3 2.4 http://sega.jp/dc/010912/ (Wayback Machine: 2007-05-18 09:38)
- ↑ https://sega.jp/history/hard/dreamcast/software_l.html#tab02 (Wayback Machine: 2020-02-01 22:57)
- ↑ [ ]
- ↑ http://www.guinnessworldrecords.com/world-records/first-playstation-2-game-to-support-online-play/ (Wayback Machine: 2015-09-13 03:22)
- ↑ https%3A%2F%2Fgamefaqs.gamespot.com%2Fgamecube%2F557563-capcom-vs-snk-2-eo%2Fboxes%2F22560 (Wayback Machine: 2024-06-23 01:52)
- ↑ https://www.mobygames.com/game/5003/capcom-vs-snk-2-mark-of-the-millennium/cover/group-17598/cover-42177/ (Wayback Machine: 2024-06-23 06:45)
- ↑ File:Capcom vs SNK 2 DC credits.pdf
- ↑ 100% Consoles, "Décembre 2001" (FR; 2001-1x-xx), page 71
- ↑ Consoles +, "Novembre 2001" (FR; 2001-1x-xx), page 88
- ↑ Dorimaga, "2001-08 extra (2001-09-21)" (JP; 2001-09-07), page 35
- ↑ Dorimaga, "2002-18 (2002-10-11)" (JP; 2002-09-27), page 33
- ↑ Famitsu, "2001-09-21" (JP; 2001-09-07), page 100
- ↑ GamesMaster, "January 2002" (UK; 2001-12-20), page 99
- ↑ MAN!AC, "12/2001" (DE; 2001-11-07), page 50
- ↑ Play, "Grudzień 2001" (PL; 2001-xx-xx), page 30
- ↑ PSX Extreme, "10/2001" (PL; 2001-1x-xx), page 49
- ↑ Strana Igr, "Noyabr 2001 2/2" (RU; 2001-xx-xx), page 67
| Capcom vs. SNK 2 Millionaire Fighting 2001 | |
|---|---|
|
Main page | Comparisons | Development | Magazine articles | Reception | Artwork | Compliance | Technical information | Bootlegs | |
| Capcom vs. games for Sega systems | ||
|---|---|---|
| X-Men vs. Street Fighter (1997) | Marvel Super Heroes vs. Street Fighter (1998) | ||
| Marvel vs. Capcom: Clash of Super Heroes (1999) | Marvel vs. Capcom 2: New Age of Heroes (2000) | Capcom vs. SNK: Millennium Fight 2000 (2000) | Capcom vs. SNK Millennium Fight 2000 Pro (2001) | Capcom vs. SNK 2 Millionaire Fighting 2001 (2001) | ||
| Related Games | ||
| X-Men: Children of the Atom (1995) | Marvel Super Heroes (1997) | ||
| The King of Fighters games for Sega systems or published by Sega | |
|---|---|
| The King of Fighters '95 (1996) | The King of Fighters '96 (1996) | The King of Fighters '96 + '95: Gentei KOF Double Pack (?) | The King of Fighters '97 (1998) | The King of Fighters Best Collection (1998) | |
| The King of Fighters: Dream Match 1999 (1999) | The King of Fighters: Evolution (2000) | The King of Fighters 2000 (2002) | The King of Fighters 2001 (2002) | The King of Fighters 2002 (2003) | |
| The King of Fighters Neowave (2004) | The King of Fighters XI (2005) | |
| The King of Fighters XIV (2016) | |
| Unlicensed The King of Fighters games for Sega systems | |
| King of Fighters 98' (1998) | The King of Fighters '99 (1999) | Jue Zhan Tian Huang (2000) | |
| Related games | |
| Capcom vs. SNK: Millennium Fight 2000 (2000) | Capcom vs. SNK Millennium Fight 2000 Pro (2000) | Capcom vs. SNK 2 Millionaire Fighting 2001 (?) | NeoGeo Battle Coliseum (2005) | SNK Heroines: Tag Team Frenzy (2018) | |
- Dreamcast Arcade Stick-compatible games
- Dreamcast Keyboard-compatible games
- Jump Pack-compatible games
- Dreamcast Modem-compatible games
- Neo Geo Pocket/Dreamcast Setsuzoku Cable-compatible games
- Dreamcast VGA Box-compatible games
- Visual Memory Unit-compatible games
- 1-2 player games
- All arcade games
- NAOMI games
- 2001 NAOMI games
- All 2001 games
- NAOMI GD-ROM games
- 2001 NAOMI GD-ROM games
- Arcade fighting games
- All fighting games
- JP Dreamcast games
- All JP games
- Dreamcast games
- 2001 Dreamcast games
- Dreamcast fighting games
- Dreamcast games with ADX audio
- Dreamcast games using Flash
- All games
- Bad external reference
- Capcom vs. SNK 2 Millionaire Fighting 2001
- Capcom vs.
- The King of Fighters