Difference between revisions of "Dreamcast Controller"
From Sega Retro
| Line 16: | Line 16: | ||
}} | }} | ||
}} | }} | ||
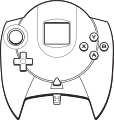
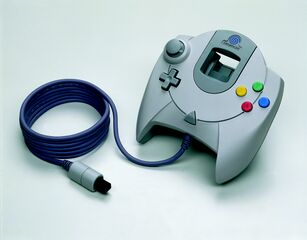
| − | The ''' | + | The '''Controller''' is the primary interface for interacting with the [[Sega Dreamcast]] video game console. It was bundled with every system and is supported by every Dreamcast game. |
| − | + | ==Hardware== | |
| − | + | With the Dreamcast, Sega went back to using the term "controller" for its main form of input, having previously preferred the term "control pad" with the [[Sega Mega Drive]] and [[Sega Saturn]]. As is to be expected, it increments on ideas seen with previous Sega hardware, being the logical progression from the Saturn's [[3D Control Pad]], originally debuting in mid-1996 as a response to the Nintendo 64. However, the 3D Control Pad was not as widely adopted as perhaps hoped, so the Dreamcast is the first (and only) Sega console to be equipped with analogue controls straight out of the box. | |
| − | |||
| − | |||
| − | |||
| − | |||
| − | |||
| − | |||
| − | + | On the top left of the controller sits an "analogue thumb pad" (analogue stick), above a four-way directional pad (D-Pad), a {{start}} button in the centre of the controller and {{A}}, {{B}}, {{X}} and {{Y}} face buttons on the right. On top of the controller there are two analogue triggers, {{L}} and {{R}} in the top-left and top-right, respectively. Unlike the Sega Saturn (and Mega Drive) there are no {{C}} and {{Z}} buttons, and the controller has moved past the need for a switch to toggle between analogue and digital modes, seen on the 3D Control Pad. | |
| − | + | The most striking difference with the Dreamcast controller is its two "expansion sockets" on the top. Typically the first socket (in front) houses a [[VMU]] (as there is a gap to see the screen) while the one in back houses other expansions such as the [[Dreamcast Jump Pack|Jump Pack]]. | |
| − | |||
| − | The | + | The Dreamcast controller stands as [[Sega]]'s largest standard control pad for any of their systems, and was not redesigned during the console's run. Over the years it has run into some criticism, primarily for being uncomfortable for those with larger hands, but also for the high sensitivity of the thumb pad. Furthermore its lack of a second thumb pad was a noticable disadvantage when compared to the [[PlayStation 2]] (and original PlayStation in its later years). It was also the last mainstream video game controller not to have vibration features as standard. |
| − | + | One curious design feature is controller's lead, which comes out of the bottom, only to be looped back up and clipped in place so as not to get in the way. While unconventional, Sega appears to have designed it this way to assist with storage - that is to say, the lead can be wrapped around the controller and clipped at the end. | |
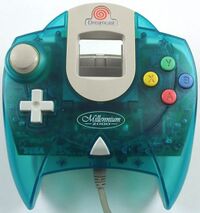
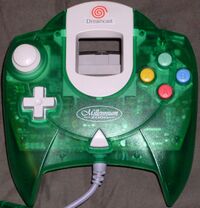
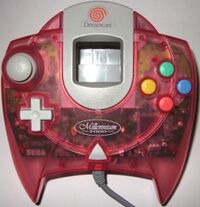
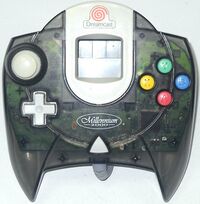
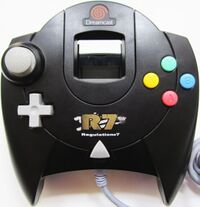
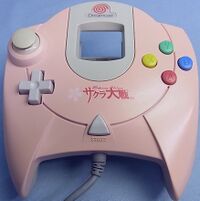
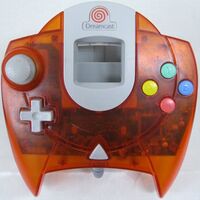
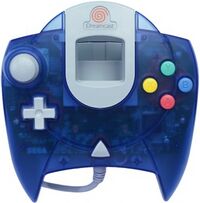
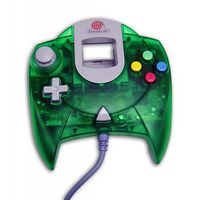
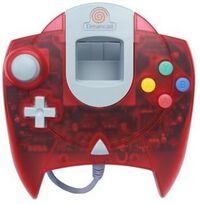
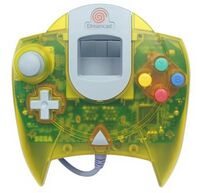
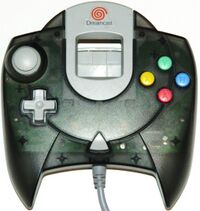
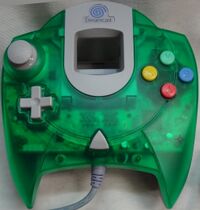
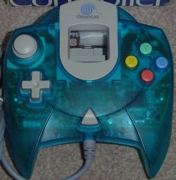
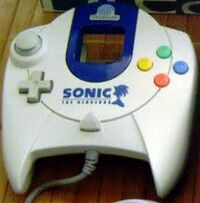
| − | + | Many novelty Dreamcast controllers were produced in a wide variety of colours. | |
| − | |||
| − | + | ===Internal workings=== | |
| + | Although each button can be configured to perform a specific and distinctive action, all of the buttons, except for the two analog triggers and thumb pad, work on the same principle. In essence, each button is a switch that completes a circuit whenever it is pressed. A small metal disc beneath the button is pushed into contact with two strips of conductive material on the circuit board inside the controller. While the metal disc is in contact, it conducts electricity between the two strips. | ||
| − | ==List of | + | The controller senses that the circuit is closed and sends that data to the Dreamcast. The CPU compares that data with the instructions in the game software for that button, and triggers the appropriate response. There is also a metal disc under each arm of the directional pad. If you're playing a game in which pushing down on the directional pad causes the character to crouch, a similar string of connections is made from the time of the push down on the pad to when the character crouches. |
| + | |||
| + | The analog thumb pad and triggers work in a completely different way from the buttons described above. The triggers each have a tiny magnet attached to the end of the trigger arm. When the trigger is depressed, the magnet is pushed toward a sensor mounted on the controller's circuit board. Through the process of induction, the magnet creates resistance to the current passing through the sensor. On the bottom of the magnet is a layer of foam padding. Pushing harder on the trigger compresses the padding, which brings the magnet closer to the sensor. The closer the magnet is to the sensor, the more resistance is induced. This variable resistance makes the triggers pressure-sensitive. | ||
| + | |||
| + | The thumb pad also uses a magnet, along with four small sensors. The sensors are arranged like a compass, with one at each of the cardinal points (north, south, east, west). The base of the joystick is shaped like a ball, with tiny spokes radiating out. The ball sits in a socket above the sensors. Spikes on the socket fit between the spokes on the ball. This allows for an extraordinary amount of movement without letting the thumb pad twist out of alignment with the sensors. As the thumb pad is moved, the magnet in the base moves closer to one or two of the sensors, and farther from the others. The system monitors the changes in induction caused by the magnet's movement to calculate the position of the thumb pad. | ||
| + | |||
| + | ==Gallery== | ||
| + | <gallery> | ||
| + | Dreamcast Controller Expansion.jpg|Top of the controller, showing the two expansion sockets, analogue triggers and lead clip. | ||
| + | </gallery> | ||
| + | |||
| + | ==List of controllers== | ||
===Japan=== | ===Japan=== | ||
{{SectionsNewStart|imagewidths=200px}} | {{SectionsNewStart|imagewidths=200px}} | ||
| Line 54: | Line 58: | ||
| back=Dc standardcontroller jp box back.jpg | | back=Dc standardcontroller jp box back.jpg | ||
| spinemissing=yes | | spinemissing=yes | ||
| + | | square=yes | ||
| + | }} | ||
| + | }} | ||
| + | |||
| + | {{SectionsNew| | ||
| + | | name=Transparent-green () () | ||
| + | | image= | ||
| + | | desc= | ||
| + | {{Scanbox | ||
| + | | console=Dreamcast | ||
| + | | region=JP | ||
| + | | front= | ||
| + | | back= | ||
| + | | spinemissing= | ||
| square=yes | | square=yes | ||
}} | }} | ||
| Line 61: | Line 79: | ||
| name=Transparent-blue () () | | name=Transparent-blue () () | ||
| image=DCController AquaBlue JP.jpg | | image=DCController AquaBlue JP.jpg | ||
| + | | desc= | ||
| + | {{Scanbox | ||
| + | | console=Dreamcast | ||
| + | | region=JP | ||
| + | | front= | ||
| + | | back= | ||
| + | | spinemissing= | ||
| + | | square=yes | ||
| + | }} | ||
| + | }} | ||
| + | {{SectionsNew| | ||
| + | | name=Transparent-pink () () | ||
| + | | image= | ||
| desc= | | desc= | ||
{{Scanbox | {{Scanbox | ||
| Line 243: | Line 274: | ||
| name=Biohazard Code: Veronica (red) () () | | name=Biohazard Code: Veronica (red) () () | ||
| image=DCController JP CodeVeronicaRed.jpg | | image=DCController JP CodeVeronicaRed.jpg | ||
| − | | desc= | + | | desc=Packaged with console. |
| − | |||
| − | |||
| − | |||
| − | |||
| − | |||
| − | |||
| − | |||
| − | |||
}} | }} | ||
| Line 257: | Line 280: | ||
| name=Biohazard Code: Veronica (black) () () | | name=Biohazard Code: Veronica (black) () () | ||
| image=DCController JP CodeVeronicaBlack.jpg | | image=DCController JP CodeVeronicaBlack.jpg | ||
| − | | desc= | + | | desc=Packaged with console. |
| − | |||
| − | |||
| − | |||
| − | |||
| − | |||
| − | |||
| − | |||
| − | |||
}} | }} | ||
| Line 271: | Line 286: | ||
| name=Hello Kitty (pink) () () | | name=Hello Kitty (pink) () () | ||
| image=DCController JP HelloKittyPink.jpg | | image=DCController JP HelloKittyPink.jpg | ||
| − | | desc= | + | | desc=Packaged with console. |
| − | |||
| − | |||
| − | |||
| − | |||
| − | |||
| − | |||
| − | |||
| − | |||
}} | }} | ||
| Line 285: | Line 292: | ||
| name=Hello Kitty (blue) () () | | name=Hello Kitty (blue) () () | ||
| image=DCController JP HelloKittyBlue.jpg | | image=DCController JP HelloKittyBlue.jpg | ||
| − | | desc= | + | | desc=Packaged with console. |
| − | |||
| − | |||
| − | |||
| − | |||
| − | |||
| − | |||
| − | |||
| − | |||
}} | }} | ||
| Line 299: | Line 298: | ||
| name= R7 () () | | name= R7 () () | ||
| image=DCController JP R7.jpg | | image=DCController JP R7.jpg | ||
| + | | desc=Packaged with console. | ||
| + | }} | ||
| + | |||
| + | {{SectionsNew| | ||
| + | | name=Sakura Taisen (HKT-7700-19) () | ||
| + | | image=Controller DC JP SakuraTaisen.jpg | ||
| desc= | | desc= | ||
{{Scanbox | {{Scanbox | ||
| Line 311: | Line 316: | ||
{{SectionsNew| | {{SectionsNew| | ||
| − | | name=Sakura Taisen | + | | name=Sakura Taisen |
| − | | image= | + | | image= |
| desc= | | desc= | ||
{{Scanbox | {{Scanbox | ||
| Line 425: | Line 430: | ||
}} | }} | ||
}} | }} | ||
| − | |||
| − | |||
| − | |||
{{SectionsNew| | {{SectionsNew| | ||
| name=Sega Sports () () | | name=Sega Sports () () | ||
| image=DCController US SegaSports.jpg | | image=DCController US SegaSports.jpg | ||
| − | | desc= | + | | desc=Packaged with console. |
| − | |||
| − | |||
| − | |||
| − | |||
| − | |||
| − | |||
| − | |||
| − | |||
}} | }} | ||
|} | |} | ||
| Line 518: | Line 512: | ||
| name=Sonic the Hedgehog 10th Anniversary | | name=Sonic the Hedgehog 10th Anniversary | ||
| image=DCController EU Sonic.jpg | | image=DCController EU Sonic.jpg | ||
| − | | desc= | + | | desc=Packaged with console. |
| − | |||
| − | |||
| − | |||
| − | |||
| − | |||
| − | |||
| − | |||
| − | |||
}} | }} | ||
|} | |} | ||
| Line 536: | Line 522: | ||
</gallery> | </gallery> | ||
| − | == | + | ==References== |
{{ratings | {{ratings | ||
| icon=DC | | icon=DC | ||
| Line 542: | Line 528: | ||
| cvg_source={{num|216|page=66|pdf=CVG UK 216.pdf}} | | cvg_source={{num|216|page=66|pdf=CVG UK 216.pdf}} | ||
}} | }} | ||
| − | |||
| − | |||
<references/> | <references/> | ||
{{clear}} | {{clear}} | ||
Revision as of 12:43, 26 March 2016
| ||||||||||||||||||||||||||||||
| Controller | ||||||||||||||||||||||||||||||
|---|---|---|---|---|---|---|---|---|---|---|---|---|---|---|---|---|---|---|---|---|---|---|---|---|---|---|---|---|---|---|
| Made for: Sega Dreamcast | ||||||||||||||||||||||||||||||
| Manufacturer: Sega | ||||||||||||||||||||||||||||||
|
The Controller is the primary interface for interacting with the Sega Dreamcast video game console. It was bundled with every system and is supported by every Dreamcast game.
Contents
Hardware
With the Dreamcast, Sega went back to using the term "controller" for its main form of input, having previously preferred the term "control pad" with the Sega Mega Drive and Sega Saturn. As is to be expected, it increments on ideas seen with previous Sega hardware, being the logical progression from the Saturn's 3D Control Pad, originally debuting in mid-1996 as a response to the Nintendo 64. However, the 3D Control Pad was not as widely adopted as perhaps hoped, so the Dreamcast is the first (and only) Sega console to be equipped with analogue controls straight out of the box.
On the top left of the controller sits an "analogue thumb pad" (analogue stick), above a four-way directional pad (D-Pad), a START button in the centre of the controller and ![]() ,
, ![]() ,
, ![]() and
and ![]() face buttons on the right. On top of the controller there are two analogue triggers,
face buttons on the right. On top of the controller there are two analogue triggers, ![]() and
and ![]() in the top-left and top-right, respectively. Unlike the Sega Saturn (and Mega Drive) there are no
in the top-left and top-right, respectively. Unlike the Sega Saturn (and Mega Drive) there are no ![]() and
and ![]() buttons, and the controller has moved past the need for a switch to toggle between analogue and digital modes, seen on the 3D Control Pad.
buttons, and the controller has moved past the need for a switch to toggle between analogue and digital modes, seen on the 3D Control Pad.
The most striking difference with the Dreamcast controller is its two "expansion sockets" on the top. Typically the first socket (in front) houses a VMU (as there is a gap to see the screen) while the one in back houses other expansions such as the Jump Pack.
The Dreamcast controller stands as Sega's largest standard control pad for any of their systems, and was not redesigned during the console's run. Over the years it has run into some criticism, primarily for being uncomfortable for those with larger hands, but also for the high sensitivity of the thumb pad. Furthermore its lack of a second thumb pad was a noticable disadvantage when compared to the PlayStation 2 (and original PlayStation in its later years). It was also the last mainstream video game controller not to have vibration features as standard.
One curious design feature is controller's lead, which comes out of the bottom, only to be looped back up and clipped in place so as not to get in the way. While unconventional, Sega appears to have designed it this way to assist with storage - that is to say, the lead can be wrapped around the controller and clipped at the end.
Many novelty Dreamcast controllers were produced in a wide variety of colours.
Internal workings
Although each button can be configured to perform a specific and distinctive action, all of the buttons, except for the two analog triggers and thumb pad, work on the same principle. In essence, each button is a switch that completes a circuit whenever it is pressed. A small metal disc beneath the button is pushed into contact with two strips of conductive material on the circuit board inside the controller. While the metal disc is in contact, it conducts electricity between the two strips.
The controller senses that the circuit is closed and sends that data to the Dreamcast. The CPU compares that data with the instructions in the game software for that button, and triggers the appropriate response. There is also a metal disc under each arm of the directional pad. If you're playing a game in which pushing down on the directional pad causes the character to crouch, a similar string of connections is made from the time of the push down on the pad to when the character crouches.
The analog thumb pad and triggers work in a completely different way from the buttons described above. The triggers each have a tiny magnet attached to the end of the trigger arm. When the trigger is depressed, the magnet is pushed toward a sensor mounted on the controller's circuit board. Through the process of induction, the magnet creates resistance to the current passing through the sensor. On the bottom of the magnet is a layer of foam padding. Pushing harder on the trigger compresses the padding, which brings the magnet closer to the sensor. The closer the magnet is to the sensor, the more resistance is induced. This variable resistance makes the triggers pressure-sensitive.
The thumb pad also uses a magnet, along with four small sensors. The sensors are arranged like a compass, with one at each of the cardinal points (north, south, east, west). The base of the joystick is shaped like a ball, with tiny spokes radiating out. The ball sits in a socket above the sensors. Spikes on the socket fit between the spokes on the ball. This allows for an extraordinary amount of movement without letting the thumb pad twist out of alignment with the sensors. As the thumb pad is moved, the magnet in the base moves closer to one or two of the sensors, and farther from the others. The system monitors the changes in induction caused by the magnet's movement to calculate the position of the thumb pad.
Gallery
List of controllers
Japan
|
Standard (HKT-7701) (1998-11-27) | ||
|---|---|---|---|
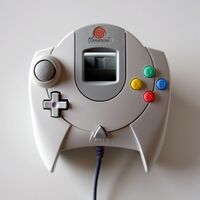
| Standard Dreamcast controllers are white, a colour which was reportedly decided very late in the console's development cycle. This original Japanese model was the basis for all controllers which followed. | |||
| Transparent-green () () | |||
| |||
|
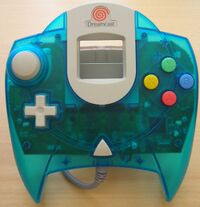
Transparent-blue () () | ||
| |||
| Transparent-pink () () | |||
| |||
|
Millennium 2000 (blue) (HKT-7700-01) () | ||
| |||
|
Millennium 2000 (green) (HKT-7700-02) () | ||
| |||
|
Millennium 2000 (pink) (HKT-7700-03) () | ||
| |||
|
Millennium 2000 (black) (HKT-7700-04) () | ||
| |||
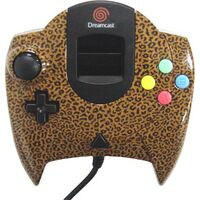
|
Leopard () () | ||
Available exclusively through Dreamcast Direct.
| |||
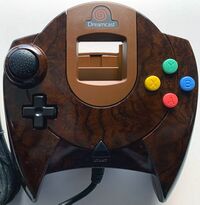
|
Wood () () | ||
Available exclusively through Dreamcast Direct.
| |||
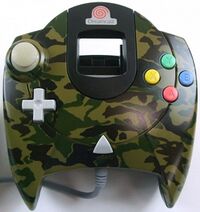
|
Camouflage () () | ||
Available exclusively through Dreamcast Direct.
| |||
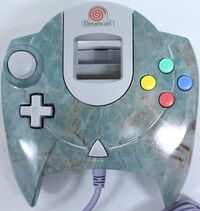
|
Marble () () | ||
Available exclusively through Dreamcast Direct.
| |||
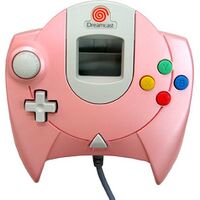
|
Pink () () | ||
| |||
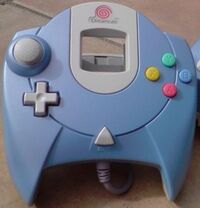
|
Pearl Blue () () | ||
Available exclusively through Dreamcast Direct.
| |||
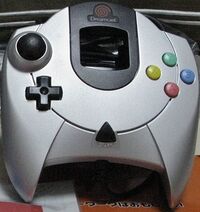
|
Silver () () | ||
Available exclusively through Dreamcast Direct.
| |||
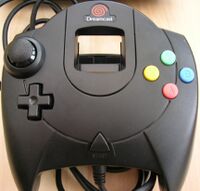
|
Super Black () () | ||
Available exclusively through Dreamcast Direct.
| |||
|
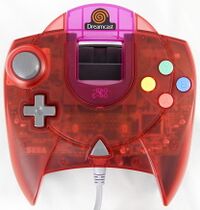
Biohazard Code: Veronica (red) () () | ||
| Packaged with console. | |||
|
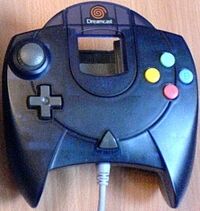
Biohazard Code: Veronica (black) () () | ||
| Packaged with console. | |||
|
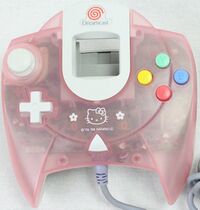
Hello Kitty (pink) () () | ||
| Packaged with console. | |||
|
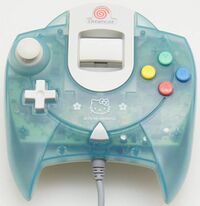
Hello Kitty (blue) () () | ||
| Packaged with console. | |||
|
R7 () () | ||
| Packaged with console. | |||
|
Sakura Taisen (HKT-7700-19) () | ||
| |||
| Sakura Taisen | |||
| |||
|
ChuChu Rocket! Limited Edition (HDR-0048) (1999-11-11) | ||
This orange Dreamcast controller was released as part of a limited edition version of ChuChu Rocket!. It was not sold separately.
|
North America

|
Standard (MK-50100) (1999-09-09) | ||
|---|---|---|---|
|
Transparent-blue (MK-50101) () | ||
| |||
|
Transparent-green (MK-50102) () | ||
| |||
|
Transparent-red (MK-50103) () | ||
| |||
|
Transparent-yellow (MK-50104) () | ||
It is said yellow controllers (and VMUs) are the hardest colour to find in North America.
| |||
|
Transparent-charcoal ((MK-50105) () | ||
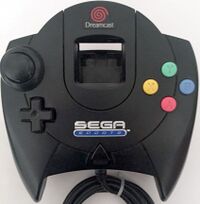
|
Sega Sports () () | ||
| Packaged with console. |
Europe
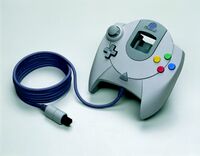
|
Standard () (1999-10-14) | ||
|---|---|---|---|
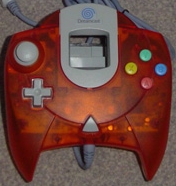
|
Transparent-red() () | ||
Available exclusively via Dreamarena.
| |||
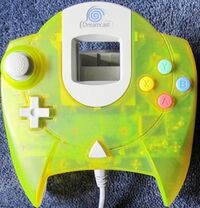
|
Transparent-yellow () () | ||
Available exclusively via Dreamarena.
| |||
|
Transparent-green () () | ||
Available exclusively via Dreamarena.
| |||
|
Transparent-blue () () | ||
Available exclusively via Dreamarena.
| |||
|
Sonic the Hedgehog 10th Anniversary | ||
| Packaged with console. |
Hardware Diagrams
References
| Sega Retro Average | ||||||||||||||
|---|---|---|---|---|---|---|---|---|---|---|---|---|---|---|
|
| 63 | |
|---|---|
| Based on 2 reviews | |
- ↑ File:CVG UK 215.pdf, page 59
- ↑ File:SegaMagazin DE 71.pdf, page 7
- ↑ 3.0 3.1 File:CVG UK 216.pdf, page 66 Cite error: Invalid
<ref>tag; name ":File:CVG UK 216.pdf_p66" defined multiple times with different content - ↑ Computer & Video Games, "December 2000" (UK; 2000-11-15), page 62


