Dynamite Headdy
From Sega Retro
| Dynamite Headdy | |||||||||||||||||||||||||||||||||||||||||||||||||||||||||||||||||||||||||||||||||||||||||||||||||||||||||||||||||||||||||||||||||||||||||||||||||||||||||||||||||||||||||||||||||||||||||
|---|---|---|---|---|---|---|---|---|---|---|---|---|---|---|---|---|---|---|---|---|---|---|---|---|---|---|---|---|---|---|---|---|---|---|---|---|---|---|---|---|---|---|---|---|---|---|---|---|---|---|---|---|---|---|---|---|---|---|---|---|---|---|---|---|---|---|---|---|---|---|---|---|---|---|---|---|---|---|---|---|---|---|---|---|---|---|---|---|---|---|---|---|---|---|---|---|---|---|---|---|---|---|---|---|---|---|---|---|---|---|---|---|---|---|---|---|---|---|---|---|---|---|---|---|---|---|---|---|---|---|---|---|---|---|---|---|---|---|---|---|---|---|---|---|---|---|---|---|---|---|---|---|---|---|---|---|---|---|---|---|---|---|---|---|---|---|---|---|---|---|---|---|---|---|---|---|---|---|---|---|---|---|---|---|---|
| System(s): Sega Mega Drive, Sega Master System, Sega Game Gear, Virtual Console, Steam, Android, iOS | |||||||||||||||||||||||||||||||||||||||||||||||||||||||||||||||||||||||||||||||||||||||||||||||||||||||||||||||||||||||||||||||||||||||||||||||||||||||||||||||||||||||||||||||||||||||||
| Publisher: Sega
| |||||||||||||||||||||||||||||||||||||||||||||||||||||||||||||||||||||||||||||||||||||||||||||||||||||||||||||||||||||||||||||||||||||||||||||||||||||||||||||||||||||||||||||||||||||||||
| Developer: | |||||||||||||||||||||||||||||||||||||||||||||||||||||||||||||||||||||||||||||||||||||||||||||||||||||||||||||||||||||||||||||||||||||||||||||||||||||||||||||||||||||||||||||||||||||||||
| Sound driver: | |||||||||||||||||||||||||||||||||||||||||||||||||||||||||||||||||||||||||||||||||||||||||||||||||||||||||||||||||||||||||||||||||||||||||||||||||||||||||||||||||||||||||||||||||||||||||
| Genre: Action | |||||||||||||||||||||||||||||||||||||||||||||||||||||||||||||||||||||||||||||||||||||||||||||||||||||||||||||||||||||||||||||||||||||||||||||||||||||||||||||||||||||||||||||||||||||||||
| Number of players: 1 | |||||||||||||||||||||||||||||||||||||||||||||||||||||||||||||||||||||||||||||||||||||||||||||||||||||||||||||||||||||||||||||||||||||||||||||||||||||||||||||||||||||||||||||||||||||||||
| |||||||||||||||||||||||||||||||||||||||||||||||||||||||||||||||||||||||||||||||||||||||||||||||||||||||||||||||||||||||||||||||||||||||||||||||||||||||||||||||||||||||||||||||||||||||||

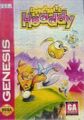
Dynamite Headdy (ダイナマイトヘッディー) is a platform game developed by Treasure and published by Sega for the Sega Mega Drive and Sega Game Gear. Tec Toy also brought it to the Sega Master System in Brazil. A Sega 32X port was planned, but cancelled due to the system's low popularity.
Contents
Story
| “ | On-stage Rampage! The curtain is raised, and the Treasure Theater Show begins. The star of the show is Dynamite Headdy, the guy with the coolest head on stage. But danger lurks backstage—Trouble Bruin, a henchman of Dark Demon, stirs up trouble as he tries to do away with Headdy! But Trouble Bruin is small stuffing compared to Dark Demon, who strives to rule the world by converting the inhabitants into his evil minions! Most devastating are the Keymasters, who serve as Dark Demon's elite guard. | „ |
— US manual[18] | ||
The game stars Headdy, a heroic puppet with interchangeable heads who was captured, but was rejected and has escaped from incineration. He must defeat the evil Dark Demon, an evil emperor who wishes to take over the land of puppets. Along the way, he will encounter Heather/Fingy, a mysterious female puppet who collects the keys that Headdy recovers from defeating Dark Demon's Keymasters, and Trouble Bruin/Maruyama, a bear doll who lurks backstage to pursue Headdy at every turn possible in order to defeat him and take over the show.
Gameplay
As a platformer, Dynamite Headdy sees the player travel across nine levels known as "Scenes", each of which are split into multiple levels. The core mechanic of the game is Headdy's head, which can detach from his body in eight directions for a variety of purposes, the most common of which is to attack enemies. Besides attacking, Headdy can also use his head to interact with other objects such as boxes and switches, or to grab on to HangMan to pull himself to high places or to bring platforms into reach. Headdy can also upgrade his head with many temporary Power Up Heads provided to him by HeadCase; Headdy can only use them for a short amount of time, but most of them can be cancelled at any time by pressing ![]() .
.
As a common staple of Treasure-developed games, the game has multiple bosses to fight, with Scenes even having multiple mini-bosses that appear at specific points. Major bosses, known as Keymasters, are encountered in the final level of each Scene, and a character named Beau will appear to indicate their weak points to the player. Secret Bonus Points are hidden all over each Scene in the game, and are found by meeting certain conditions such as defeating specific enemies or mini-bosses, destroying certain targets, or attacking Bino. Finding Secret Bonus Points only serves to increase the player's score at the end of each Scene.
Dynamite Headdy is known for its difficulty level, with the International releases being made significantly harder than the Japanese version. The game also uses a distinct graphical style to give the impression that all the events take place on a theatre stage, with many of the backgrounds designed to look like cheap cardboard sets. All the characters that Headdy interacts with are all living toys and puppets.
Items
| Big 500 | |
|---|---|
| Awards 500 points. | |
| Banana | |
| Restores a portion of Headdy's health. | |
| 1-UP | |
| Awards an extra life. | |
| Continue | |
| Several of these are dropped by defeated Keymasters. Collect 13 of them in the International version, or 10 in the Japanese version, to get a continue. |
Power Up Heads
| Lotsa Heads | |
|---|---|
| Gives Headdy three heads to attack with. | |
| Liberty Head | |
| Sends Headdy to the Intermission bonus game. | |
| Head Trip | |
| A "power-down" that makes Headdy's head so heavy he can barely move, leaving him vulnerable to enemy attack. Cannot be cancelled. | |
| Slammer Head | |
| Doubles Headdy's attack power. It can also destroy blocks with hammer icons on them. | |
| Pig Head | |
| Gives Headdy a pig nose that can shoot homing projectiles at enemies. Hold | |
| War Head | |
| Automatically sprays projectiles in eight directions all around Headdy. | |
| Protector Head | |
| Surrounds Headdy with a barrier of spinning fireballs that can damage enemies. | |
| Spike Head | |
| Allows Headdy to cling to walls and ceilings in order to climb them. | |
| Empty Head | |
| Makes Headdy invincible to most forms of damage. The only things it cannot protect him from are bottomless pits and hitting Heather by mistake in the Scene 7-1 boss fight. | |
| Super Head | |
| Makes Headdy move faster and jump higher, and increases his attack range. | |
| Sleepy Head | |
| Makes Headdy fall asleep to regain health. This can leave him vulnerable to attacks, however. | |
| Pin Head | |
| Shrinks Headdy down to half his size, allowing him to enter small passageways. Cannot be cancelled. | |
| Bomb Head | |
| Destroys all on-screen enemies and inflicts severe damage to bosses after pressing | |
| Vacuum Head | |
| Sucks in all nearby enemies and items when | |
| Ticker Head | |
| Stops time for a few seconds, allowing Headdy to repeatedly attack bosses while they're vulnerable. | |
| Rocket Head | |
| Allows Headdy to fly and shoot a piercing laser from his nose, but can only face forward. Appears only throughout Scene 6. | |
| Air Head | |
| Allows Headdy to fly and shoot streams of bullets in three directions, as well as allowing him to face forward and backward. Appears only throughout Scene 6. | |
| Feather Head | |
| Allows Headdy to fly and shoot a stream of birds from his beak, but can only face forward. Appears only throughout Scene 6. |
Scenes
| 1-1: The Getaway/Escape Hero! | |
|---|---|
| The game opens with an auto-running section where the Robo-Collector will chase after Headdy and the escaped townsfolk. Headdy will eventually outrun the Robo-Collector, but it can be destroyed for a Secret Bonus Point. At the end, recurring boss Trouble Bruin/Maruyama will make his entrance and attack by harnessing energy, then charging into Headdy. Two hits when he is vulnerable will defeat him. | |
| 2-1: Practice Arena/Three Friends | |
| This level serves as a tutorial for the three friends who will assist Headdy throughout the game: HeadCase/Mokkun, HangMan/Yakkun and Beau/Fukkun. The player can choose to take on these tutorials by entering their respective doors, and receive Secret Bonus Points if they successfully complete each tutorial. | |
| 2-2: Toys in the Hood/North Town | |
| The first proper level in the game, with various platforms and objects to interact with, and a split path depending on whether the player takes the Spike Head or the Pin Head. Catherine Derigueur/Catherine Degoon and Snake Eyes/Happy Comecome are fought as mini-bosses in this level.
The first Liberty Head is found in this level, just before the steep slope. | |
| 2-3: Mad Dog and Headdy/Concert Panic | |
| Although Trouble Bruin/Maruyama will show up in the Floating Platform/Octopus Trap, Mad Dog/Bounty Boundy will drop in and crush him, and must be fought as the first Keymaster. His attacks involve leaping into the air and coming back down with an enemy. His tail is the weak point. | |
| 3-1: Down Under/Fire Carnival | |
| The next Scene begins with Headdy hopping across a series of tilting platforms over lava, with said platforms offering eight-directional movement. At the end of the level, Trouble Bruin/Maruyama will rip through the background and pull Headdy backstage. | |
| 3-2: Backstage Battle | |
| Piloting the Rocket Grappler/Tail Hanger, Trouble Bruin/Maruyama engages Headdy in another boss fight, taking place backstage. As Headdy is caught in the mech's grasp, he cannot move and must rely on his head and the occasional power-up to be able to attack Trouble Bruin/Maruyama as he is swung around. At certain points, the player must hold | |
| 3-3: The Green Room/Guest Area | |
| After Backstage Battle, the player will encounter HeadCase with a Sleepy Head and the second Liberty Head in the game. Walking right, Headdy will find himself on The Battle Show, where he must fight the Puppeteer & Gentleman Jim/Marrio & Nettoh, a pair of mini-bosses who work together to fight Headdy. They can be destroyed in either order, with the surviving mini-boss changing his attack pattern, though defeating the Puppeteer/Marrio first will award a Secret Bonus Point. After defeating both bosses, the player can backtrack to recover health from the Sleepy Head before moving on. | |
| 3-4: Clothes Encounter/Starlight Storm | |
| This level pits the player against the second Keymaster, the Wooden Dresser/Jacquline Dressy. This boss will change into an assortment of outfits that give her different attacks. Headdy must attack each piece in the order indicated by Beau in order to make her weak point, her heart, vulnerable to attack. | |
| 4-1: Terminate Her Too/South Town | |
| Taking place in another town stage, the player will hit switches that will alter the terrain, as well as switches that will take the player above the stage to navigate shifting blocks and conveyor belts. Mons Meg/Rebecca is fought as a mini-boss here. | |
| 4-2: Mad Mechs/Working Gear | |
| Headdy is now in a factory setting filled with various hazards to avoid. He can either sneak under them using the Pin Head, or he can pick up the Slammer Head and take an alternate path with swinging pendulum platforms and hammer blocks.
The third Liberty Head is found from the first HeadCase encountered upon entering the level. | |
| 4-3: Mad Mechs 2/Restless Factory | |
| This level is a continuation of the factory seen in the previous level, this time featuring spinning fan platforms that Headdy can shift by using his head, though Flying Soldiers and fans can also interact with them and send Headdy spinning undesirably. | |
| 4-4: Heathernapped/Mystery Spot | |
| By going right in this level, the player will discover that there is no Keymaster here. There was supposed to be one, but Heather/Fingy already beat Headdy to it. By waiting at the start, the player can take out Bino for a Secret Bonus Point. | |
| 5-1: Go Headdy Go/Puppet Tower | |
| This level basically serves as a playable cutscene where Trouble Bruin appears in the Flying Scythe/Tower Crasher and chases Headdy up the Puppet Tower. The fourth Liberty Head is also offered just before this. | |
| 5-2: Stair Wars/Go Up! | |
| Following on from the cutscene in the previous level, Trouble Bruin will chase Headdy up the tower, and attack by taking segments of the tower, and occasionally flying toward the tower itself, giving the player a chance to attack. Once he is defeated, the player can enter the tower. | |
| 5-3: Towering Internal/Rolling Rolling | |
| Once inside the tower, the player will continue to climb up the tower. The player has to move left or right to reach the next HangMan and climb higher while avoiding enemies and hazards, and dealing with mini-bosses such as the Armordillo/Armored Soldier | |
| 5-4: Spinderella/On the Sky | |
| At the very top of the tower is the third (technically fourth) Keymaster, Spinderella/Motor Hand. This boss will attempt to punch Headdy and get its hands stuck on the floor, allowing the player to get behind and attack the battery on the Keymaster's back. Once in a while, the boss will rotate the arena, altering the perspective so that Headdy is in the background. | |
| 6-1: The Flying Game/Air Walker | |
| At the start of this level, the player must choose from one of three special heads that will give Headdy the ability to fly, as the entirety of Scene 6 is a series of shoot-'em-up levels. This level has the player fly through the sky, shooting down waves of enemies and taking out the Sky Battleship/Sky Jaws. At the end of the stage, the player will enter a large fortress in the sky. | |
| 6-2: Fly Hard/Reckless Wheel | |
| Trouble Bruin/Maruyama continues to keep up his persistence by attacking Headdy in the Wheeler-Dealer/Chris Wheel. The player has to shoot down his projectiles, then focus on shooting him directly once he enters the foreground. After dealing enough damage, he will stay in the background and attack at a more rapid pace, only to be humourously halted by a "STOP" sign, allowing the player to continue. | |
| 6-3: Fly Hard 2/Light Velocity | |
| Following on from the previous level, this level sees the player flying through the fortress. The fortress' corridors are narrow and filled with spider-like enemies, pistons and electrical fields, so the player must fly carefully to avoid taking too much damage. | |
| 6-4: Baby Face | |
| After exiting the fortress, the player will encounter Baby Face, the fourth (technically fifth) Keymaster. This is a multi-phase boss fight in which the boss goes through multiple forms as it takes damage, changing up his attack pattern for each one. The boss starts out as a baby, and after dealing enough damage, his face splits open to reveal a boy, an adult, and finally an old man. | |
| 7-1: Headdy Wonderland/Paradise? | |
| Headdy arrives in what appears to be a paradise filled with cows, birds and lucky cats, as well as the fifth Liberty Head. The player will soon encounter the stage's boss, the Gatekeeper/Yayoi, and they must distract the boss so that Heather/Fingy can toss the keys collected from Keymasters into the basket on her back.
After doing so, the keys will reveal the location of Dark Demon's castle, destroying the pleasant background and revealing a more ominous one, and Heather/Fingy will be ambushed by the Nasty Gatekeeper/Izayoi. The player must then fight this frenzied robot in one of the more infamous boss fights, who attacks by swinging her claw and launching it directly at Headdy's head, and attack her face whenever she drops bombs. They have to be careful not to hit Heather/Fingy by mistake, or they will be punished by an unavoidable attack. Once the boss is defeated, Headdy will head for the tower, with Trouble Bruin/Maruyama following behind. | |
| 8-1: The Rocket Tier/Fight! | |
| Dark Demon's tower opens with a long hallway with giant missiles that will take out everything in their path. The player must avoid these missiles by either using the Pin Head to hide in the potholes, which is easier but makes the player slower, or the Spike Head to cling to the ceiling, which is harder to do but allows them to proceed more quickly. | |
| 8-2: Illegal Weapon 3/Missile Base | |
| The player eventually reaches the room where the missiles are being fired from, and must stop the missiles by attacking the commander. It is strongly urged to use either the Spike Head or Pin Head to avoid the missiles like in the previous level. | |
| 8-3: Fun Forgiven/Radical Party | |
| At the start of this level, the player has to make their way down safely by attacking the Penguins/Mustle Nasunasus when they are above the down arrow blocks, and avoid being crushed into the walls. The sixth and final Liberty Head is located here, on a legde that requires the player to use a Penguin/Mustle Nasunasu as a stepping stone to reach, and is the player's last chance to play the bonus game.
The player then engages in a mini-boss fight with Tarot, and must hit the numbered orbs that deal different points of damage into the boss' face, and avoid hitting the heart orb as doing so will heal the boss. In its second phase, the player has to avoid the swinging buzzsaw and attack the face. When Tarot is defeated, the player will go through a section with Venus Headdy Traps/Head Spitters and swinging platforms with HangMan on them to cross a pit. Obviously, the plyer should not hit the "DON'T SHOOT" targets or they will be stuck with a Head Trip (though one of them hides a Secret Bonus Point). | |
| 8-4: Vice Versa/Reverse World | |
| This level introduces the gimmick of hitting certain targets to flip the level upside-down and back again to progress. Enemy behaviour will change according to the level's orientation, and the player will come across block-pushing puzzles that make use of the gimmick. The mini-boss, Sparky/Thunder Captain, must be defeated by flipping the level to drop the metal balls on his head, with the larger balls inflicting more damage, however the balls can also hurt Headdy. | |
| 8-5: Twin Freaks/Funny Angry | |
| In this level, the player engages in a notoriously difficult boss fight against Twin Freaks/Rever Face. The boss is continously advancing towards the player, and he can only be attacked in his ear when he is happy. When the level is flipped upside-down, the boss becomes angry, becoming faster and invulnerable until the level is flipped. With narrow passageways, enemies to avoid and spike beds to jump over, it is easy for the player to die instantly by being crushed between the boss. | |
| 9-1: Fatal Contraption/The Rival | |
| Trouble Bruin/Maruyama makes one last attempt at ending Headdy's show career by chasing him up a vertically auto-scrolling level in the Super Finagler/Spider Phantom. The player will have to move fast and avoid hazards while also choosing their paths carefully until they reach the top, where Trouble Bruin will attempt to finish off Headdy...only for the mech to malfunction. | |
| 9-2: Far Trek/Brain Break! | |
| The Super Finagler/Spider Phantom is rampaging throughout the final corridor leading up to Dark Demon, and the player has to keep moving to avoid being hit by its lasers. The player must also keep away from Trouble Bruin/Maruyama, as he will latch on to Headdy and slow him down, making it harder to avoid the mech's lasers. Whenever this happens, the player must repeatedly attack Trouble Bruin to shake him off. Eventually, both Trouble Bruin and the mech will fall behind, and the player can then reach the end of the corridor. | |
| 9-3: Finale Analysis/Final Attack | |
| Headdy finally reaches the final battle with Dark Demon, who will use his magic to whisk Heather/Fingy off the stage before starting the battle and change the background. Dark Demon will use a variety of attacks that are determined by the colour of the orb in his hand, and before this happens, various power-ups will circle around Headdy so the player can choose the best head suited for surviving Dark Demon's attacks, such as the Pin Head to avoid the falling ceiling and giant laser, or offensive heads like the Pig Head, War Head and Slammer Head to deal with enemy swarms. Dark Demon's body will flash blue when he can be hit. |


Intermission bonus game

If the player picks up a Liberty Head in certain levels, they will be transported to the Intermission bonus game. This is a basketball style mini-game in which the objective is to use Headdy's head to hit the balls into the baskets marked with Star icons and reach a certain number of points. The ball machines at the bottom of the screen will provide an endless stream of basketballs to shoot, but they will occasionally fire bombs that will hurt the player. Once a ball touches the ground, it turns blue and can't be used. The hoops continuously scroll to the left, and each one is marked with an icon that has different effects:
| Star | |
|---|---|
| These baskets must be shot at for points to clear the bonus game. | |
| Basketball | |
| Doubles the speed of which the ball machines will fire balls and bombs. | |
| Slow | |
| Slows down the hoops for a few seconds, making it easier to score. | |
| Key | |
| Destroys one of the ball machines, therefore they must be avoided. |
The bonus game will end in failure if both ball machines are destroyed, the player takes too much damage from bombs or they cancel the Liberty Head by pressing ![]() . After the bonus game ends, the player will be returned to where they found the Liberty Head.
. After the bonus game ends, the player will be returned to where they found the Liberty Head.
However, if the player successfully makes the required number of shots, they will clear the bonus game and will be awarded a secret number, which they will need to use at the end of the game. The secret numbers earned from the bonus game are randomly generated for each playthrough. There are a total of four bonus games that must be played to get all four secret numbers, but there are only six opportunities in the game to play the bonus game. The number of points the player needs to score is increased by five for each successive bonus game, and bombs appear more frequently.
History
Legacy
Translation group M.I.J.E.T. restored and translated the cut dialogue in a translation patch made in 2007.
The game has also been released as part of the Wii's Virtual Console service, and was included in Sega Mega Drive Ultimate Collection, Sega Mega Drive Classics, and the Japanese and Western models of the Mega Drive Mini.
Versions
Version history
- Main article: Dynamite Headdy/Changelog.
| System | Version | Size | Date | Comment | Ref | Icon | |
|---|---|---|---|---|---|---|---|
| 1.2.0 | 137.6MB | 2018-08-06 | [19] | ||||
| 1.1.0 | 2018-05-08 | [19] | |||||
| 1.0 | 2018-04-18 | [19] | |||||
| 2.0.0 | 47MB | 2019-01-31 | [20] | ||||
| 1.2.2 | 47MB | 2018-11-01 | [21] | ||||
| 1.2.1 | 45MB | 2018-08-06 | [22] | ||||
| 1.1.1 | 45MB | 2018-05-09 | [23] | ||||
| 1.0.0 | 43MB | 2018-04-18 | [23] |
Downloadable content
| Title and description | Links | Releases |
|---|---|---|
Premium Upgrade
|
Production credits
Mega Drive version
- Producer: Kafuichi
- Main Programmer: Masato Maegawa
- Programmers: Keiji Fujita, SRK, Yaiman
- Support Programmer: Kazuhiko Ishida
- Character Designers: Koichi Kimura, Makoto Ogino
- Background Designers: Kouichi Kimura, Kaname Shindoh
- Guest Designer: Tenkabito
- Sound Producer: Nazo²Suzuki
- Sound Effects: Satoshi Murata
- Music Composers: Katsuhiko Suzuki, Yasuko, Kouji, Aki, Non
- Public Relations: Hiroyuki, Take
- Director: Hiroshi Asoh
- Special Thanks to: PP, Etsuko
- Interpreters: Shinobu Shindoh, James Spahn
- Producer: Max Taylor
- Game Testers: Ben Szymkowiak, Maria Tuzzo, Darin Johnston, Matt McKnight, Rey Alferez, Alex Villagran, Fernando Valderrama, Christine Watson, Aaron Hommes, Jeff Loney, Mark Griffin, Kim Rogers, Atom Ellis, Alex Fairchild, John Jansen, Janine Cook, David Forster, Ben Cureton, Jeff Kessler, Dave Martin, Greg Vogt, Mark Paniagua
- Interpreter: Jill Alexander
- Product Manager: Pamela Kelly
- Developed by: Treasure™
- Published by: Sega™ 1994
- Marketing Assistant: Lisa Best
- Cover artist: Osamu Muto
Game Gear version
- Cover artist: Osamu Muto
Digital manuals

Steam manual
Magazine articles
- Main article: Dynamite Headdy/Magazine articles.
Promotional material
- Main article: Dynamite Headdy/Promotional material.
Artwork


Sega Forever icon

Mega Drive US prototype box art

Physical scans
Mega Drive version
| 83 | |
|---|---|
| Based on 37 reviews | |
| Mega Drive, US |
|---|
 Cover
|
Cart Manual |
| Mega Drive, EU |
|---|
 Cover
|
Cart 50x50px Manual |
| Mega Drive, JP |
|---|
 Cover
|
Cart Manual |
| Mega Drive, JP (Jitsuenyou Sample) |
|---|
 Cover
|
Cart |
| Mega Drive, AU |
|---|
 Cover
|
| Mega Drive, BR |
|---|
 Cover
|
Manual |
| Mega Drive, FR |
|---|
|
Manual |
Master System version
| Master System, BR |
|---|
 Cover
|
Cart |
Game Gear version
| Sega Retro Average | ||||
|---|---|---|---|---|
|
| N/A | |
|---|---|
| Based on 0 reviews | |
| Game Gear, US |
|---|
  Cover
|
Cart Manual |
| Game Gear, EU |
|---|
  Cover
|
Cart Manual |
| Game Gear, JP |
|---|
  Cover
|
 Cart Manual |
Technical information
ROM dump status
| System | Hash | Size | Build Date | Source | Comments | |||||||||
|---|---|---|---|---|---|---|---|---|---|---|---|---|---|---|
|
2MB | 1994-06 | Cartridge (US/EU) | |||||||||||
|
2MB | 1994-08 | Cartridge (JP) | |||||||||||
|
2MB | 1994-06-22 | CD-R disc[72] | Page | ||||||||||
|
2MB | 1994-06-16 | CD-R disc[73] | Page | ||||||||||
|
2MB | 1994-06-14 | CD-R disc[74] | File on disc was named "CABEZA" (Spanish for "head") | Page | |||||||||
|
2MB | 1994-04 | Page | |||||||||||
|
512kB | Cartridge (BR) | ||||||||||||
|
512kB | Cartridge (JP) | ||||||||||||
|
512kB | Cartridge (US/EU) | ||||||||||||
|
1994-07-06 | Page | ||||||||||||
|
1994-07-05 | Page | ||||||||||||
|
1994-07-01 | Page | ||||||||||||
|
1994-06-15 | Page |
External links
- Sega of Japan Virtual Console pages: Mega Drive
- Nintendo catalogue pages: US, UK, AU
- Dynamite Headdy on Steam
- Dynamite Headdy on Google Play
- Dynamite Headdy on iTunes: US, UK
References
- ↑ 1.0 1.1 Computer & Video Games, "October 1994" (UK; 1994-09-15), page 68
- ↑ 2.0 2.1 Mean Machines Sega, "April 1995" (UK; 1995-02-28), page 36
- ↑ Electronic Gaming Monthly, "August 1994" (US; 1994-xx-xx), page 130
- ↑ 4.0 4.1 Game Players, "Vol. 7 No. 10 October 1994" (US; 1994-xx-xx), page 80
- ↑ Sega Magazine, "November 1994" (UK; 1994-10-15), page 96
- ↑ Electronic Gaming Monthly, "August 1994" (US; 1994-xx-xx), page 146
- ↑ 7.0 7.1 http://www.nintendolife.com/games/megadrive/dynamite_headdy (Wayback Machine: 2017-06-25 00:05)
- ↑ https://archive.is/McWbr
- ↑ 9.0 9.1 http://www.nintendo.com/games/detail/c6hDuIcxzUIMK7TqmLH6A-RaZjKnCtot (Wayback Machine: 2010-11-23 00:42)
- ↑ https://www.nintendo.co.jp/wii/vc/software/04.html (Wayback Machine: 2018-03-05 23:40)
- ↑ http://vc.sega.jp:80/vc_headdy/ (Wayback Machine: 2007-08-13 08:02)
- ↑ http://www.nintendo.com.au/index.php?action=catalogue&prodcat_id=41&prod_id=19735&pageID=4 (Wayback Machine: 2012-04-03 02:02)
- ↑ 13.0 13.1 13.2 13.3 13.4 https://steamdb.info/app/211201/ (Wayback Machine: 2017-05-22 17:12)
- ↑ 14.0 14.1 14.2 14.3 14.4 http://steamdb.info/app/211201/ (Wayback Machine: 2013-05-22 20:20)
- ↑ 15.0 15.1 15.2 15.3 15.4 15.5 15.6 15.7 15.8 15.9 https://steamdb.info/app/211201/history/?changeid=5755268
- ↑ 16.0 16.1 16.2 16.3 16.4 16.5 16.6 16.7 16.8 16.9 http://steamdb.info/app/211201/ (Wayback Machine: 2019-09-08 21:07)
- ↑ 17.0 17.1 17.2 17.3 17.4 17.5 @SEGAForever on Twitter (Wayback Machine: 2018-09-19 23:26)
- ↑ File:Dynamite Headdy MD US Manual.pdf, page 4
- ↑ 19.0 19.1 19.2 https://itunes.apple.com/us/app/dynamite-headdy-classic/id1324013989?mt=8 (Wayback Machine: 2018-09-19 23:32)
- ↑ Google Play (com.sega.dynamite.classic) (Wayback Machine: 2019-04-08 22:35)
- ↑ APKPure (com.sega.dynamite.classic) (Wayback Machine: 2019-04-08 22:36)
- ↑ Google Play (com.sega.dynamite.classic) (Wayback Machine: 2018-09-19 23:21)
- ↑ 23.0 23.1 APKPure (com.sega.dynamite.classic) (Wayback Machine: 2018-09-19 23:36)
- ↑ 24.0 24.1 24.2 24.3 24.4 24.5 24.6 https:/twitter.com/SEGAForever/status/985973235949932544 (Wayback Machine: 2018-09-19 23:26)
- ↑ https://itunes.apple.com/us/app/dynamite-headdy-classic/id1324013989?mt=8 (Wayback Machine: 2018-04-20 01:51)
- ↑ https://itunes.apple.com/gb/app/dynamite-headdy-classic/id1324013989?mt=8 (Wayback Machine: 2018-09-19 23:29)
- ↑ https://itunes.apple.com/fr/app/dynamite-headdy-classic/id1324013989?mt=8 (Wayback Machine: 2018-10-18 00:13)
- ↑ Google Play (com.sega.dynamite.classic) (Wayback Machine: 2018-09-19 23:21)
- ↑ Beep! MegaDrive, "August 1994" (JP; 1994-07-08), page 19 (21)
- ↑ Sega Saturn Magazine, "September 1995" (JP; 1995-08-08), page 83 (85)
- ↑ Computer & Video Games, "October 1994" (UK; 1994-09-15), page 68-70 (68)
- ↑ 32.0 32.1 Electronic Gaming Monthly, "September 1994" (US; 1994-xx-xx), page 36
- ↑ Game Players, "Vol. 7 No. 10 October 1994" (US; 1994-xx-xx), page 78-79 (80)
- ↑ GamesMaster, "October 1994" (UK; 1994-09-22), page 52-53 (52)
- ↑ 35.0 35.1 Joypad, "Décembre 1994" (FR; 1994-1x-xx), page 54
- ↑ Mean Machines Sega, "November 1994" (UK; 1994-09-30), page 74-77 (74)
- ↑ Next Generation, "Premiere Issue 1995" (US; 1994-12-08), page 99/101 (105)
- ↑ 1700 igr dlya Sega, "" (RU; 2001-xx-xx), page 65
- ↑ Beep! MegaDrive, "August 1994" (JP; 1994-07-08), page 21
- ↑ Consoles +, "Octobre 1994" (FR; 1994-xx-xx), page 120
- ↑ Digitiser (UK) (1994-11-09)
- ↑ Entsiklopediya luchshikh igr Sega. Vypusk 1, "" (RU; 1999-xx-xx), page 309
- ↑ Entsiklopediya luchshikh igr Sega. Vypusk 3, "" (RU; 2000-xx-xx), page 33
- ↑ Famitsu, "1994-08-12" (JP; 1994-07-29), page 40
- ↑ Freak, "11/94" (IL; 1994-xx-xx), page 1
- ↑ Game Players, "Vol. 7 No. 12 December 1994" (US; 1994-1x-xx), page 51
- ↑ GamePro, "October 1994" (US; 1994-xx-xx), page 50
- ↑ GamePro, "Oktober 1994" (DE; 1994-09-30), page 50
- ↑ GamesMaster, "October 1994" (UK; 1994-09-22), page 52
- ↑ GamesMaster (UK) "Series 4, episode 7" (1994-11-01, 24:00) (+9:24)
- ↑ Games World: The Magazine, "November 1994" (UK; 1994-09-29), page 13
- ↑ Game Informer, "October 1997" (US; 1997-xx-xx), page 82
- ↑ Game Informer, "November 1994" (US; 1994-1x-xx), page 16
- ↑ Mega, "October 1994" (UK; 1994-09-29), page 14
- ↑ Mega Force, "Décembre 1994" (FR; 1994-12-02), page 48
- ↑ Mega Fun, "10/94" (DE; 1994-09-21), page 61
- ↑ Magazina Igrushek, "1/1996" (RU; 1996-xx-xx), page 52
- ↑ Mean Machines Sega, "November 1994" (UK; 1994-09-30), page 74
- ↑ Next Generation, "Premiere Issue 1995" (US; 1994-12-08), page 105
- ↑ Player One, "Décembre 1994" (FR; 1994-1x-xx), page 94
- ↑ Play Time, "11/94" (DE; 1994-10-05), page 104
- ↑ Power Up!, "Saturday, November 05, 1994" (UK; 1994-11-05), page 1
- ↑ Sega Magazine, "October 1994" (UK; 1994-09-15), page 84
- ↑ Sega Power, "November 1994" (UK; 1994-09-29), page 62
- ↑ Sega Pro, "November 1994" (UK; 1994-10-06), page 56
- ↑ Sega Saturn Magazine, "September 1995" (JP; 1995-08-08), page 85
- ↑ Todo Sega, "Noviembre 1994" (ES; 1994-1x-xx), page 50
- ↑ Tricks 16 bit, "Tricks Sega Gold 800 igr" (RU; 1998-03-20), page 60
- ↑ Video Games, "10/94" (DE; 1994-09-28), page 101
- ↑ VideoGames, "October 1994" (US; 1994-xx-xx), page 78
- ↑ Electronic Gaming Monthly, "September 1994" (US; 1994-xx-xx), page 38
| Dynamite Headdy | |
|---|---|
|
Main page | Comparisons | Maps | Downloadable content | Changelog | Credits | Hidden content | Bugs | Development | Magazine articles | Video coverage | Reception | Promotional material | Region coding | Technical information | Bootlegs
| |
- 1 player games
- JP Mega Drive games
- US Mega Drive games
- EU Mega Drive games
- PT Mega Drive games
- AU Mega Drive games
- BR Mega Drive games
- Mega Drive games
- 1994 Mega Drive games
- All 1994 games
- Mega Drive action games
- All action games
- JP Game Gear games
- US Game Gear games
- EU Game Gear games
- PT Game Gear games
- Game Gear games
- 1994 Game Gear games
- Game Gear action games
- BR Master System games
- Master System games
- 1995 Master System games
- All 1995 games
- Master System action games
- JP Wii Virtual Console games
- US Wii Virtual Console games
- Archived reference without original link
- EU Wii Virtual Console games
- AU Wii Virtual Console games
- Wii games
- 2007 Wii games
- All 2007 games
- Wii Virtual Console games
- US Steam games
- EU Steam games
- DE Steam games
- UK Steam games
- AU Steam games
- US Steam Linux games
- EU Steam Linux games
- DE Steam Linux games
- UK Steam Linux games
- AU Steam Linux games
- US Steam OS X games
- EU Steam OS X games
- DE Steam OS X games
- UK Steam OS X games
- AU Steam OS X games
- Steam games
- Steam Linux games
- Steam OS X games
- Sega Forever games
- US Android games
- EU Android games
- DE Android games
- AU Android games
- Android games
- US iOS games
- IOS games
- EU iOS games
- Old content rating field
- All games
- Credits without reference
- Credits without source
- Old-style rating (bemega)
- Old-style rating (bemega r)
- Old-style rating (consolesplus)
- Rating without PDF source
- Old-style rating (cvg)
- Old-style rating (egm)
- Old-style rating (famitsu)
- Old-style rating (gameplayers)
- Old-style rating (gamesmaster)
- Old-style rating (gamesmastertv)
- Old-style rating (gamesworld)
- Old-style rating (joypad)
- Old-style rating (mms)
- Old-style rating (mega)
- Old-style rating (nextgeneration)
- Old-style rating (playerone)
- Old-style rating (segamaguk)
- Old-style rating (segapower)
- Old-style rating (segapro)
- Old-style rating (vgce)
- Update ratings template
- 18 old ratings
- Pages with broken file links
- 3 old ratings
- No ratings
- Games with known prototypes
- Missing ROM hashes
- Old technical information
- Dynamite Headdy
- Unreleased 32X games
- Sega Channel games